Learn how to add, manage and use Benefits.
Benefits are the same as coupons and can be shown in the Community Tool under the Catalog and Benefits tabs. Note: The Catalog and Benefits tabs must be added and configured manually. See instructions in the Add Benefits to Community Tool section of this document.
-
Each coupon has a Main View and Detailed View. The Main View shows how many Points the coupon is worth, the offer users can receive when redeeming the coupon and a Redeem button to redeem the coupon.
-
The Detailed View shows more information on the coupon.
Create a Coupon
The default coupon looks similar to the following image. The image shows the front of the coupon (A) and the back of the coupon (B).
-
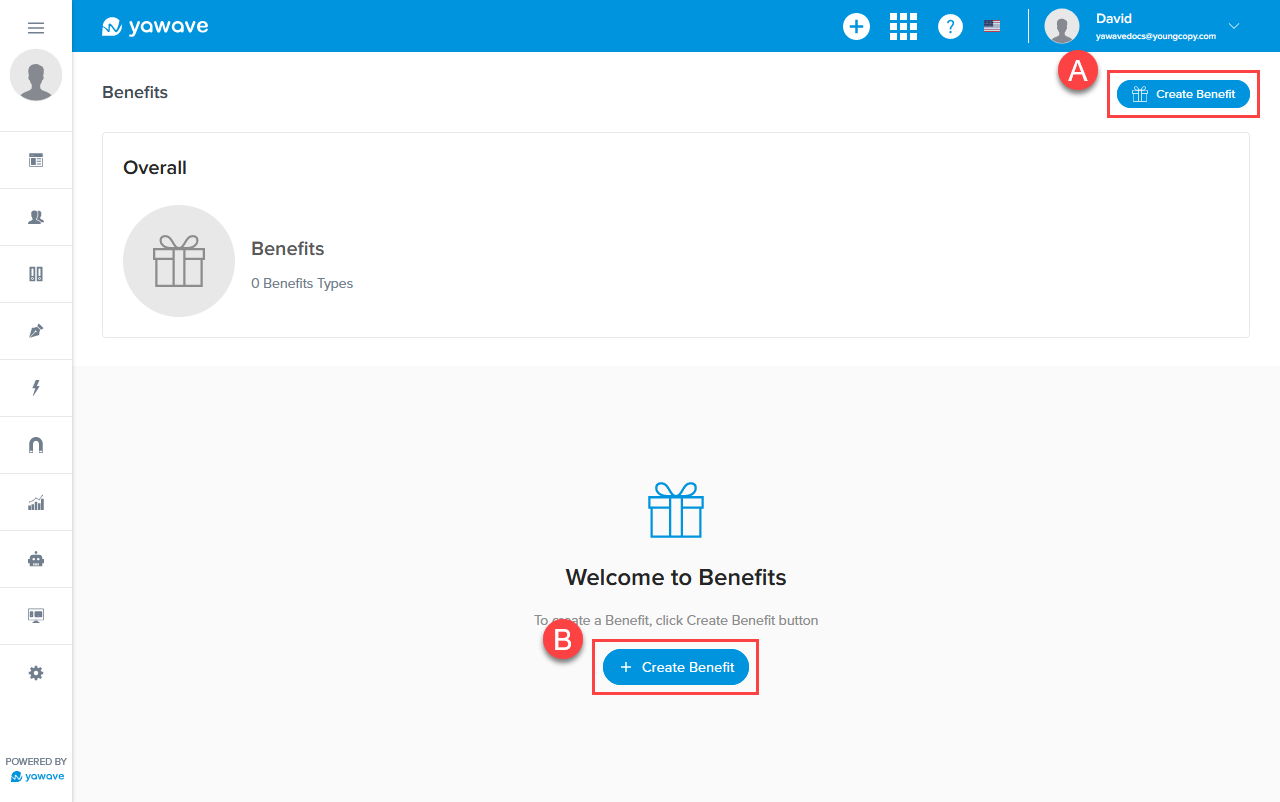
Click Activate/Benefits.
-
Click Create Benefit (A). If this is the first time you are creating Benefits, you can click Create Benefit (B) at the bottom of the screen. When you create your first Benefit, option (B) will be replaced with the Benefit(s) you create.
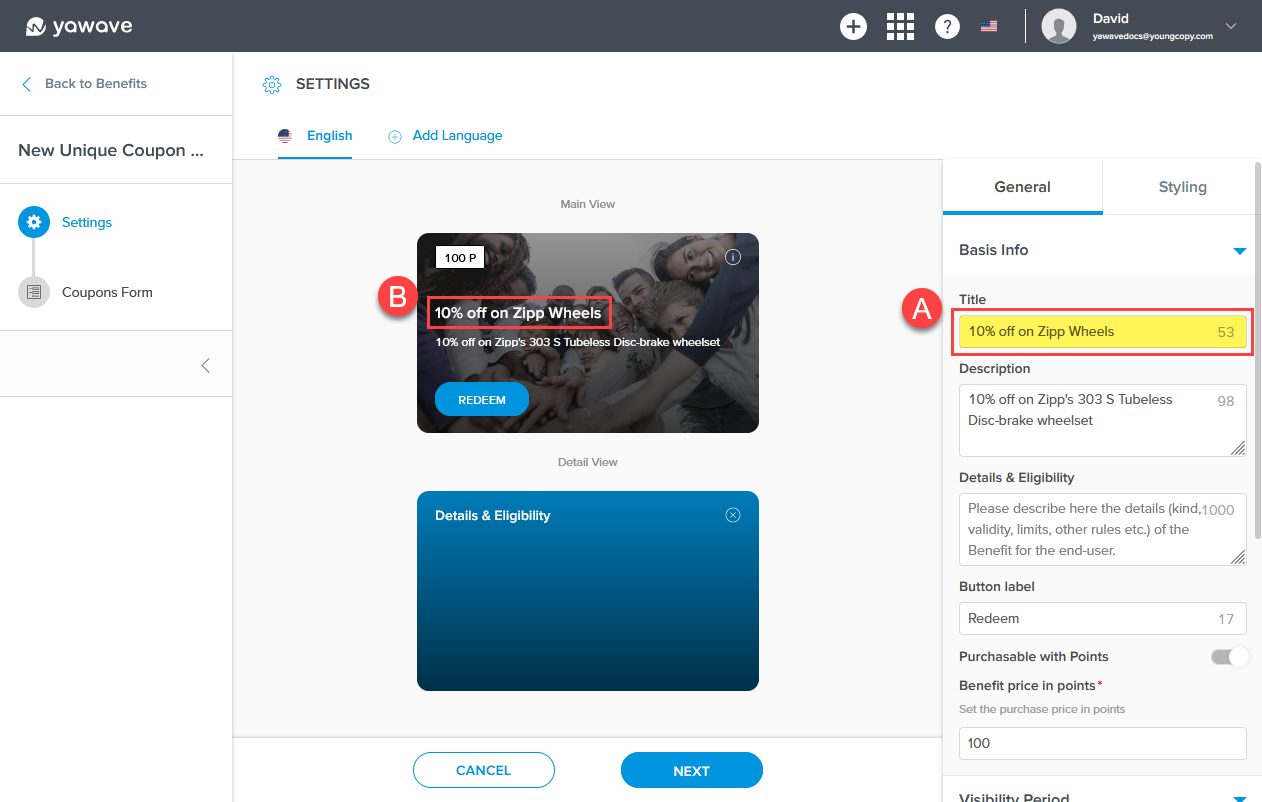
- Enter the title you want to use for the coupon in the Title field. What you enter for the Title (A) appears on the coupon's Main View (B).
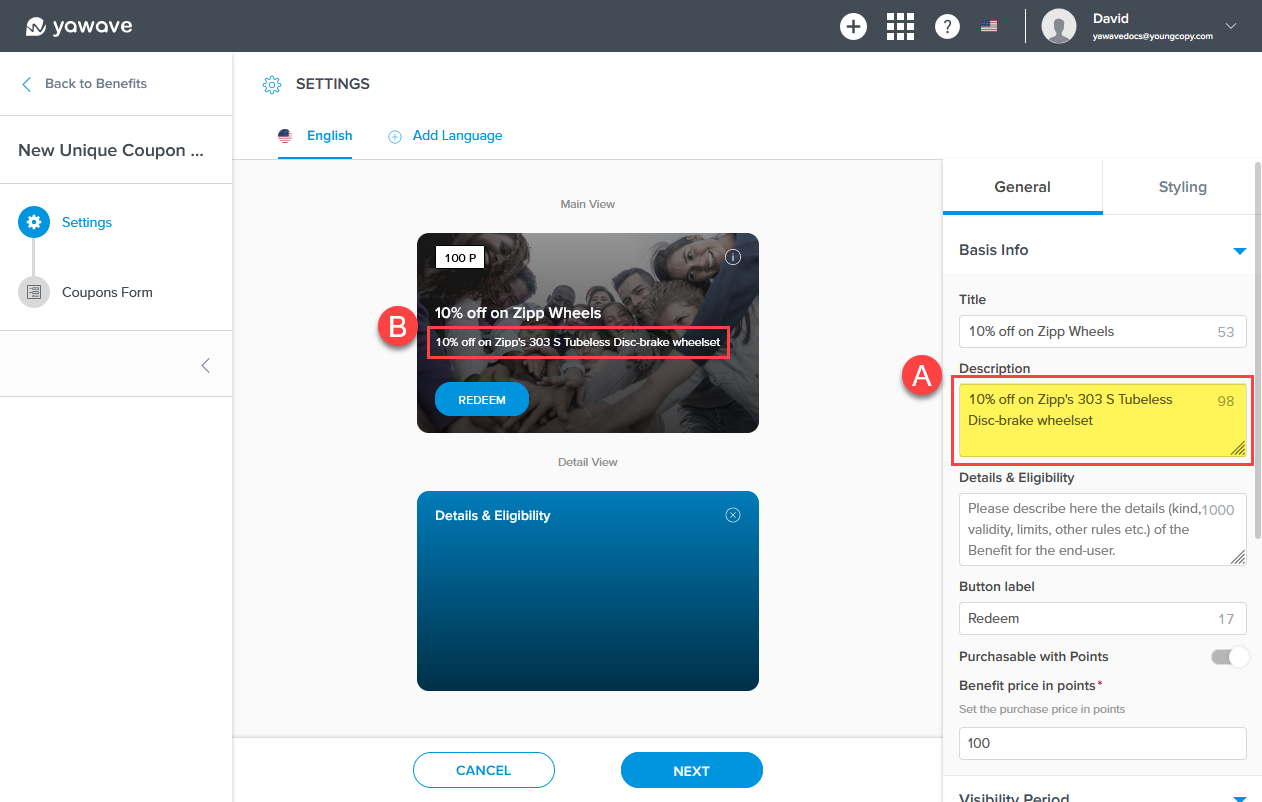
- Enter the description you want to use for the coupon in the Description field. What you enter for the Description (A) appears on the coupon's Main View (B).
- Enter the details, including eligibility for the coupon, in the Details & Eligibility field. What you enter for Details & Eligibility (A) appears on the coupon's Detail View (B). Here you can enter the rules for the coupon and depending on what you enter, you can configure those rules. Continue reading for instructions.

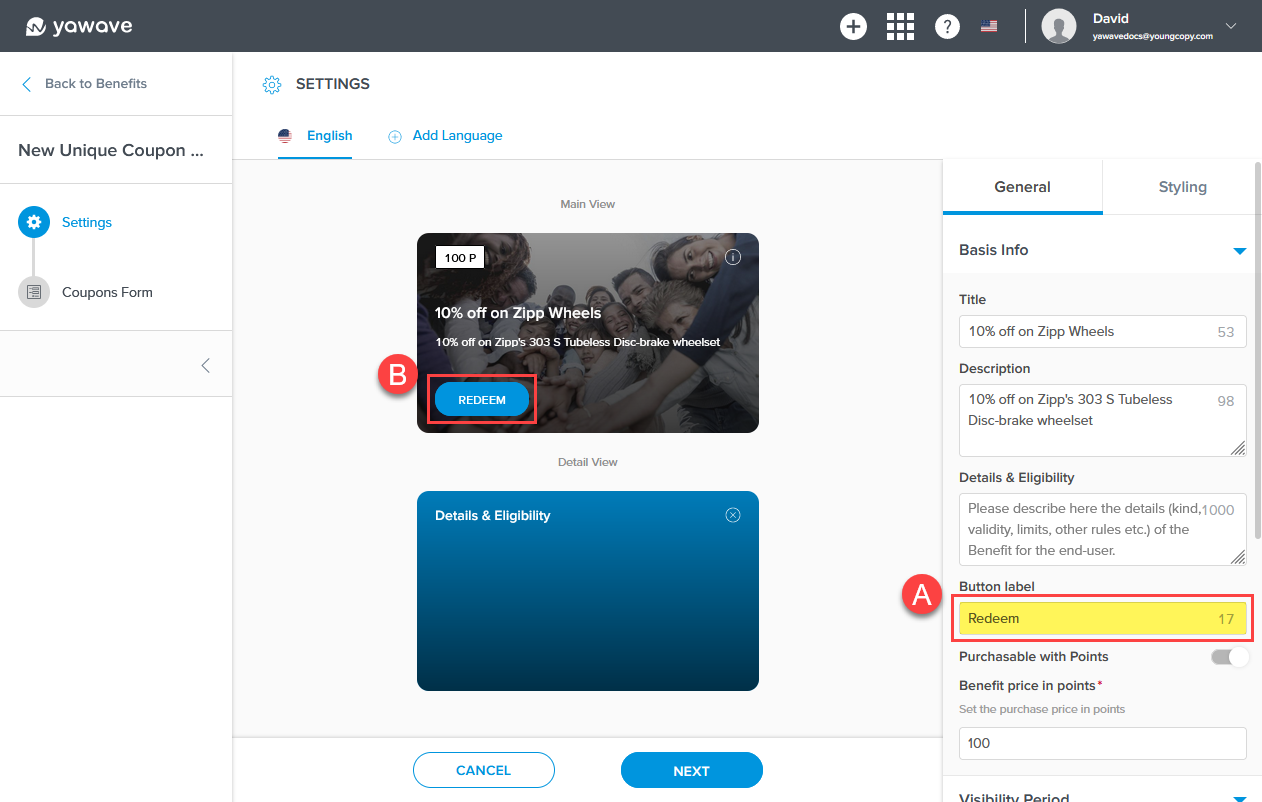
- Leave the button as default Redeem or enter a new label for the button in the Button label field. What you enter for Button label (A) appears on the Redeem button (B).
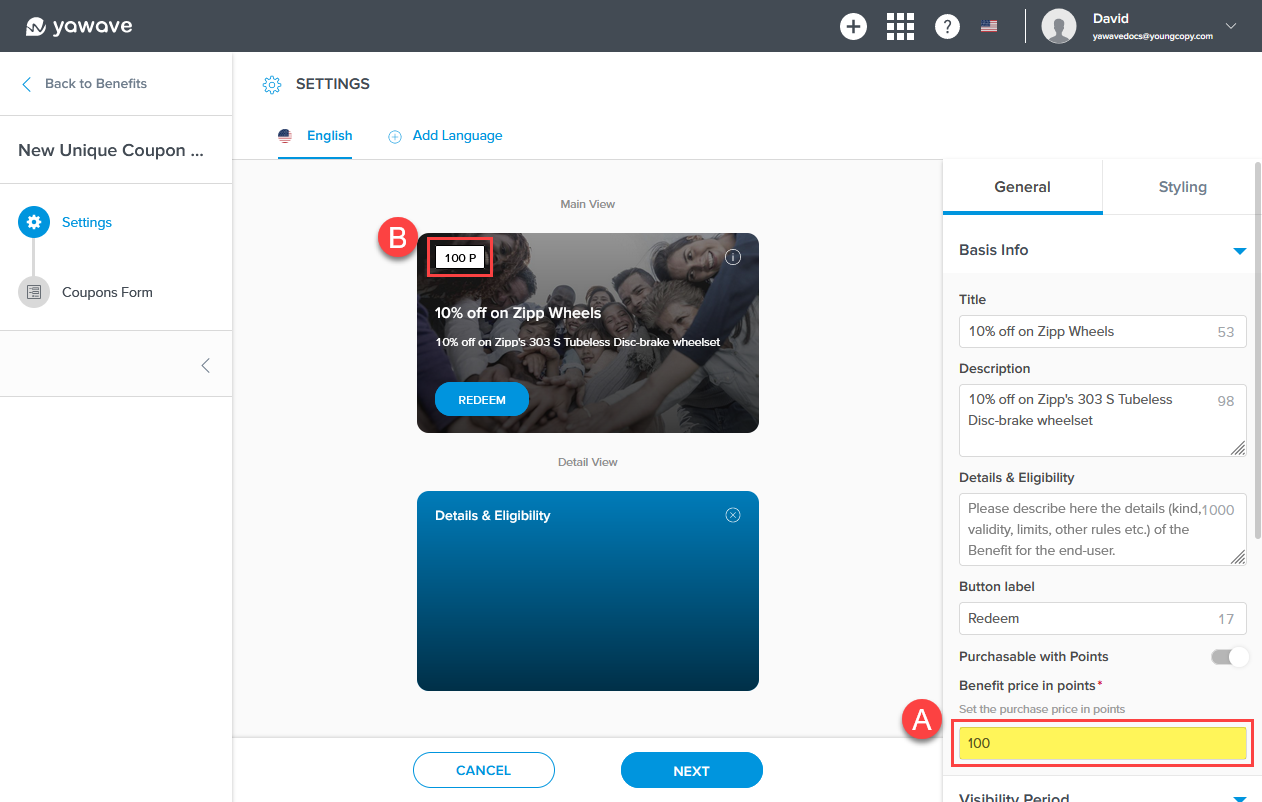
- Enter the number of points the user must have before they can redeem this coupon in the Benefit price in points. The default is 100 and can be changed to the value of your choosing. What you enter for Benefit price in points (A) appears in the Points square (B).
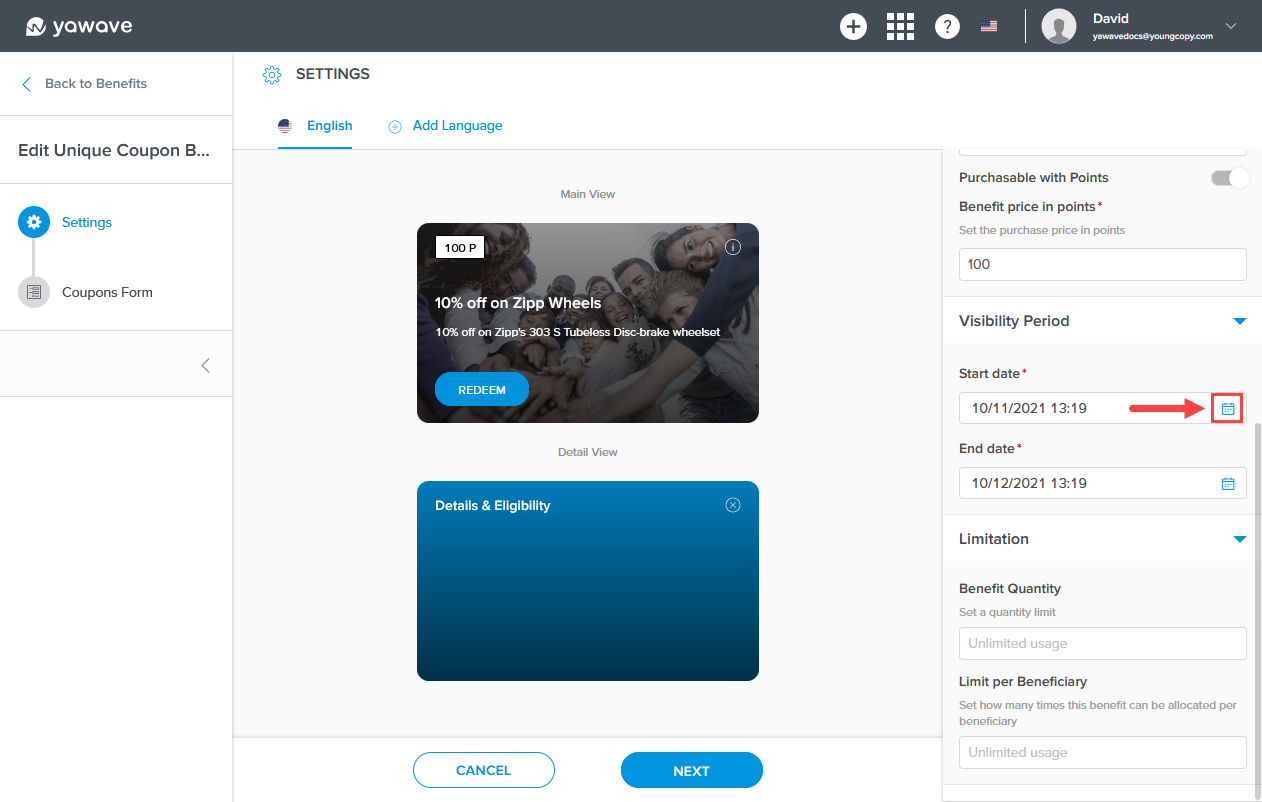
- Click the Start date calendar icon to change the start date of when the coupon is visible.
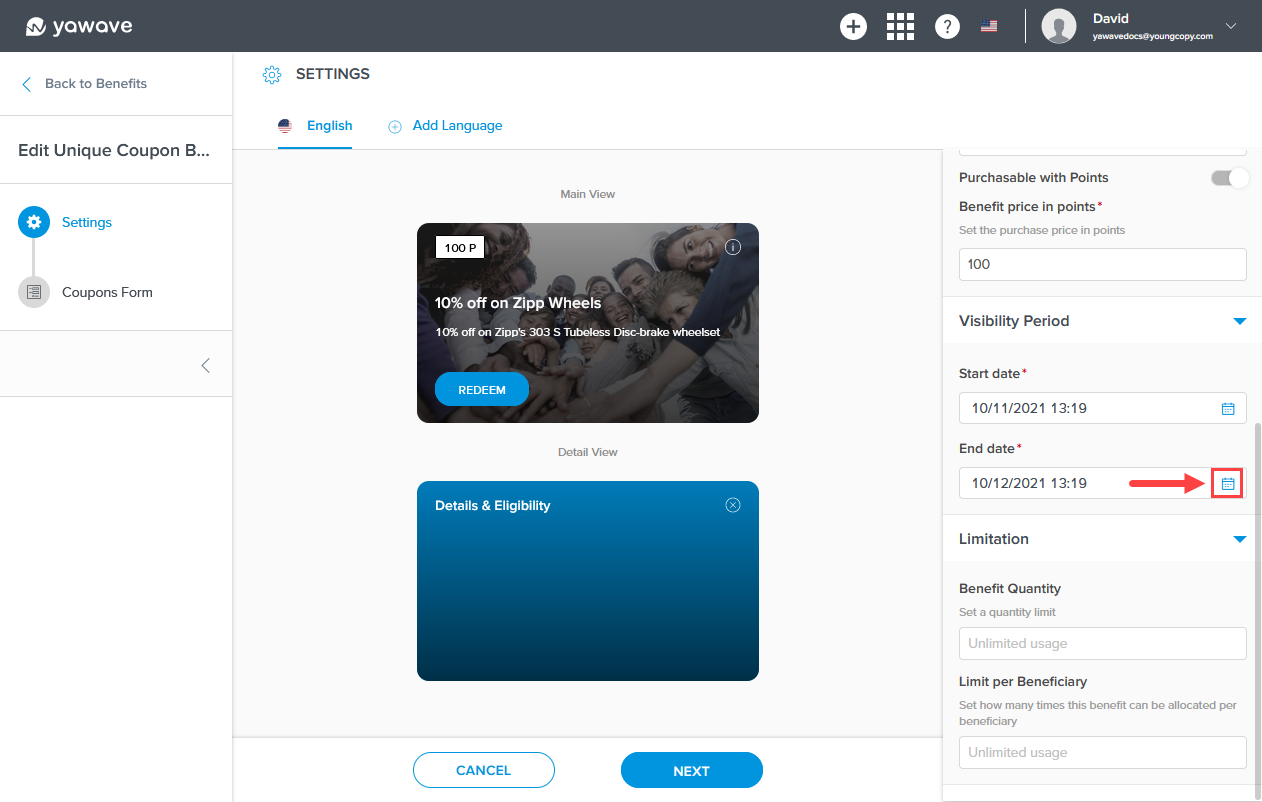
- Click the End date calendar icon to change the end date of when the coupon is no longer visible.
- Enter the number of times this coupon can be used in the Benefit Quantity field. Note: The value must be numeric or leave empty for unlimited.
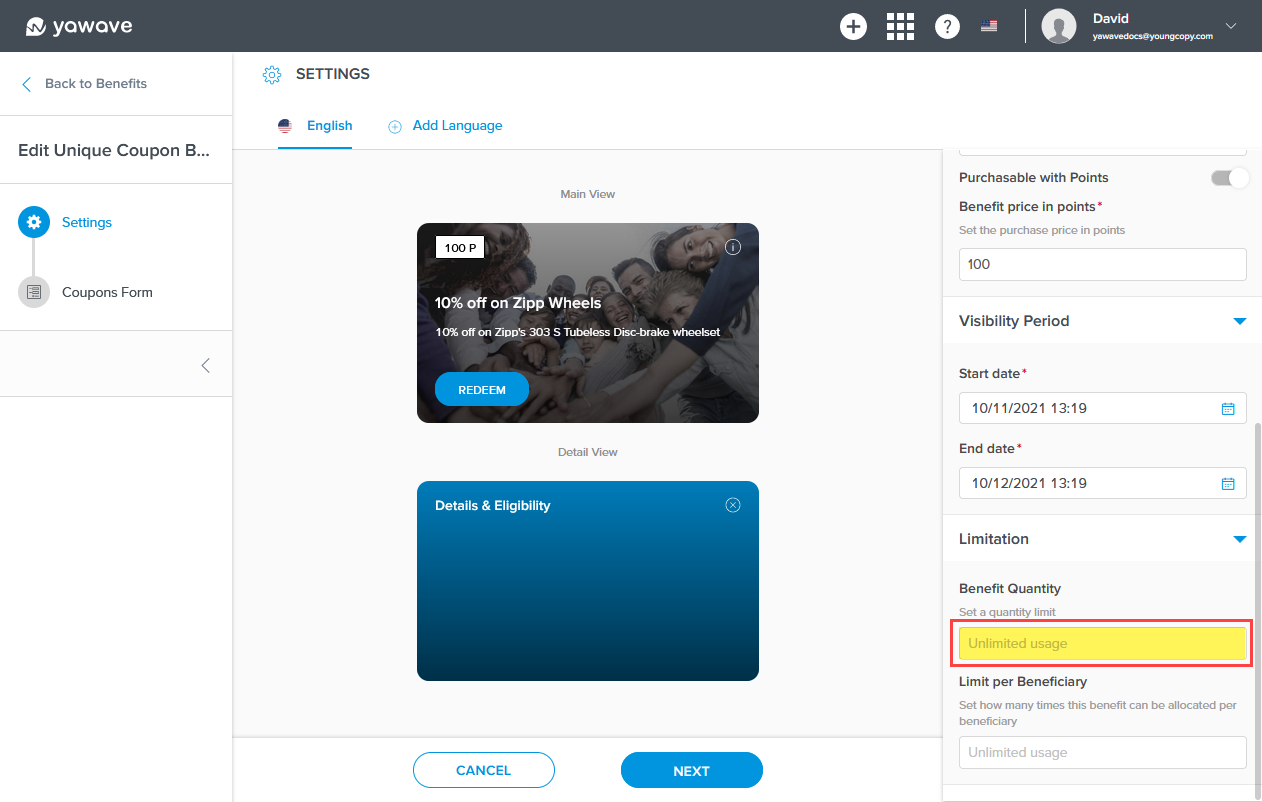
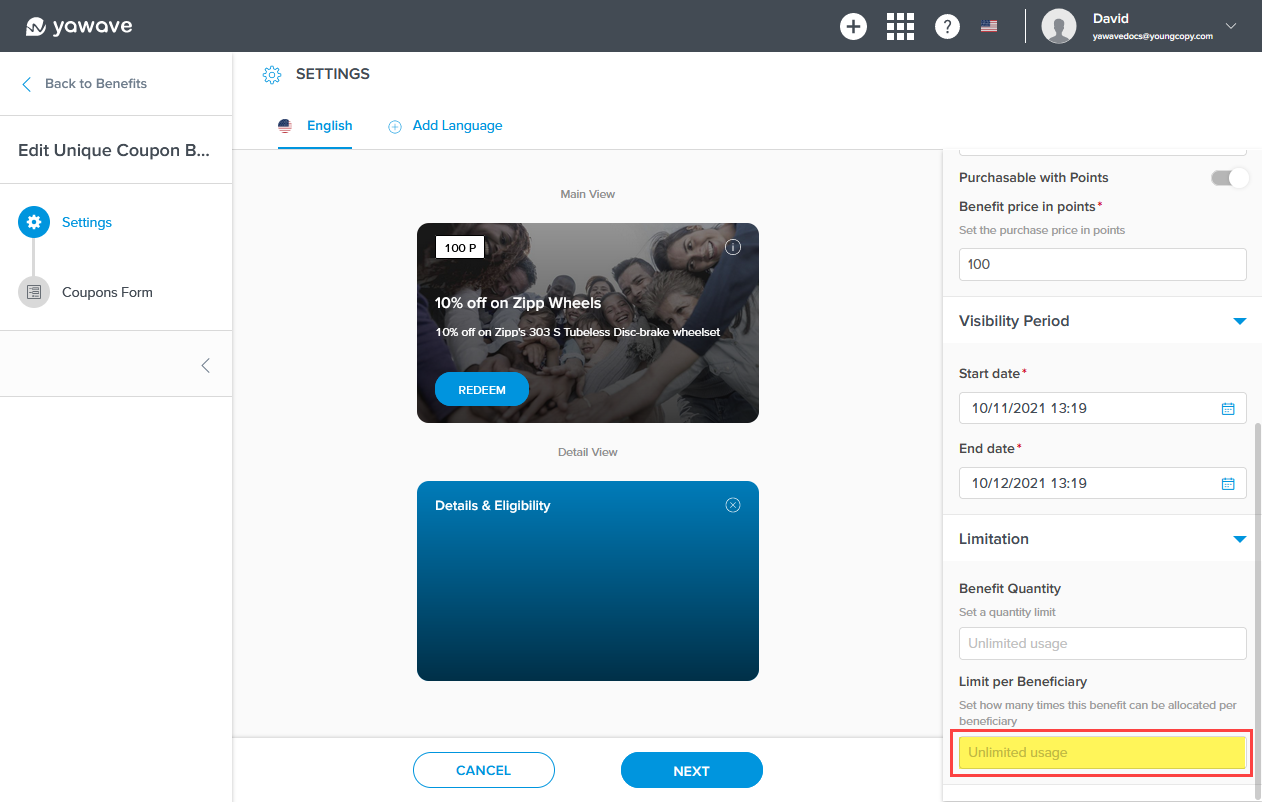
- Enter the number of times this coupon can be used per beneficiary in the Limit per Beneficiary field. Note: The value must be numeric or leave empty for unlimited.
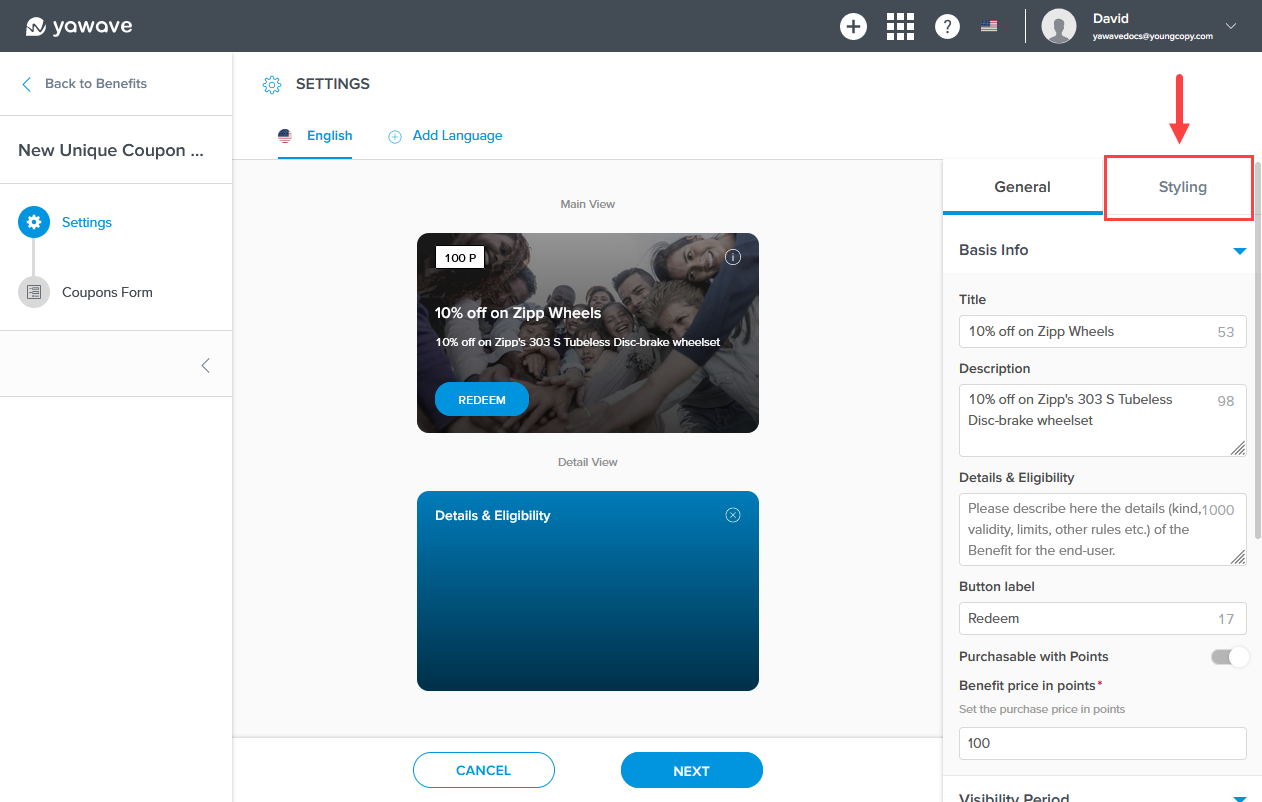
- Click the Styling tab. Note: The Styling tab is located in the Settings screen at the top of the settings.
- Click the upload icon below the Background Image to select a new image for the coupon's main view background.

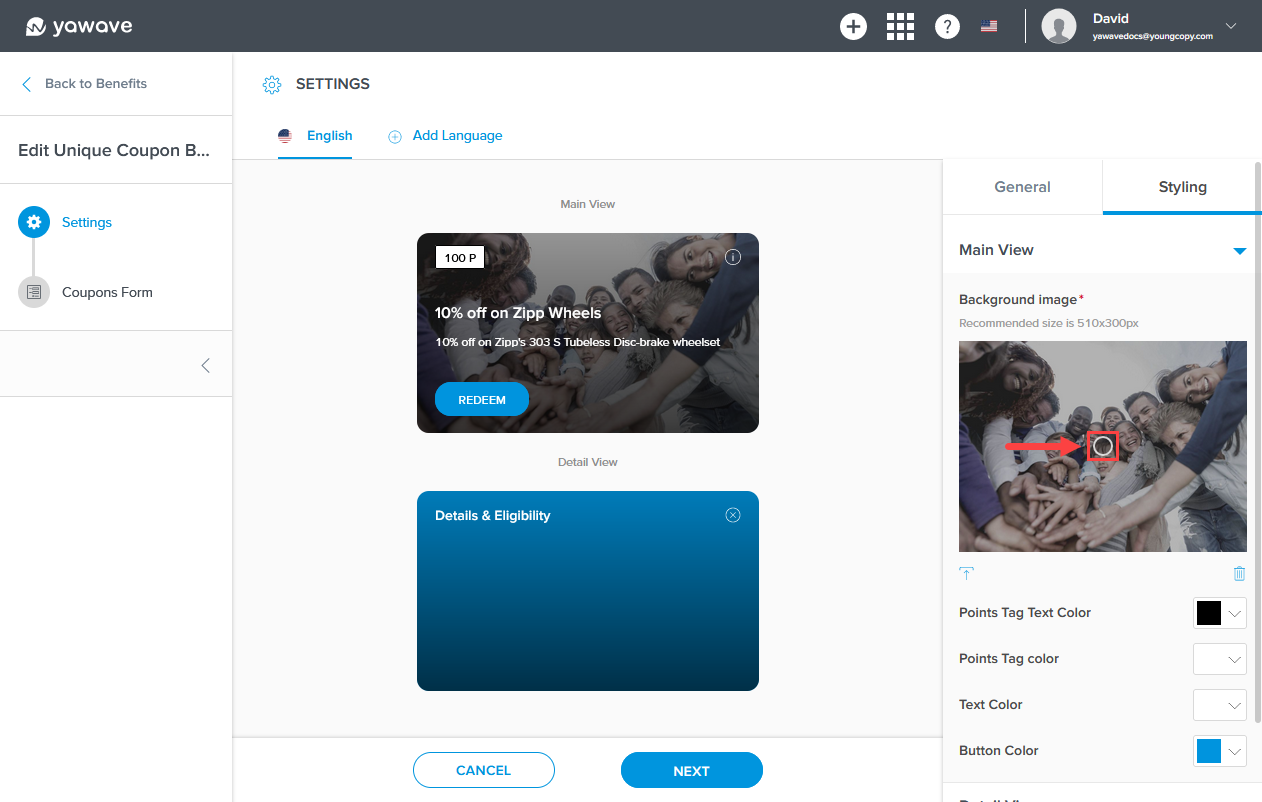
- Click and drag the Background Image circle icon to change the image's focal point.
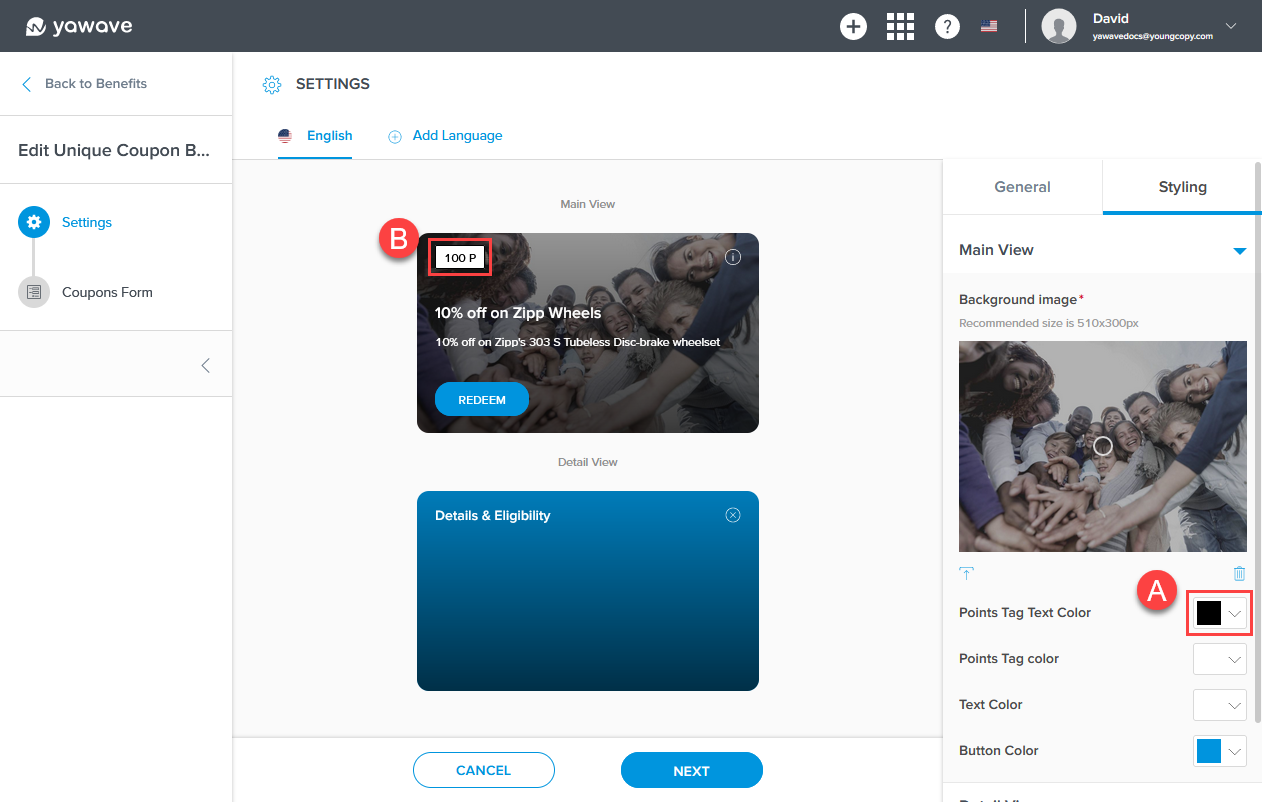
- Select the color you want to use for the Points tag's text color from the Points Tag Text Color drop-down menu. Here you can enter a Hex value, RGB value or use the color picker. The color you select for Points Tag Text Color (A) will change the text color in the Points square (B).
- Select the color you want to use for the Points tag's background color from the Points Tag color drop-down menu. Here you can enter a Hex value, RGB value or use the color picker. The color you select for Points Tag color (A) will change the background color in the Points square (B).

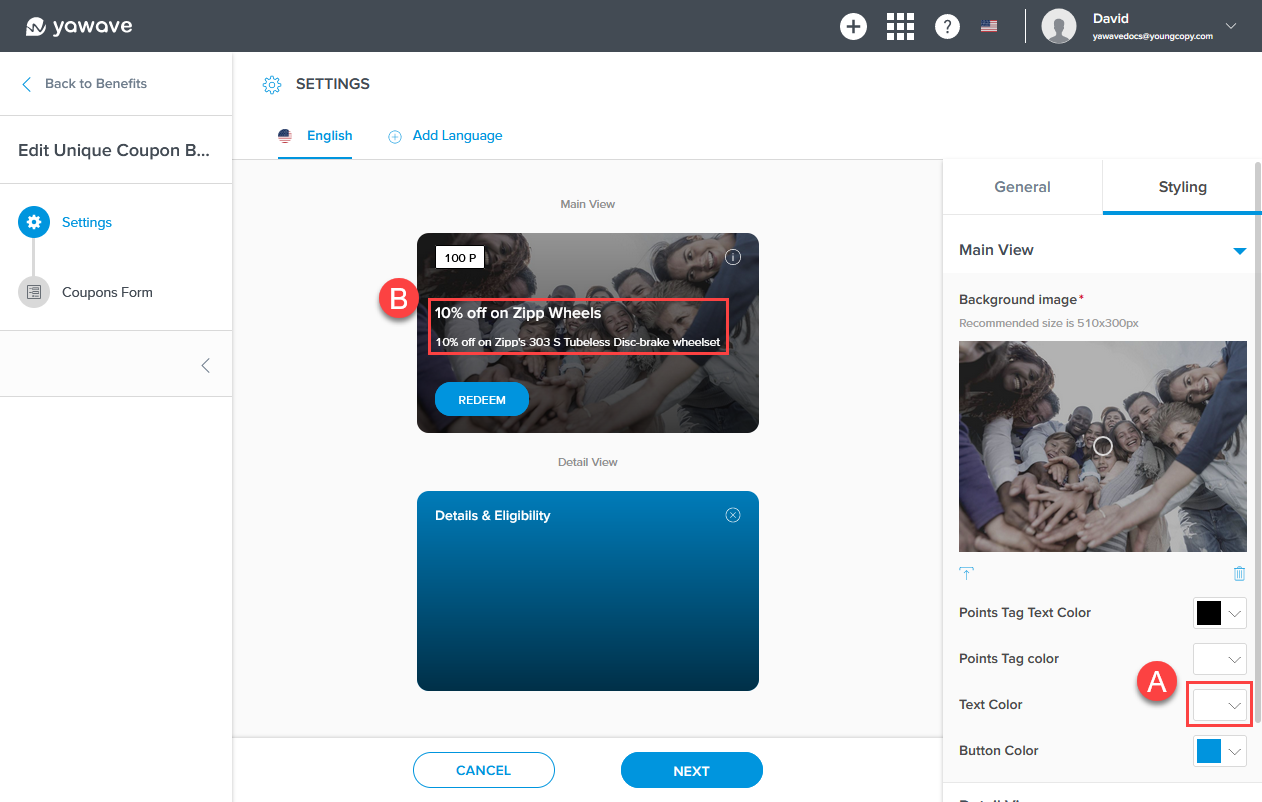
- Select the color you want to use for the coupon's text color from the Text Color drop-down menu. Here you can enter a Hex value, RGB value or use the color picker. The color you select for Text Color (A) will change the text color on the coupon's Main View (B).
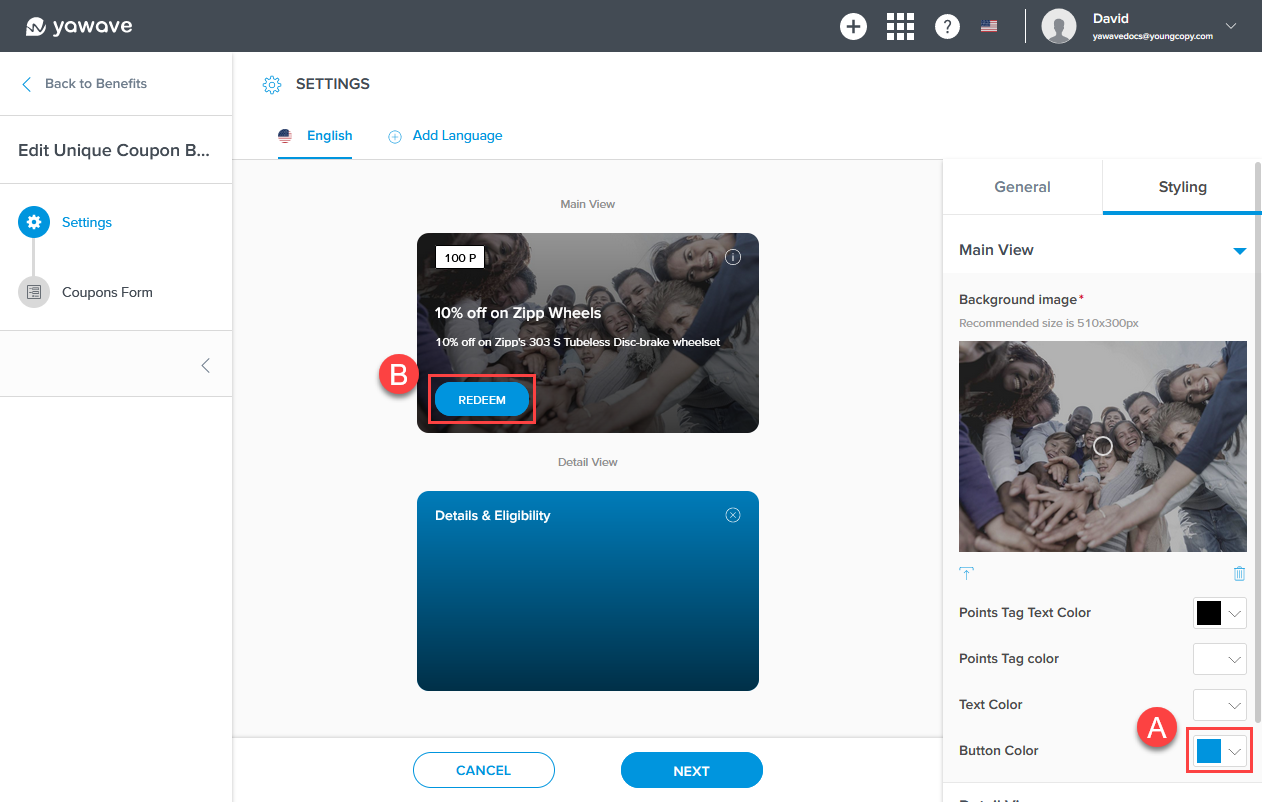
- Select the color you want to use for the coupon's button color from the Button Color drop-down menu. Here you can enter a Hex value, RGB value or use the color picker. The color you select for Button Color (A) will change the background color on the Redeem button (B).
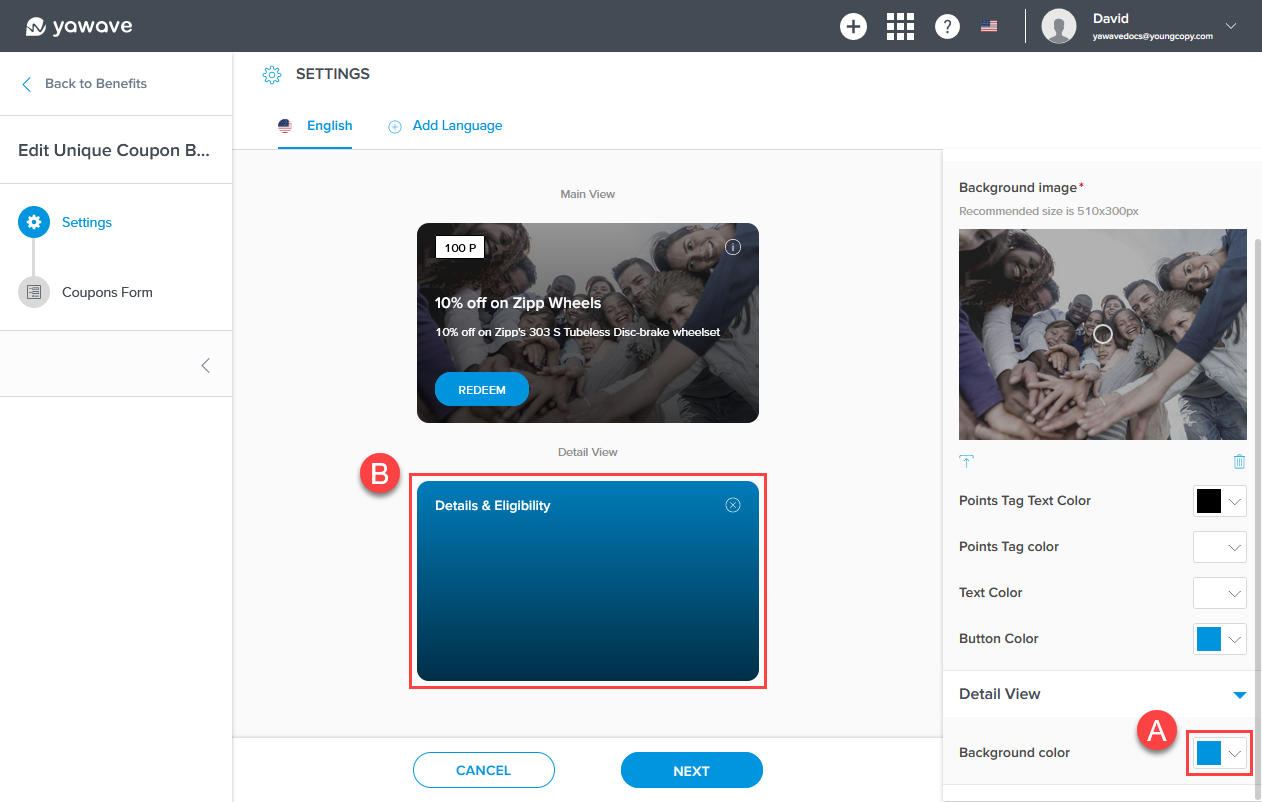
- Select the color you want to use for the coupon's Detailed View background color from the Background color drop-down menu. Here you can enter a Hex value, RGB value or use the color picker. The color you select for Background color (A) will change the background color on the coupon's Detailed View (B).
- Click Next.
Configure the Coupon's Form
In this section you can configure the coupon's form settings. The coupon form is specifically designed for you to add a coupon code to a Benefit for a particular user. The coupon's form is visible to Owners and Members only and will not be seen by end users. You can leave the coupon form settings as default or make the following adjustments.
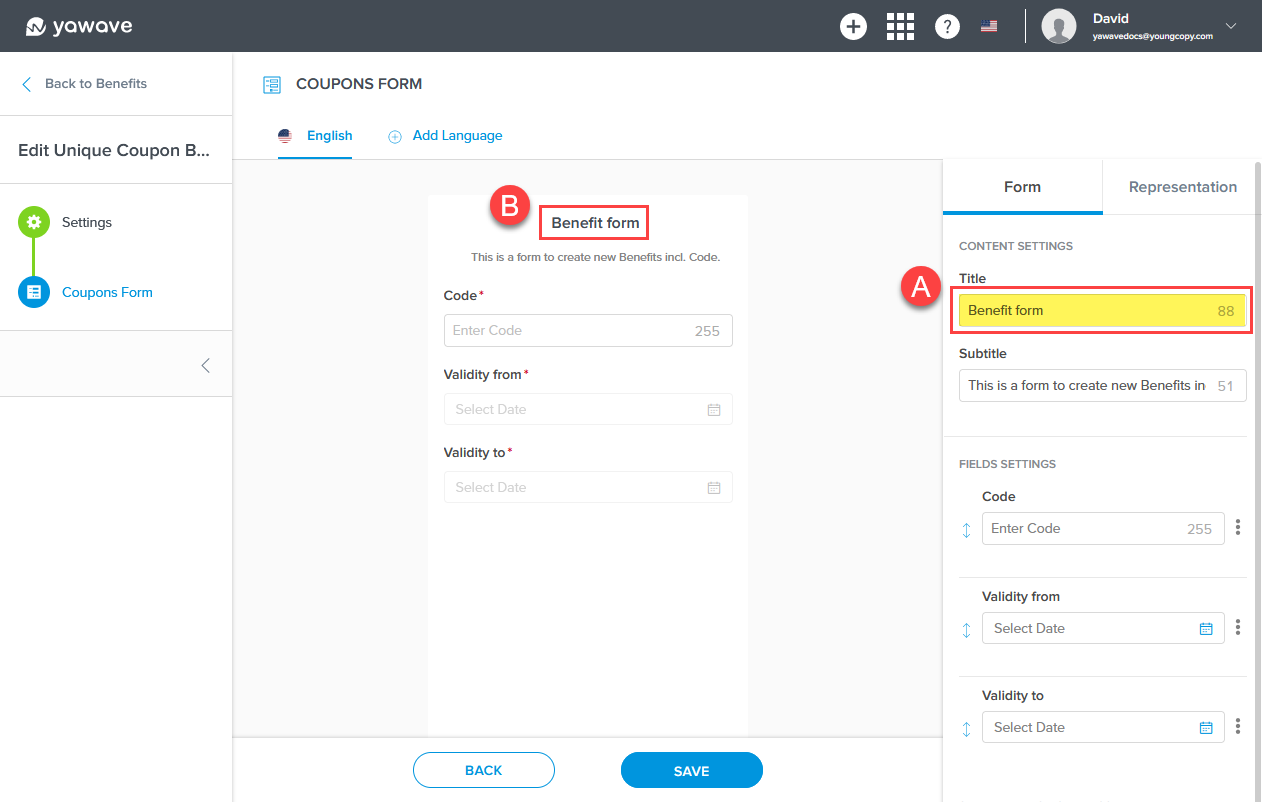
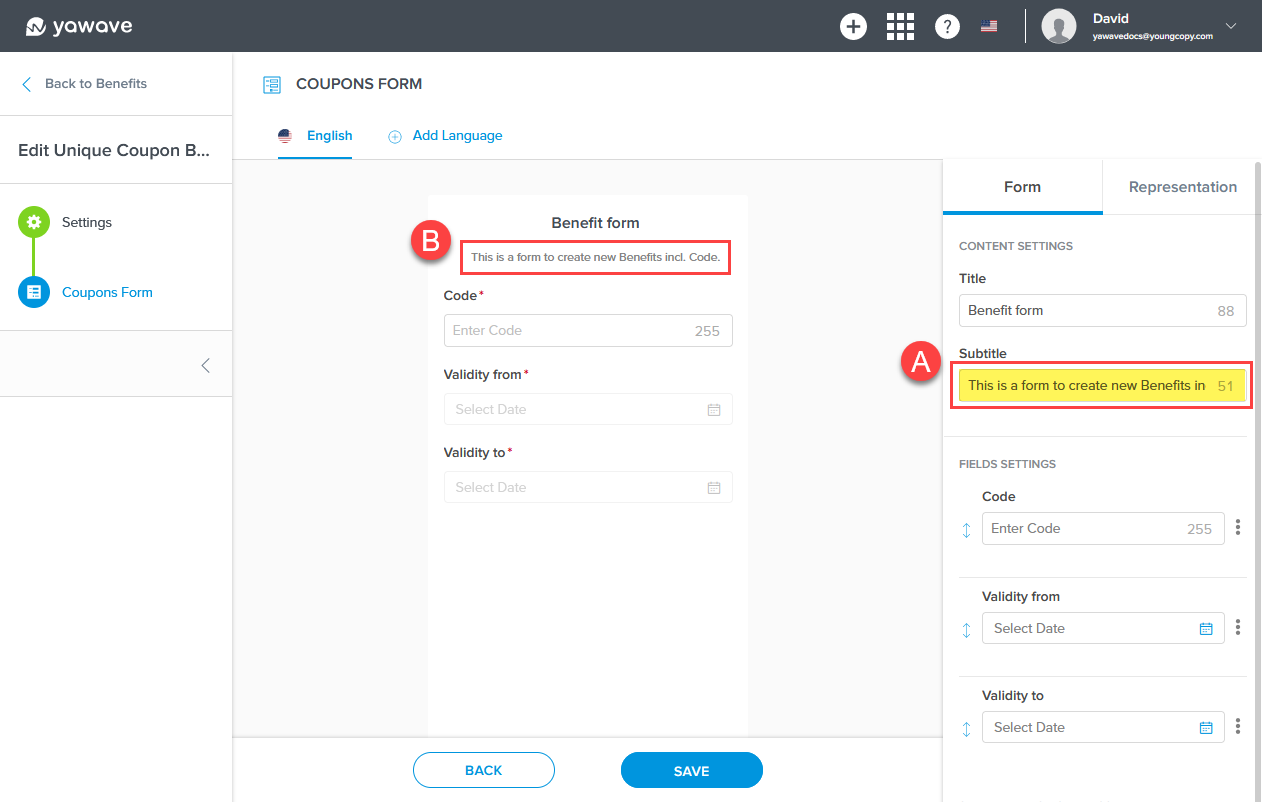
- Enter the title you want to use for the coupon form in the Title field. The title you enter in the Title field (A) will appear in the Title location on the form (B).
- Enter the subtitle you want to use for the coupon form in the Subtitle field. The title you enter in the Subtitle field (A) will appear in the Subtitle location on the form (B).
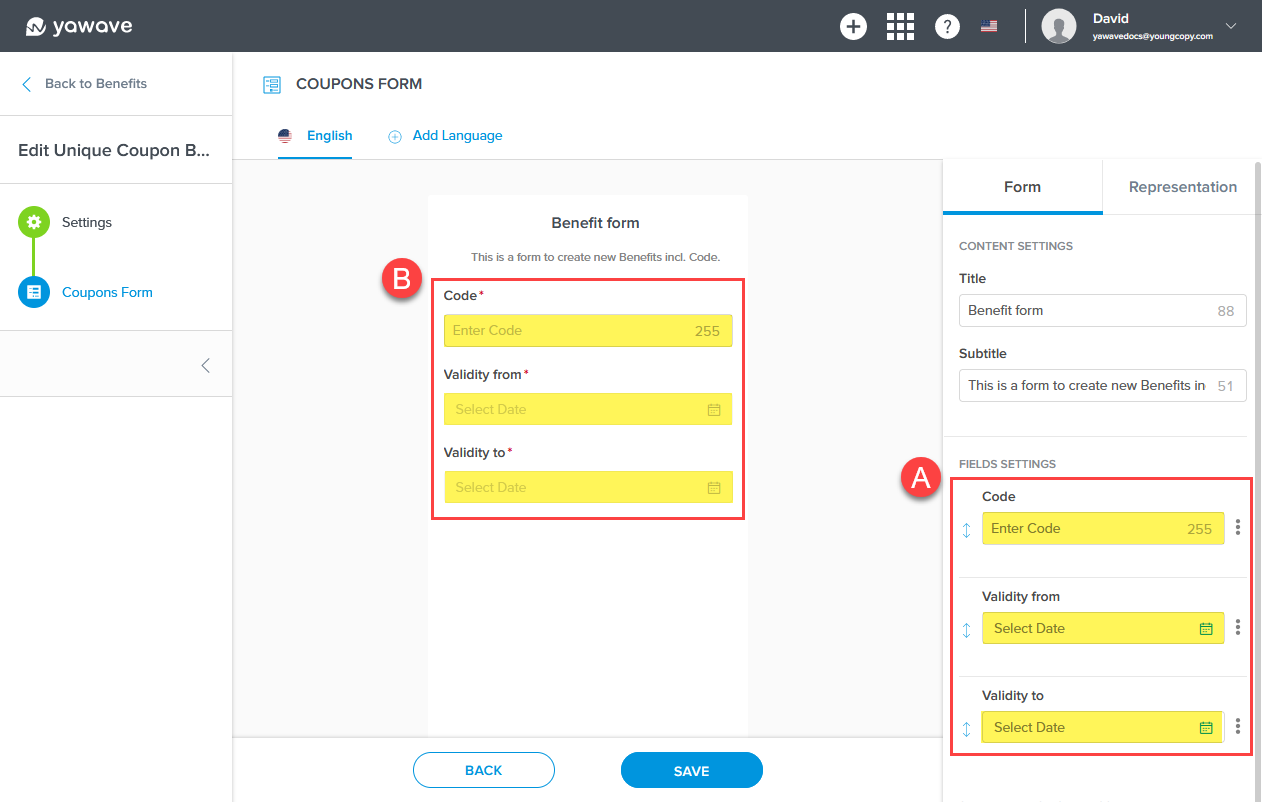
- By default the coupon form contains three fields: Code, Validity from andValidity to. You can leave the default text in each field or enter new text in each field (A). What you enter in each field (A) will appear in the form's fields (B).
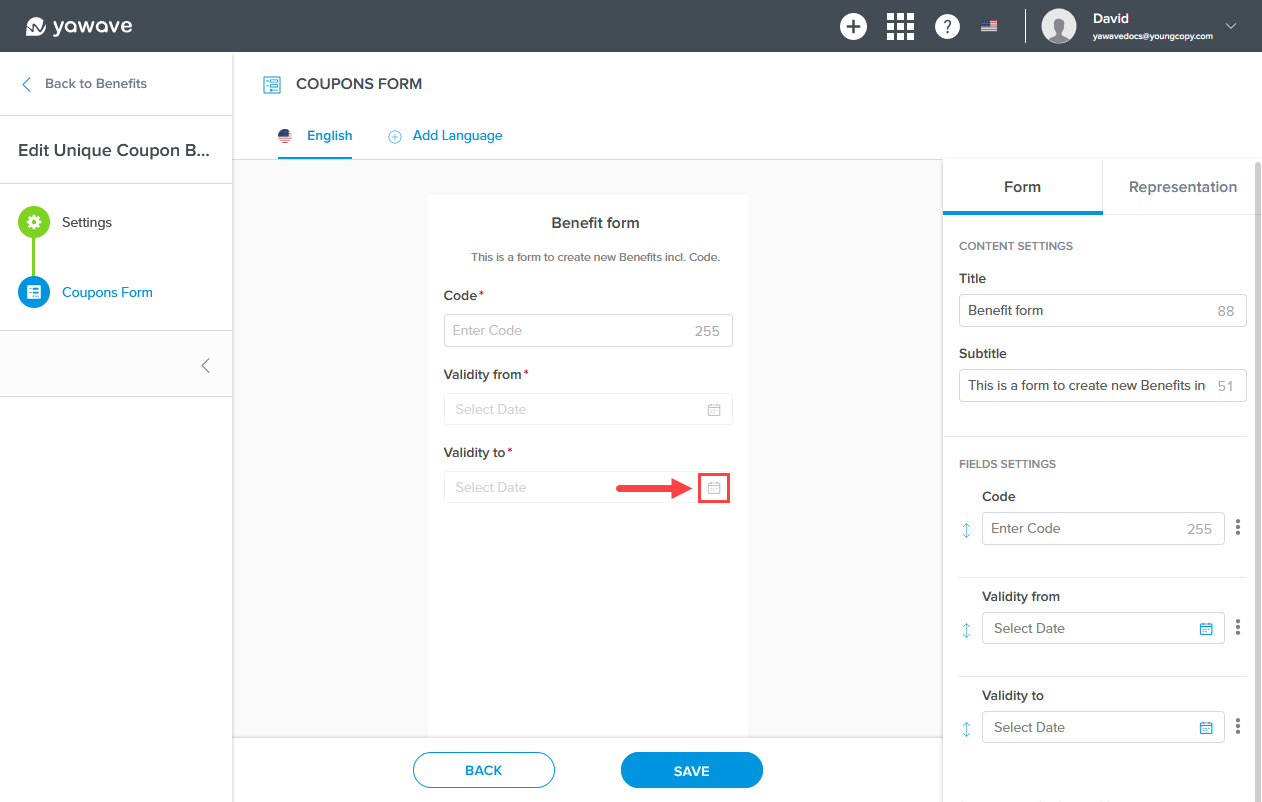
- For the Validity from field, click the calendar icon to change the start date of the coupon.

- For the Validity to field, click the calendar icon to change the end date of the coupon.
- Select the color you want to use for the coupon form's Save button color from the Color drop-down menu. Here you can enter a Hex value, RGB value or use the color picker. The color you select for Color (A) will change the Save button's color on the form (B).

- Leave the Save button's label as default Save or enter a new label you want to use for the Save button in the Label field. The label you enter in the Label field (A) will appear on the Save button (B).
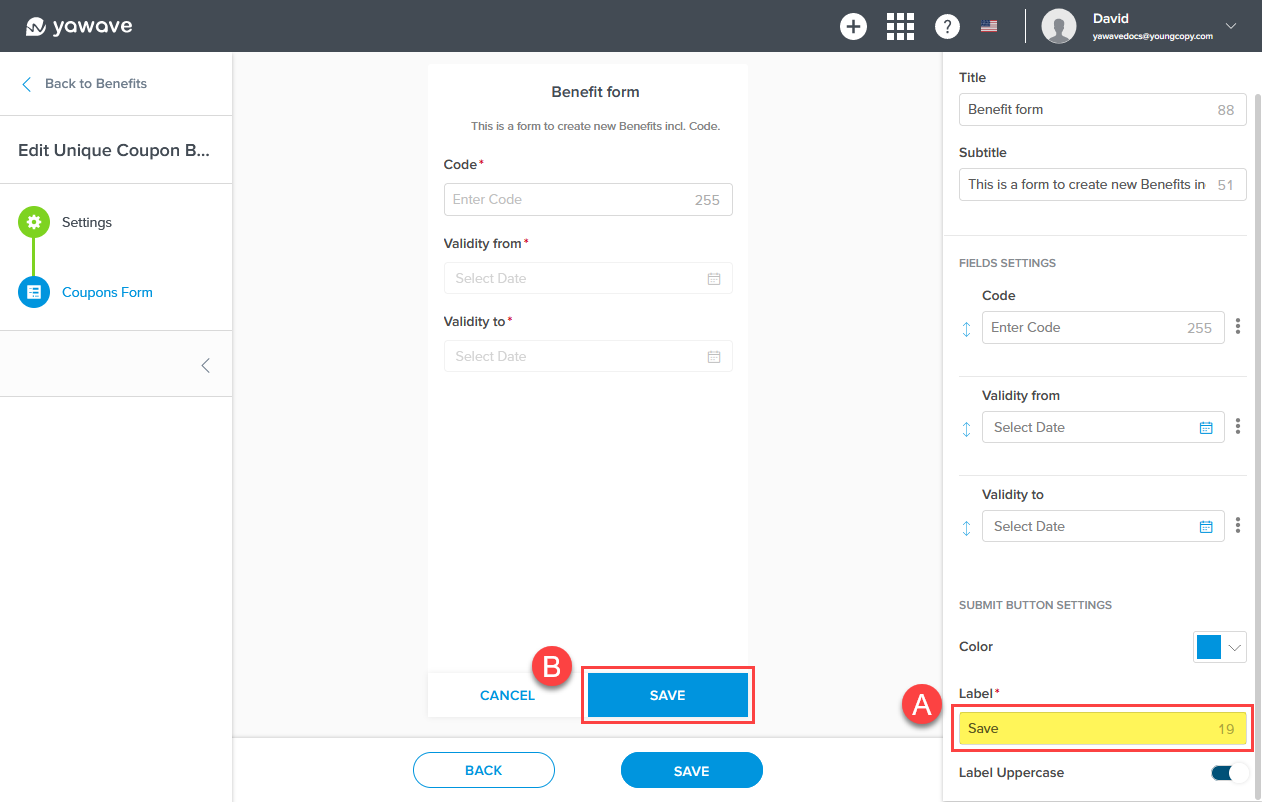
- By default the Label Uppercase toggle is enabled (A). When enabled this means the Save button's text will be all uppercase (B). Click the Label Uppercase toggle (A) once to disable if you want the Save button's text to be all lower case (B).
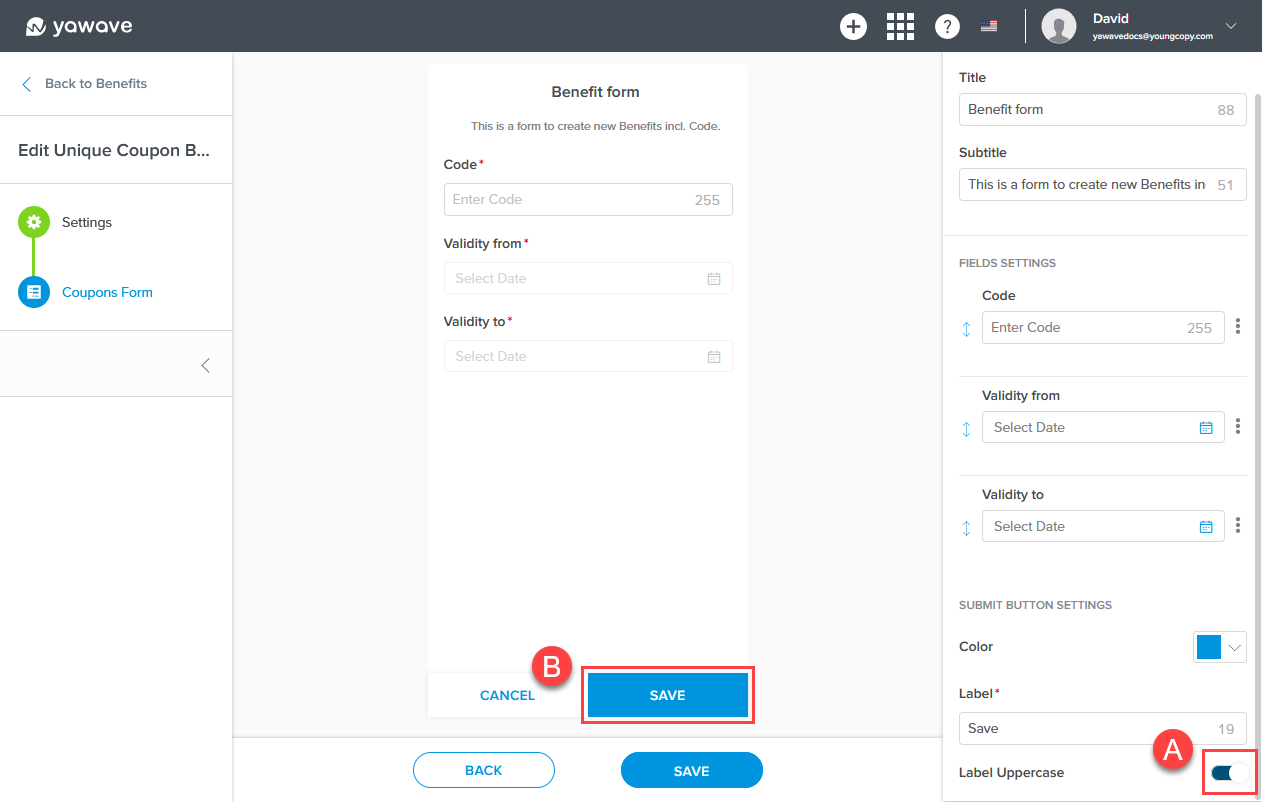
- Click Save.
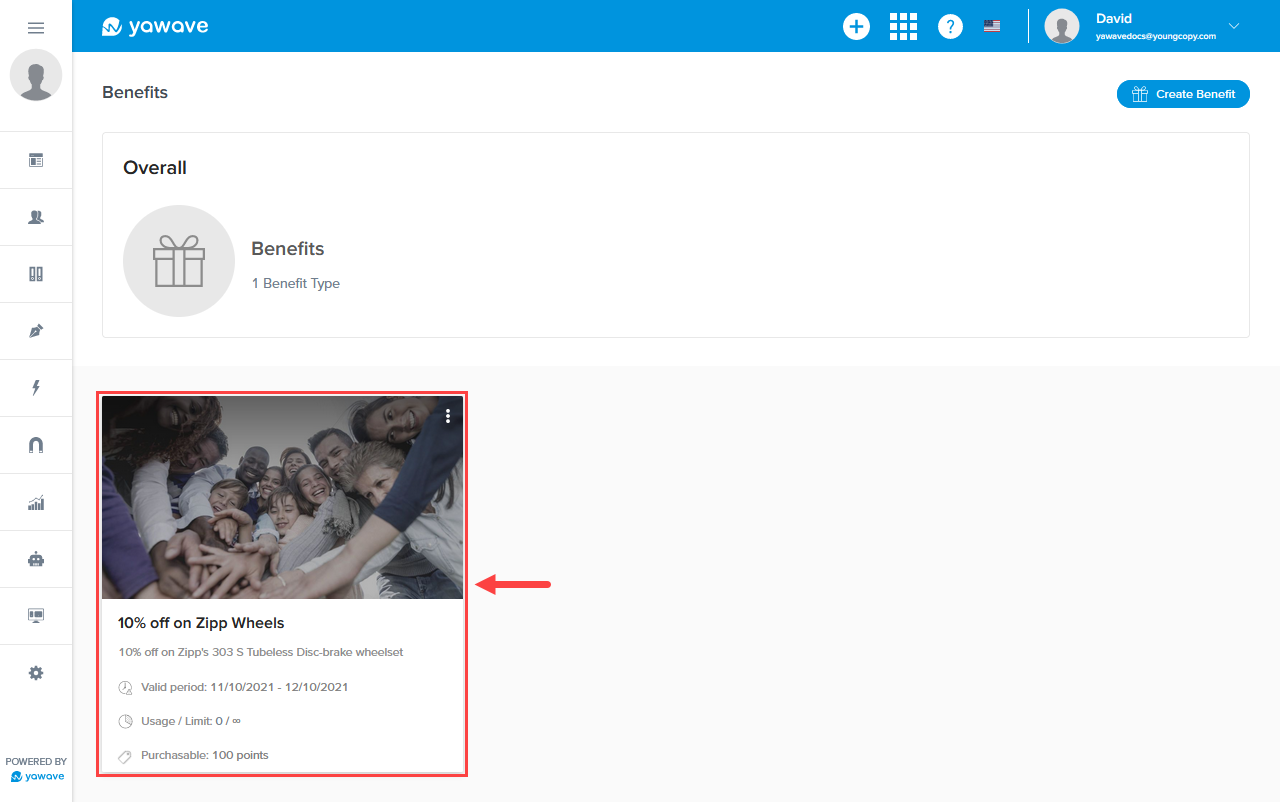
Example of Added Coupon
You should see the Benefits page with your newly created coupon. In the example below we saved the coupon's default settings so it now shows one coupon on the Benefits page. Click the coupon you created or click the coupon you want to add coupon codes to.
To get to this page, click Activate/Benefits. This assumes you have created a coupon (Benefit). See Create a Coupon for more details.
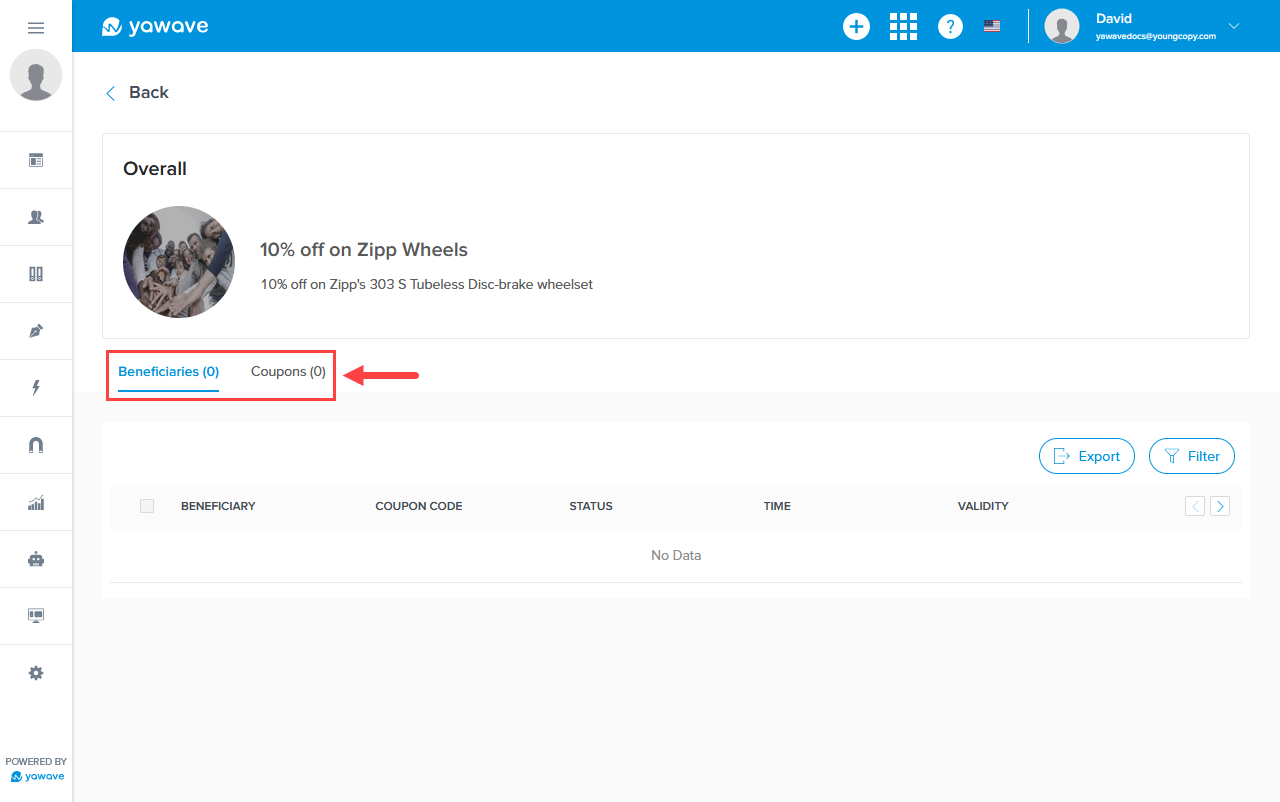
Beneficiaries Page Overview
When the page loads you should see your coupon. Notice two tabs: Beneficiaries and Coupons. The page defaults to the Beneficiaries data, which shows the beneficiaries of the coupon, the code attached to the coupon, status, time, validity and creator.
To get to this page, click Activate/Benefits and click a coupon (Benefit) you have created. This assumes you have created a coupon (Benefit). See Create a Coupon for more details.
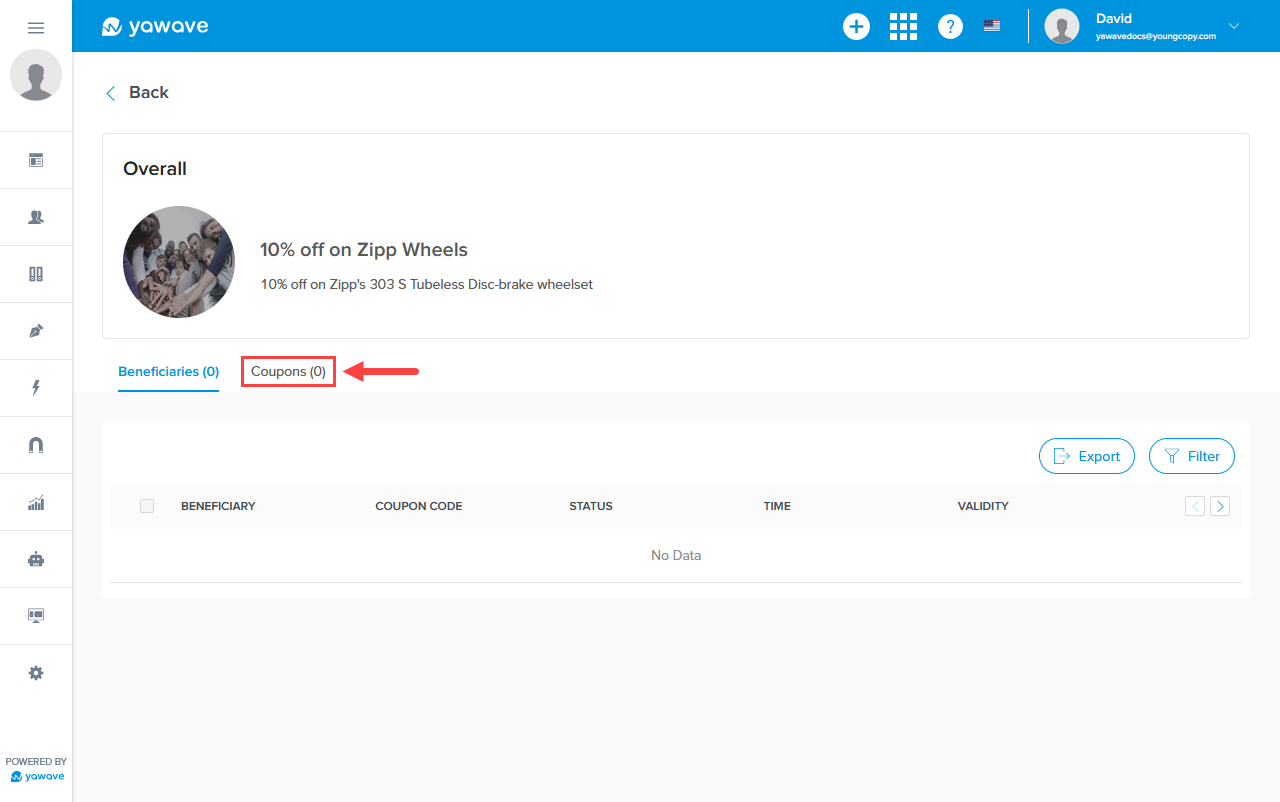
Coupons Page Overview
Click Coupons. This screen contains the coupon codes you can add for your end users to redeem. Coupon codes must be added before your end users can redeem Benefits or Rewards.
To get to this page, click Activate/Benefits and click a coupon (Benefit) you have created, then click Coupons as shown in the image below. This assumes you have created a coupon (Benefit). See Create a Coupon for more details.
Add Coupon Codes
Coupon codes must be unique and cannot be used more than once.
Add Coupon Code Manually (One at a time)
When you add a coupon code manually, you add one coupon code at a time.
To get to this page, click Activate/Benefits and click a coupon (Benefit) you have created, then click Coupons. This assumes you have created a coupon (Benefit). See Create a Coupon for more details.
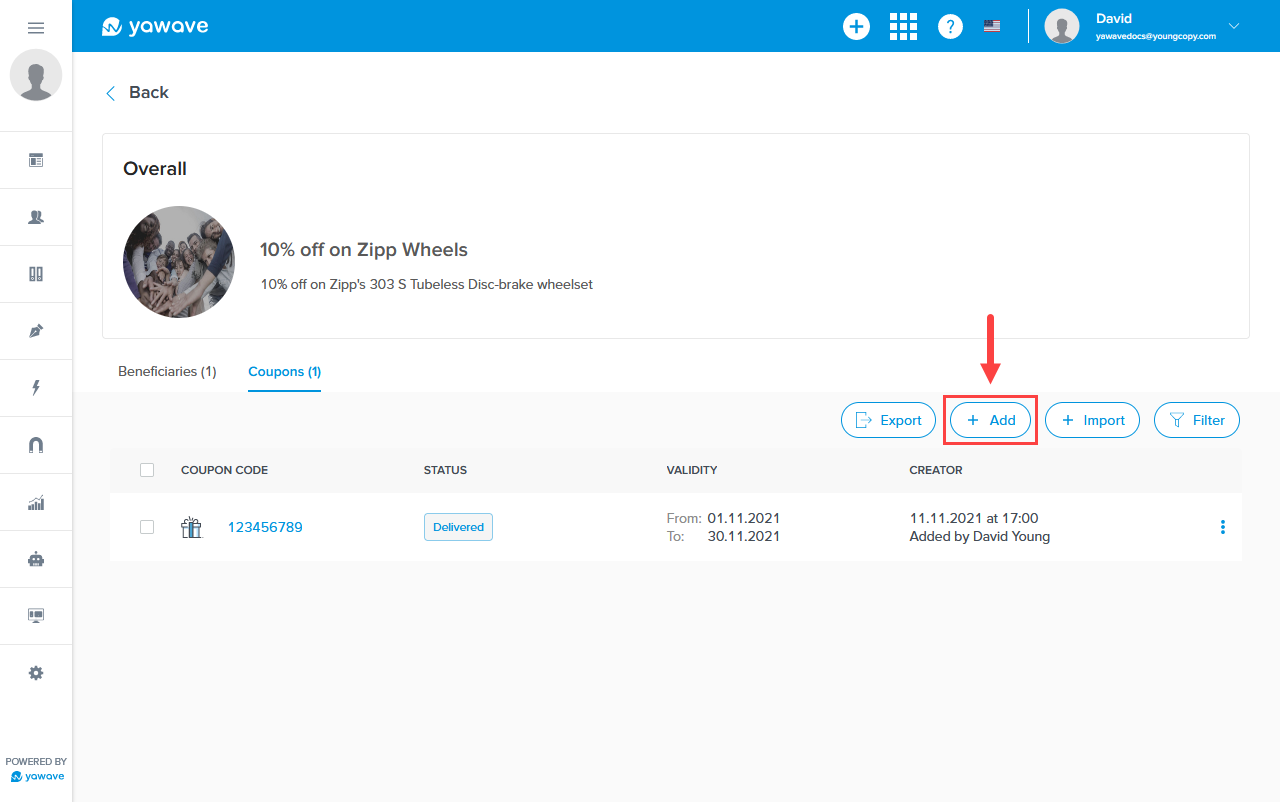
- Click Add.
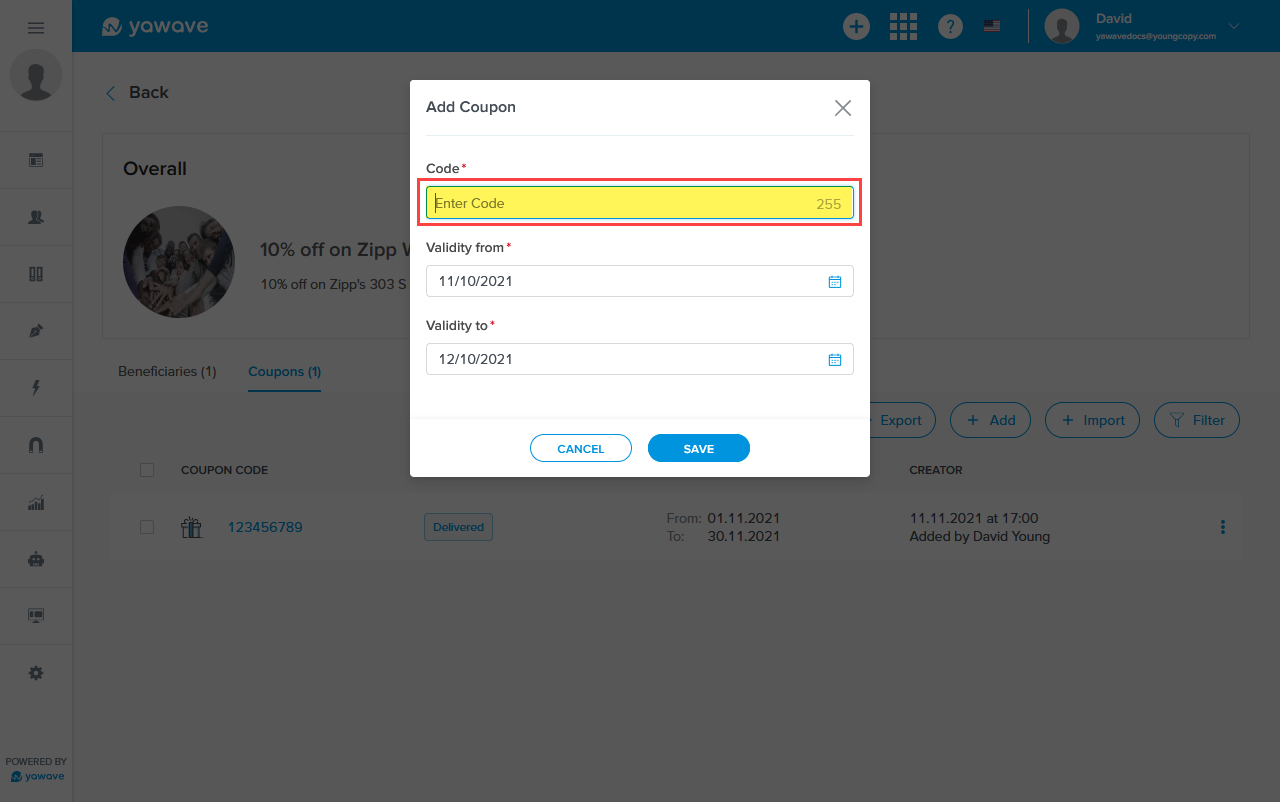
- Enter the coupon code in the Code field.
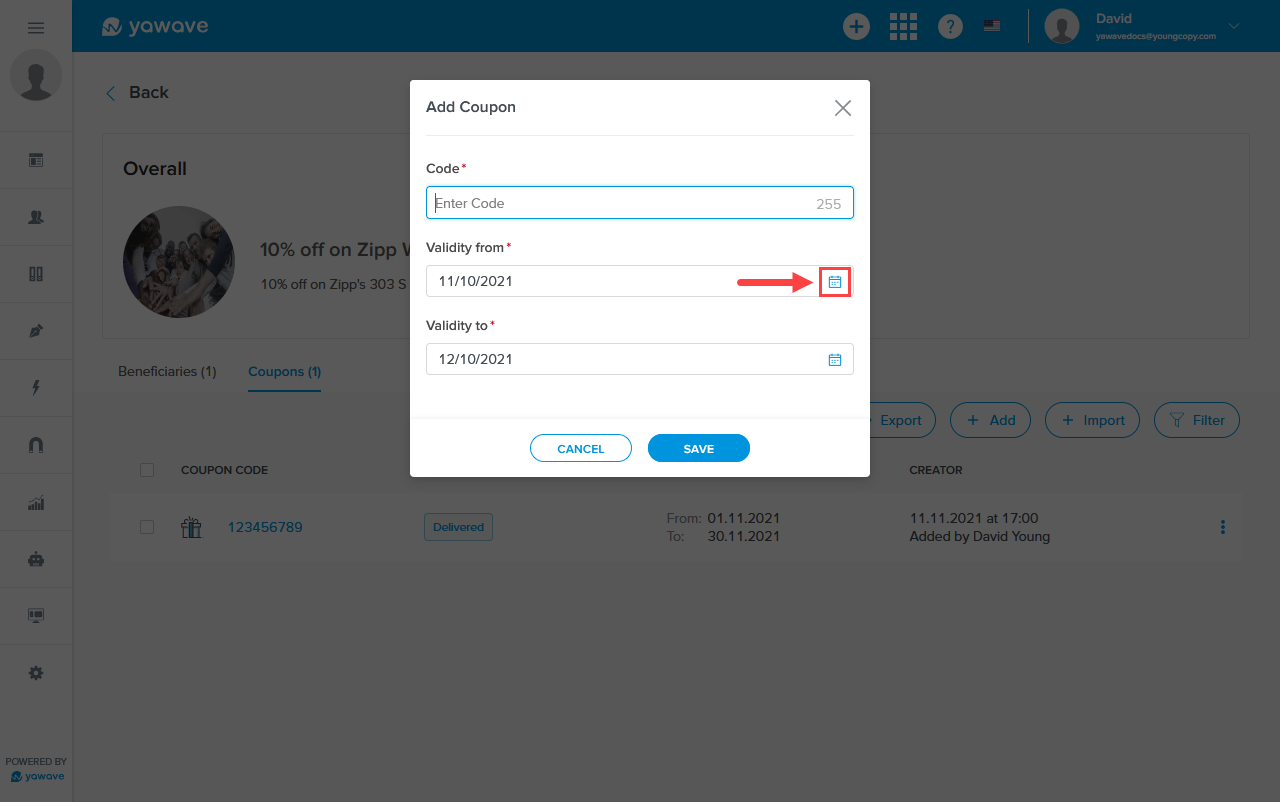
- Click the Validity from calendar icon and select the start date the coupon code is valid.
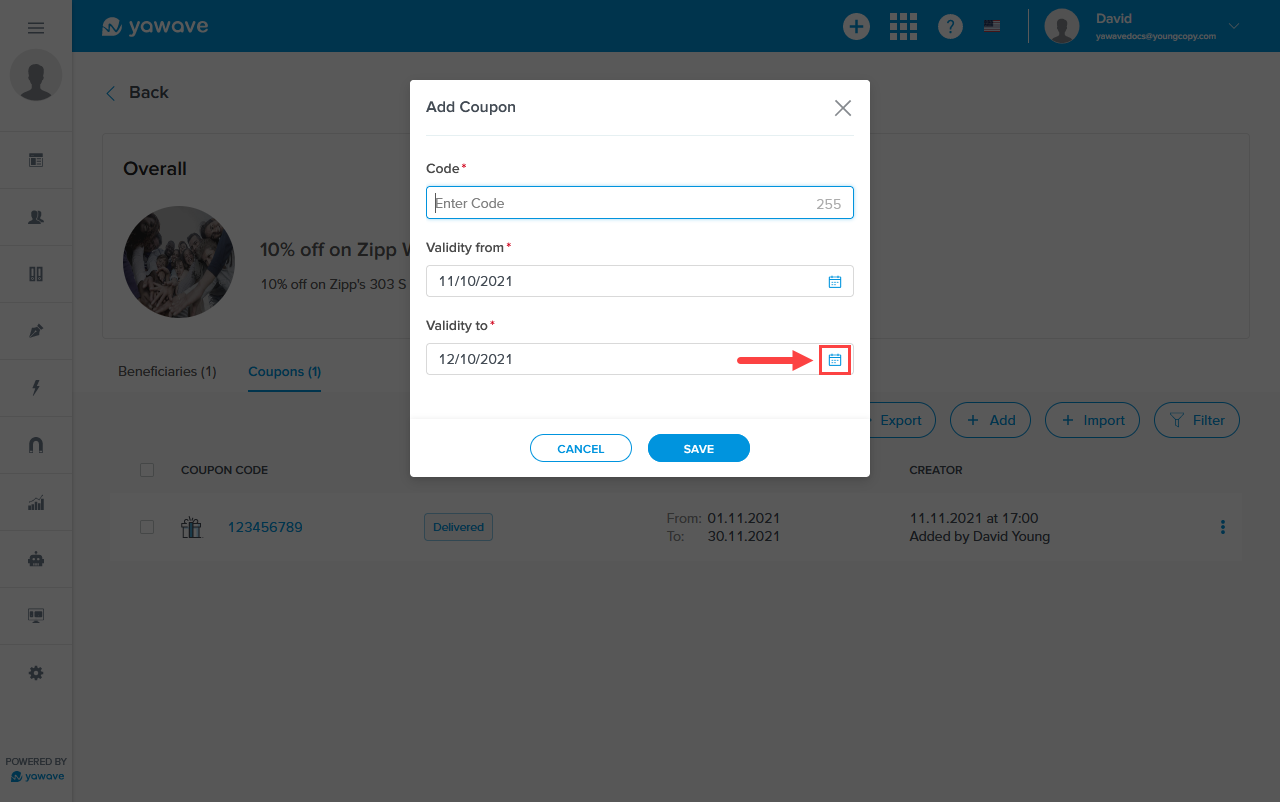
- Click the Validity to calendar icon and select the end date the coupon code is no longer valid.
- Click Save.
Add Coupon Codes in Bulk (Import)
When adding coupon codes in bulk, you need to have a .csv, .tsv or .txt file already populated with coupon codes you want to assign to the coupon. You can also add them in bulk by entering each code manually.
To get to this page, click Activate/Benefits and click a coupon (Benefit) you have created, then click Coupons. This assumes you have created a coupon (Benefit). See Create a Coupon for more details.
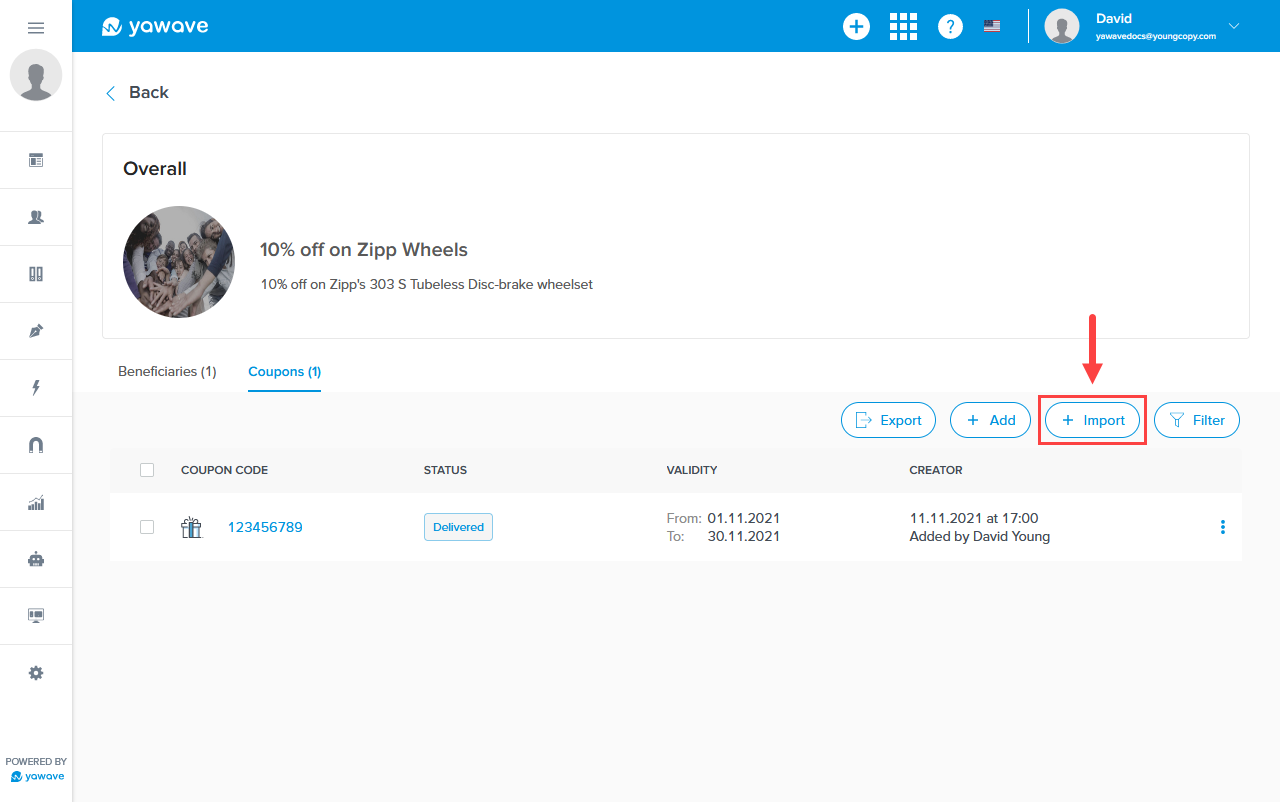
Click Import.
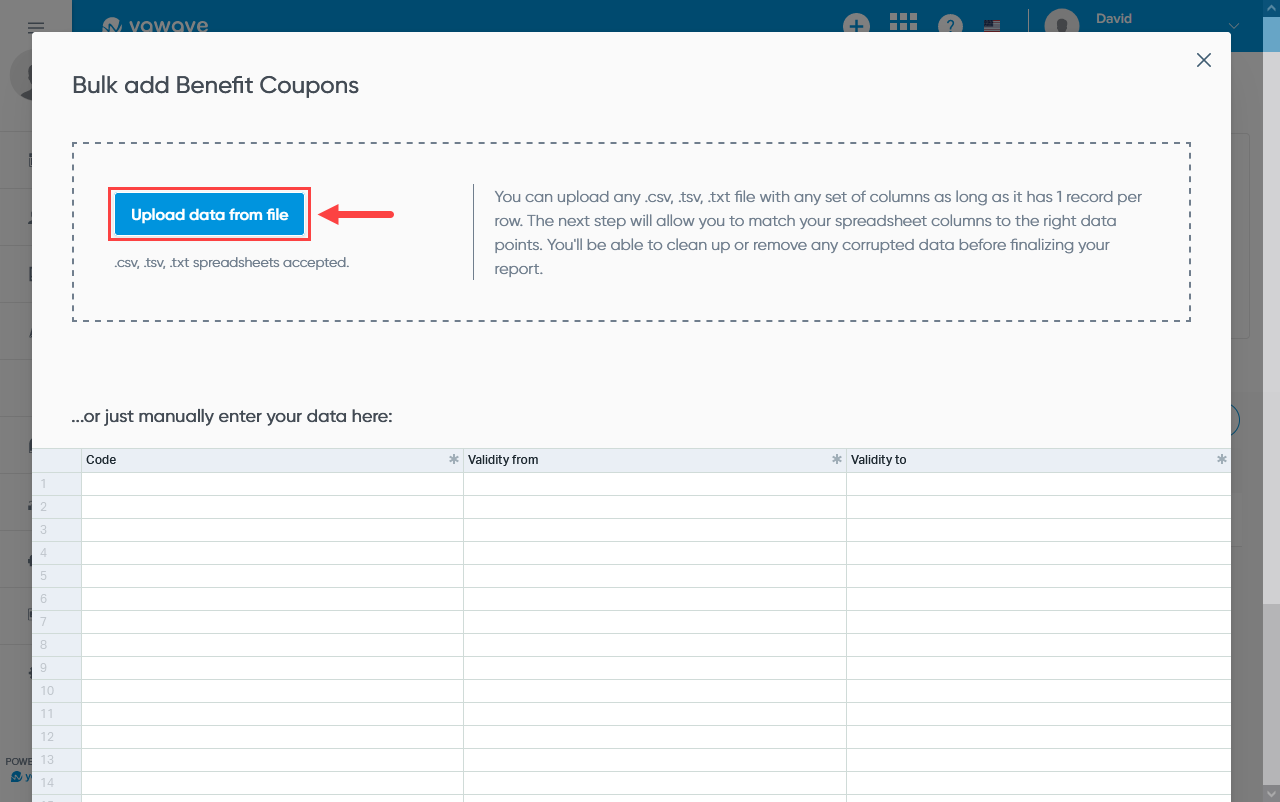
There are two ways to import coupon codes:
Upload a .csv, .tsv or .txt file with coupon codes
Click Upload data from file to upload a .csv, .tsv or .txt file containing the coupon codes you want to upload. Note: Your .csv, .tsv or .txt file should contain the following three columns:
- Code
- Validity from
- Validity to
When the file upload window appears, locate and select the .csv, .tsv or .txt file you want to upload, and follow the onscreen instructions.
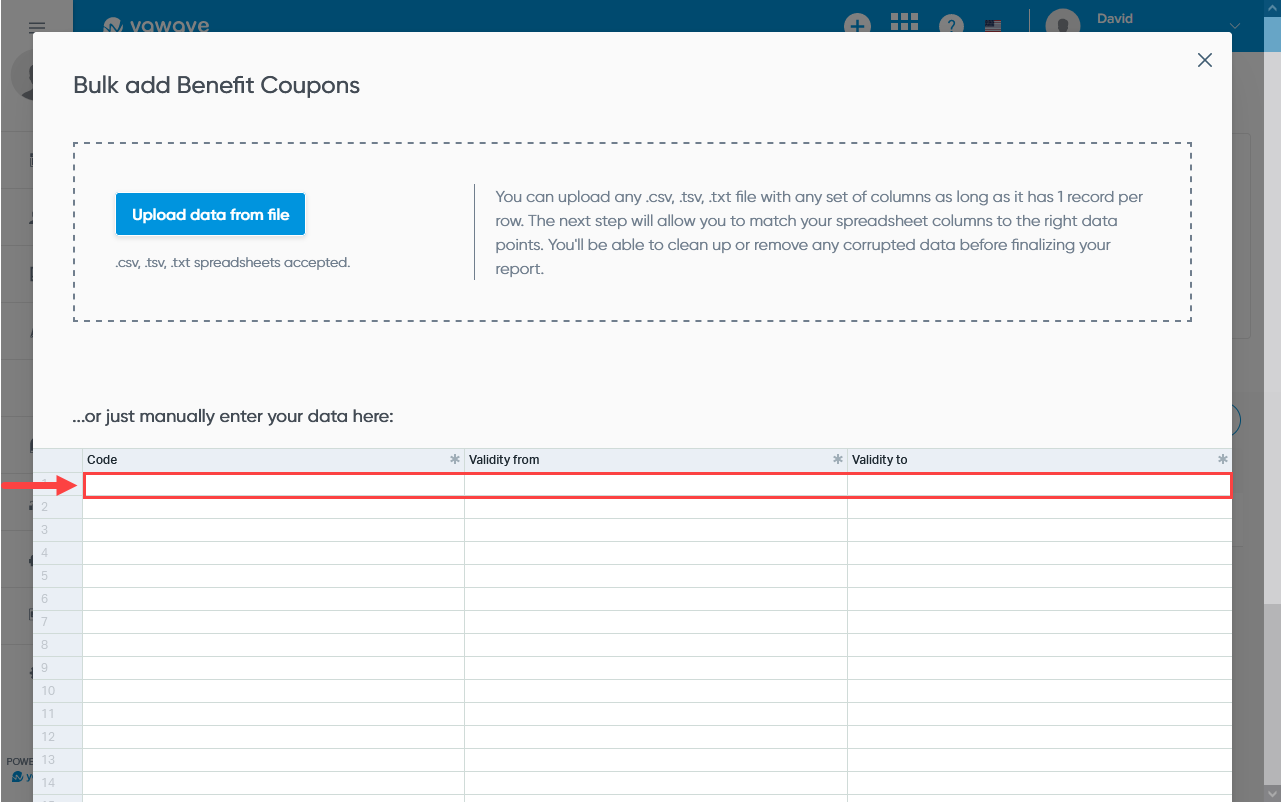
Manually enter coupon codes
Manually enter coupon codes in the spreadsheet as shown below.
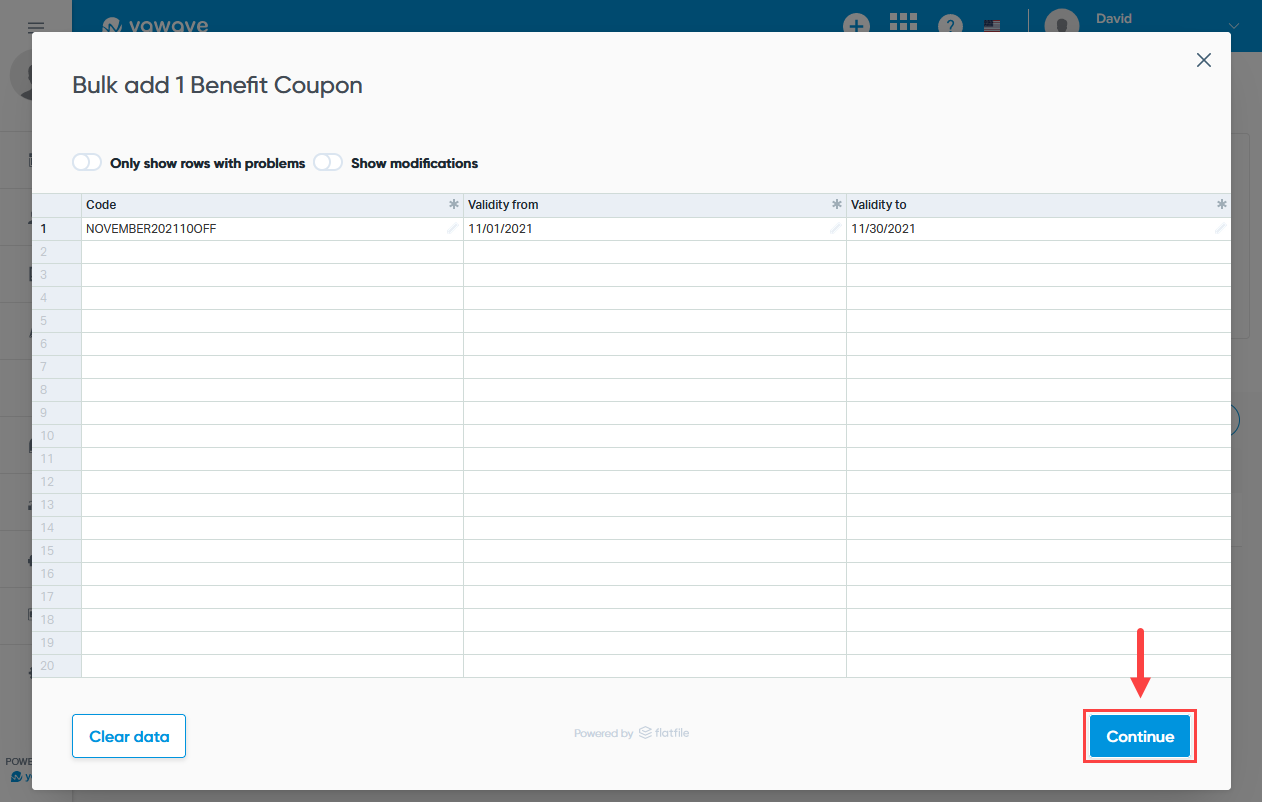
Once you have entered coupon codes manually, click Continue.
If you are ready to submit the coupon codes you have entered manually, click Yes.
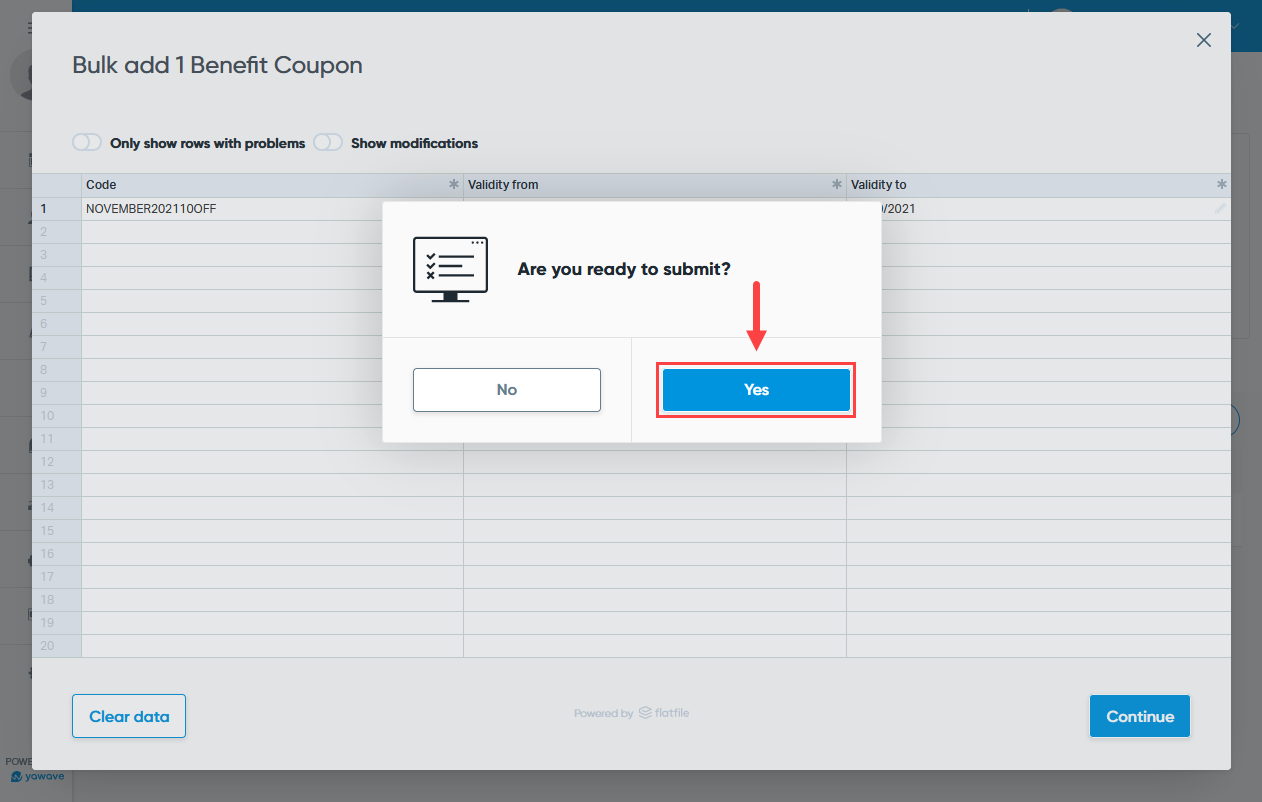
Or click No to continue to enter coupon codes manually.

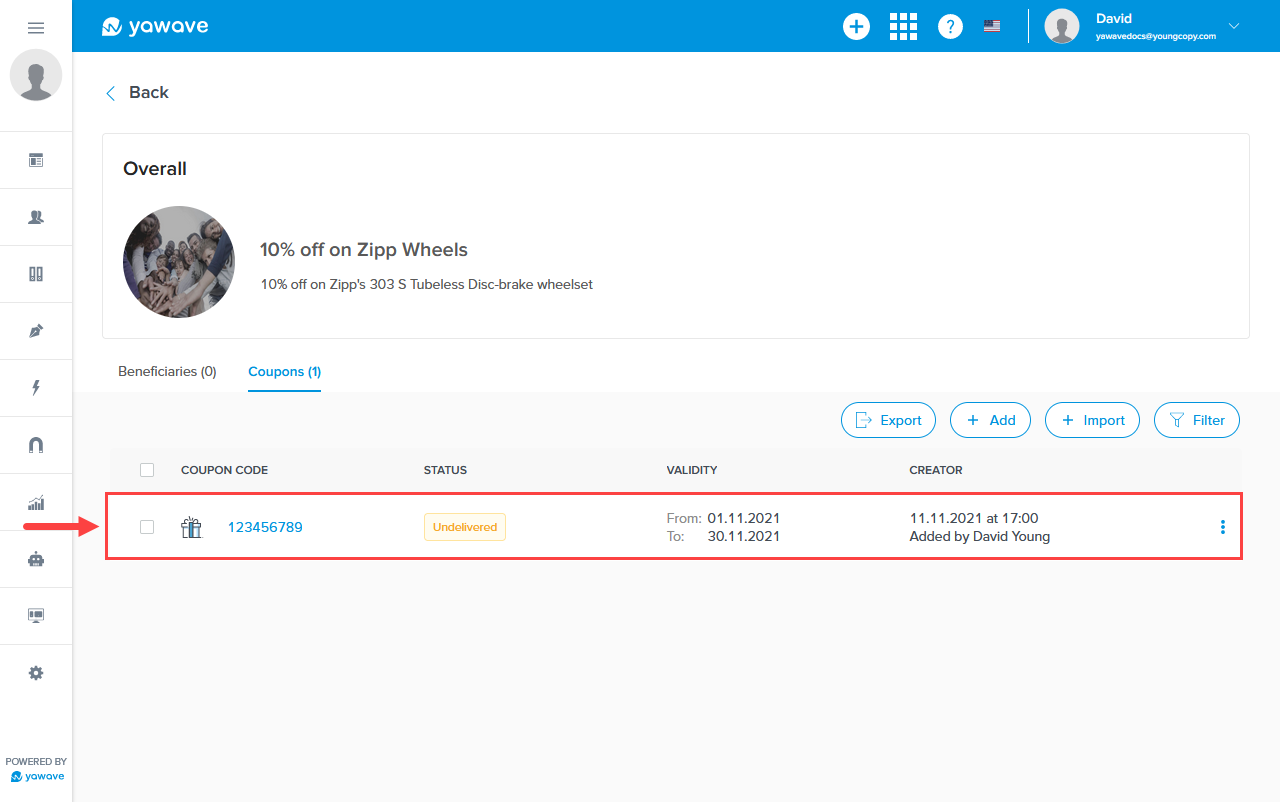
Example of Added Coupon Code
Below is an example of when we added coupon 123456789 valid from 01.11.2021 to 30.11.2021. Note: Coupon codes must be unique and can only be used once.
Edit or Delete Coupon Code
Click the three dot menu located on the same row, to the right of the coupon code and select Edit or Delete from the drop-down menu.

Add Benefits to Community Tool
Once you have created Benefits, you will need to add two tabs to the Community Tool: Catalog and Benefits. Read Add Catalog and Benefits Tabs to Community Tool for details.