Learn how to configure your Yawave application's theme below.
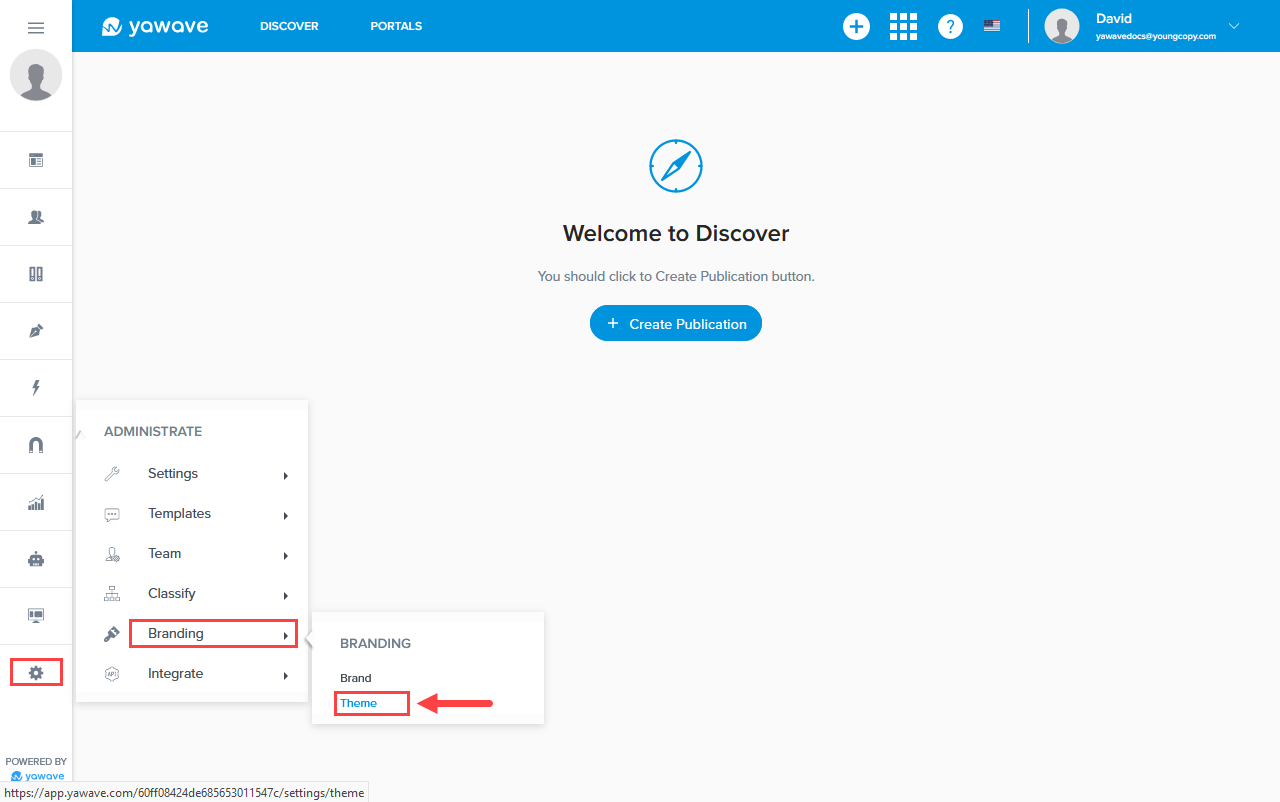
- Click Administrate/Branding/Theme.
- In the image below you'll see the Theme Settings options. Here you can set your theme's name, colors, layout style, fonts, etc.
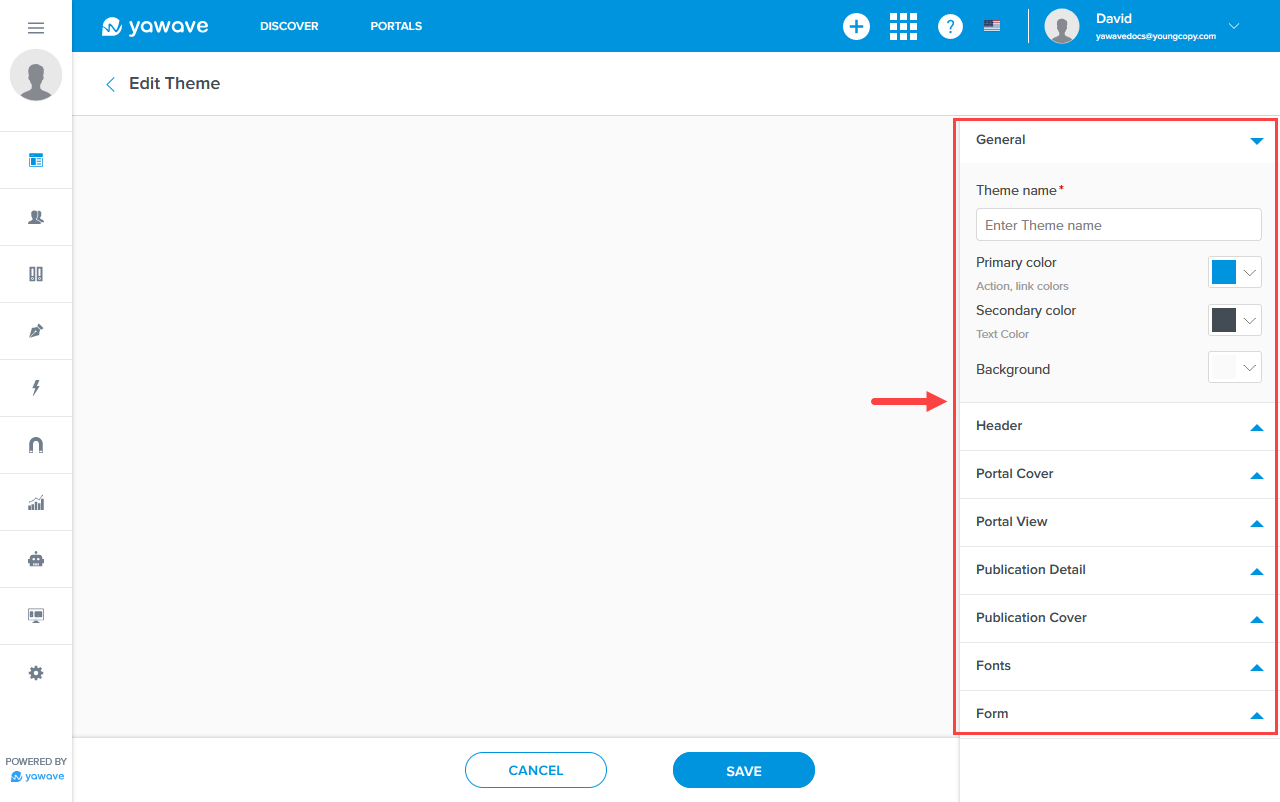
- The first bucket of settings is located under the General section. Configure the settings as instructed below.
- Enter the name of your theme in the Theme name field.
- Select the primary color you want to use from the Primary color drop-down menu. Here you can enter a Hex value, RGB value or use the color picker.
- Select the secondary color you want to use from the Secondary color drop-down menu. Here you can enter a Hex value, RGB value or use the color picker.
- Select the background color you want to use from the Background color drop-down menu. Here you can enter a Hex value, RGB value or use the color picker.
- Click Header.
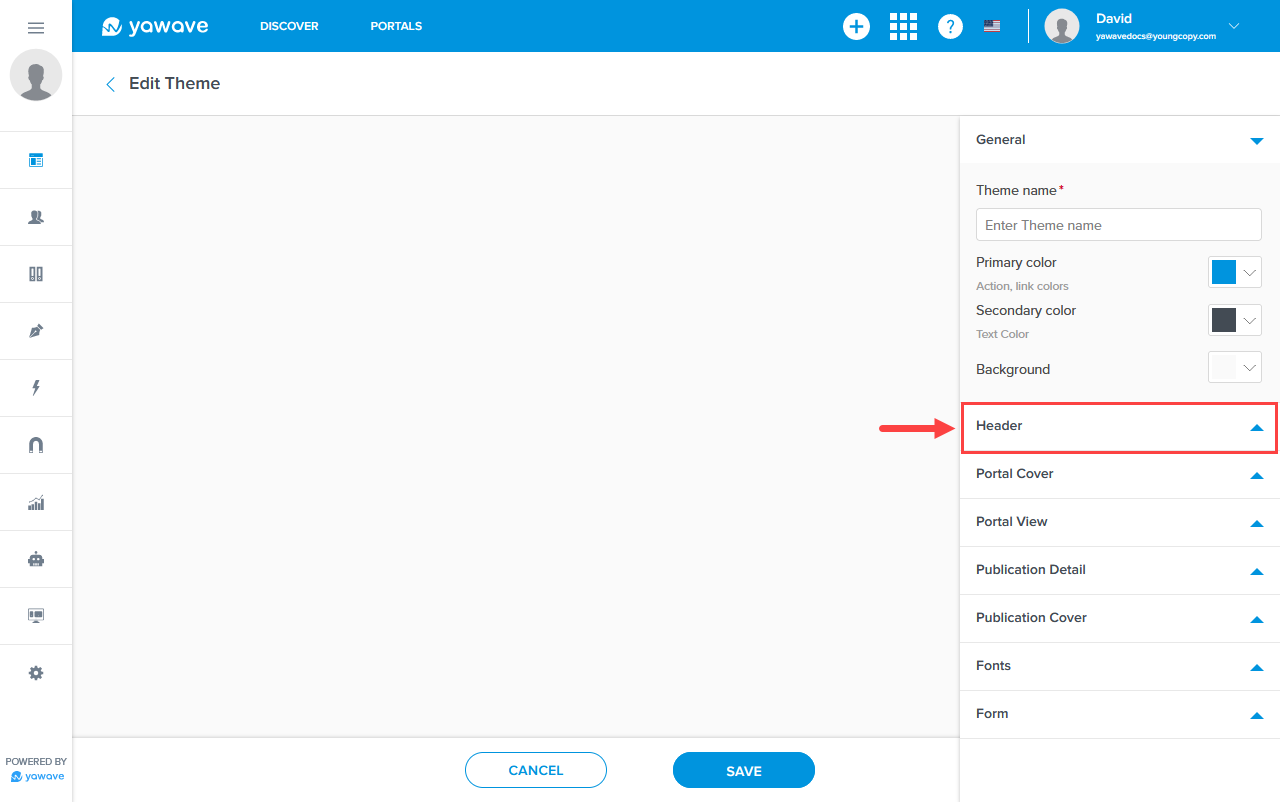
- The Header settings appear.
- Configure the Header settings as instructed below.
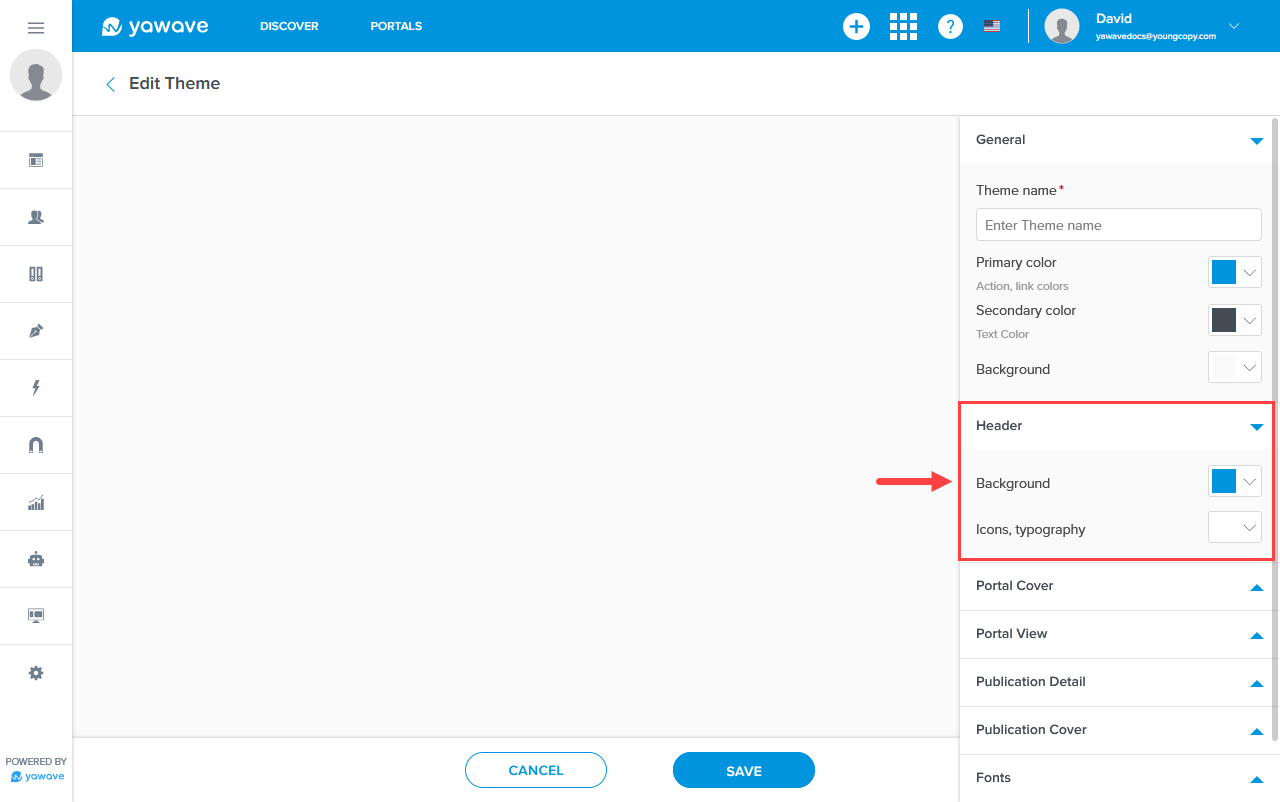
- Select the background color you want to use for the Header background from the Background drop-down menu. Here you can enter a Hex value, RGB value or use the color picker.
- Select the background color you want to use for the Header icons and typography from the Icons, typography drop-down menu. Here you can enter a Hex value, RGB value or use the color picker.
- Click Portal Cover and configure the following settings:
- By default Show Cover is enabled. When enabled the Portal(s) you create will show a cover image. Click the toggle once to disable the cover image.
- By default Custom cover height (px) is set to 165. If needed, change this number to the height desired.
- By default Portal name is enabled. When enabled the Portal(s) you create will show the Portal's name. Click the toggle once to disable the Portal's name.
- By default Portal description is enabled. When enabled the Portal(s) you create will show the Portal's description. Click the toggle once to disable the Portal's description.
- By default Portal image is enabled. When enabled the Portal(s) you create will show the Portal's image. Click the toggle once to disable the Portal's image.
- Click Publication Detail and configure the following settings:
- Select a color from the Background drop-down menu. The color you choose will appear as the background color on your Publications.
- By default Hide header is disabled. When enabled the Publication(s) you create will show the Publication's header. Click the toggle once to enable the Publication's header.
- Select the publication types you want to use for your application from the Related Content drop-down menu.
- By defaul Number of Publications is set to show 3 Publications as Custom. This mean you can drag the circular icon to the right for more Publications to be shown or drag to the left for fewer Publications to be shown. Alternatively you can select All from the drop-down menu and all Publications will be shown
- Click Publication Cover and configure the following settings:
- By defaul the left image is selected for the Cover layout style. Click the right image layout to change the layout style.
- Enter a numeric value for the Cover corner radius value. The default value is set to 2.
- By defaul the following are enabled. Click the toggle once to disable any of these options:
- Image
- Title
- Description
- Category & Subcategory
- Date & Author
- Views & Activities count
- Share panel
- Click Fonts and configure the following settings:
- Paragraph: Font Family
- Variant
- Heading: Font Family
- Variant
- Click Form and configure the following Button settings:
- Background
- Icons, typography
- Corner Radius (px)
- Click Save.
Next Steps
Configure Compliance Settings or review Onboarding Steps.