Learn how to create a Publication below.
A Publication is content you can share with your audience. For example, you may want to share an article with images, text and video or you may want to send your site's visitors to a landing page or have them view a photo, click a link and more.
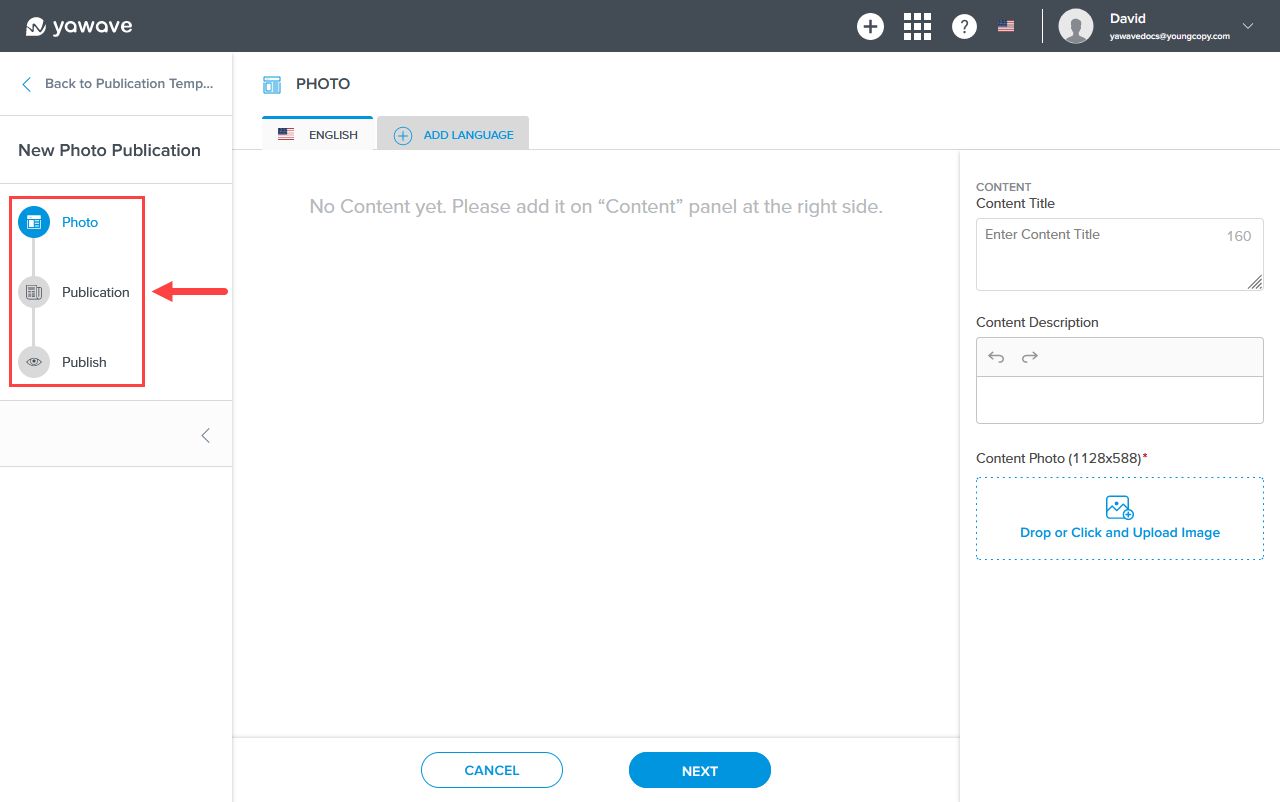
All Publication types use the following structure:
- Content (this changes based on the type of Publication you choose, ie. Photo, Article, Link, etc.) - Determine Content Title, Description, Content Body (Photo, Article, Link, etc.)
- Publication - Determine Header, Tabs and Tool associated with the Publication.
- Publish - Determine Cover Title, Image, Description, Category, Tags, Hashtags, Portal and more.
The ability to create Article or Photo Publications is no longer available. If you have been using yawave prior to December 2021, you may have created an Article or Photo Publication. If you created an Article Publication, you can still edit and use previously created Articles. However, if you Duplicate an existing Article, it will automatically change to a Landing Page. The main difference between an Article and a Landing Page is Landing Pages are wider.
Create a Publication
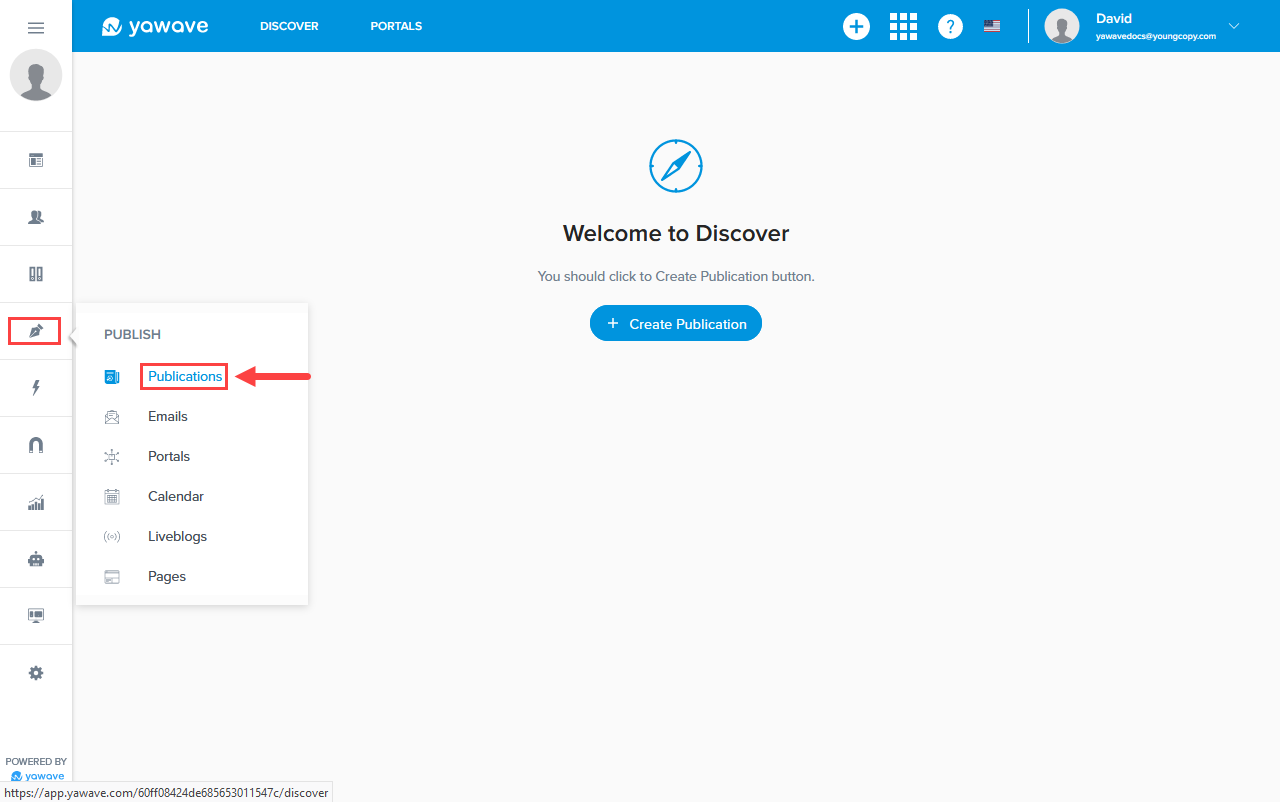
- Click Publish/Publications.
- Click Create Publication.
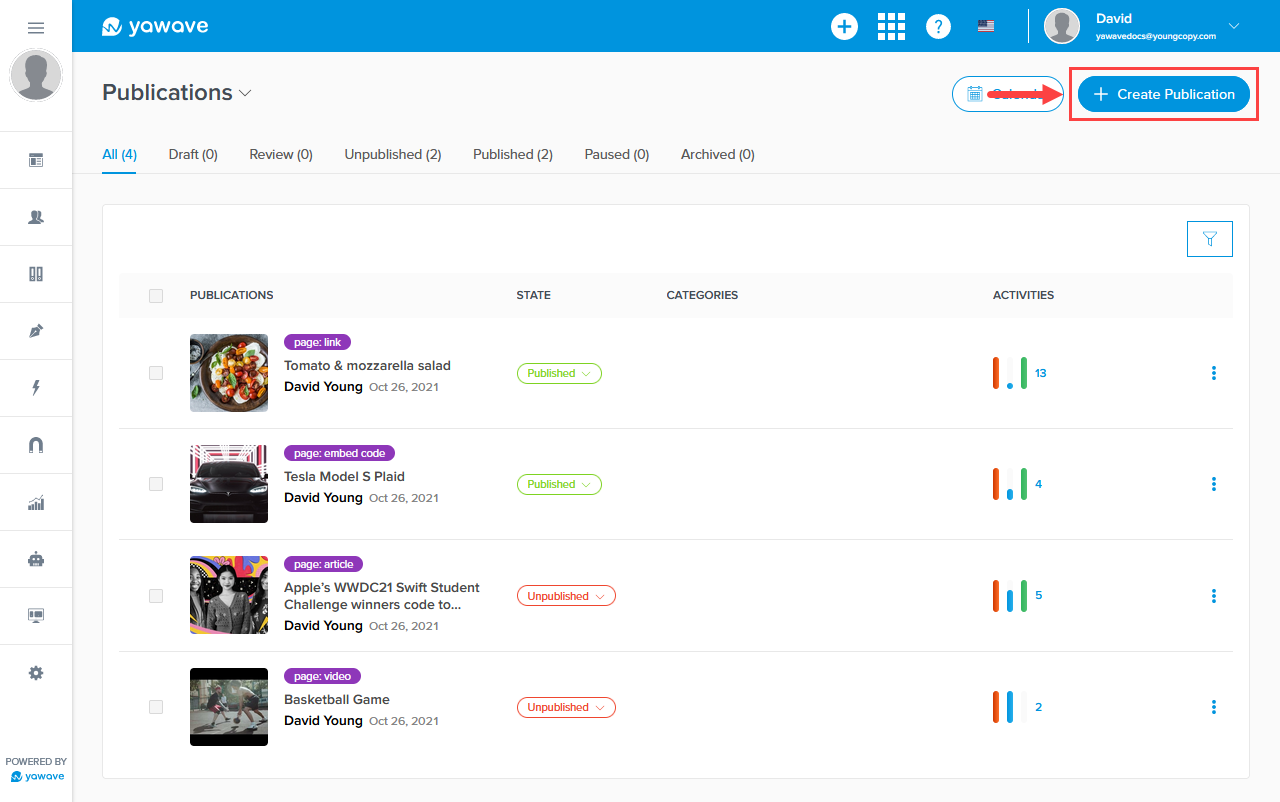
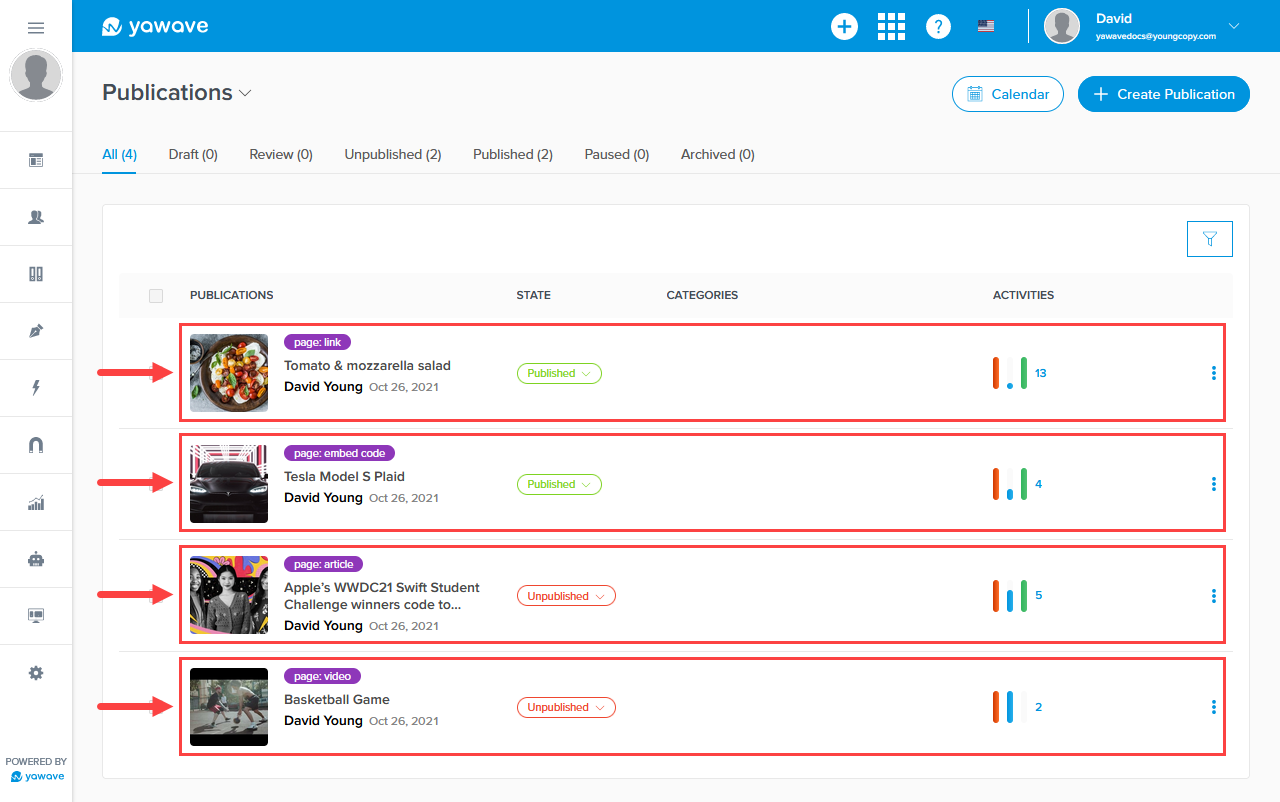
Alternatively, you can use one of the prebuilt Publications.
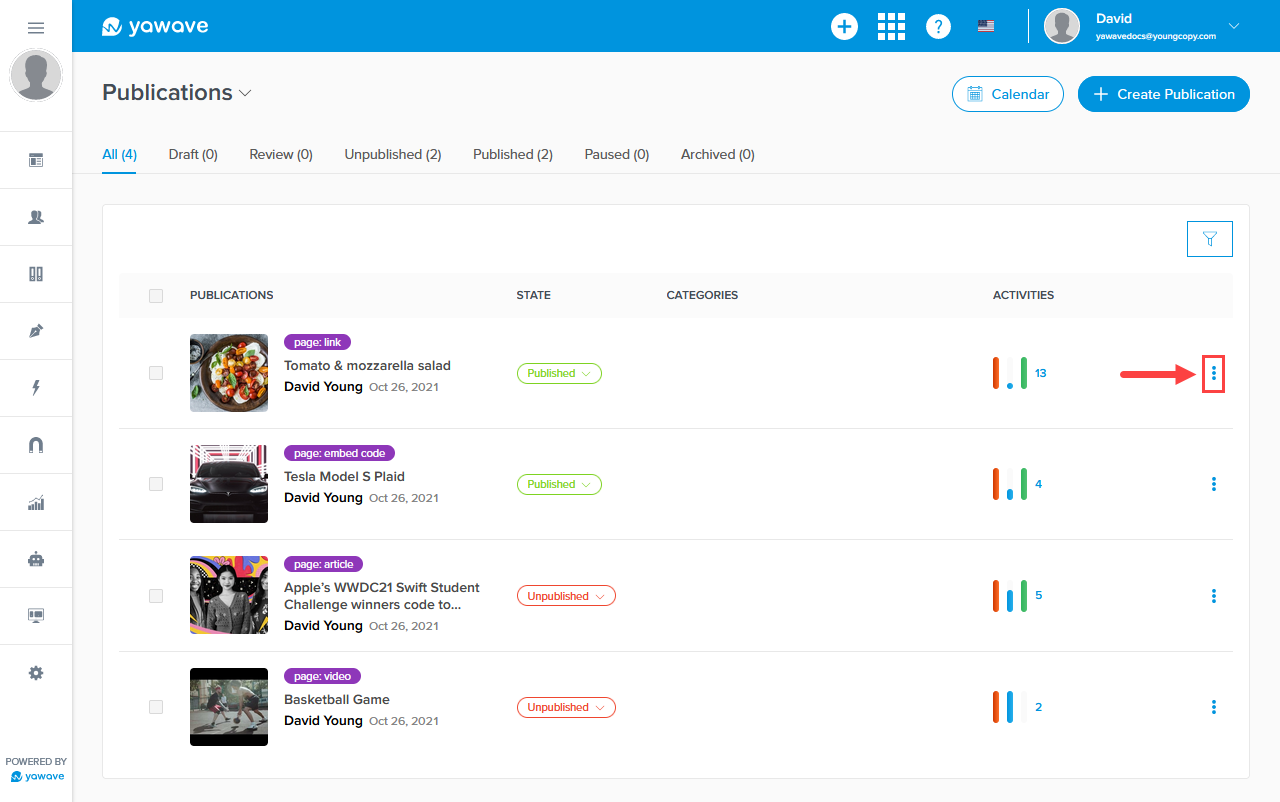
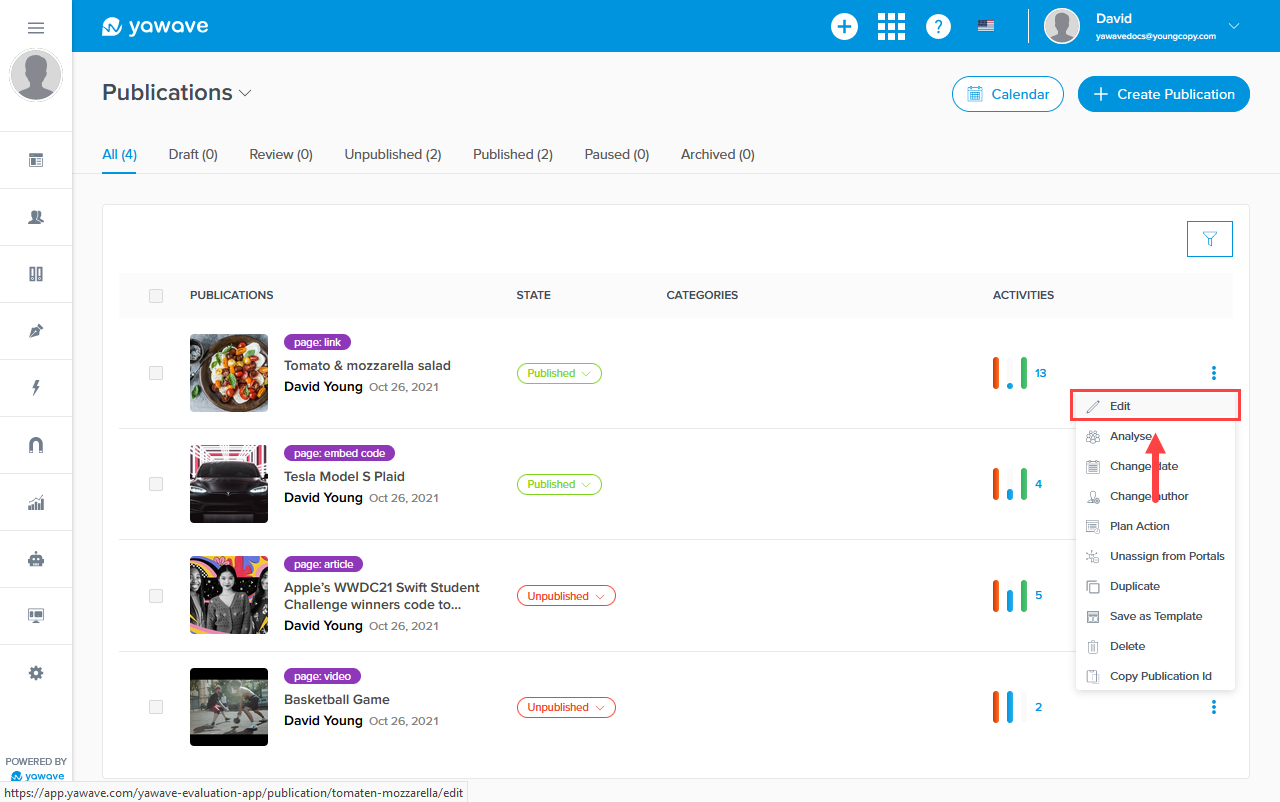
To edit a prebuilt Publication, click the three dot menu located on the far-right of the same row of the Publication you want to edit, otherwise continue to Step 3 below. Note: If this is the first time you have edited, duplicated or created a Publication, as best practice we recommend you go through all the steps in this document before using one of the prebuilt Publications.
Click Edit and configure the Publication based on your needs.
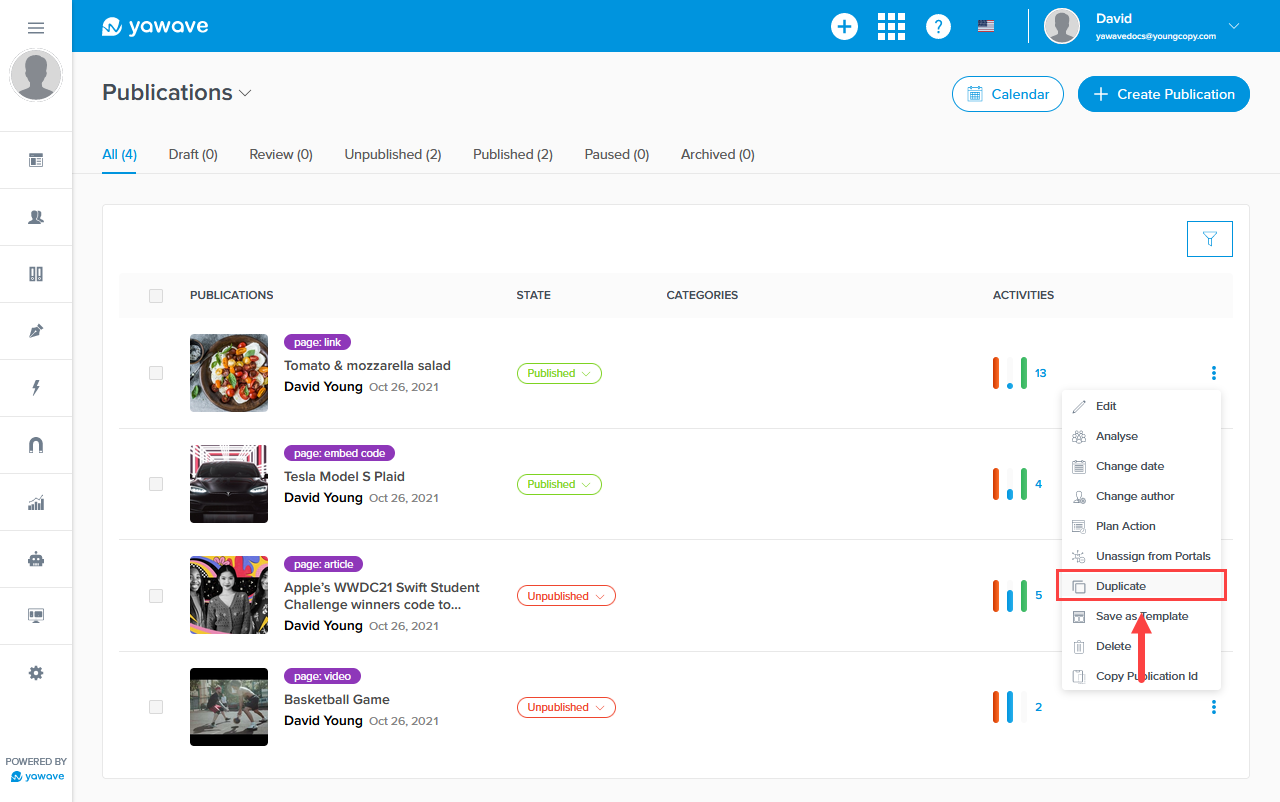
You can also duplicate a prebuilt Publication. To do this, click Duplicate from the drop-down menu as shown below. Configure the Publication based on your needs. Note: Using Duplicate to create a copy of prebuilt Publication is considered best practice. This allows you to keep the default prebuilt Publications as templates you can duplicate anytime.
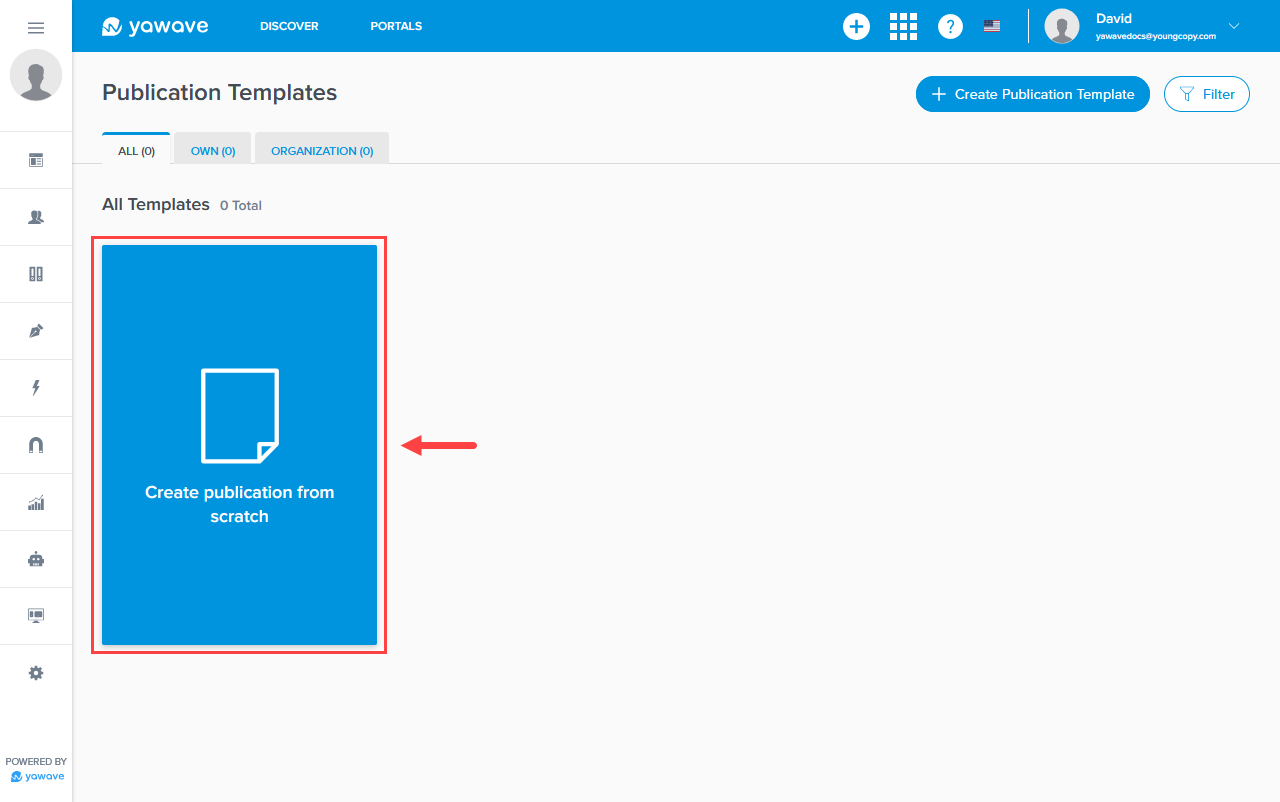
- Click Create publication from scratch.
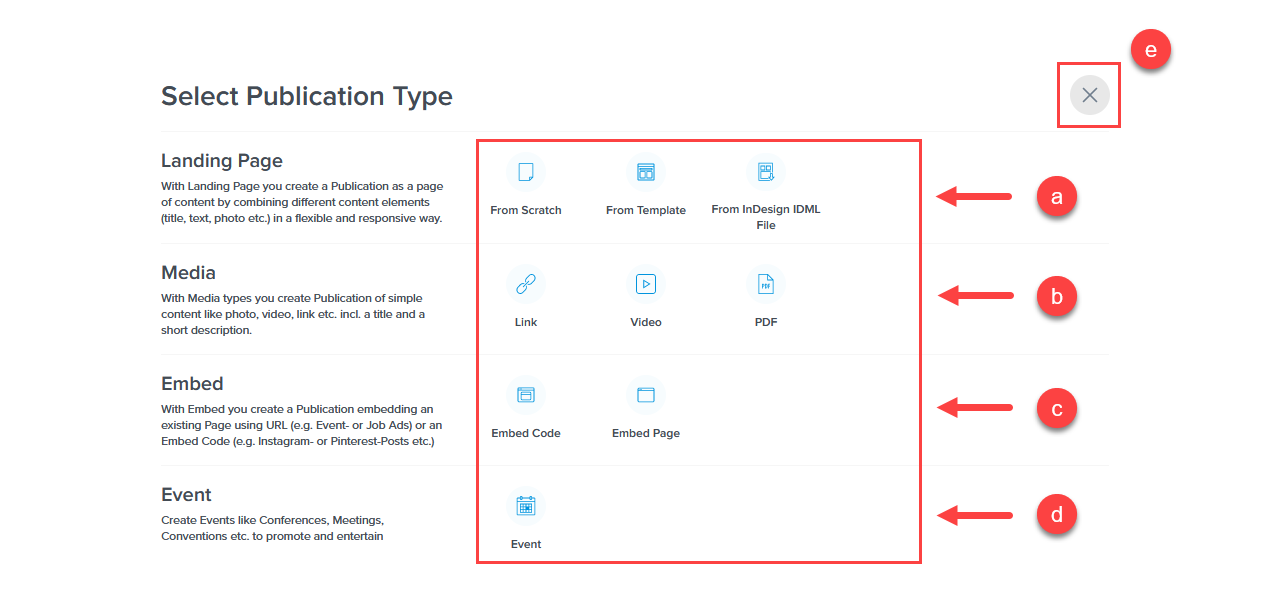
- yawave supports four Publication types (Note: Details on how to create each publication type are coming soon.):
a. Landing Page - To create a landing page, click From Scratch, From Template, or From InDesign IDML File.
b. Media - To create media, click Link, Video, or PDF.
c. Embed - To embed code or a page, click Embed Code or Embed Page.
d. Event - To create an Event, click Event.
e. Click "X" to exit the publication type options.
Add Content to a Publication
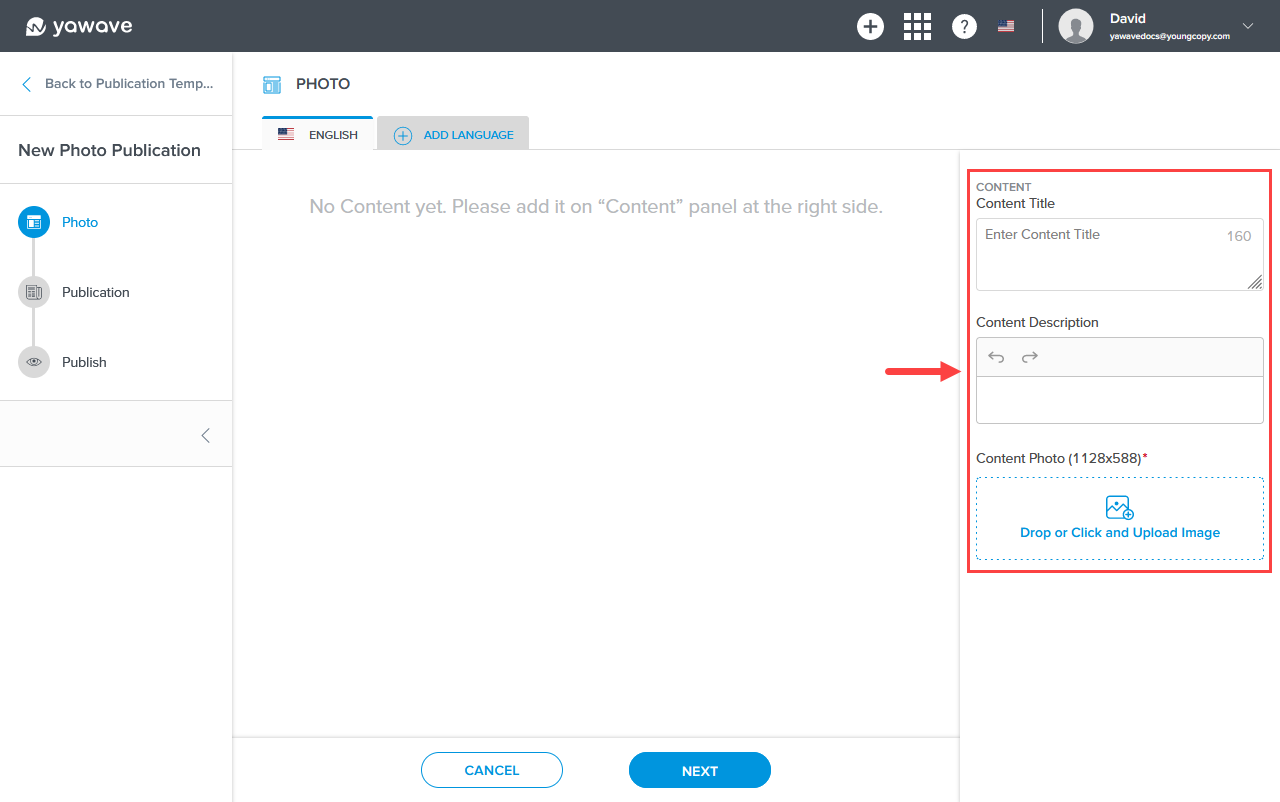
In the following example we use Publication Type Photo. Note the Content area changes based on the Publication Type you chose in Step 4 above (Article, Landing Page, Media, etc.)
- For the Photo example, enter the Content Title, Content Description and Content Photo as shown below. Note this will be different based on the Publication Type you choose.
Here's what it looks like when we added a photo of a sports car along with a title and description.
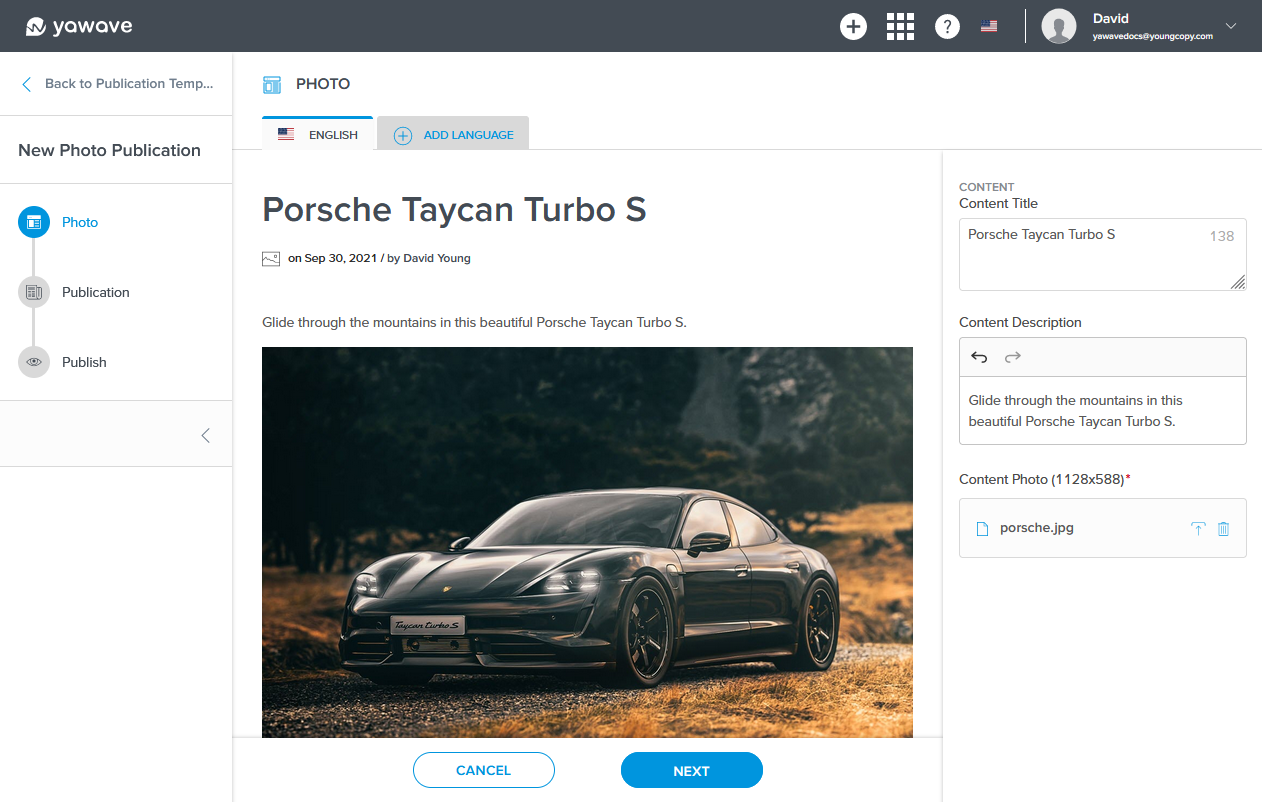
- Click Next.
Configure Publication Settings
The Publication Settings will be the same for all Publication Types. Note that the Publication Heading Settings are above the Content Settings you configured above. When configuring Publication Heading Settings you can leave it as default from the Content Settings or change the content to be different. We recommend you scroll down the page often to see the differences between the Heading and Content areas. This will be the same for all Publication Types.
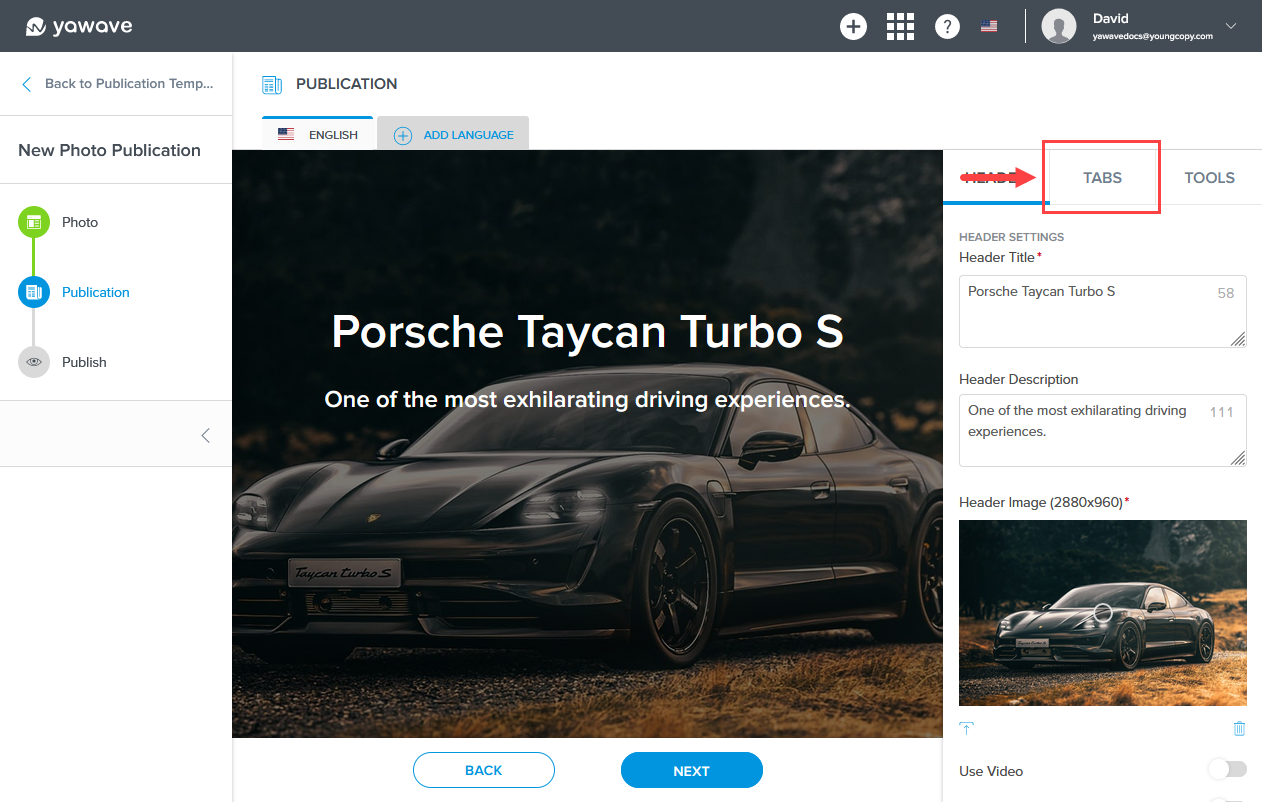
In the Publication Settings section you'll see three tabs (Header, Tabs, Tools).

Configure Header Settings
Click Header.
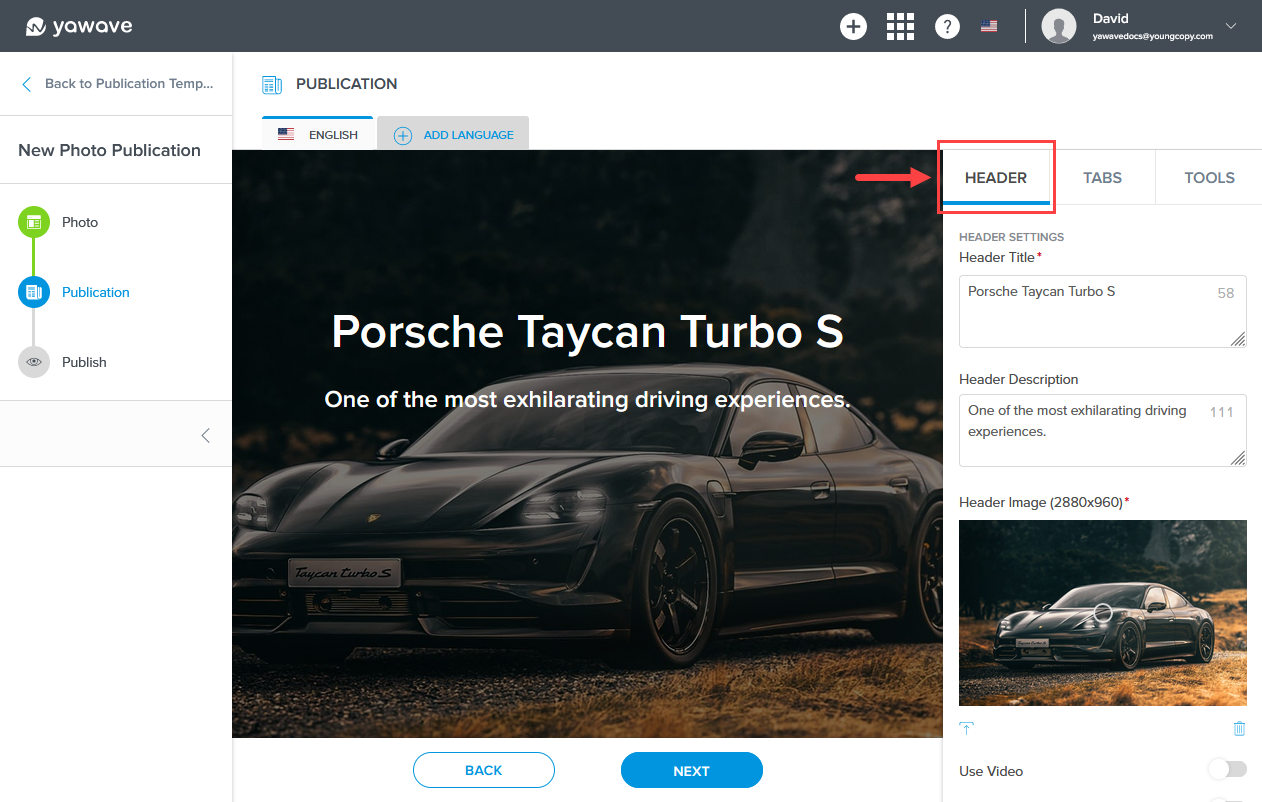
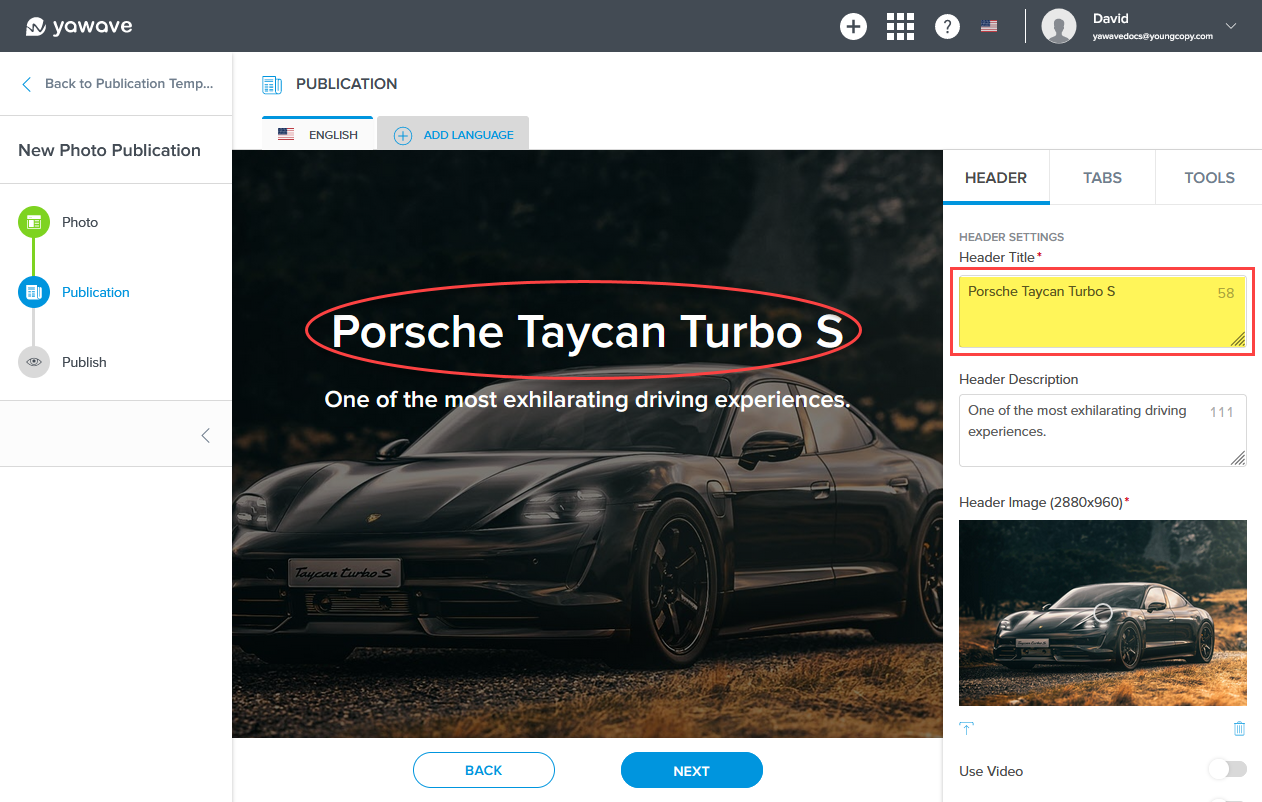
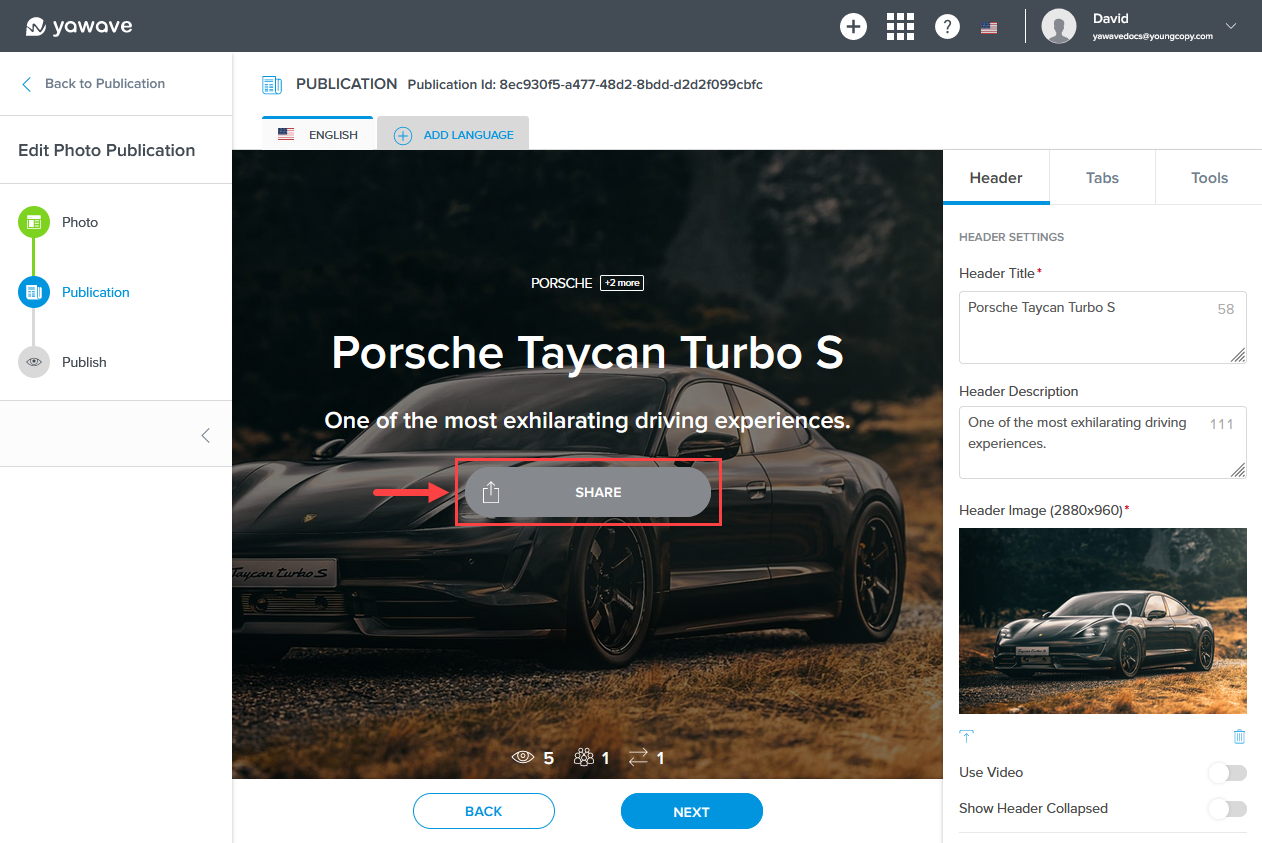
The Header Title uses what you entered in the Content Title in Step 5 above. Modify the Header Title if needed. The Header Title appears in larger font in the Header Image as shown below.
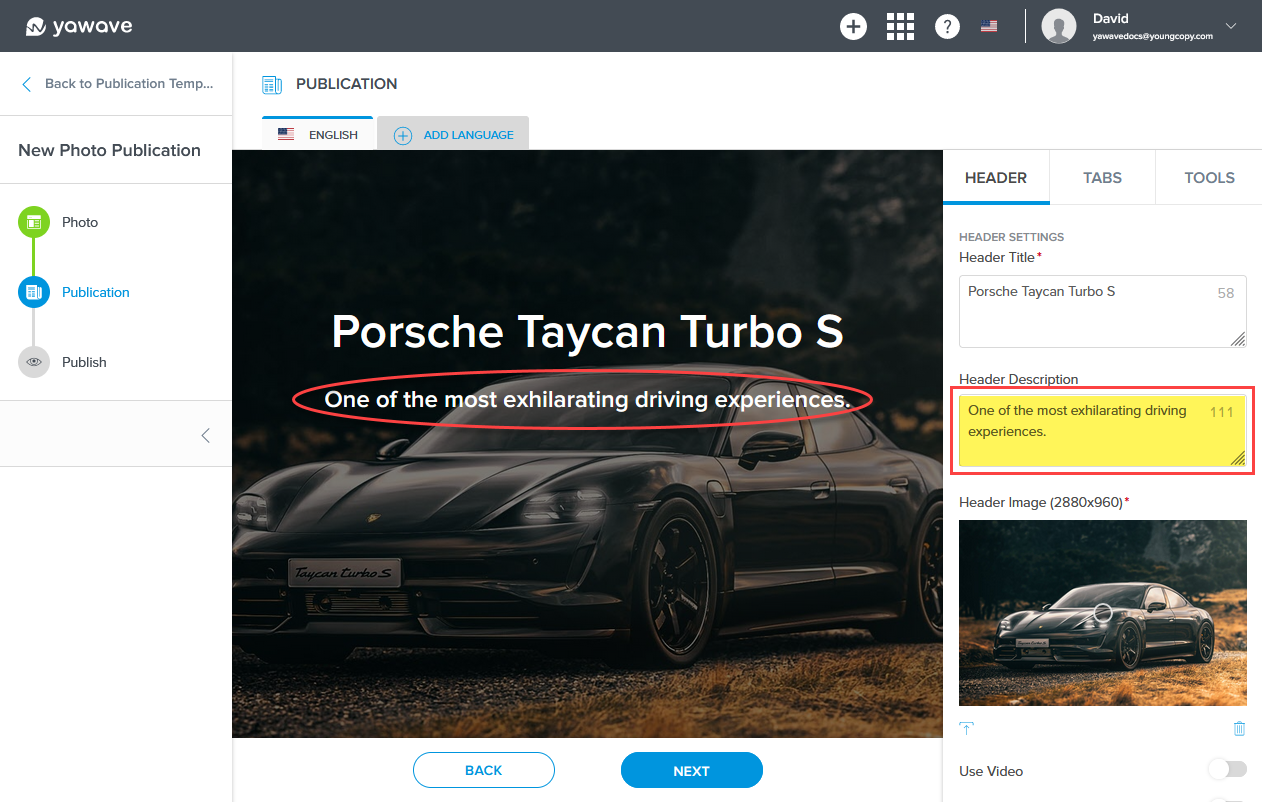
Enter a description you want to use for the Header in the Header Description field. The Header Description will appear under the Header Title as shown below.
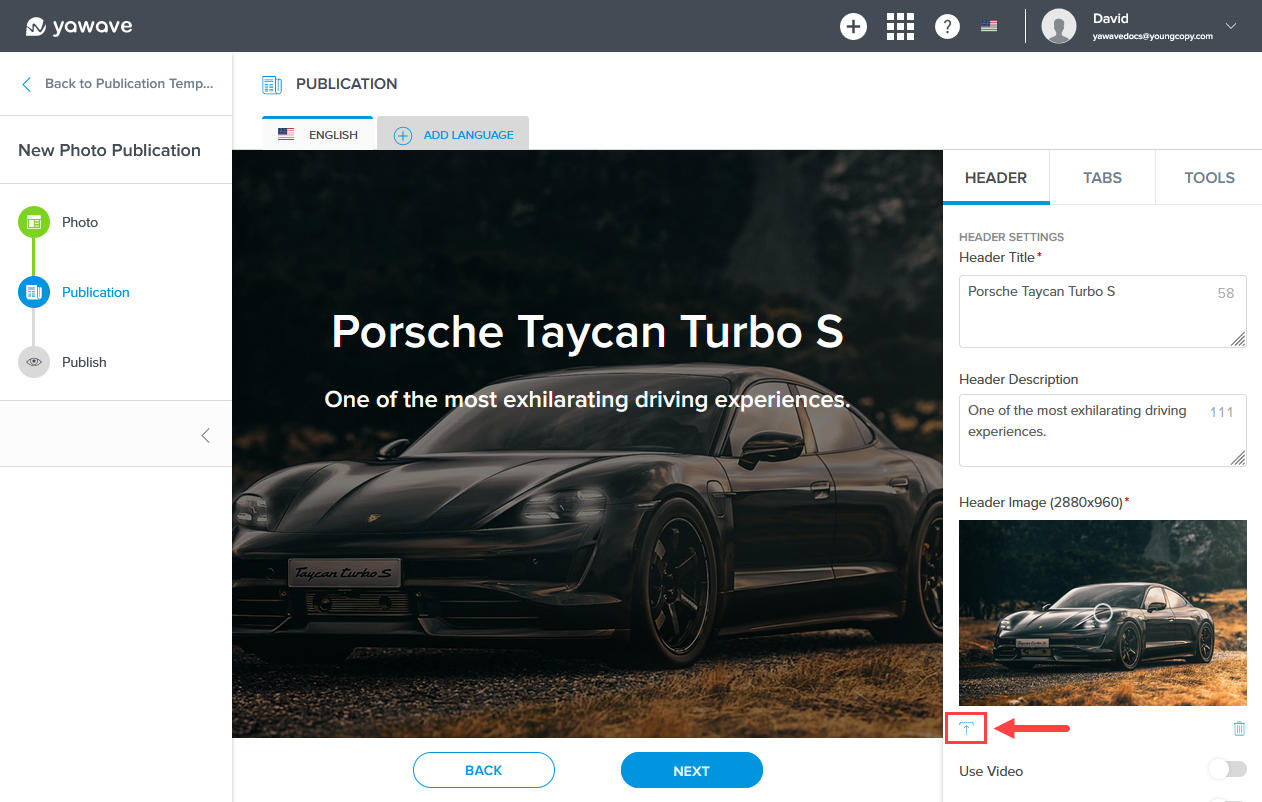
The Header Image uses the same image as the one you selected for the Content Photo above. Modify the image if needed. To modify the image, click the upload icon and upload a new image.
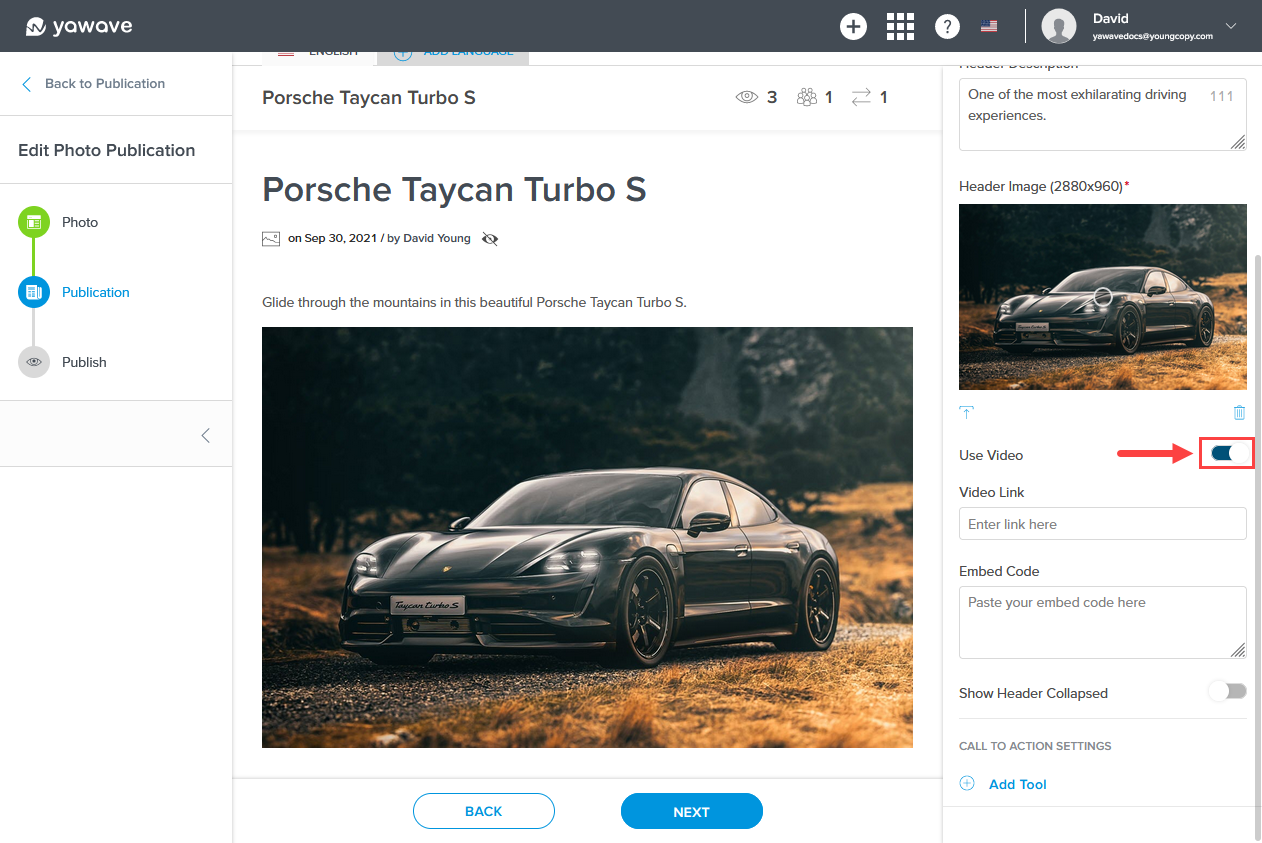
By default Use Video is disabled. When enabled the Header will use a video instead of an image. To enable using video as the Header, click the Use Video toggle once.
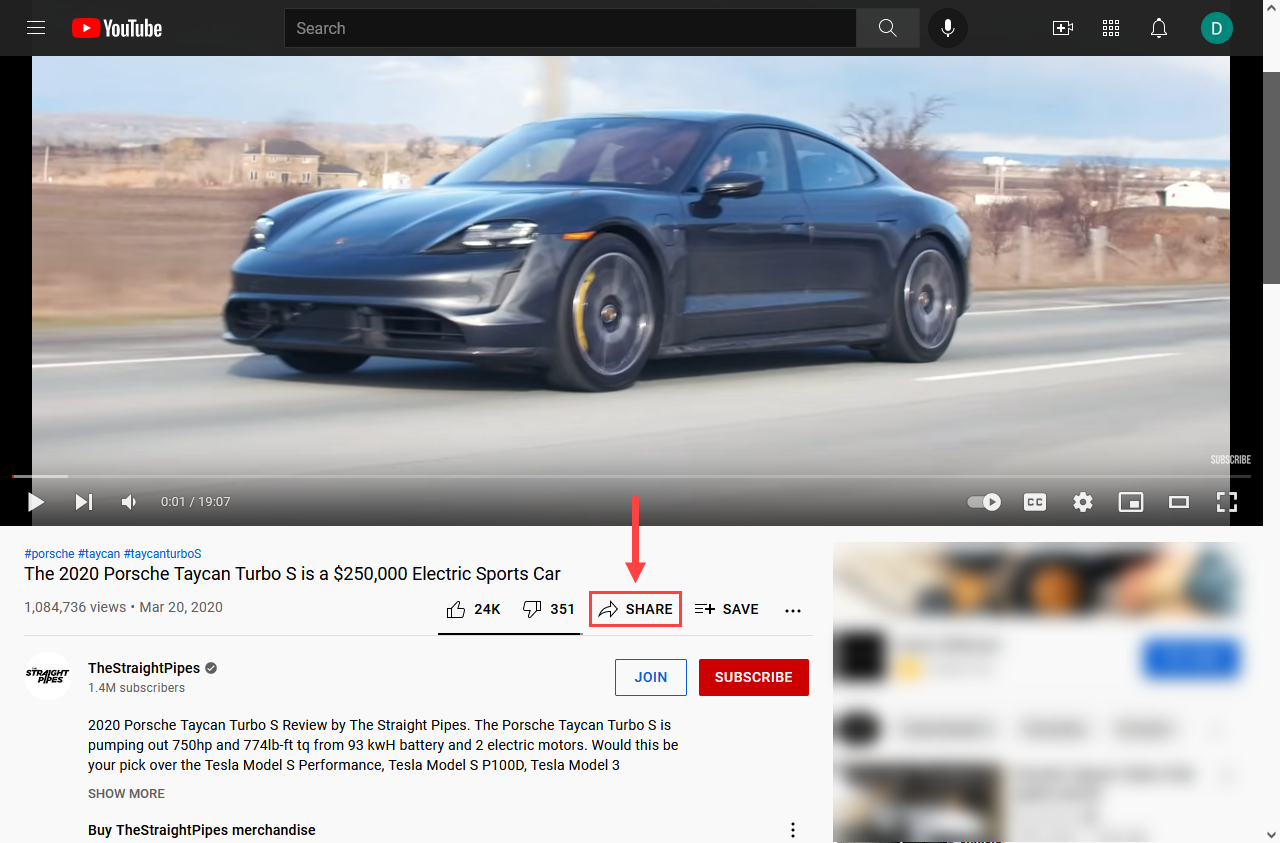
Note: Most videos include share options. See example below for the Porsche video example we found on YouTube. Click Share to see the video's link and embed code you'll need to configure the Use Video settings. Note that other video hosting services may display share options differently than YouTube.
Click the video's link (A) and then click Copy (B). Alternately, click Copy (B) and YouTube will automatically copy the link.
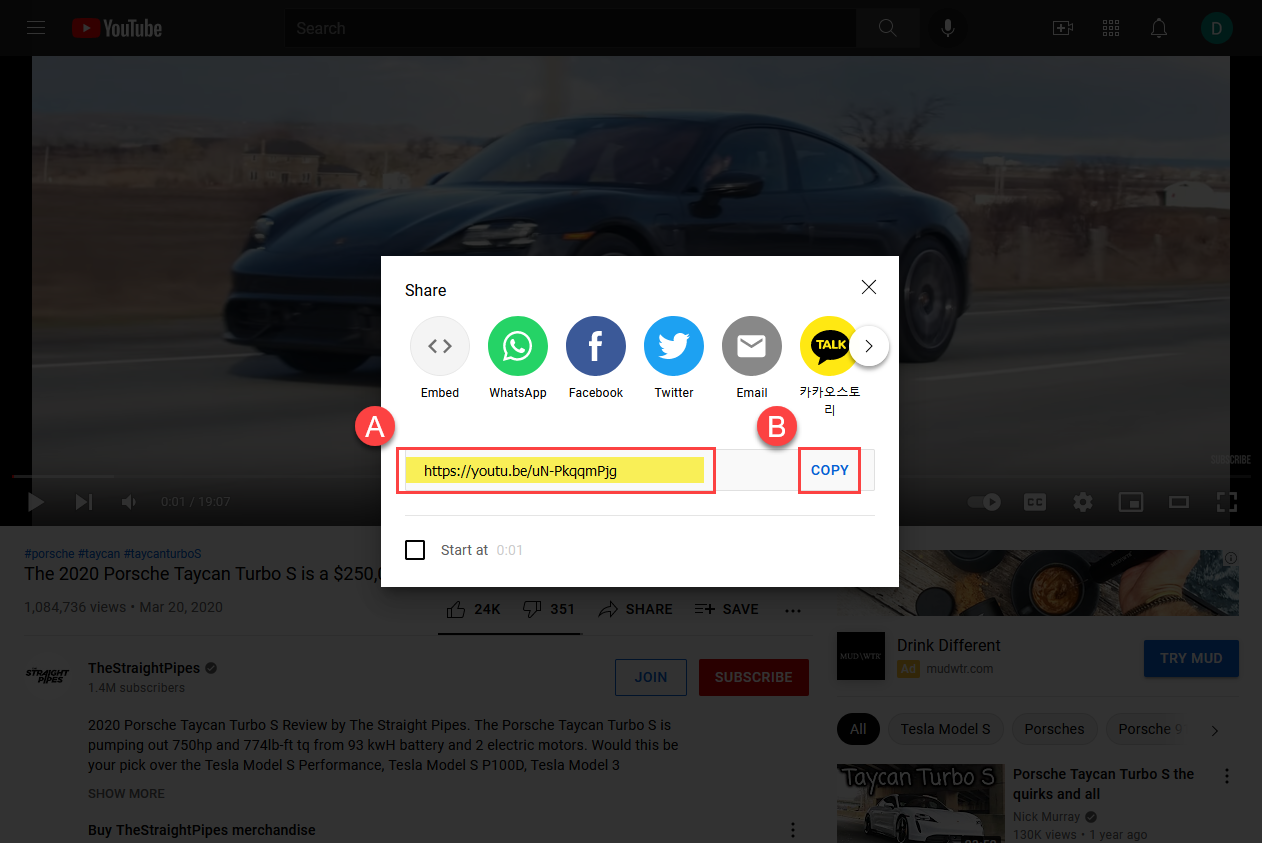
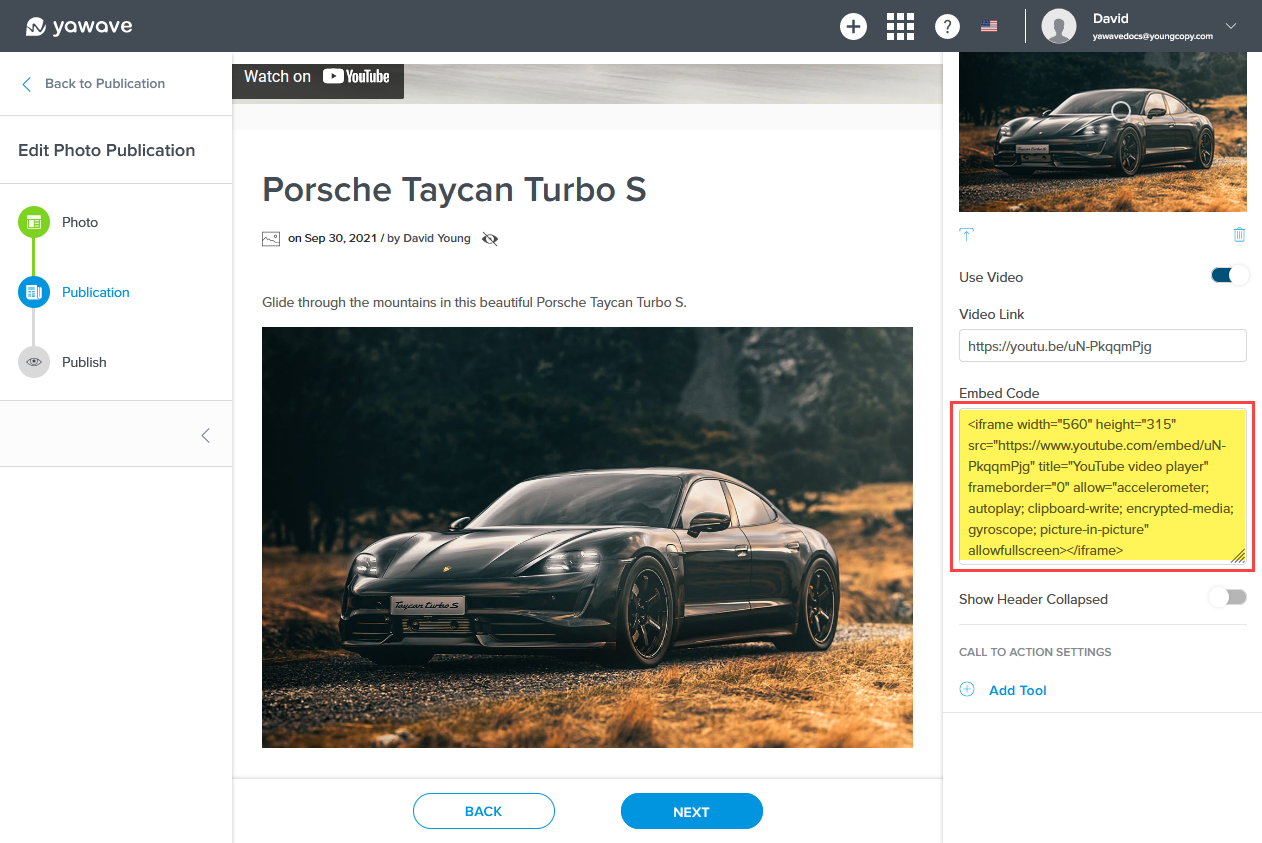
Paste the link you copied into the Video Link field.

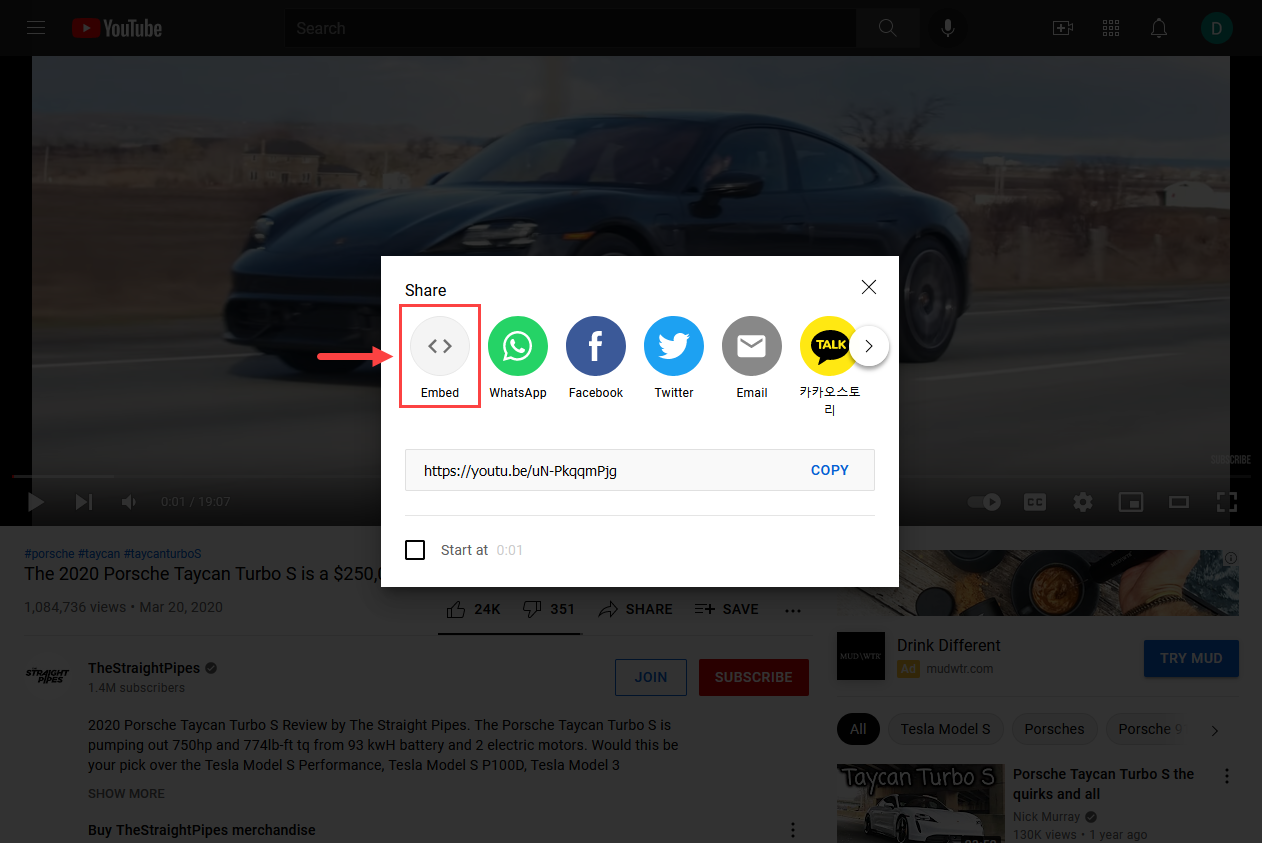
Click the Embed icon.
Copy the video's embed code.
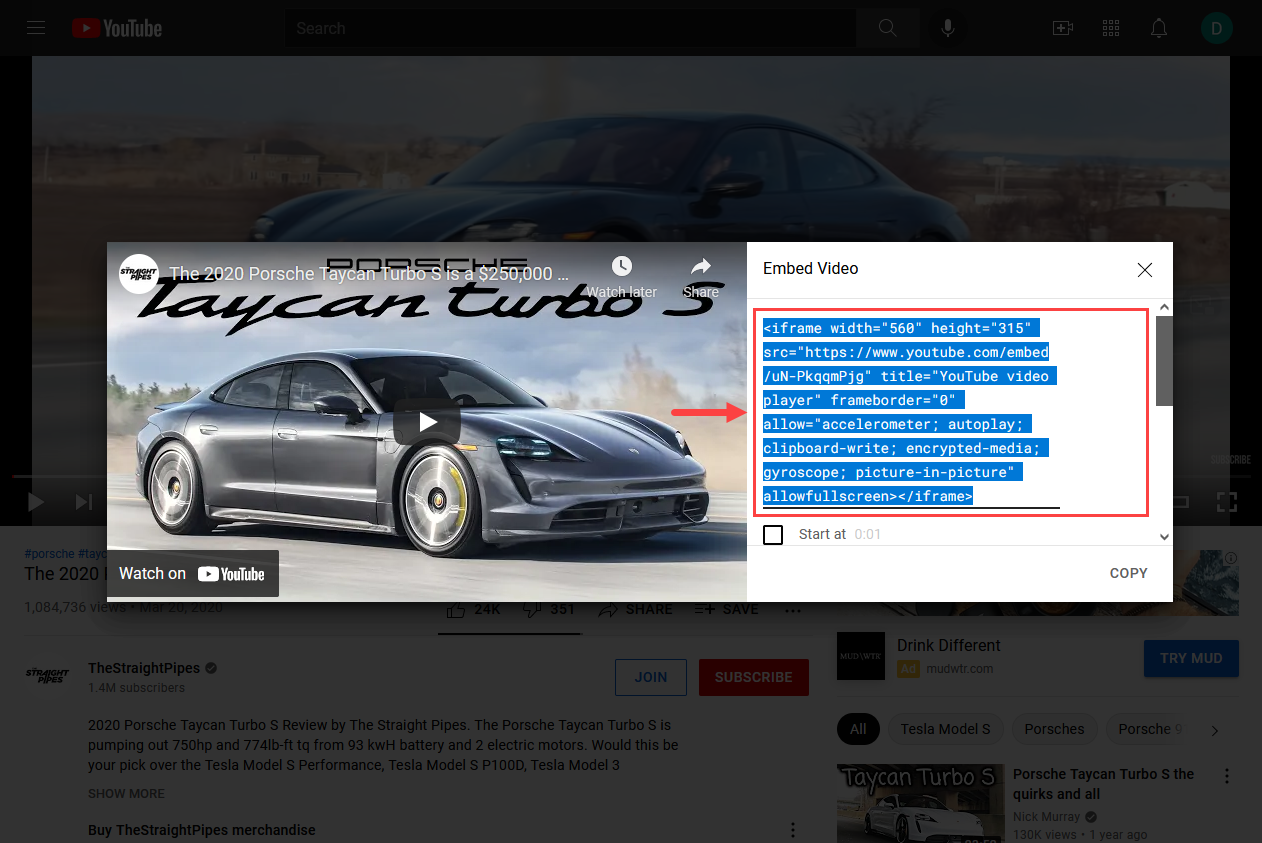
Paste the embed code you copied into the Embed Code field.
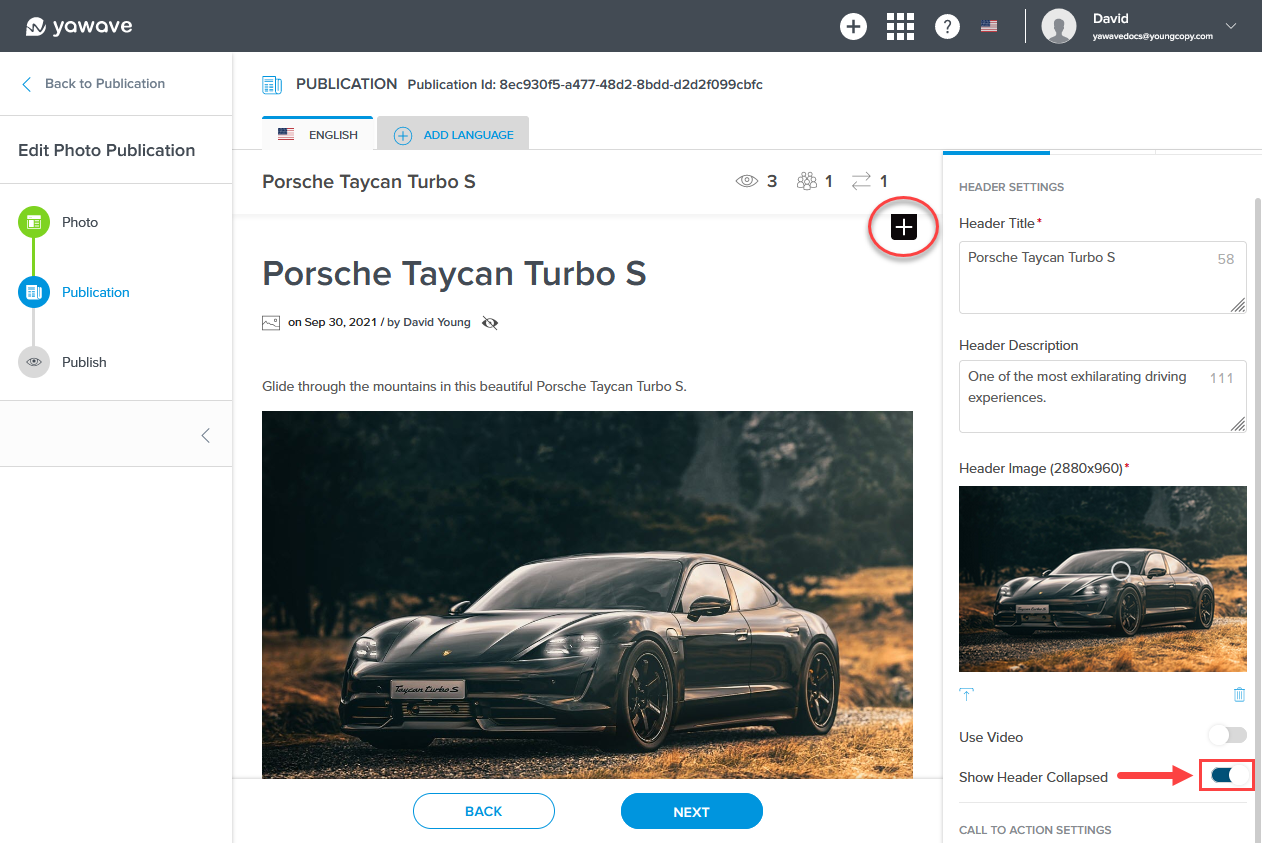
By default Show Header Collapsed is disabled. When disabled the Header will show. When Show Header Collapsed is enabled, a plus sign will be shown in place of the Header. Users will need to click the plus sign to show the Header. Click the Show Header Collapsed toggle once to enable. Notice the Header collapsed and now shows a plus sign icon (circled in the image below). Users will need to click the plus sign icon to expand the Header Image. Note: You cannot enable the Show Header Collapsed feature if Use Video is enabled. The Show Header Collapsed feature only works with images.
Add Tools (Action Settings) to Header
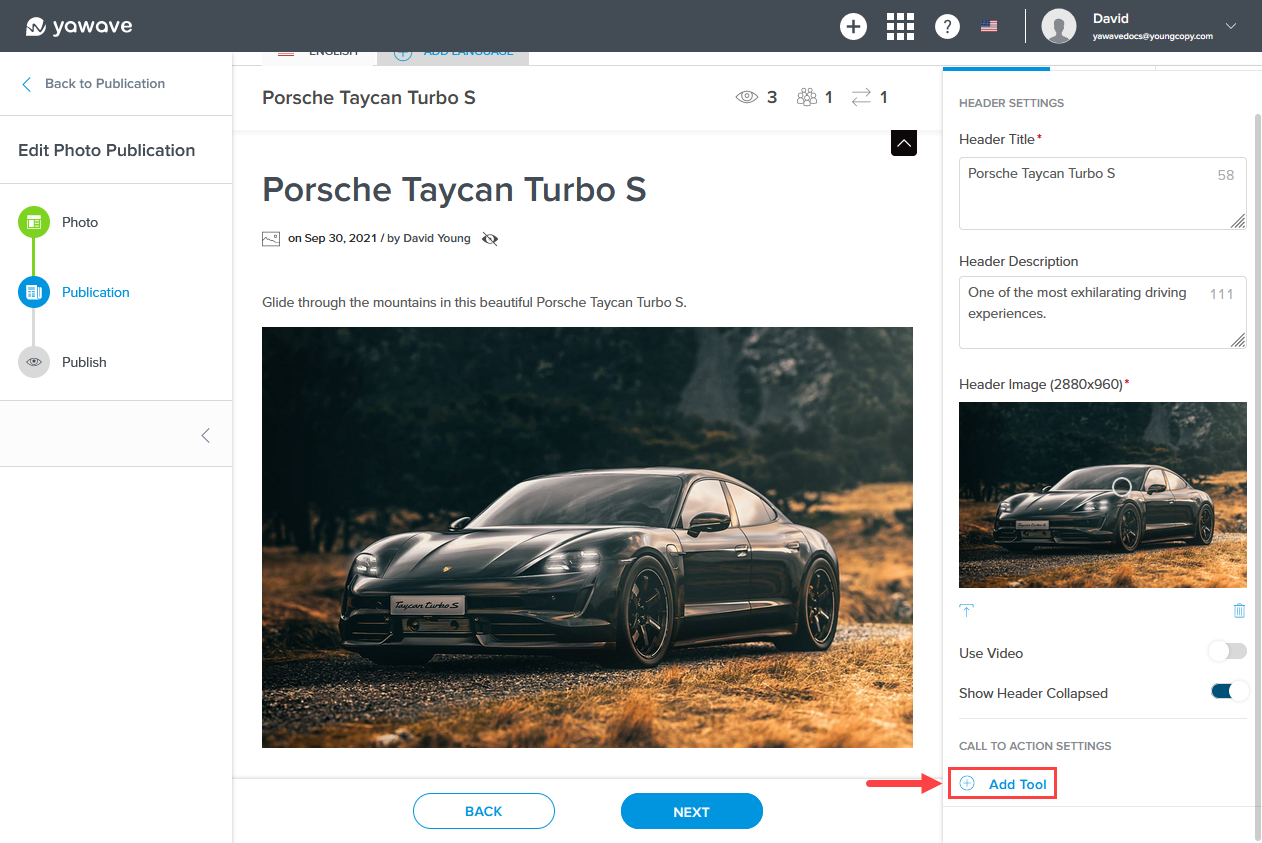
Under Call to Action Settings on the Publication screen, configure the following.
a. Click Add Tool.
b. Select one of the supported yawave Tools from the list.
Note: Before you can configure a Tool you select, you'll need to make sure the Tool has been created. If you leave the Publication Settings page to create a Tool or perform another task in yawave, the system will automatically save your settings. You'll still need to go through Steps 1 through 4 above and click Yes, Resume Editing when the message appears. Click Next if you are on the Content Settings screen until you get to where you left off, ie. Publication, Publish, etc.
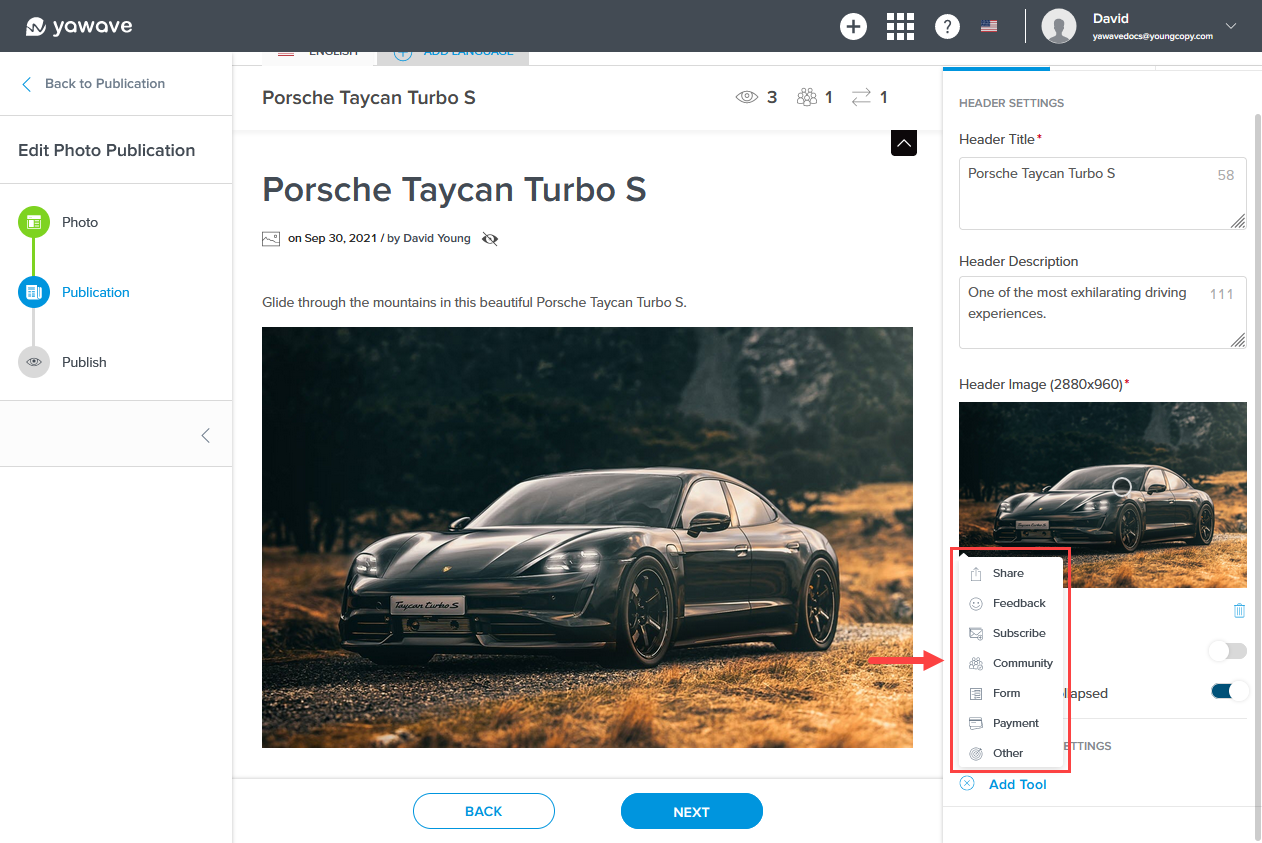
Below is an example of a Share Tool button we added. You can add multiple Tools if needed.
c. Select the Tool you want to attach to this Publication from the Tool drop-down menu. Note: The Tool depends on what you selected in b above. For example, if you selected the Share Tool you'll see Share Tool as the drop-down menu. If the Tool you want to use has not been created and not showing in the Tool drop-down menu, create one of the supported yawave Tools. When you return to this setting the Tool you want to use should be available in the Tool drop-down menu.

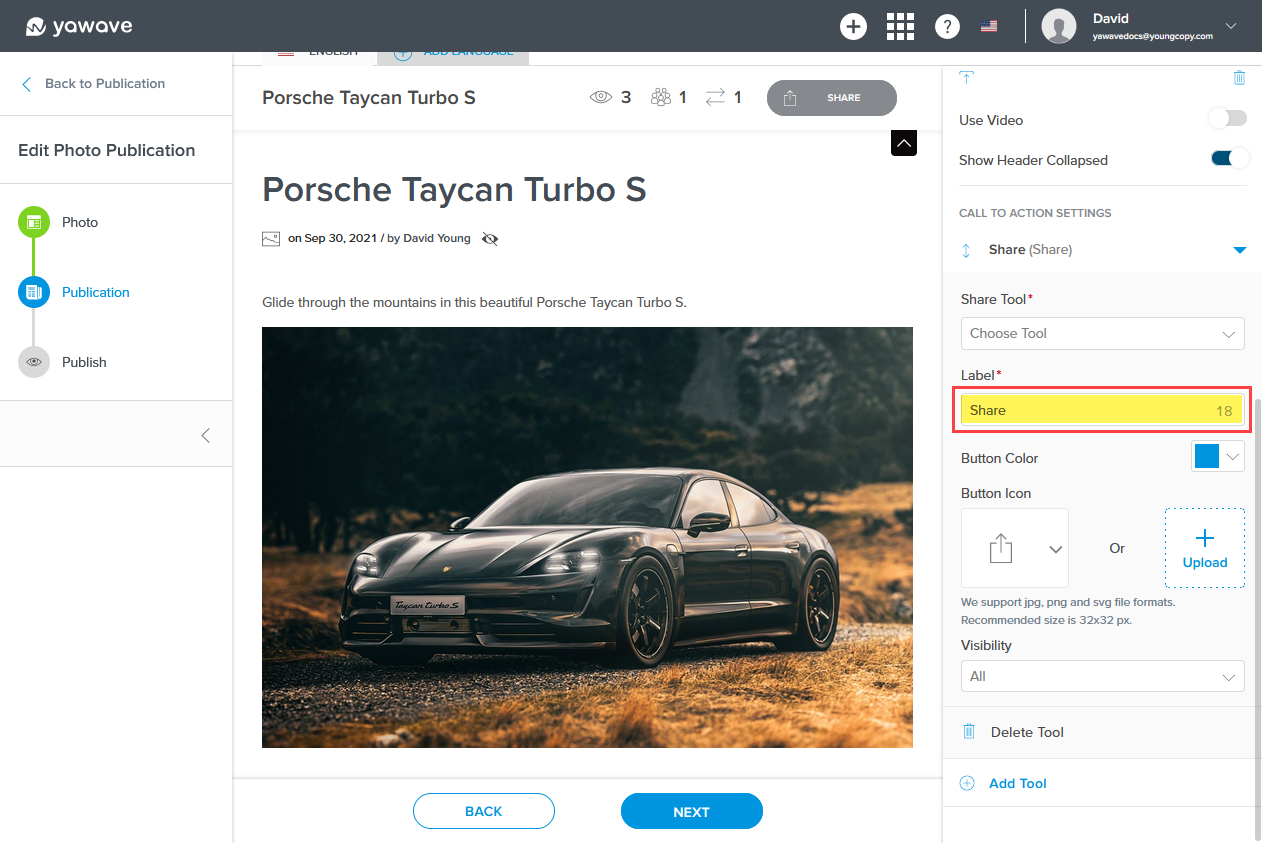
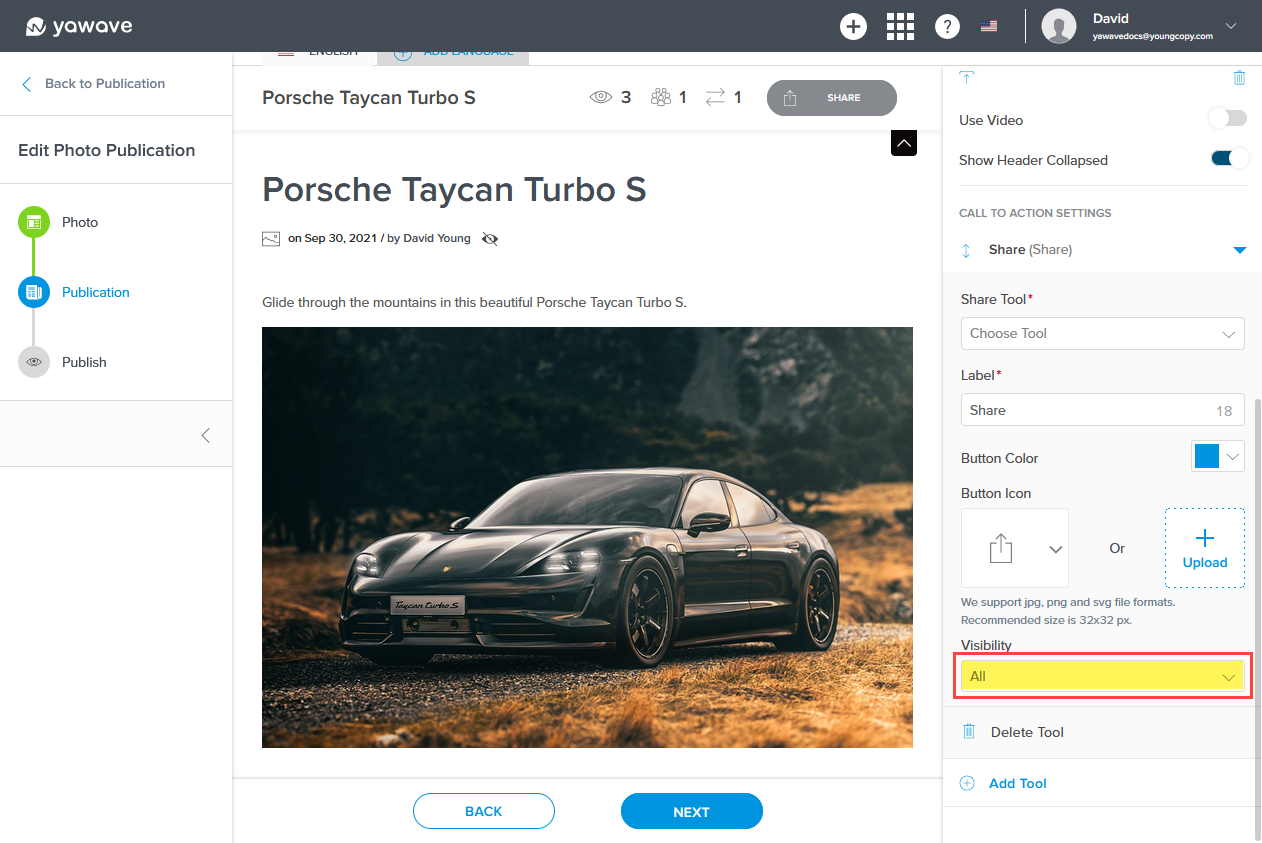
d. Enter the label you want to use for the button that appears on the Publication in the Label field.
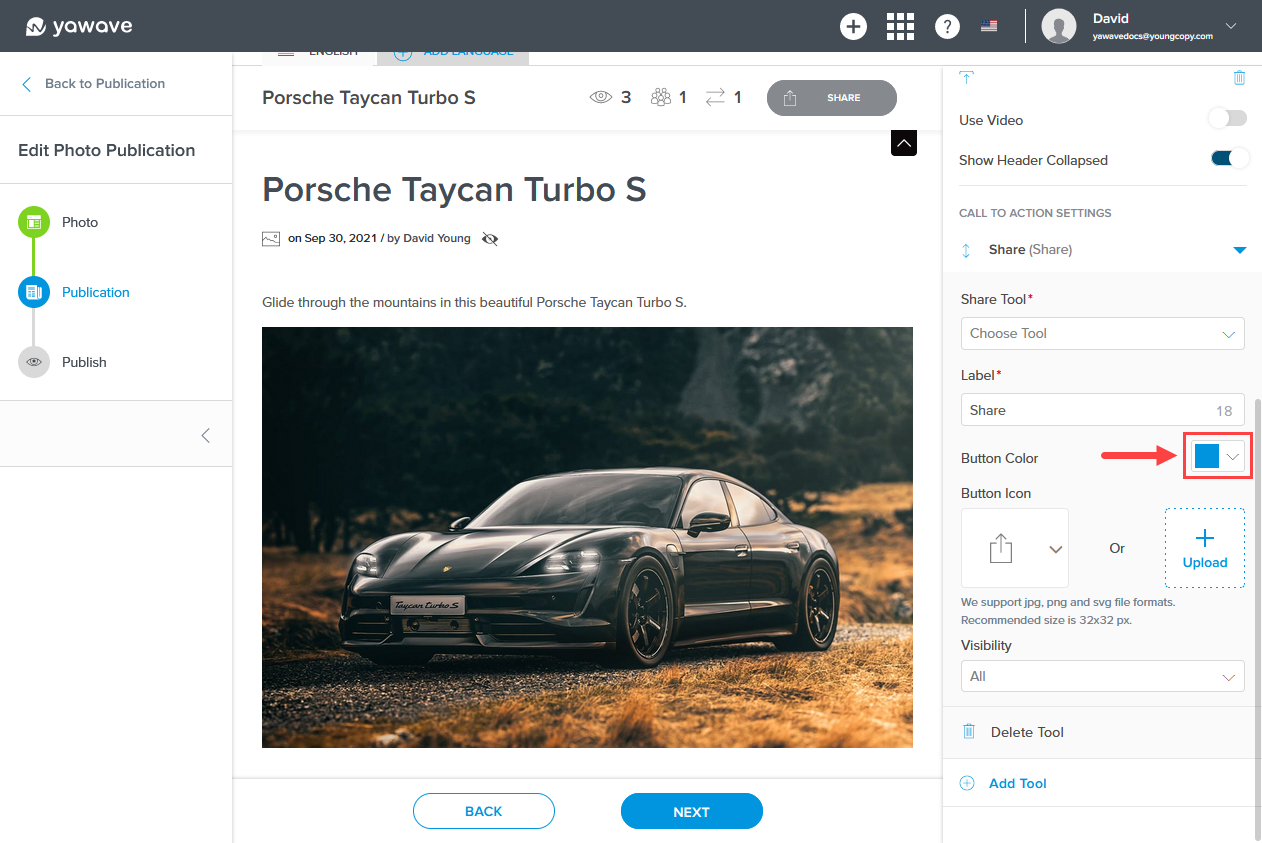
e. Enter a Hex value, RGB value or use the color picker from the Button Color.
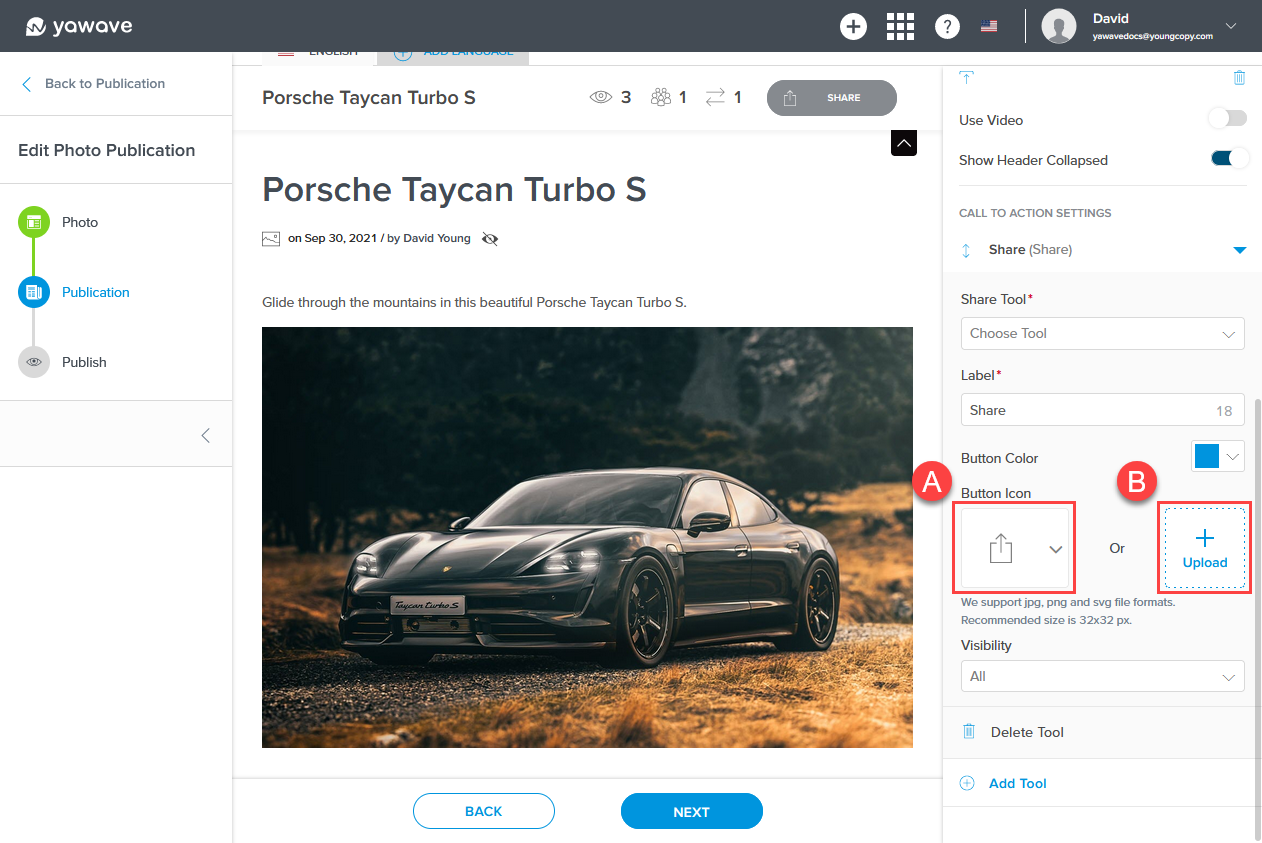
f. Use the default icon, select a pre-loaded icon from the icon drop-down menu (A) or click Upload (B) to upload a custom icon that you have created.
g. Select who can view the Publication from the Visibility drop-down menu. Choices include Manager, Logged-in User, Not logged-in User and Roles.
Configure Tabs Settings
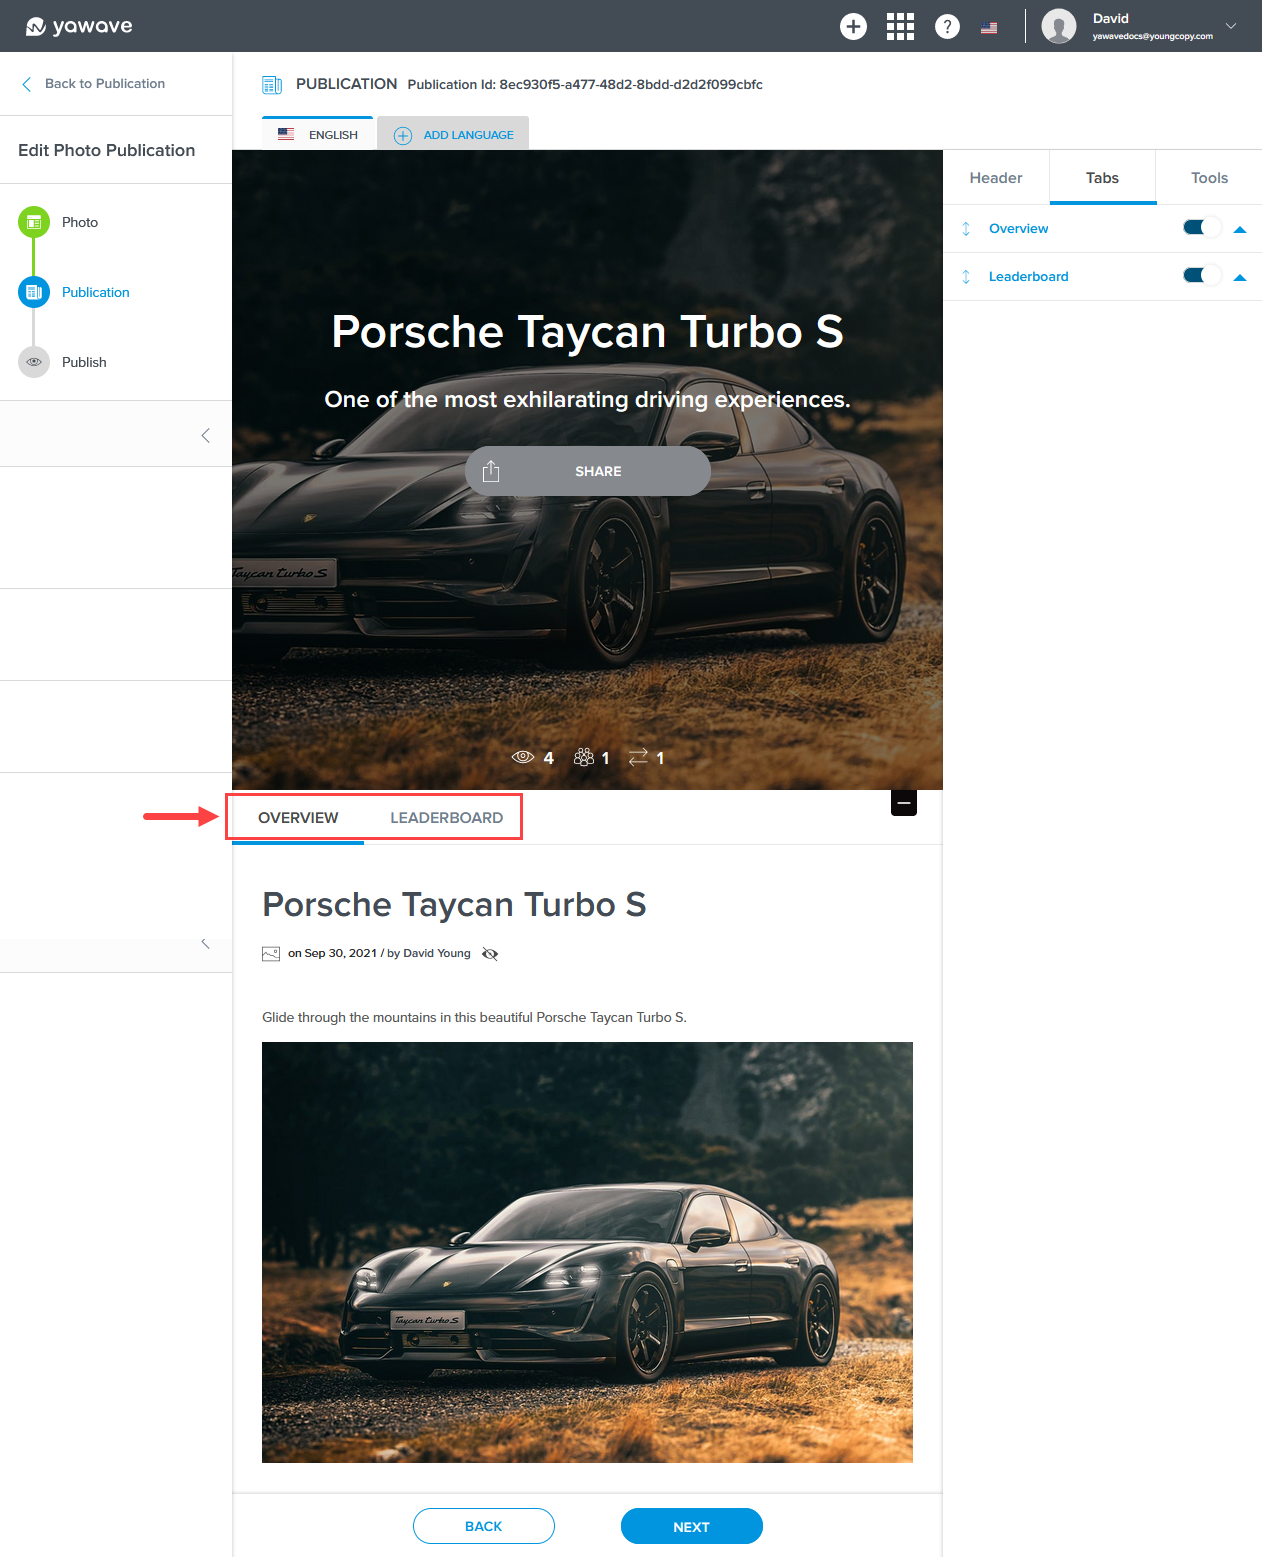
yawave currently supports two tabs (Overview and Leaderboard) that sit under the Header and above the Content. Users can toggle between the two tabs (see image below).
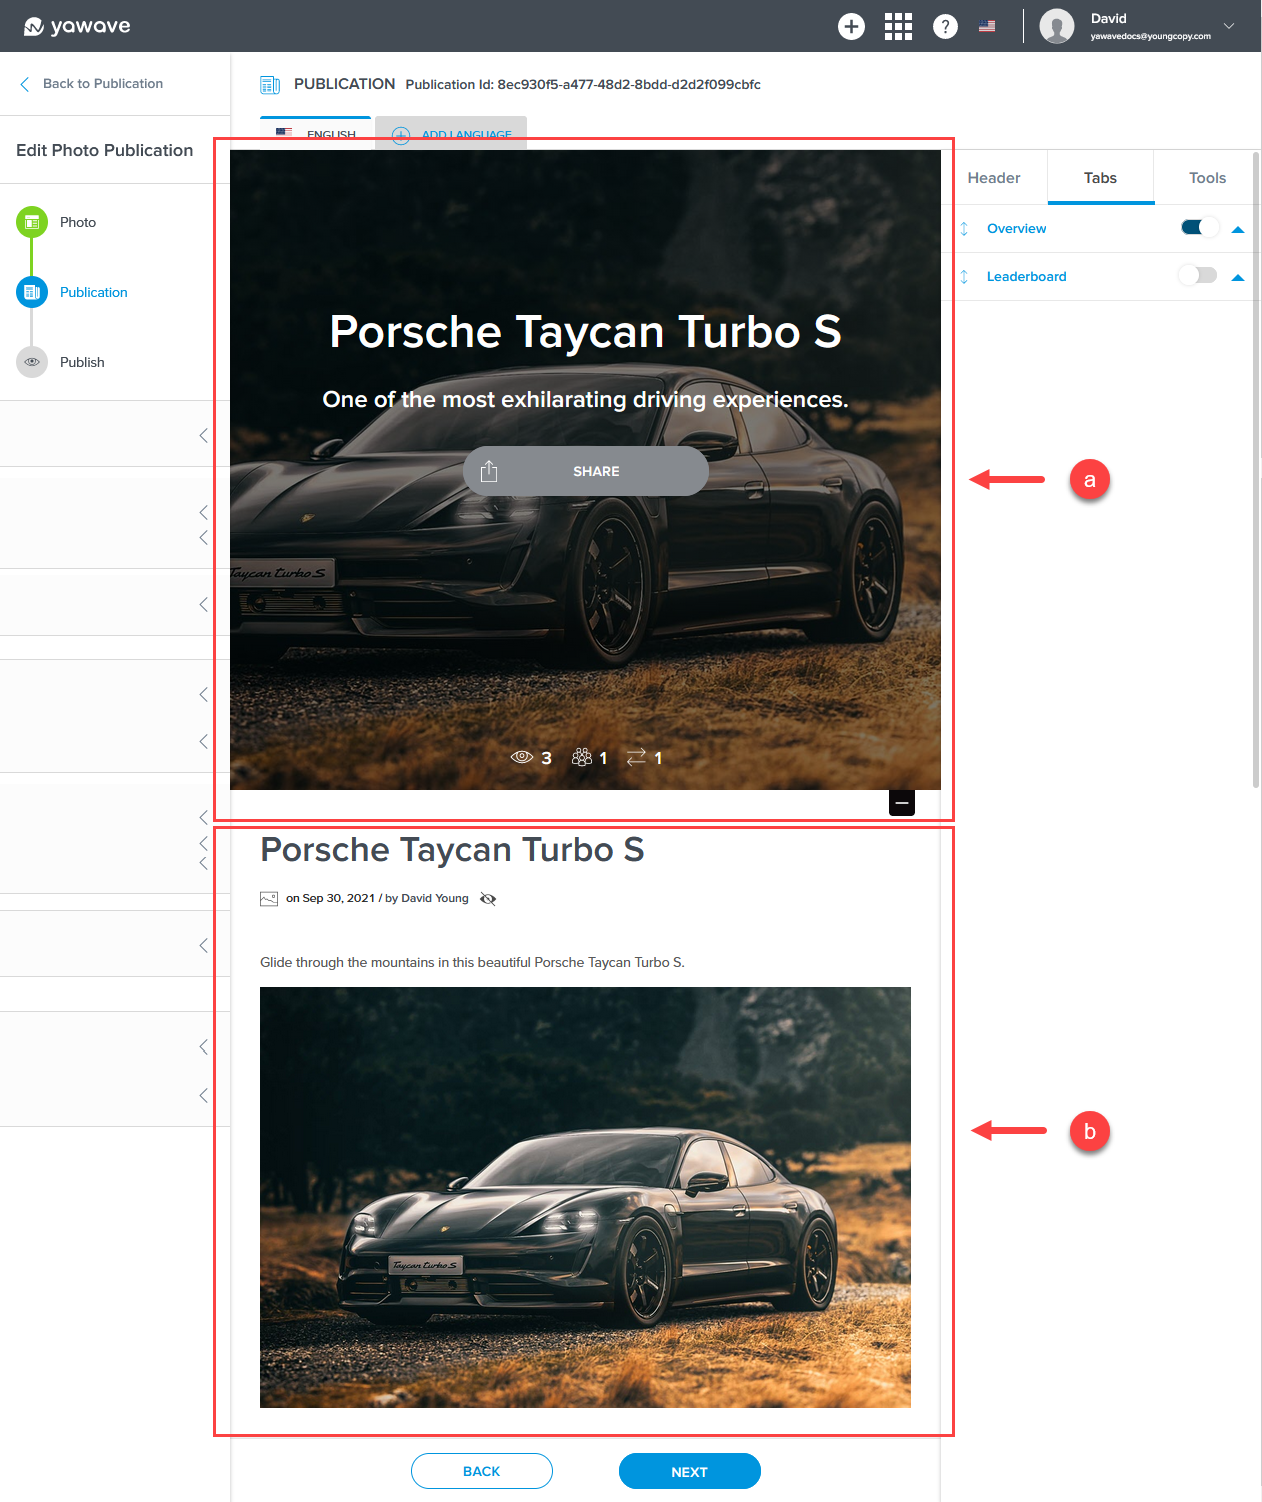
Tabs are only shown when Leaderboard is enabled, otherwise users will only see the Header (a) and Content (b).
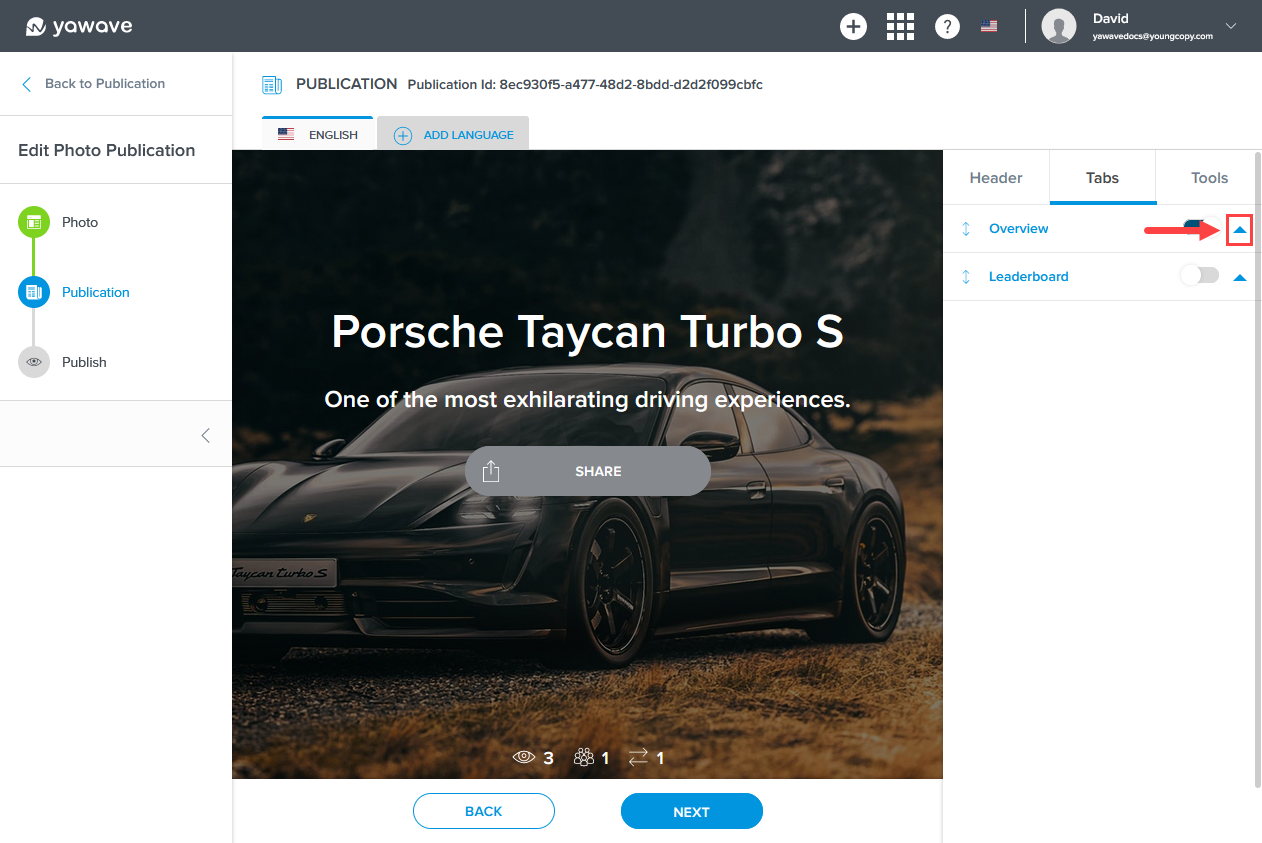
To show the Content and Leaderboard tabs, click Tabs.
Note: When Overview is disabled, the Content area is not shown. To see an example of what the Publication looks like when Overview is disabled, click the Overview toggle once to disable.

Click the down arrow next to the Overview toggle.
Enter a name for the Overview tab in the Tab Name field or leave as default.
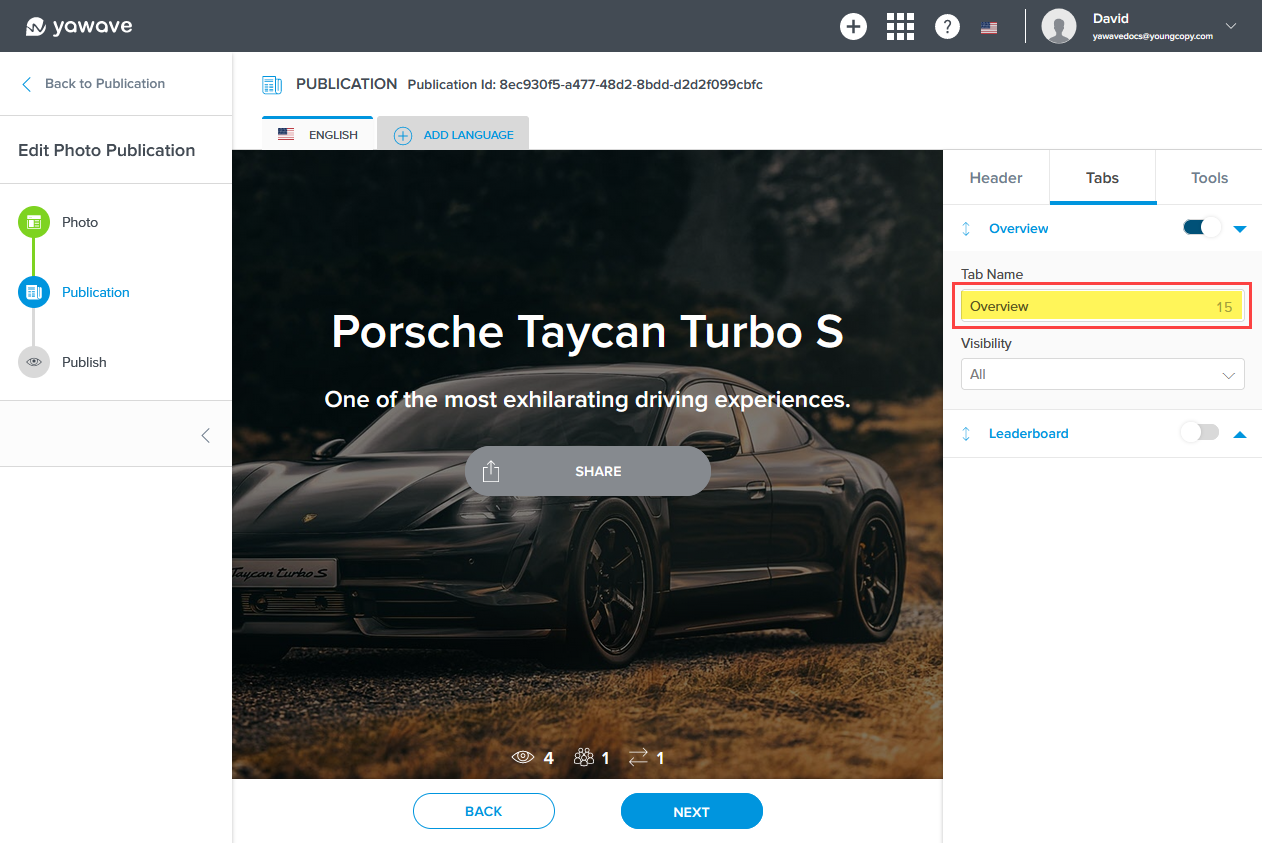
Select who can view the Overview tab from the Visibility drop-down menu. Choices include Manager, Logged-in User, Not logged-in User and Roles.

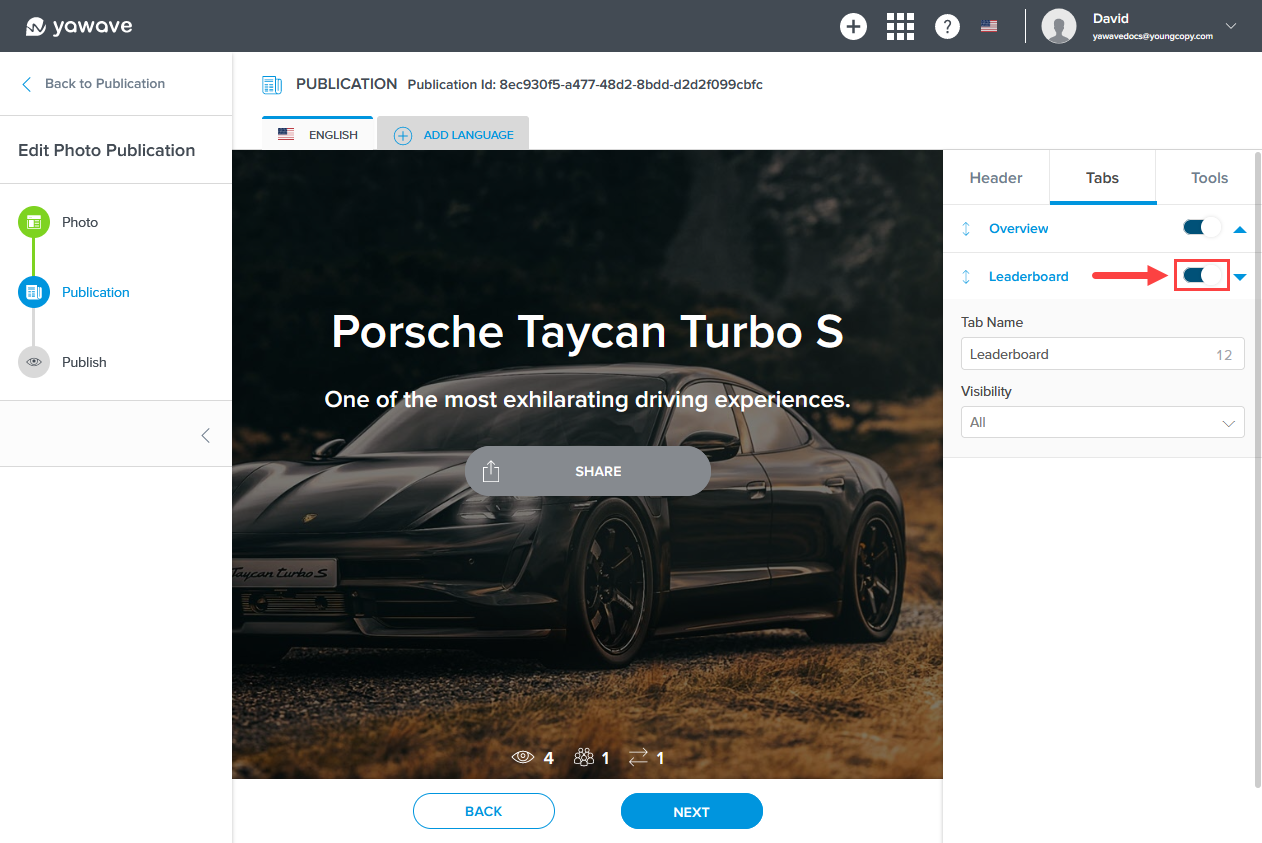
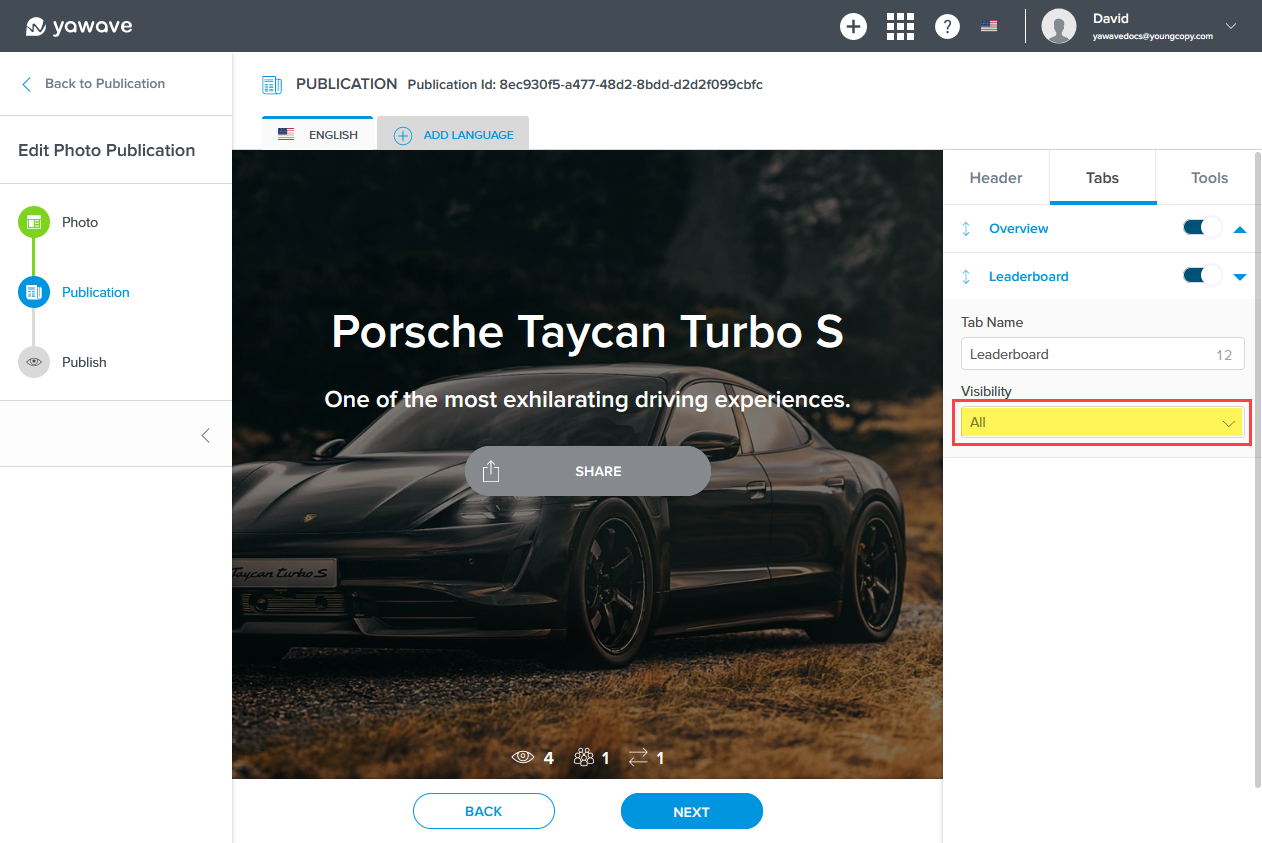
By default Leaderboard is disabled. When enabled the Leaderboard tab appears next to the Overview tab. The Leaderboard content shows Visitors, Referrers, Confirmed Converters by Place, Person, Benefit, Points. Click the Leaderboard toggle once to enable.
Enter a name for the tab in the Tab Name field or leave as default.
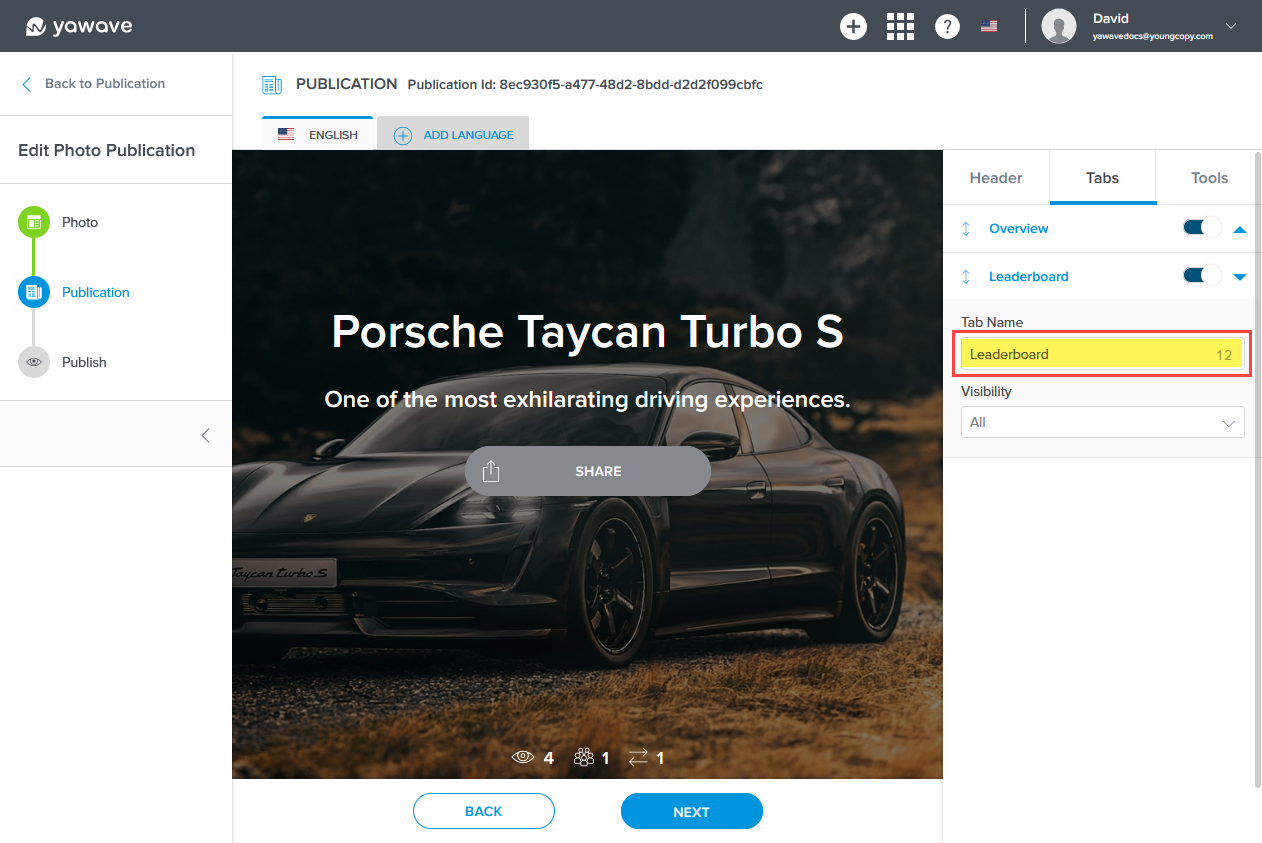
Select who can view the Leaderboard from the Visibility drop-down menu. Choices include Manager, Logged-in User, Not logged-in User and Roles.
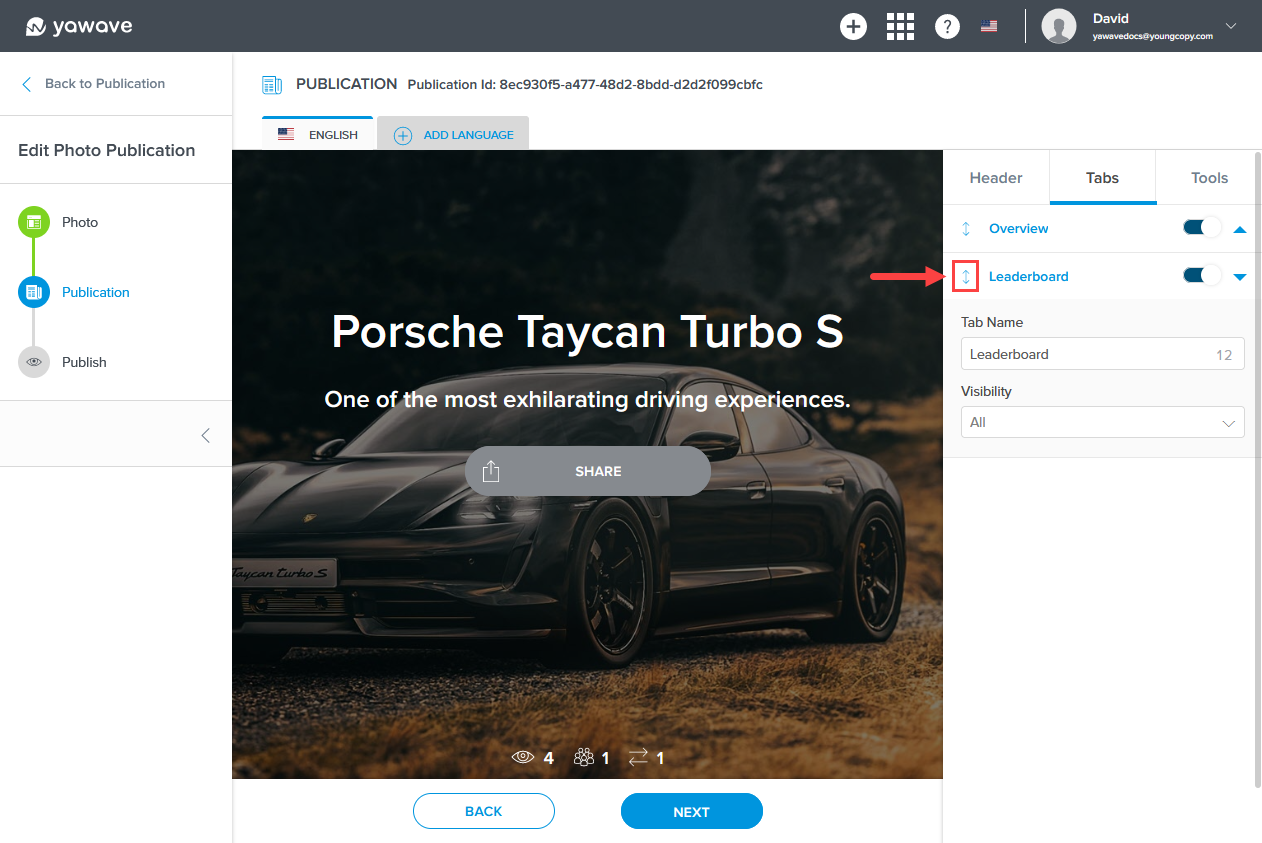
To reorder the tabs, click and drag the double arrow to the left of the tab to move the tab up or down.
Configure Tools Settings
The Tools setting for the Publication section is specifically for the Engage Tool only. Read Create an Engage Tool to learn more on why and when to enable these settings.
Click Next.
Configure Publish Settings
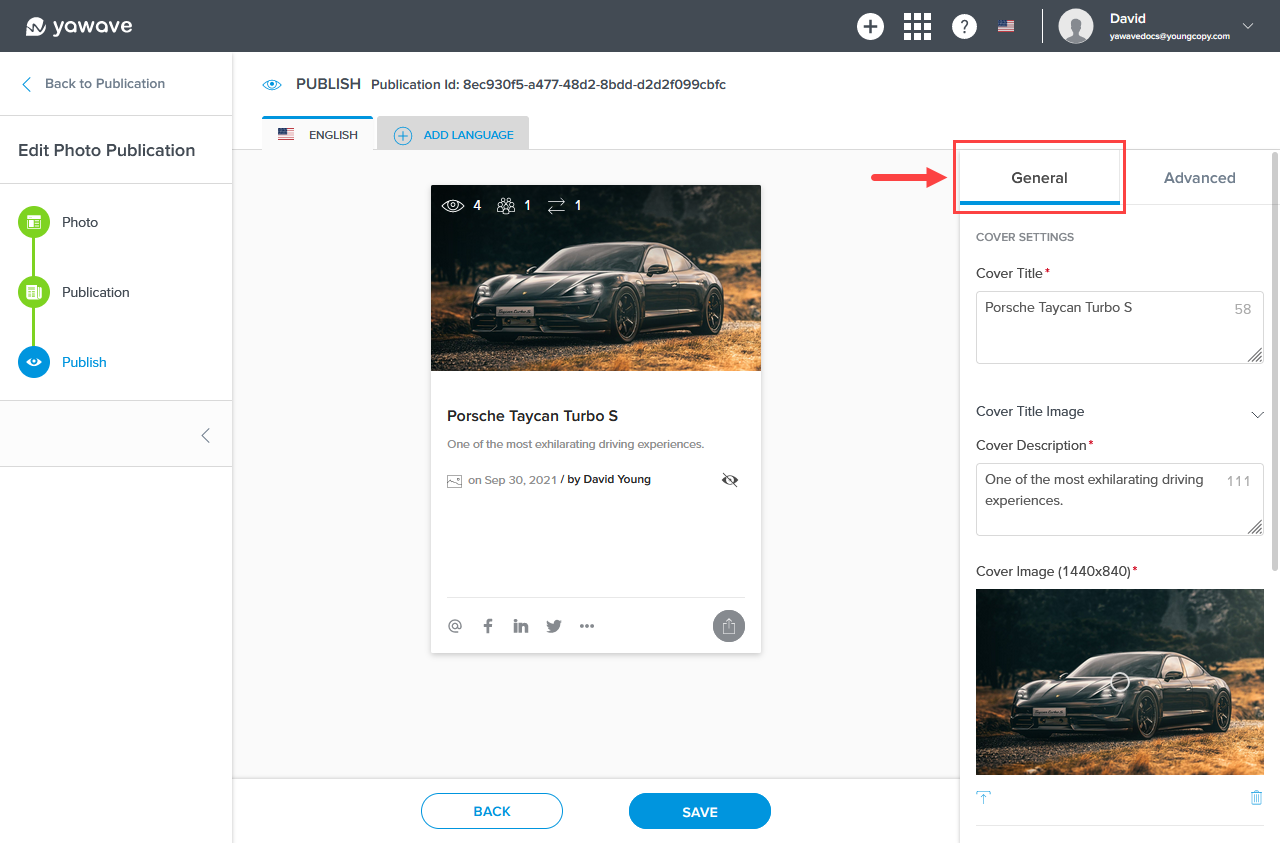
The Publish Settings shows a view of the Publication as you would see it shown in a Portal or a list of Publications. yawave copies what you entered for the Content Settings and Publication Settings.
Configure General Cover Settings
Click General.
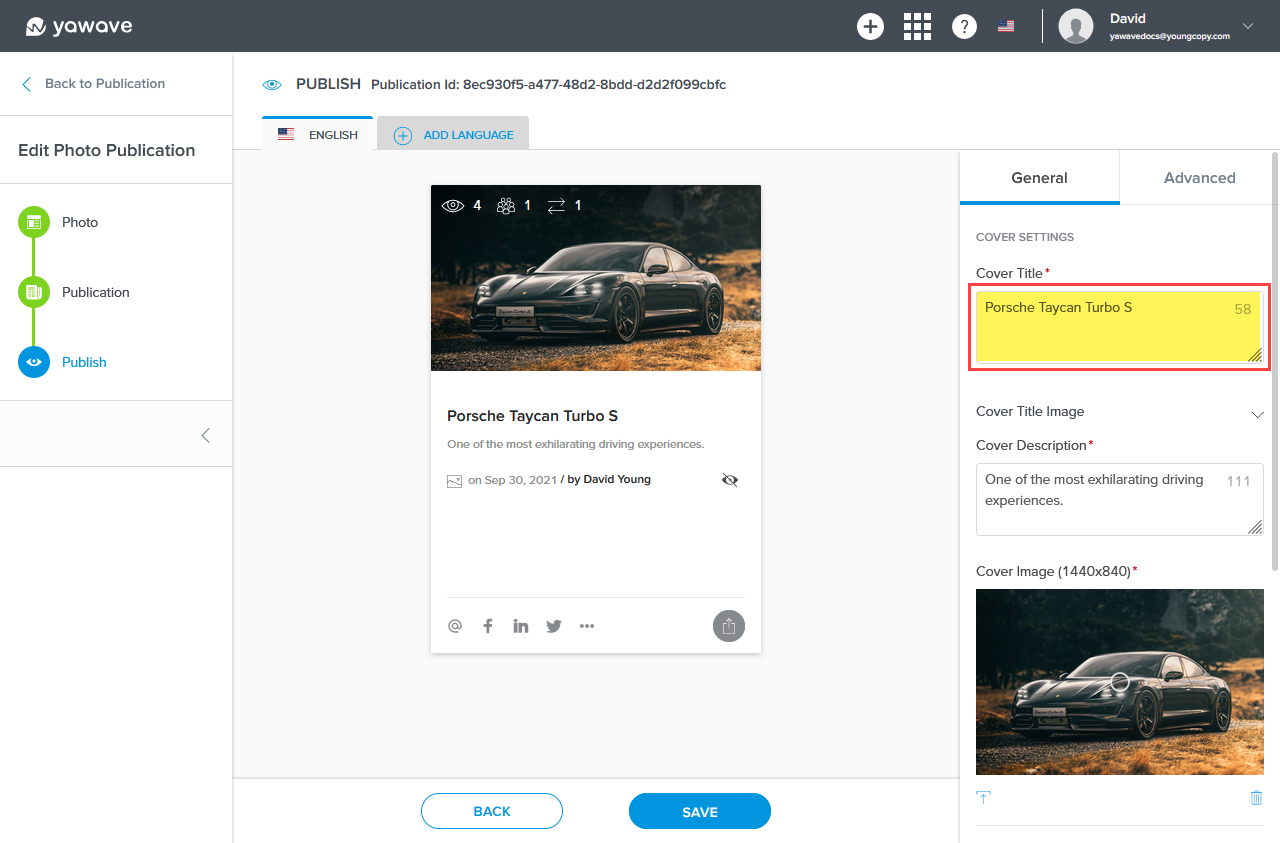
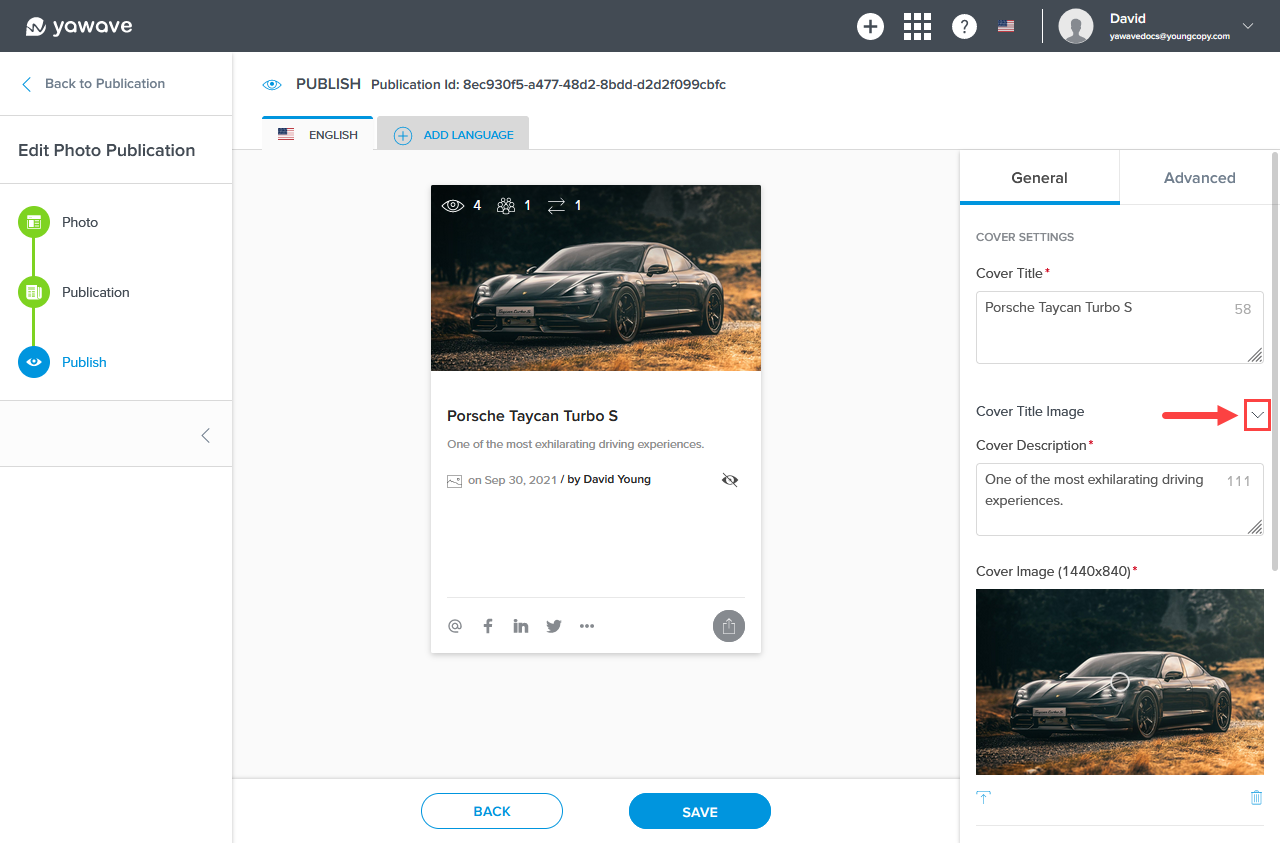
Leave as default or change the Cover Title by editing the Cover Title field.
Click the Cover Title Image down arrow.
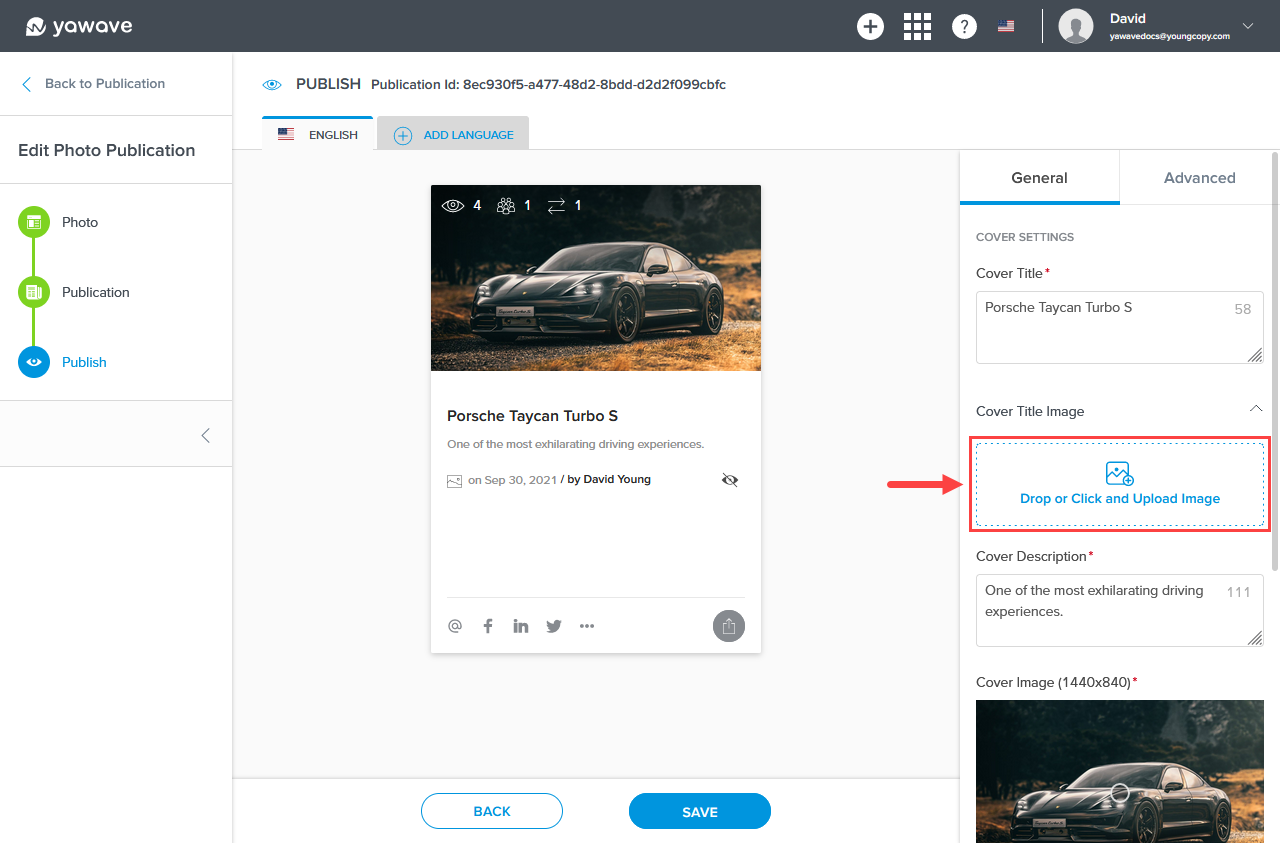
Drag and drop an image or click the Cover Title Image icon to upload a new image.
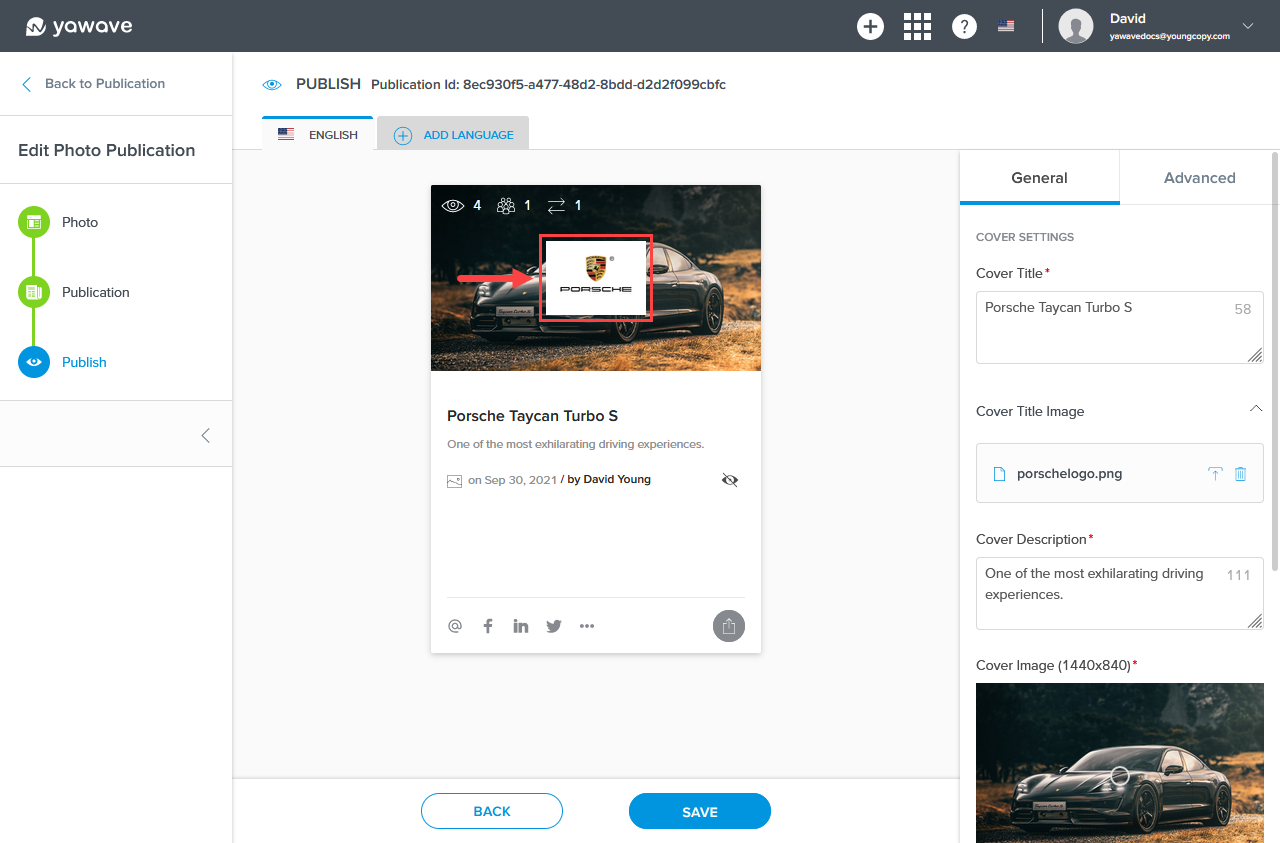
Here's an example of when we added a Porsche logo as the Cover Title Image.
Leave as default or change the Cover Description by editing the Cover Description field.
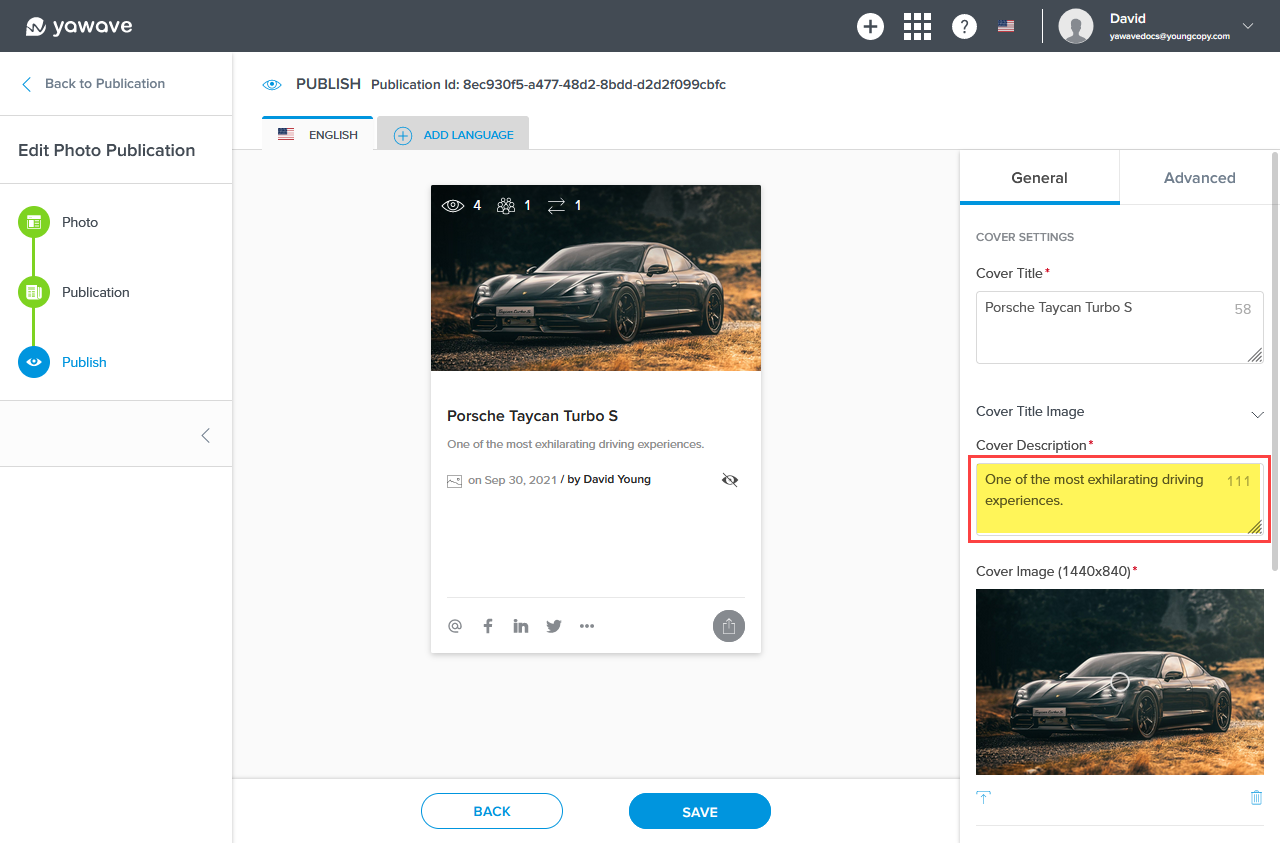
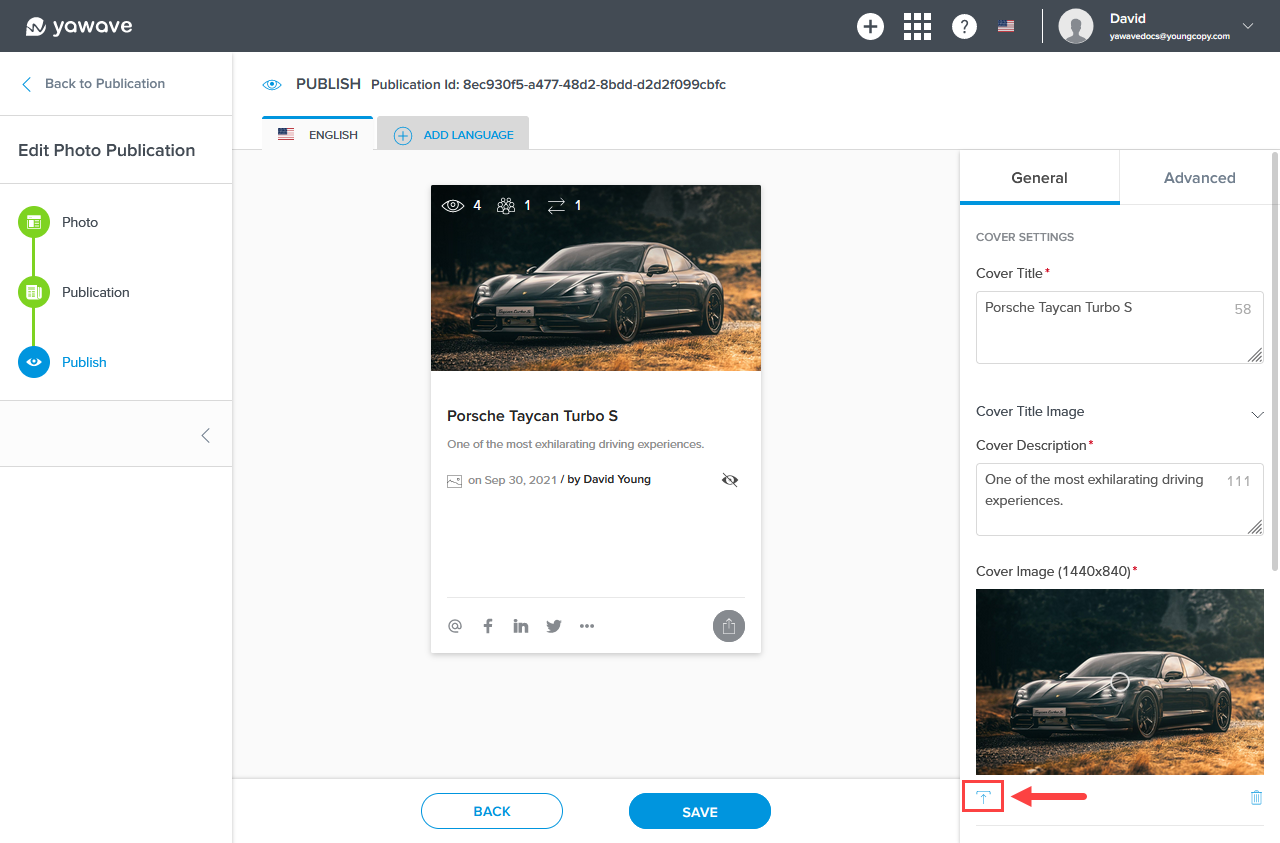
Leave as default or change the Cover Image by clicking the Cover Description upload icon.
Select a Category from the Main Category drop-down menu. If you haven't already, Create a Category.
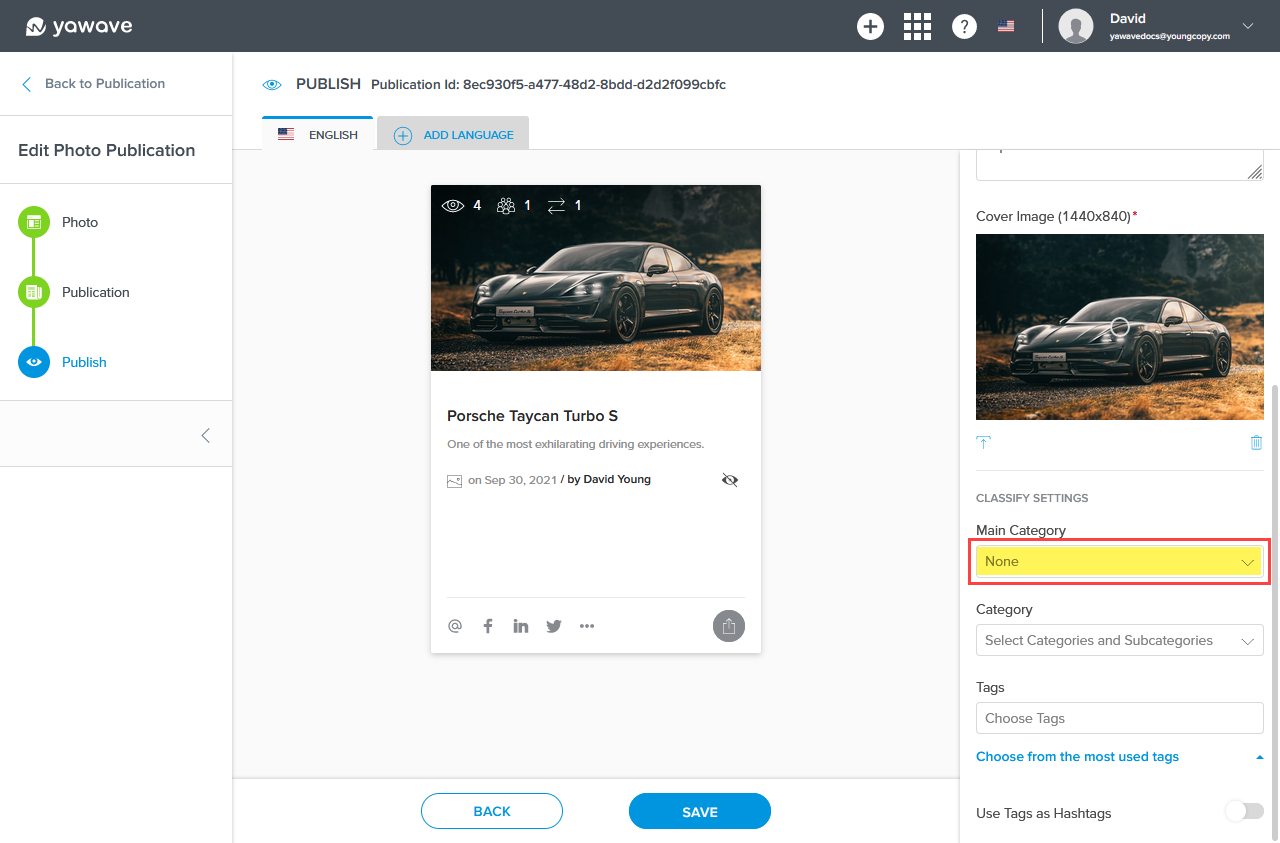
The Main Category appears on the Publication as shown below. In our example, the Main Category we're using is Porsche. Note the Main Category shows one time only. You can only select one Main Category.

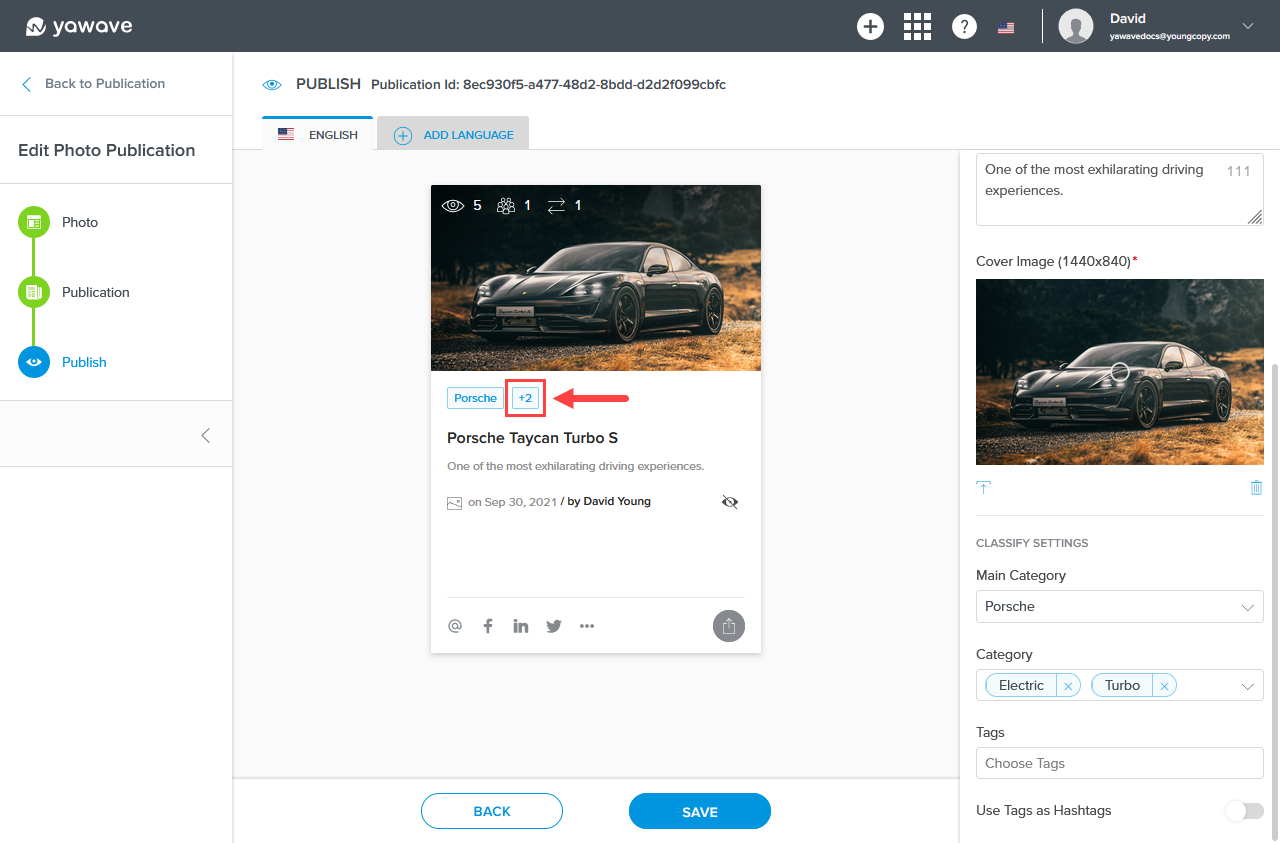
Select a Category from the Category drop-down menu. If you haven't already, Create a Category.

The Category appears on the Publication as shown below. You can select multiple categories and they will appear as a number. For example, if you select two categories for the Category setting, you'll see a box with the number two as shown in our example below.
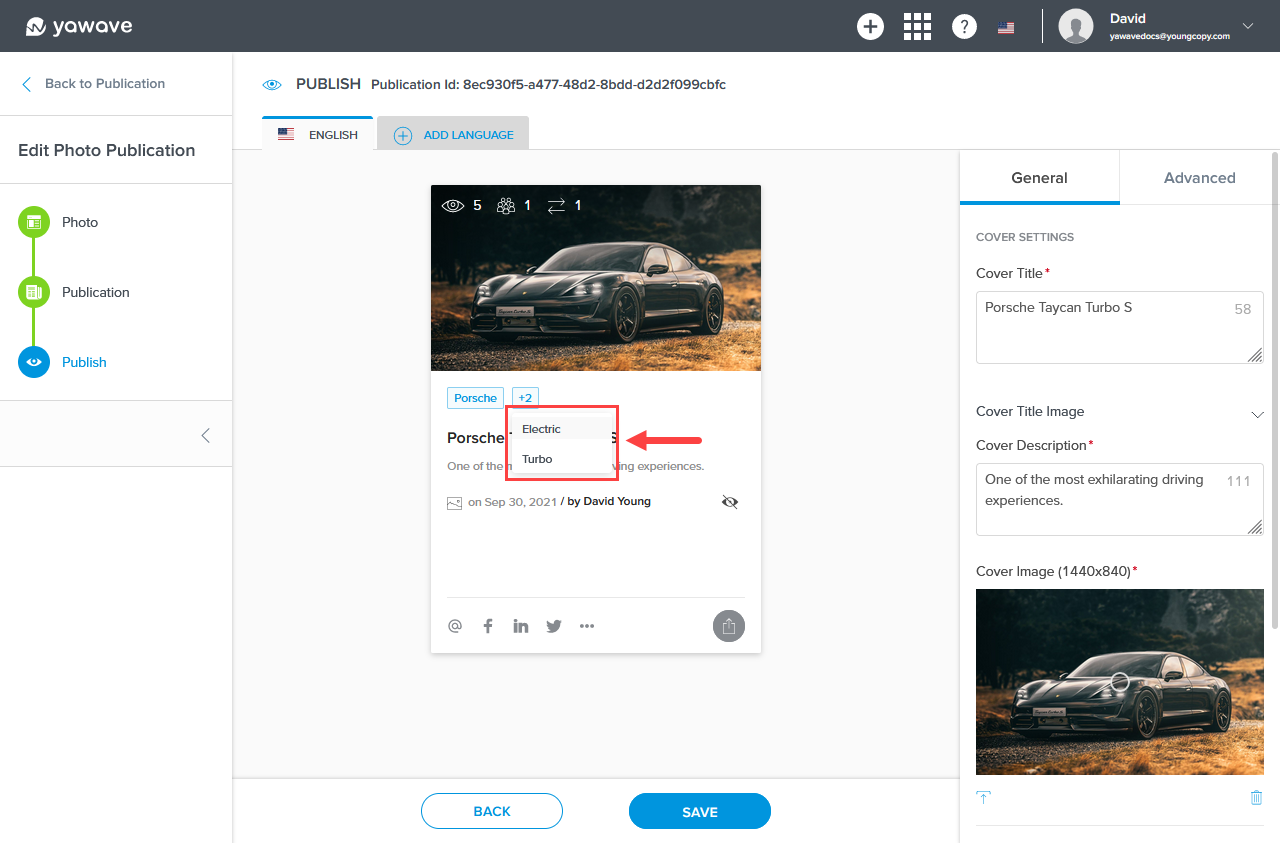
Users will need to click the box to expand the categories. In our example we added Electric and Turbo, as shown in the drop-down menu.
Select one or more Tags from the Tags drop-down menu. If you haven't already, Create a Tag.
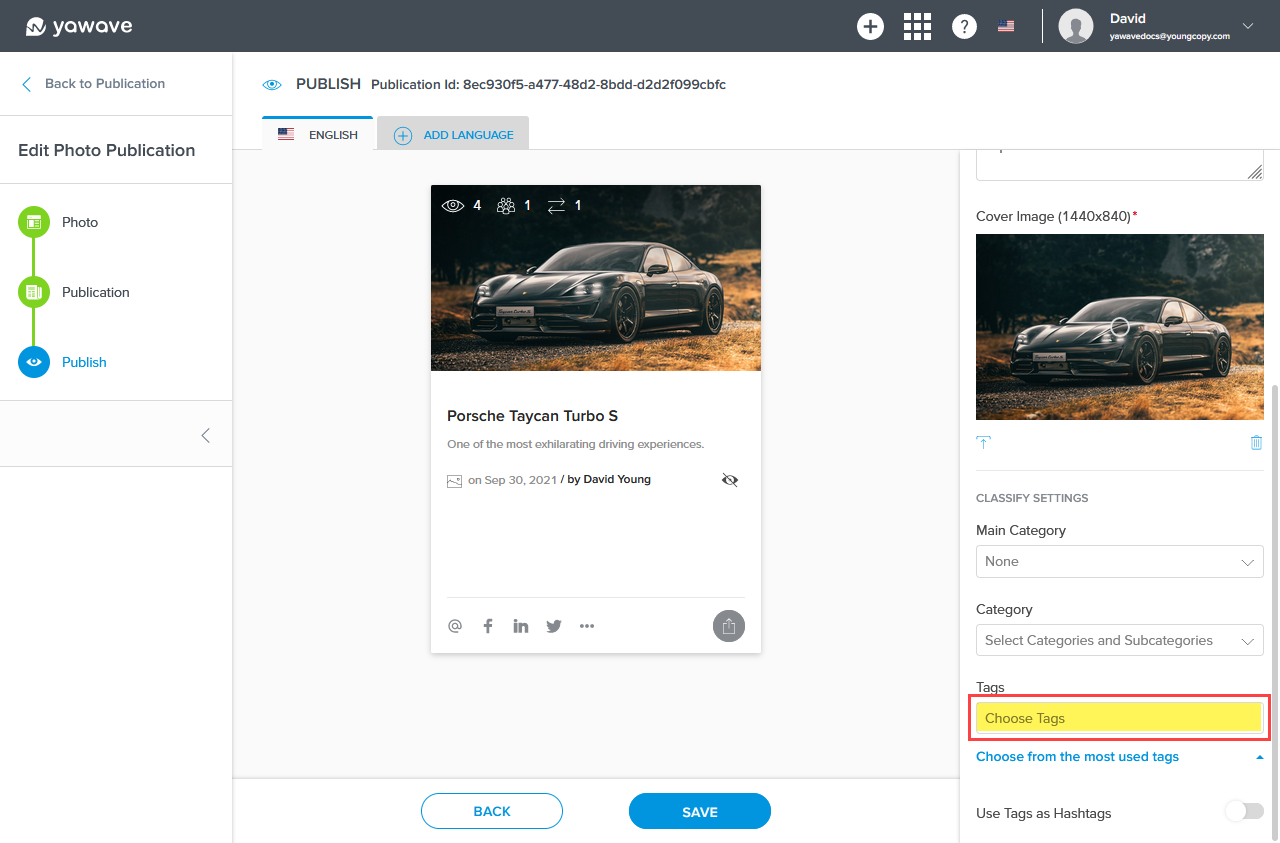
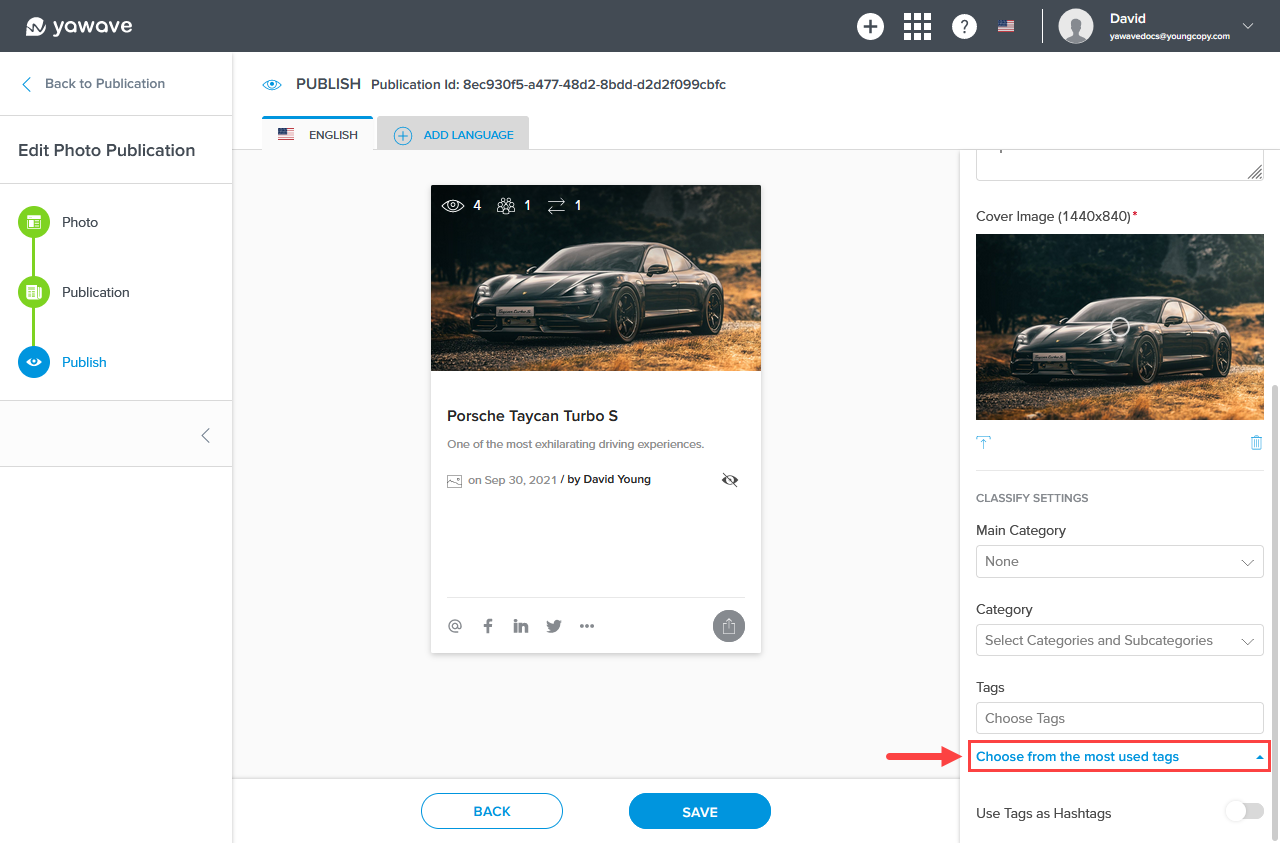
Alternatively, click the Choose from the most used tags to select from your most used tags.
By default Use Tags as Hashtags is disabled. When enabled, any social media channels you share the Publication will treat Tags you selected above as hashtags.
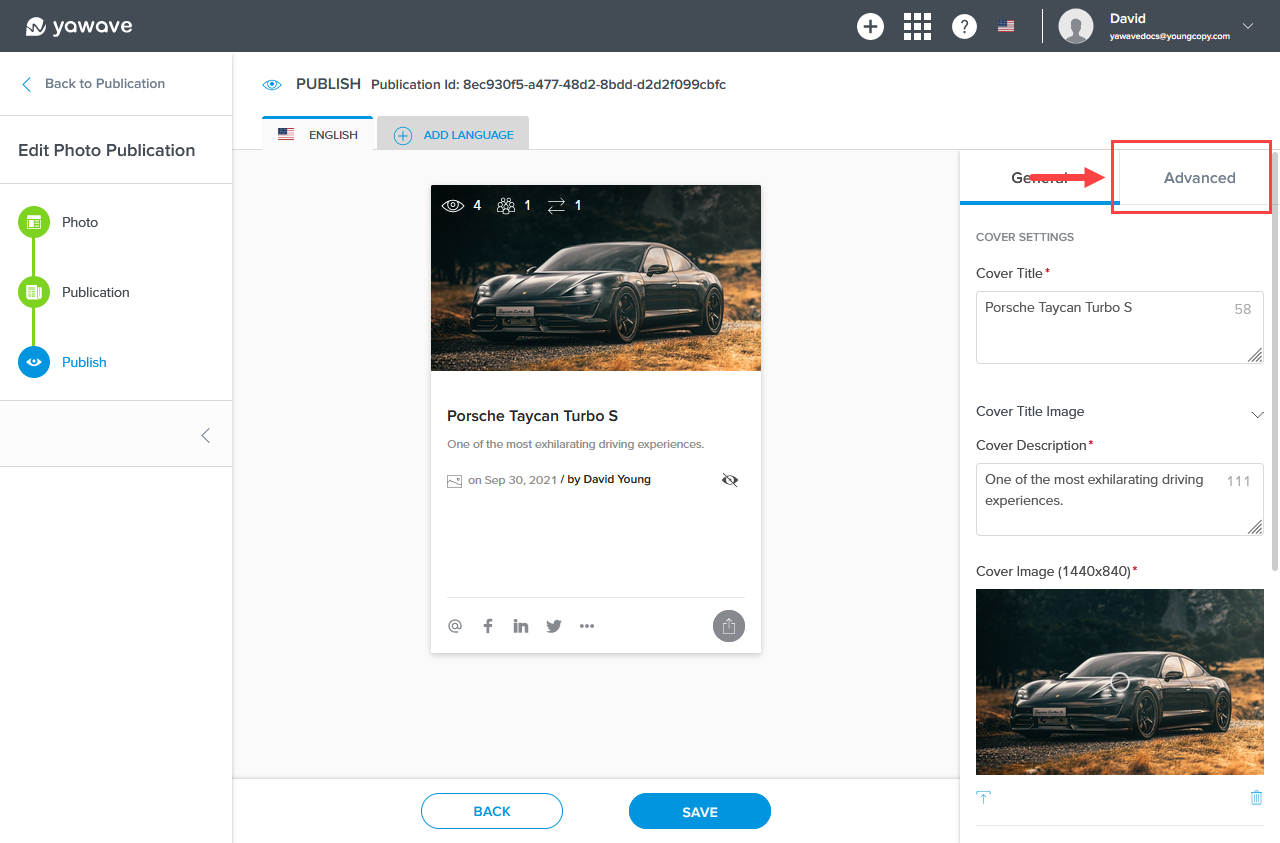
Configure Advanced Publication Settings
Click Advanced.
The URL Slug is taken from the Cover Title you entered or modified earlier. You can leave the URL Slug as default or modify if needed. Note: Once you modify the URL Slug it will not change the Cover Title.
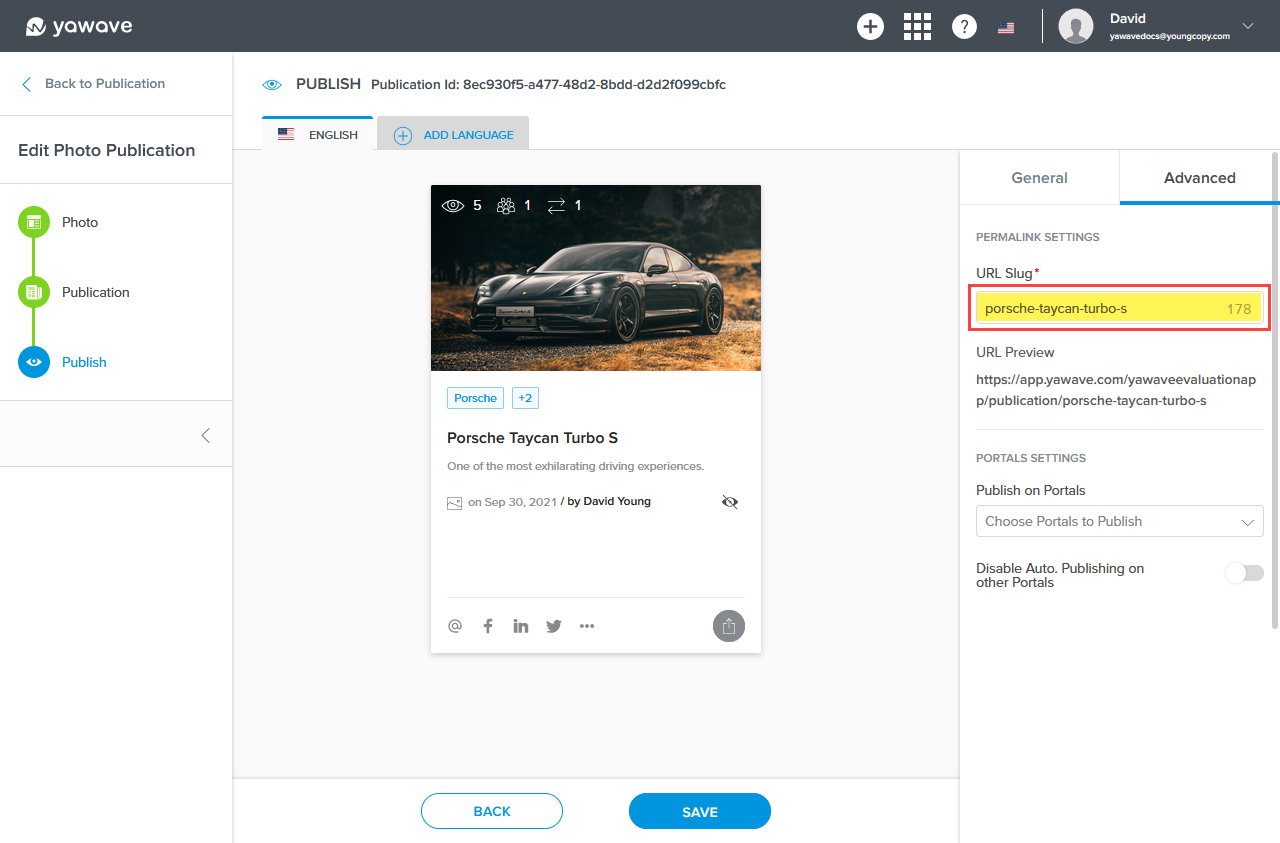
Select or highlight and copy the URL Preview link. This is the link yawave automatically generates based on the settings you previously configured. Paste the link in any browser to see a preview of the Publication.

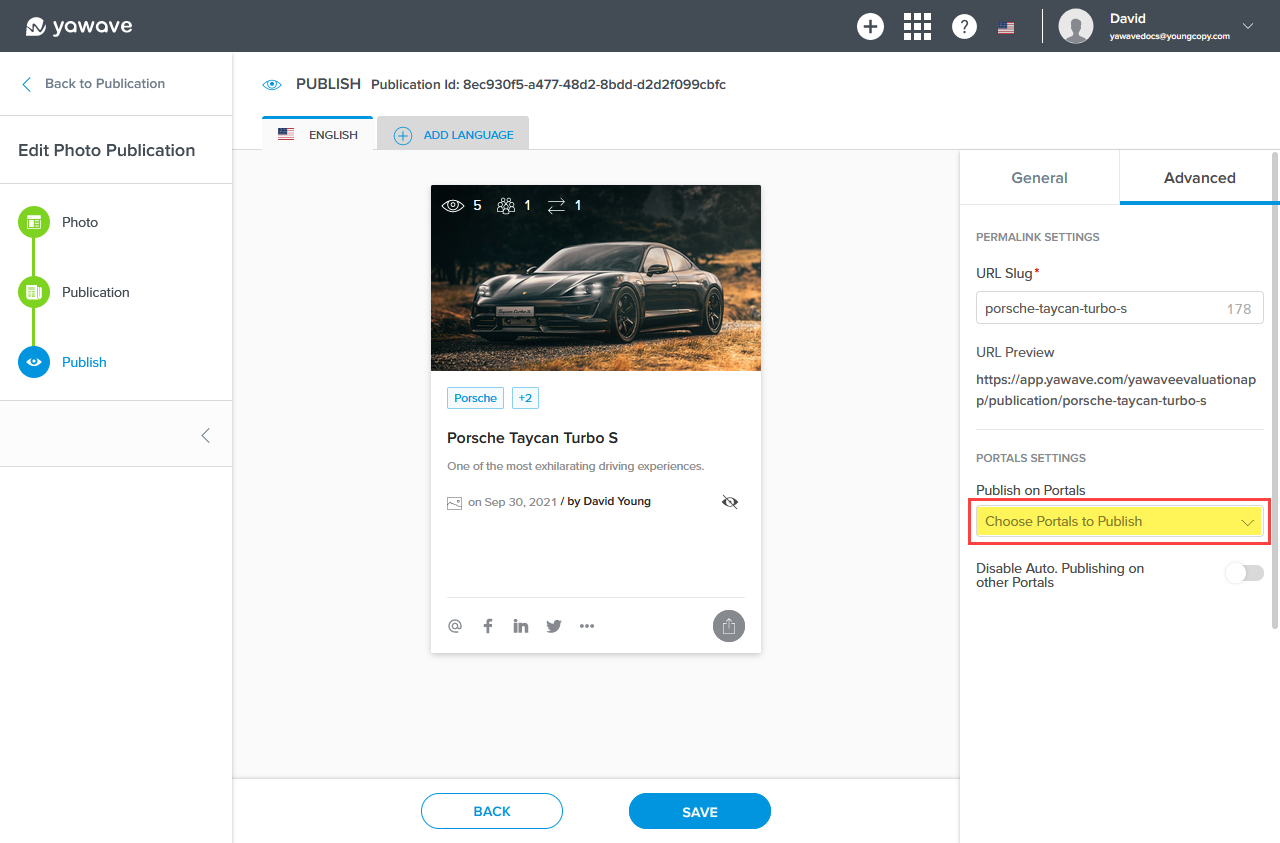
Select the Portal(s) you want attach this Publication to from the Publish on Portals drop-down menu.
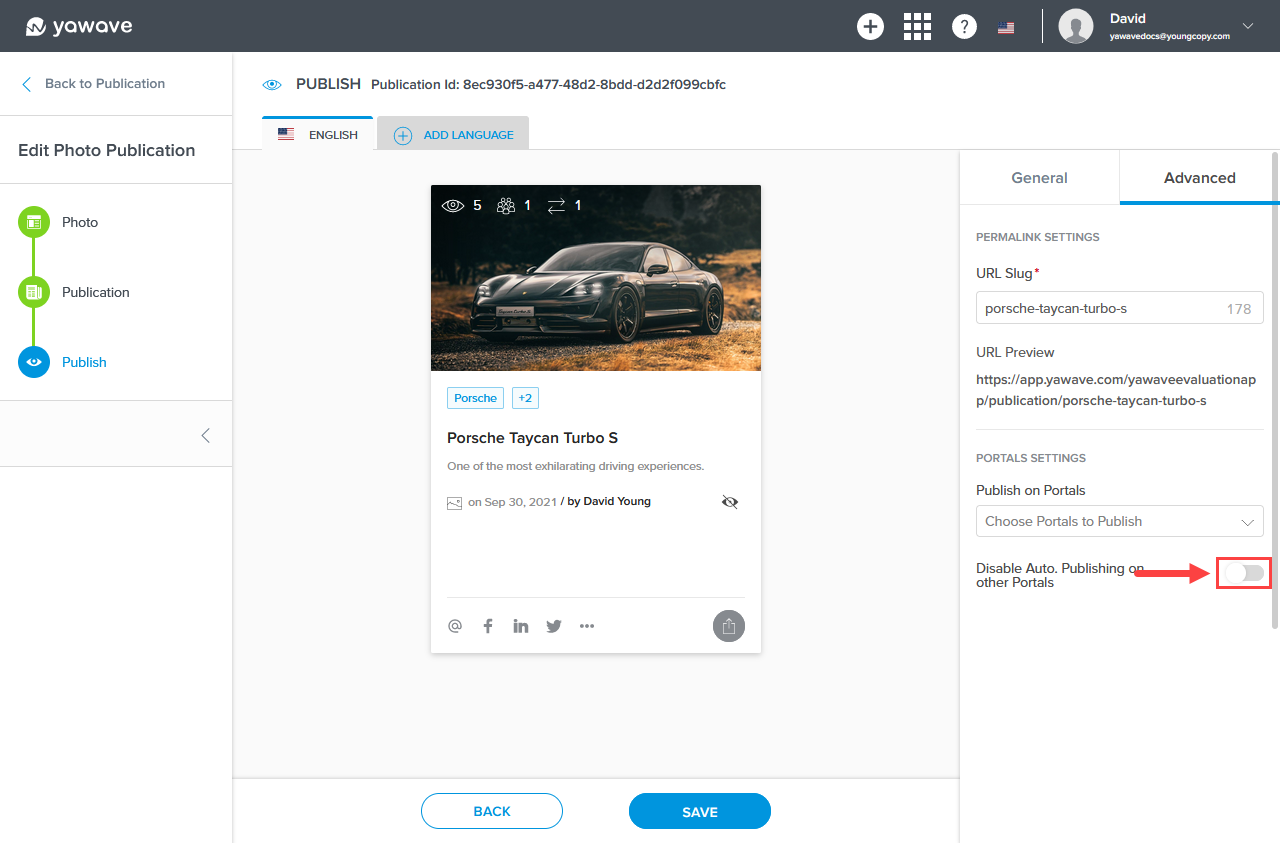
By default Disable Auto. Publishing on other Portals is disabled. When enabled, this Publication will be automatically published to all Portals. Click the Disable Auto. Publishing on other Portals toggle once to enable.
Click Save.
Create and configure Portals or review Onboarding Steps.