Learn how to create a Share Tool below.
A Share Tool contains a motivational image, buttons, text and sharing options through social media and email. A Share Tool is used to help you reach more people with your content. The more people interact with your content, the faster your contact list grows where you can promote more content, sell products, raise funds and get signups for classes, camps, and more.
When configuring a Share Tool, the default colors will use the colors you have configured in Theme settings. Note: You'll be able to override Theme settings when configuring a Share Tool. The colors you configure in a Share Tool will only apply to the Tool you are creating.
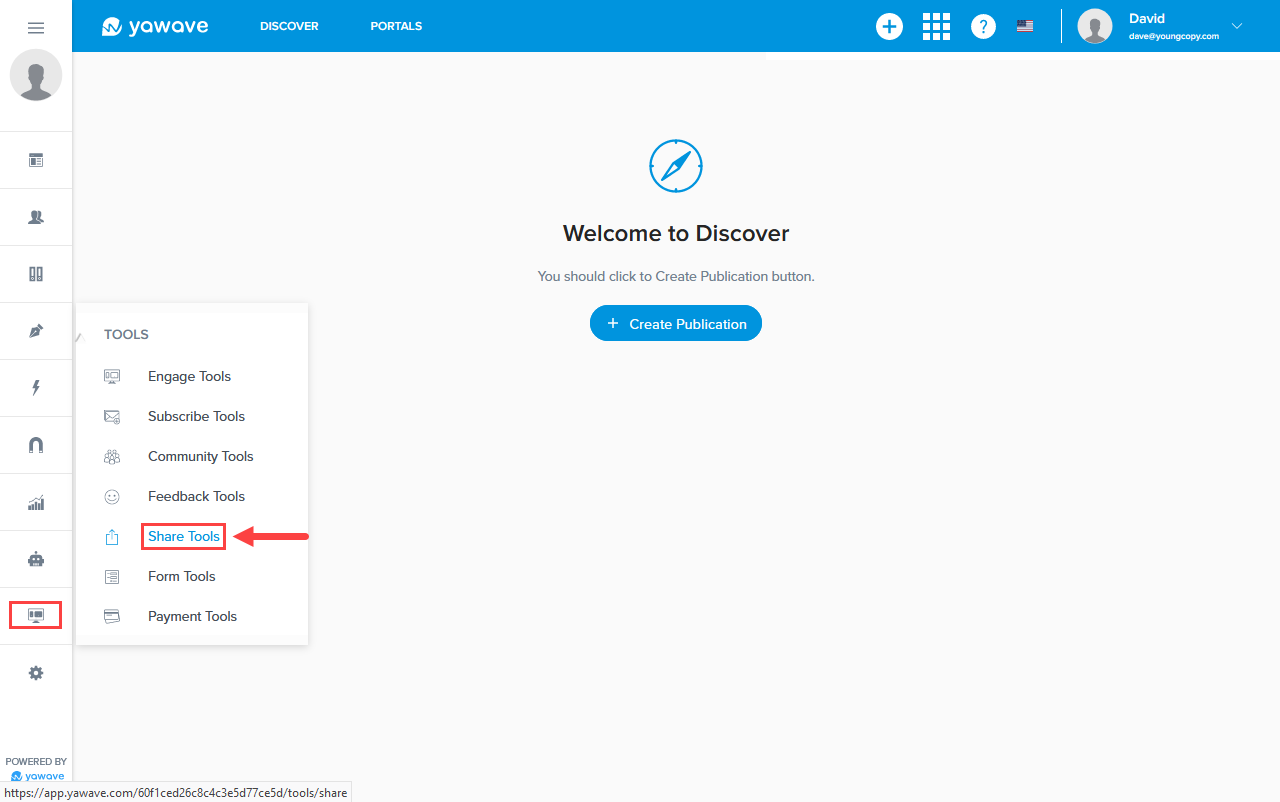
- Click Tools/Share Tools.
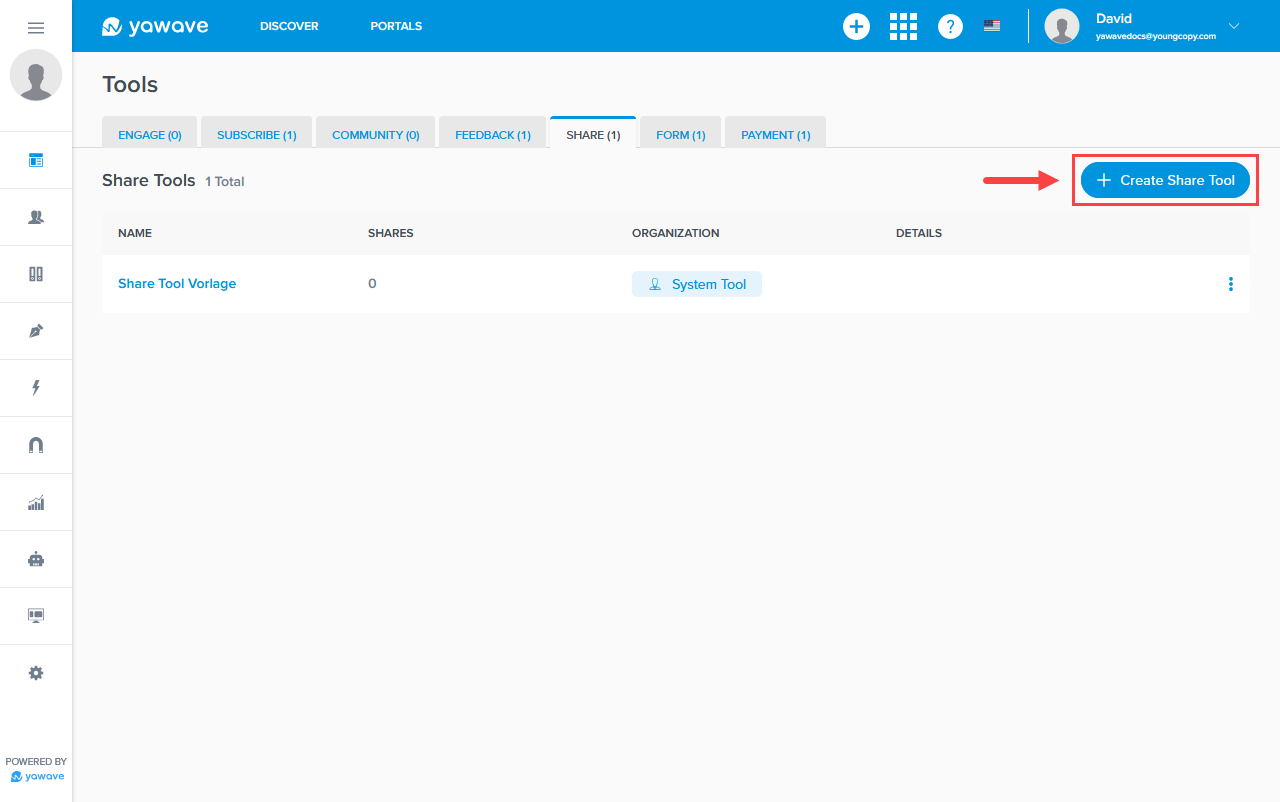
- Click Create Share Tool.
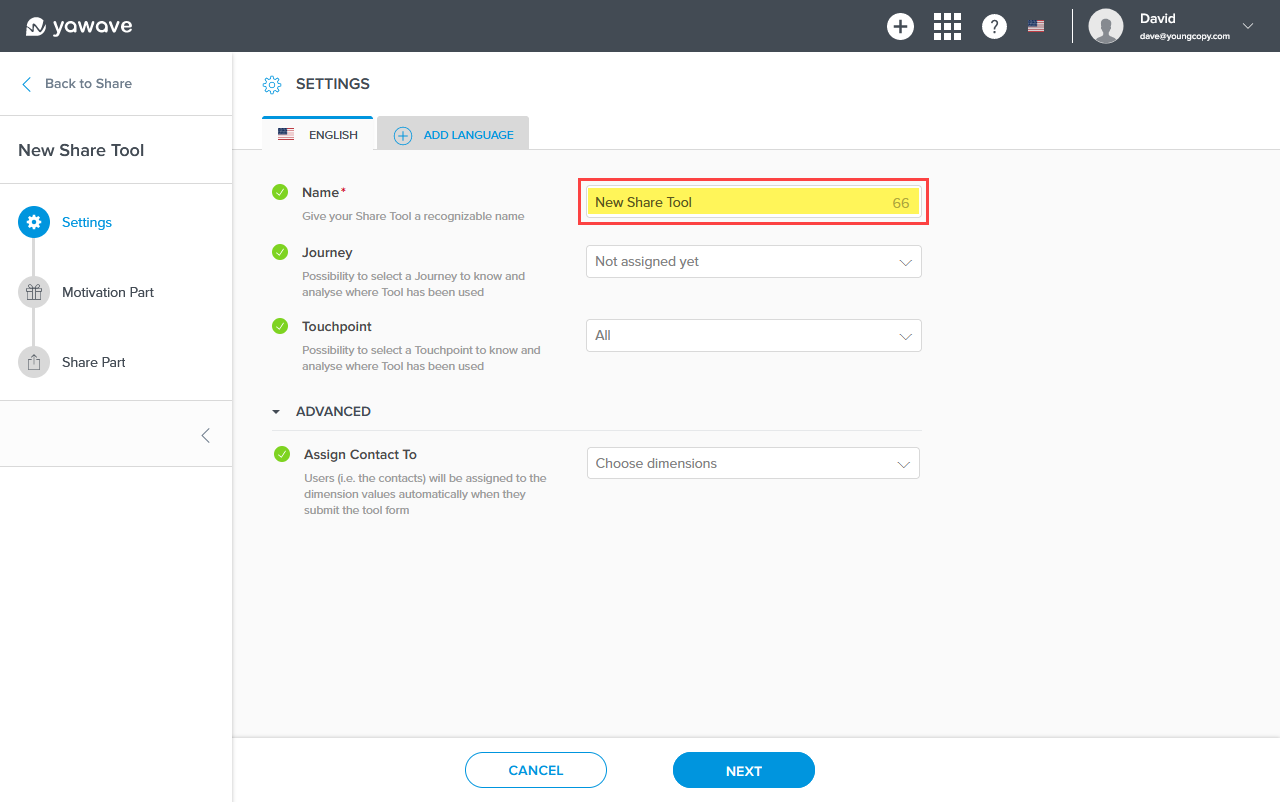
- Enter a name of your choosing in the Name field. Note: This field has a 80 character limit.
-
The Journey, Touchpoint and Assign Contact To settings are optional and require more advanced understanding of the Yawave product. If you are already familiar with these settings and how they work, complete the following, otherwise continue to Step 5.
- Select a Journey from the drop-down menu or select Add Journey to create a new one.
- Select Add Touchpoint from the drop-down menu.
- To segment contacts acquired with your new share tool, assign a contact to a dimension by selecting a dimension from the Assign Contact to drop-down menu.
-
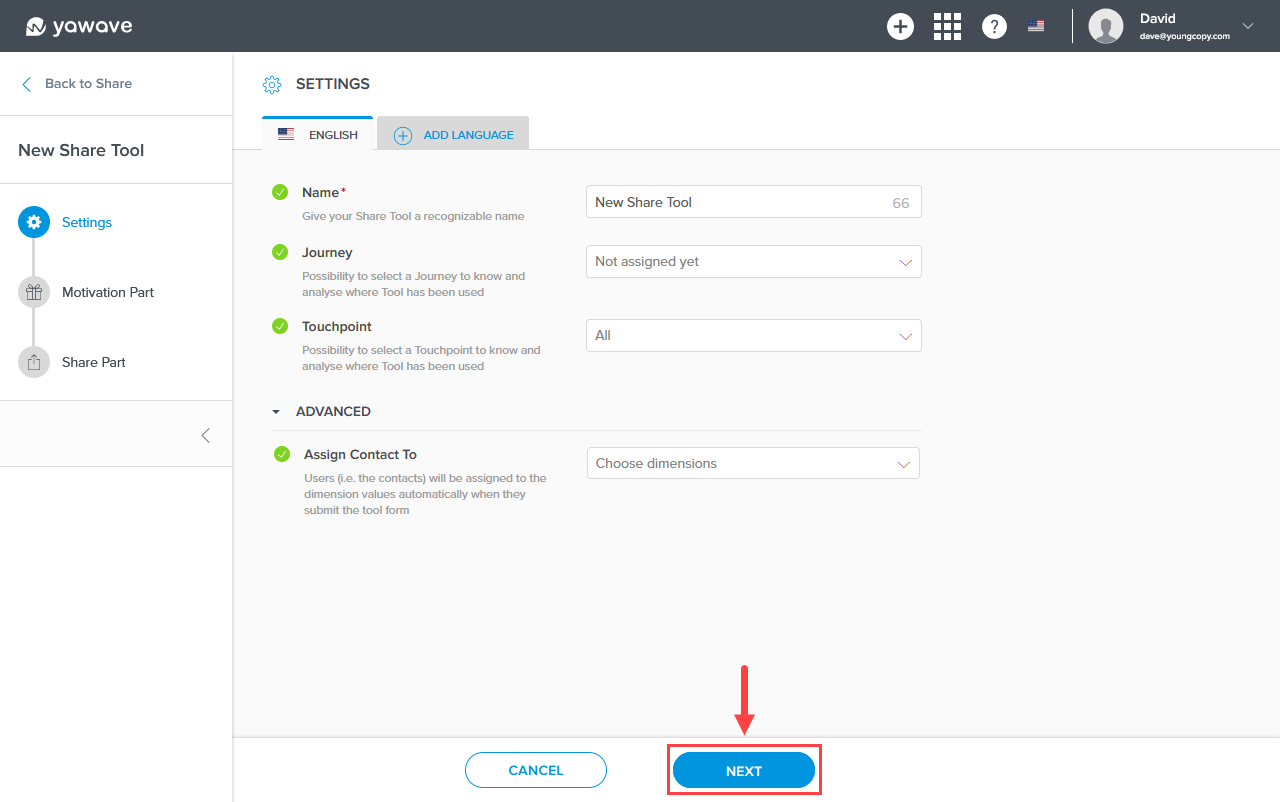
Click Next.
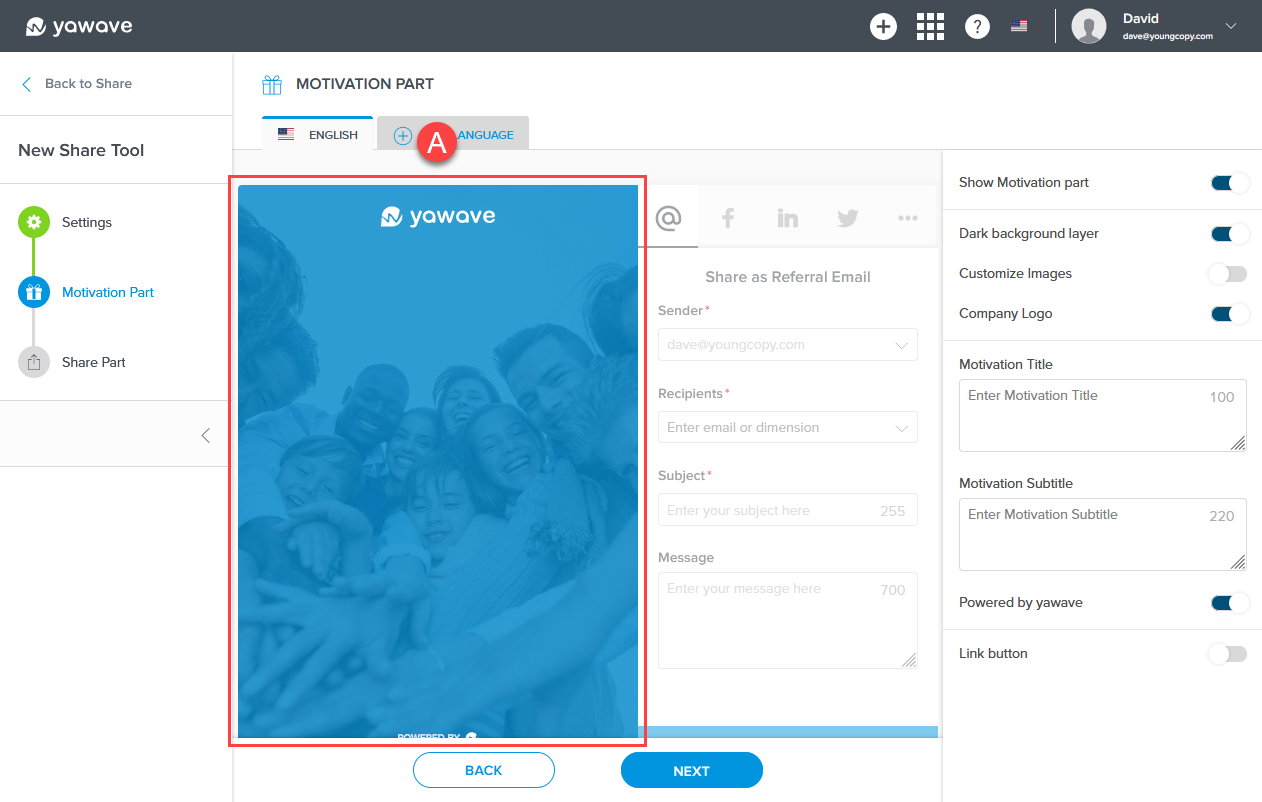
- Below you'll see two images. (A) shows the Share Tool Motivation Part output and (B) shows the Share Tool Motivation Part settings. The settings you change in (B) will reflect in the output (A). Note: The Share Tool Motivation Part output is an image and should entice your visitors to share, or at the very least, grab their attention.
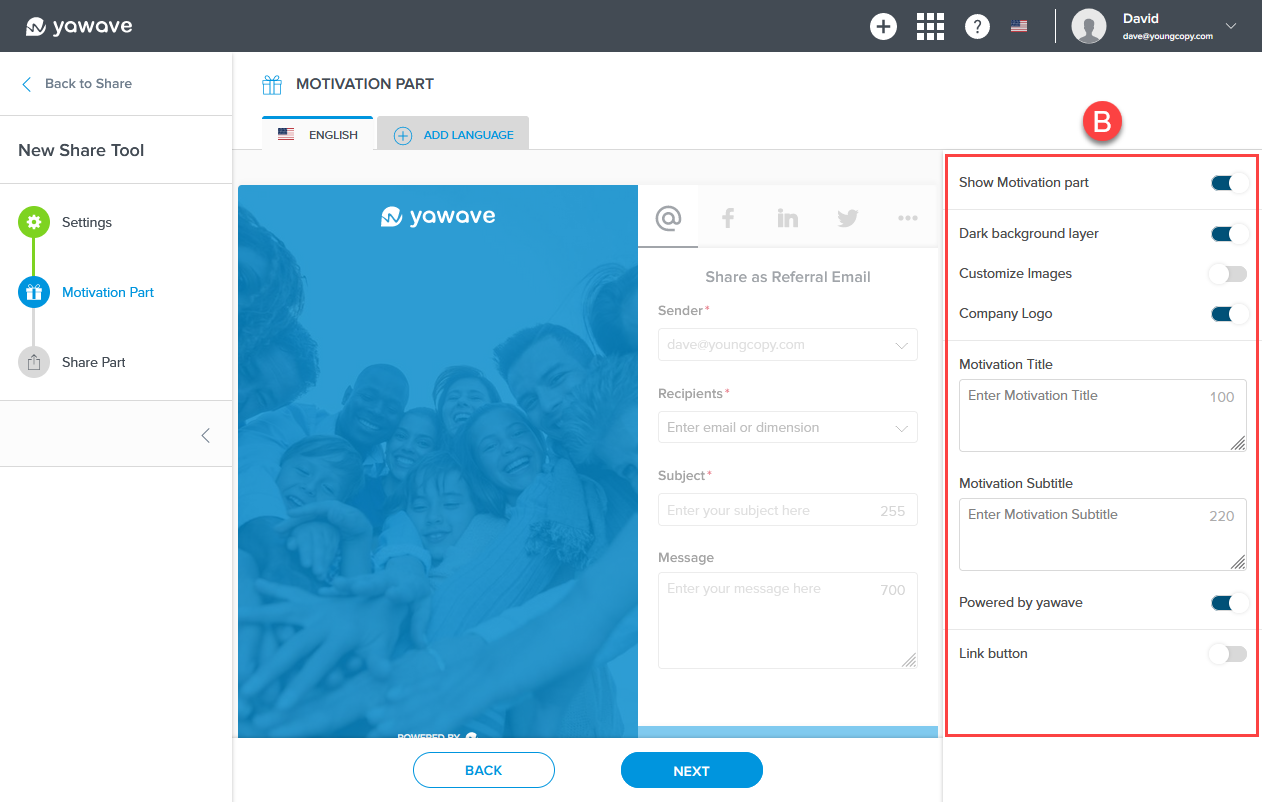
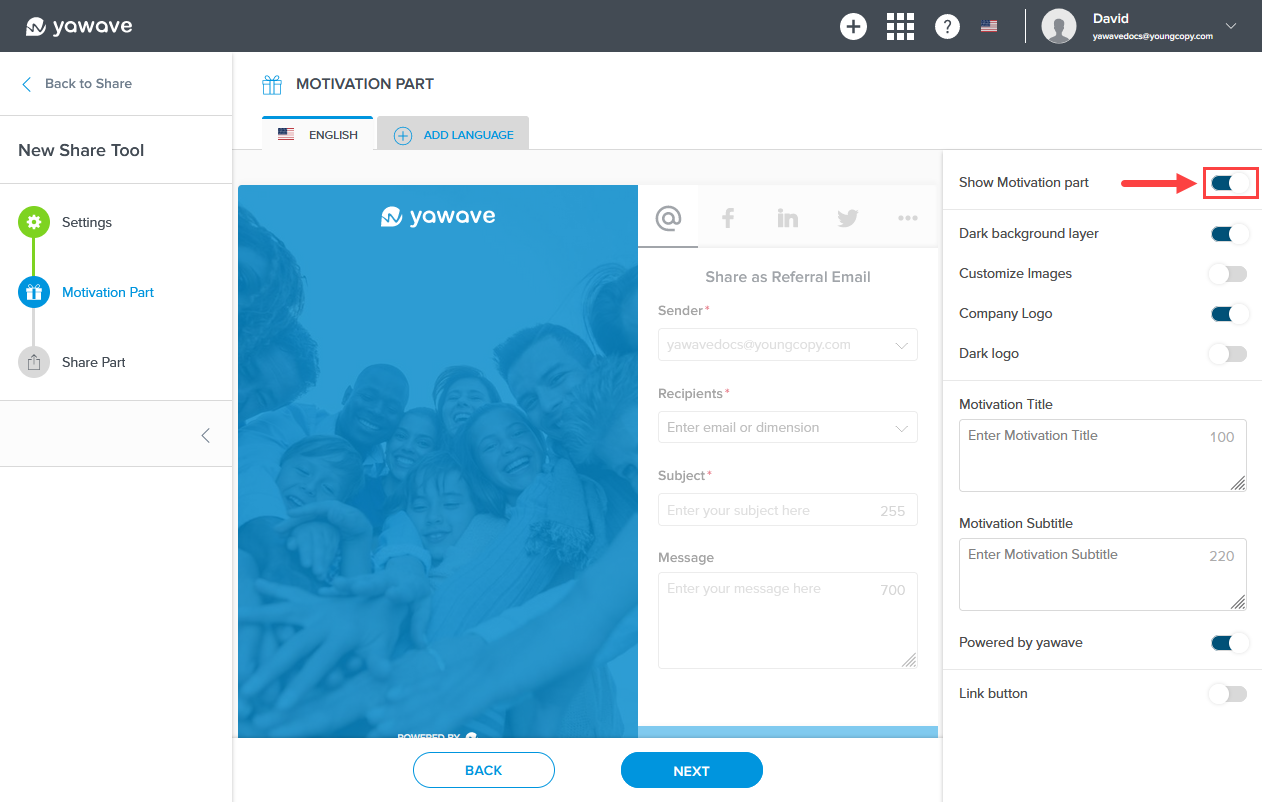
- By default Show Motivation part is enabled. If disabled, the image and Share Tool Motivation Part output will not be shown. If you do not want the Share Tool Motivation Part output to be shown, click the toggle once to disable this feature.
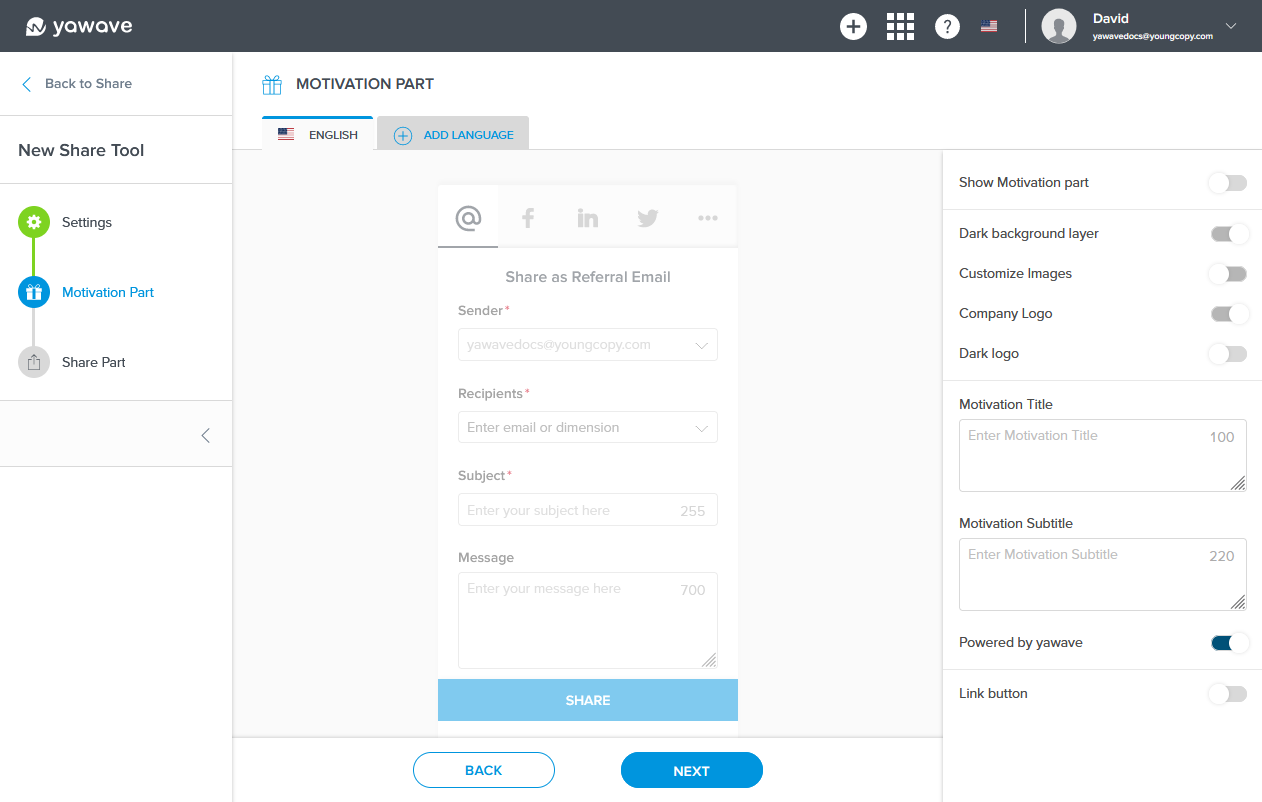
When Show Motivation part is disabled, the Share Tool Motivation Part output will look similar to the following image.
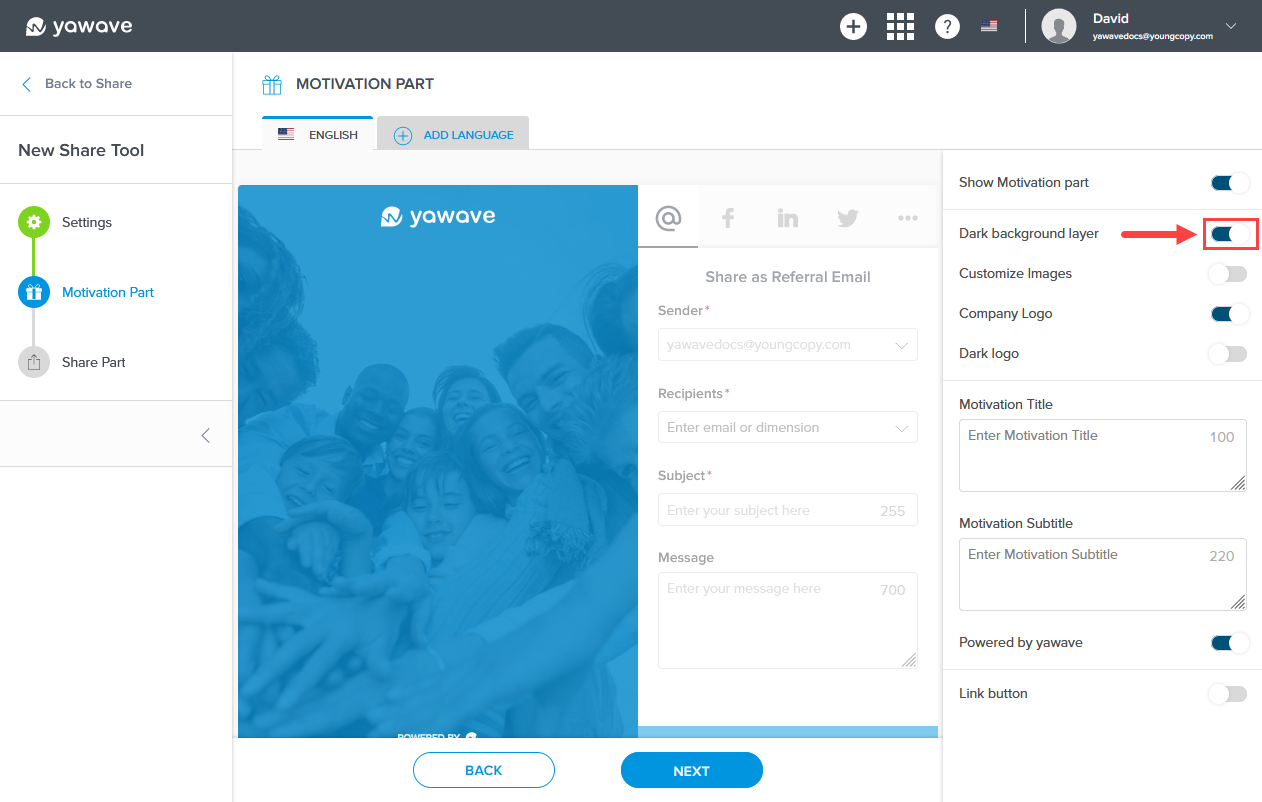
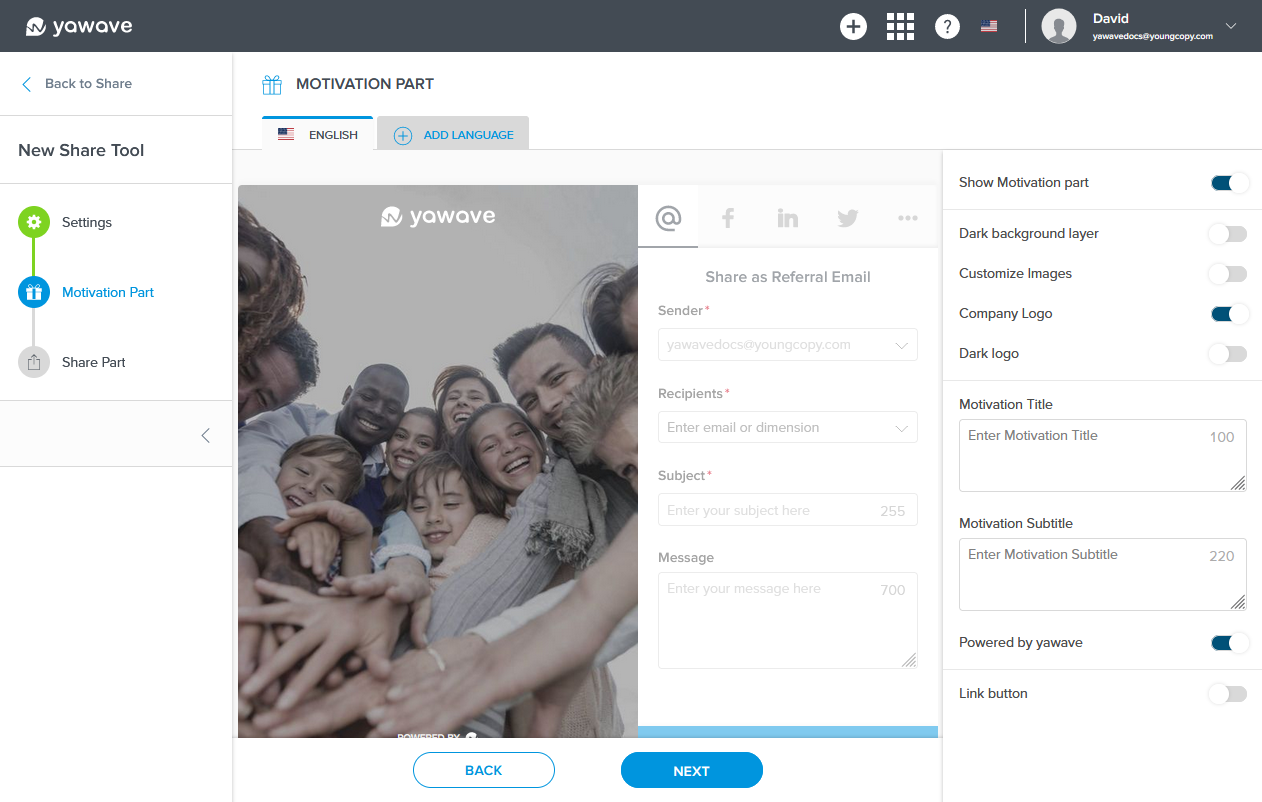
- By default Dark background layer is enabled. If disabled, the image background color (in this example, blue) will not be shown. Click the toggle once to disable this feature.
When Dark background layer is disabled, the Share Tool Motivation Part output background will look similar to the following image.
-
By default Customize images is disabled. To change the Motivation Part cover or image, click the toggle once to enable this feature. If enabled, follow the instructions below, otherwise continue to Step 10.
a. Here you'll need a Portrait Image (400x580) 200KB. Once you have the Portrait Image you want to use, drag and drop the image or click to upload.
b. Here you'll need a Landscape Image (768x400) 200KB. The Landscape Image is used to represent the Share Tool in mobile screen sizes. Once you have the Landscape Image you want to use, drag and drop the image or click to upload. -
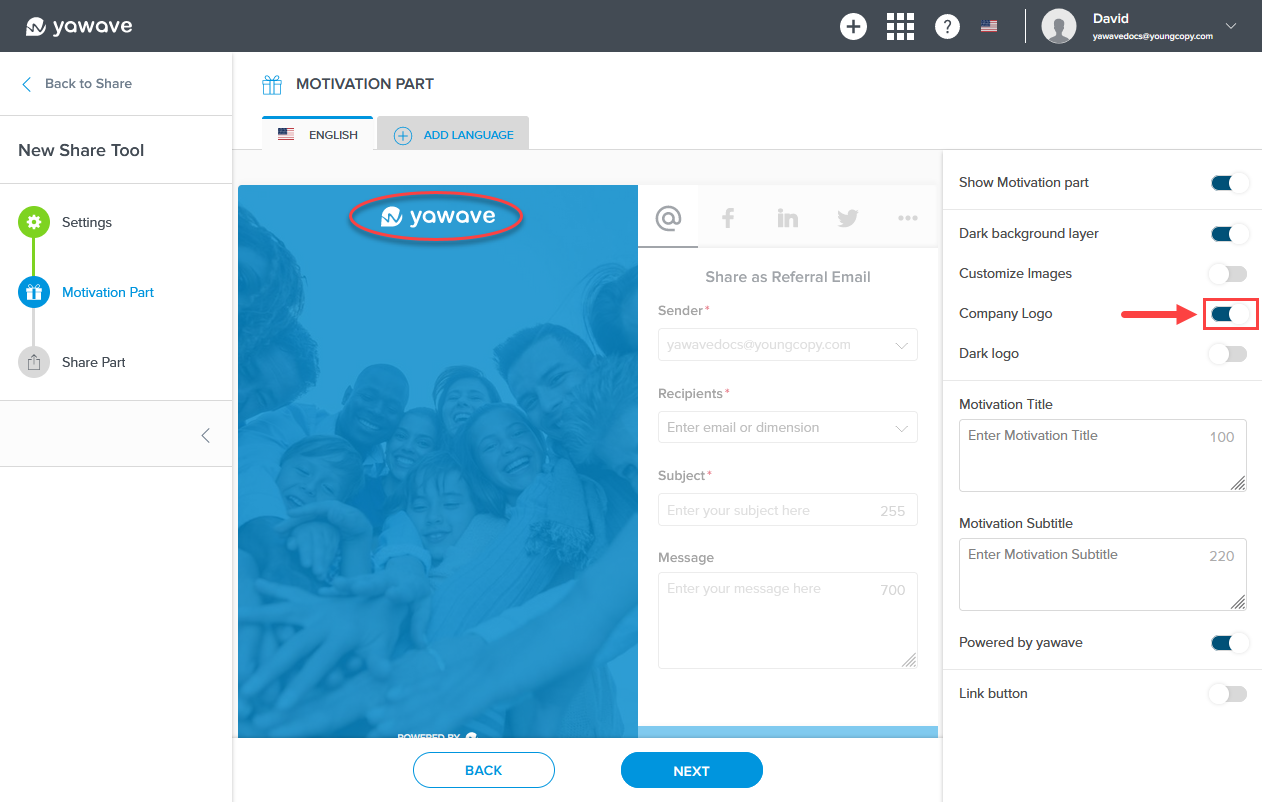
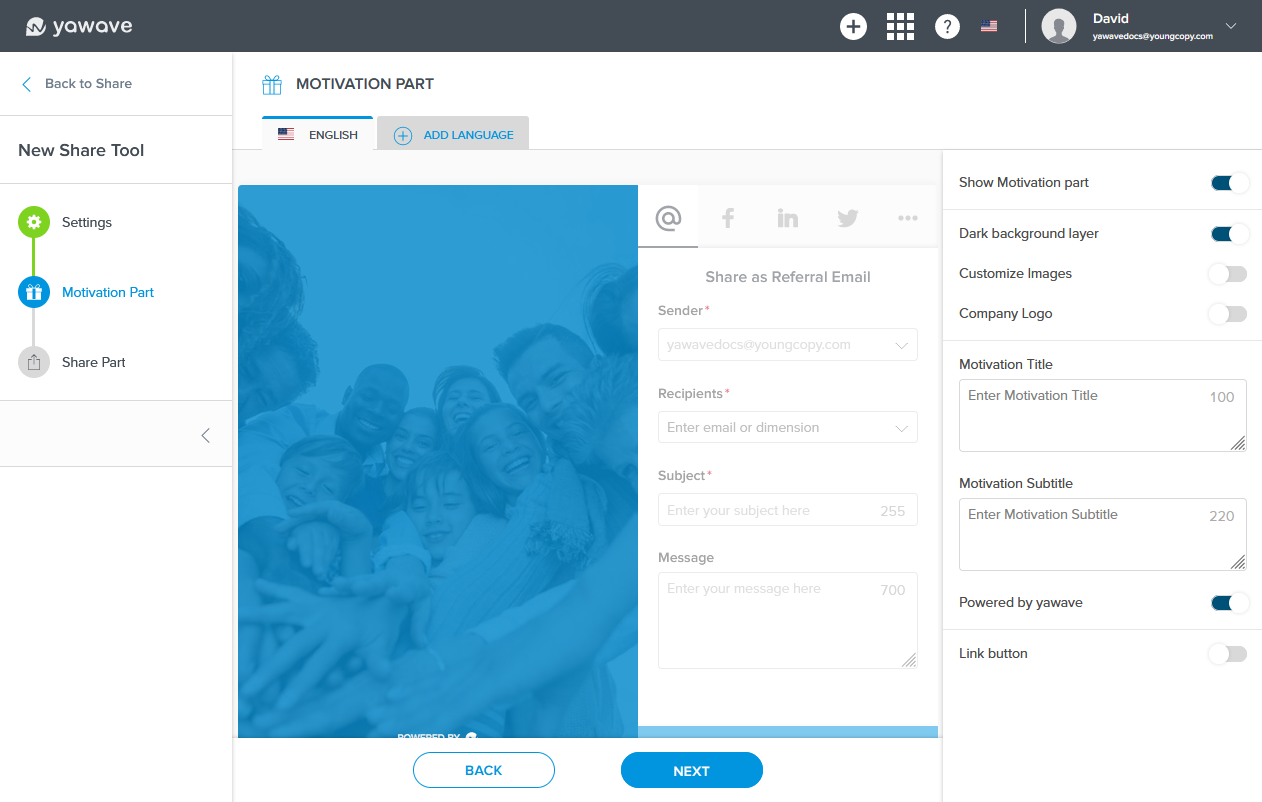
By default Company Logo is enabled. If disabled, the logo (in this example, yawave) will not be shown. Click the toggle once to disable this feature. Note: The Company Logo is set when you Configure Branding.
When Company Logo is disabled, the Share Tool Motivation Part company logo will be removed and look similar to the following image.
-
By default Dark logo is disabled. If enabled, the white logo (in this example, yawave) will be shown as a dark logo. Click the toggle once to change the white logo to a dark logo. Note: This applies to the logo in Step 10 above.
-
Enter motivational text in the Motivation Title field. (Note: This field has a 100 character limit.) While entering the motivational text you will see it appear in the Motivation Part.
-
Enter motivational text, to be shown as a subtext, in the Motivation Subtitle field. (Note: This field has a 220 character limit.) While entering the motivational text you will see it appear in the Motivation Part.
-
By default Powered by yawave is enabled. If disabled, the image will not be shown. Click the toggle once to disable this feature.
-
By default Link button is disabled. When enabled a clickable button appears. Click the toggle once to enable this feature. If enabled, follow the instructions below, otherwise continue to Step 16.
a. Enter the URL or link you want the button to go to in the Button URL field.
b. Enter the text you want to be shown on the button in the Label field. (Note: This field has a 23 character limit.) -
Click Next.
-
Below you'll see two images. (A) shows the Share Part output and (B) shows the Share Part settings. The settings you change in (B) will reflect in the output (A). Note: The Share Part output contains social media links such as Facebook, LinkedIn, Twitter, WhatsApp and more, and should entice your visitors to share with others through the social media platform(s) you choose in the Share Part settings.
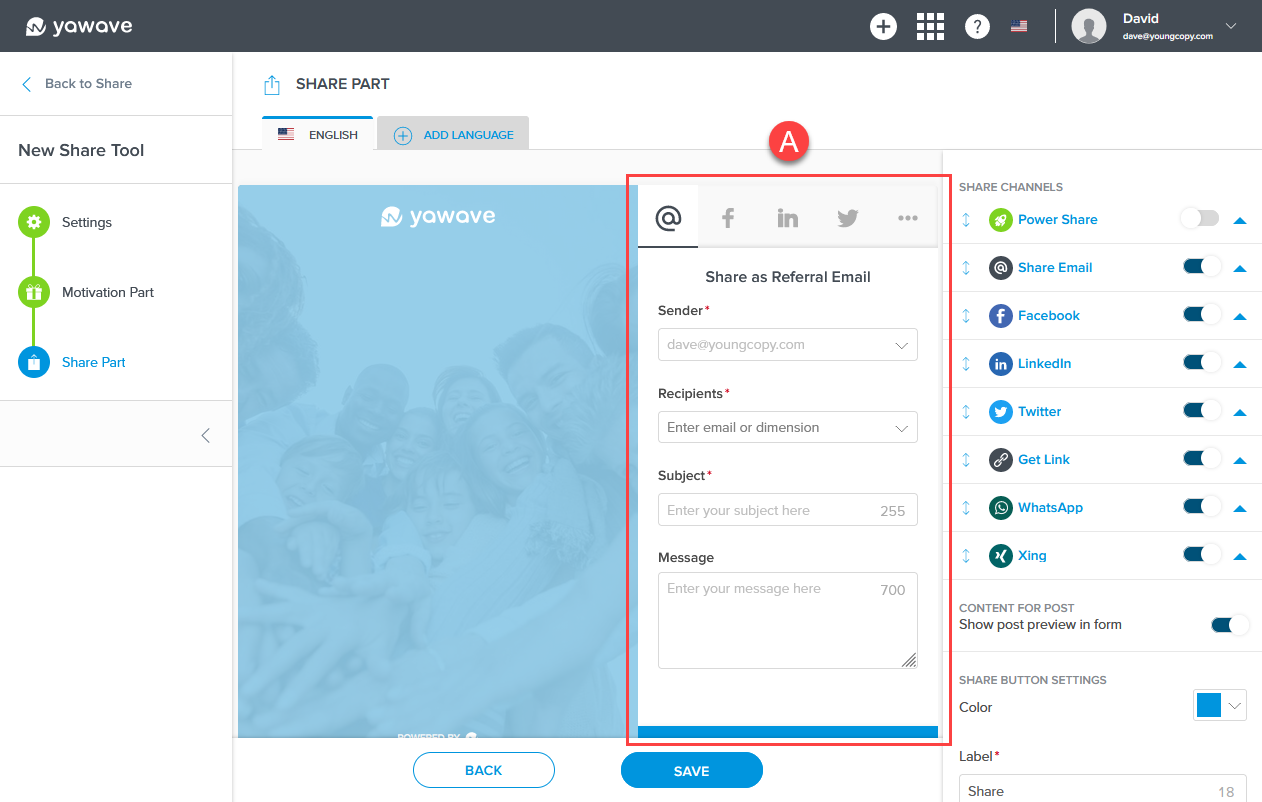
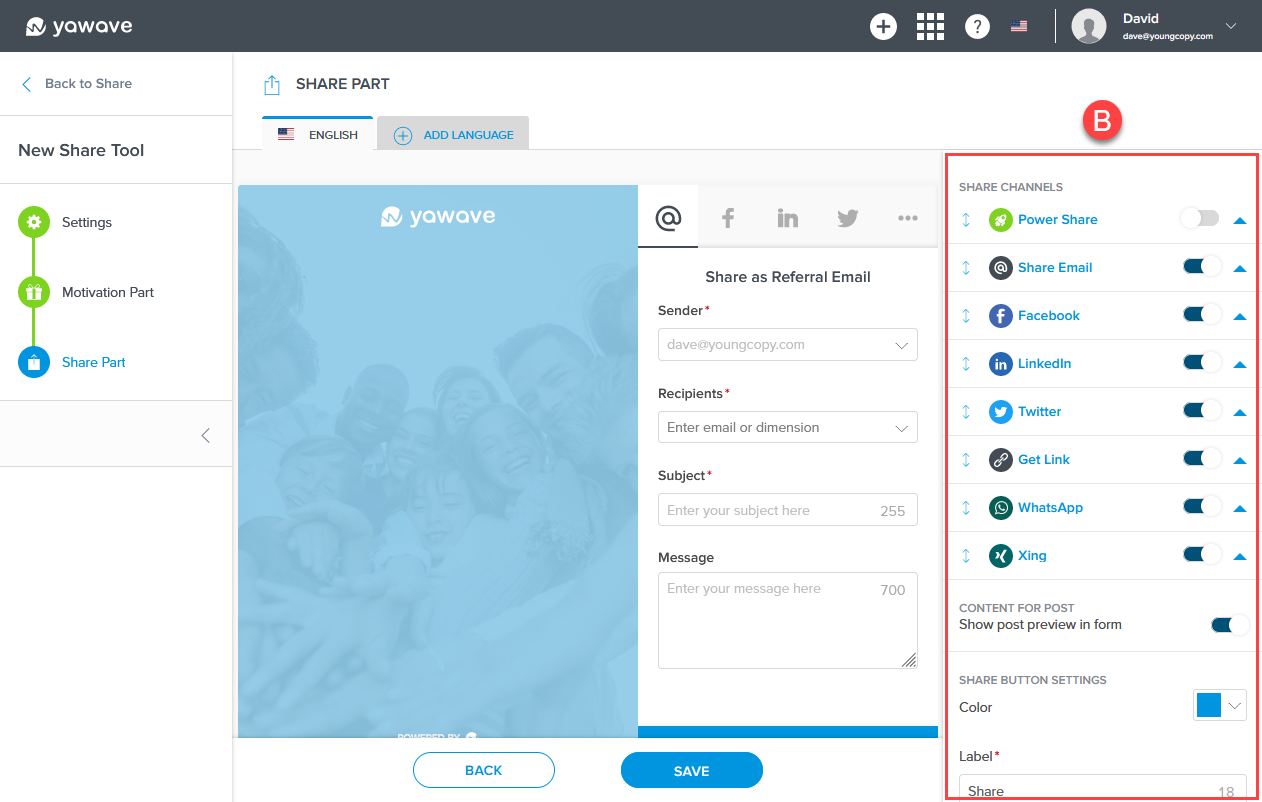
- As shown in image (B) above, all currently supported social media platforms (listed under Share Channels) are enabled by default. If disabled, the Share Channels or social media channel will not be shown. Click the toggle once to disable the Share Channels you don't want to be used in in your Share Tool. For example, if you don't want the Share Email feature to be enabled, click the Share Email toggle once to disable or remove from the available sharing options.
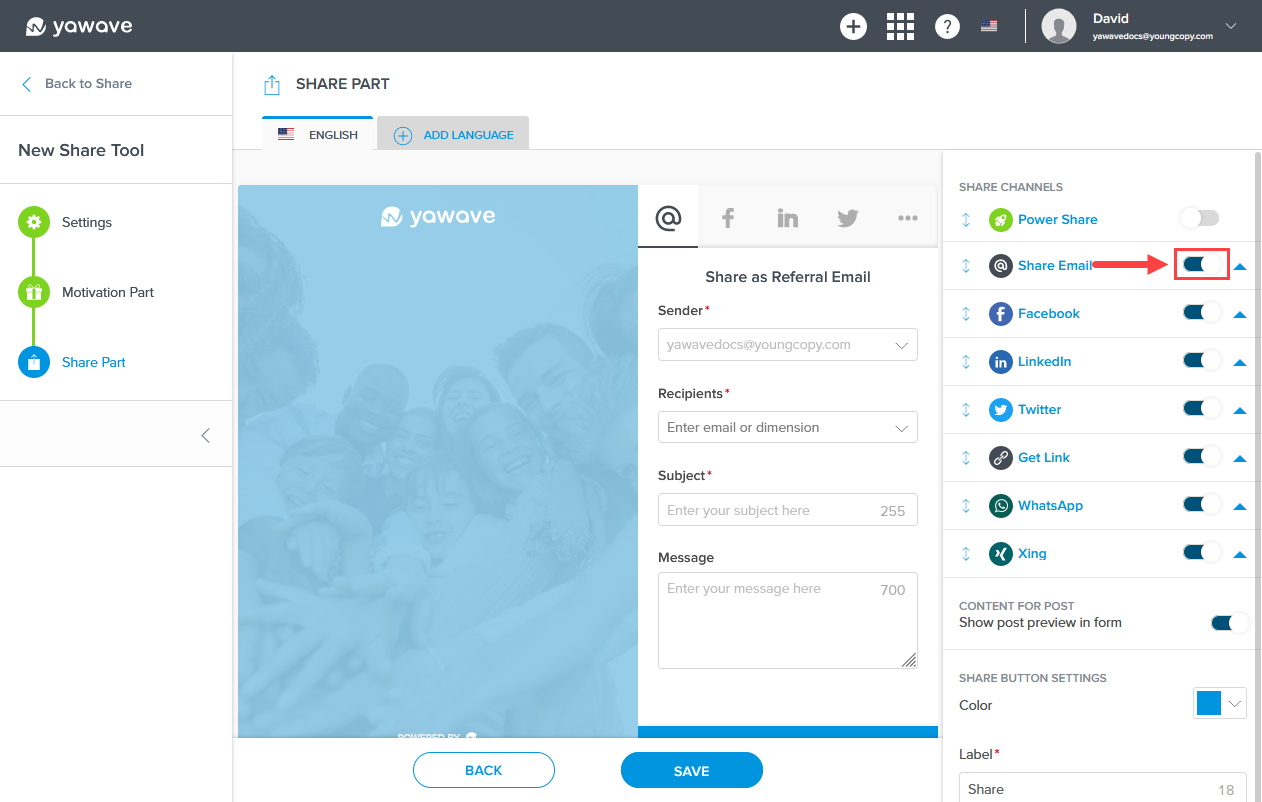
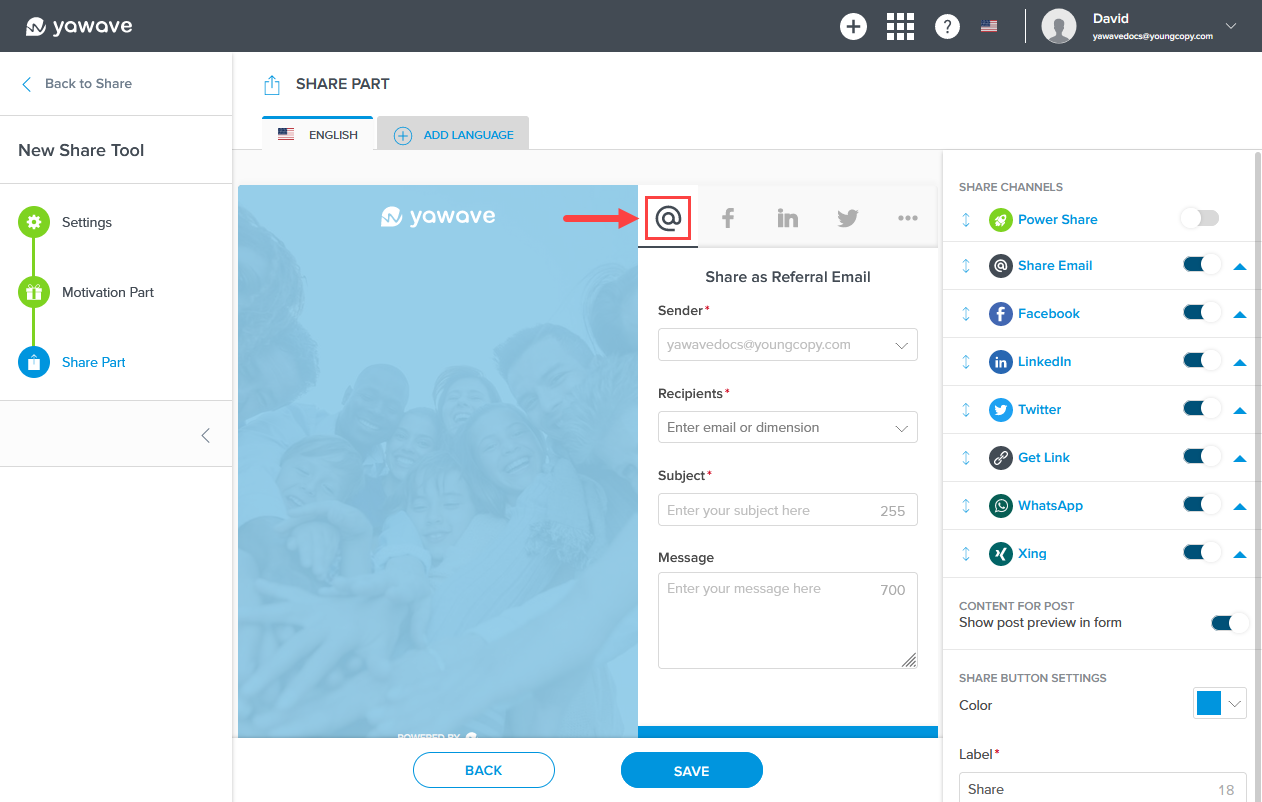
The Share Email icon is showing in the image below. When Share Email is disabled, the Share Email option will be removed from the Share Part output.
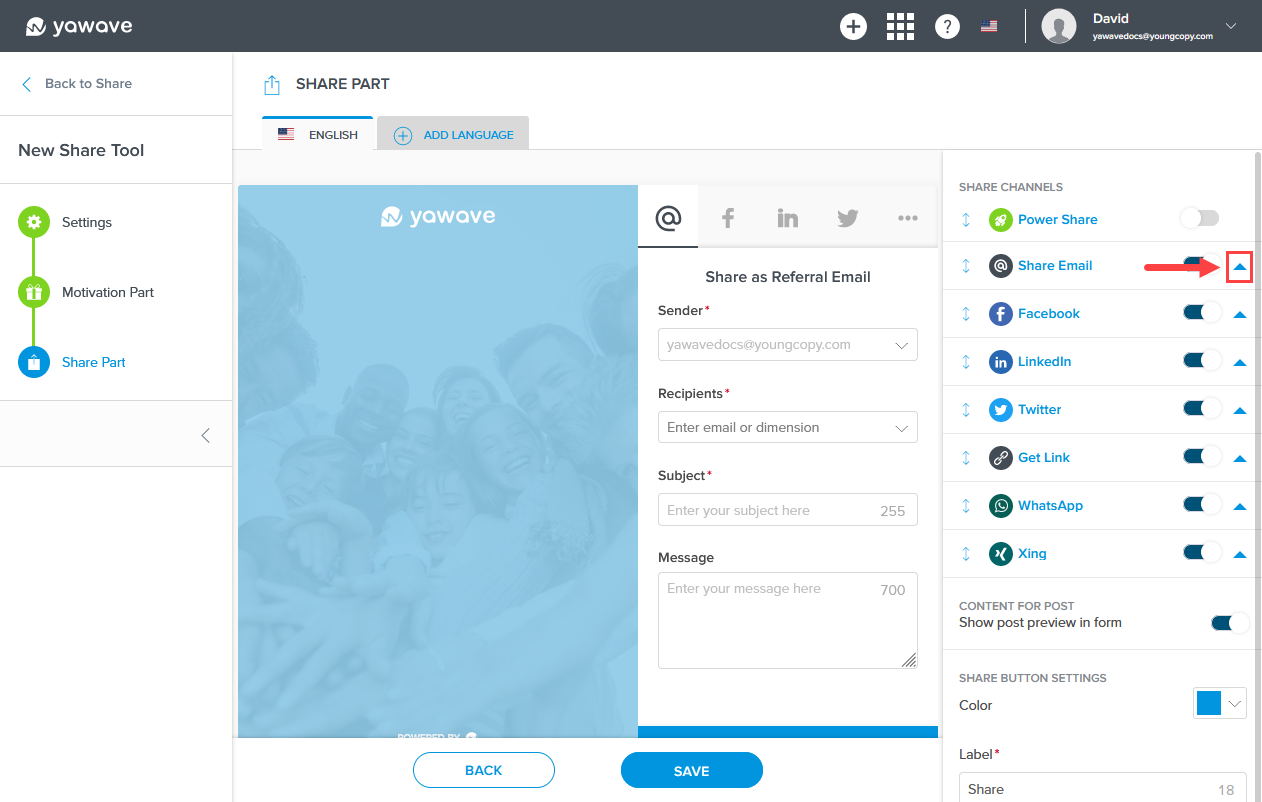
To change any of the Share Channels settings (Share Email settings in this case), click the arrow next to the Share Channel. Note: Settings will vary depending on the Share Channel.
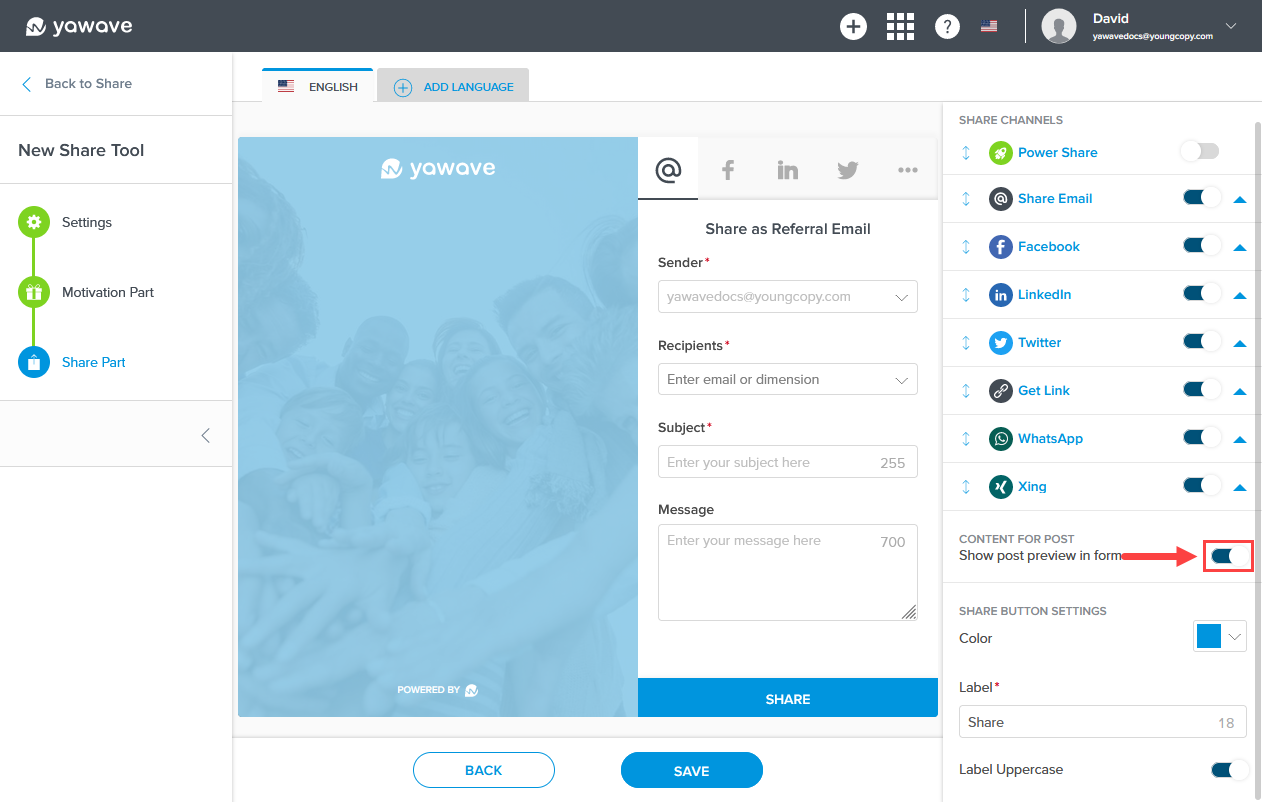
- By default Content for Post is enabled. When enabled, Content for Post shows the meta data (title and image) from the page you are sharing.
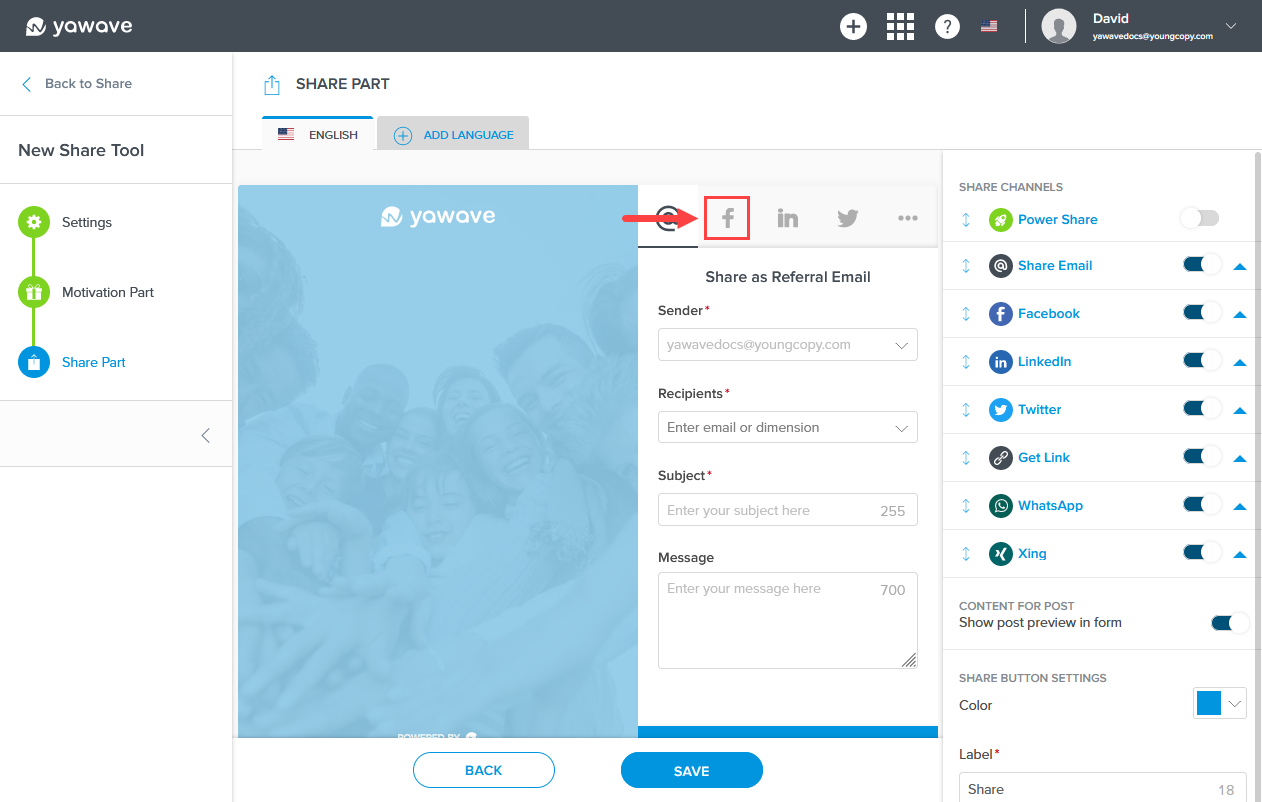
For example, click the Facebook icon in the Share Part output.
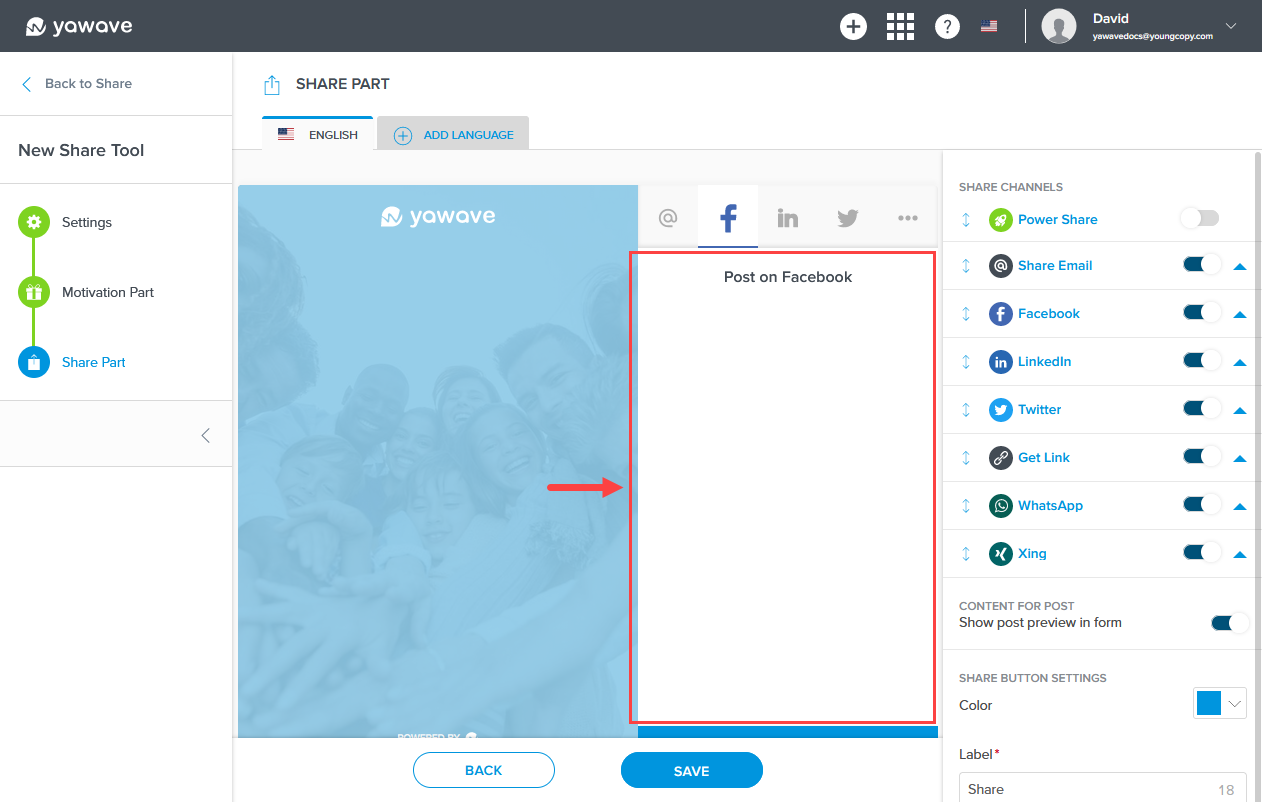
In the following image you'll see where the title and image will be displayed for Facebook. To learn how meta data works with Yawave, view this article on Open Graph.
If you do not want the title and image from the shared page's meta data to be shown, click the Content for Post toggle once to turn this feature Off.
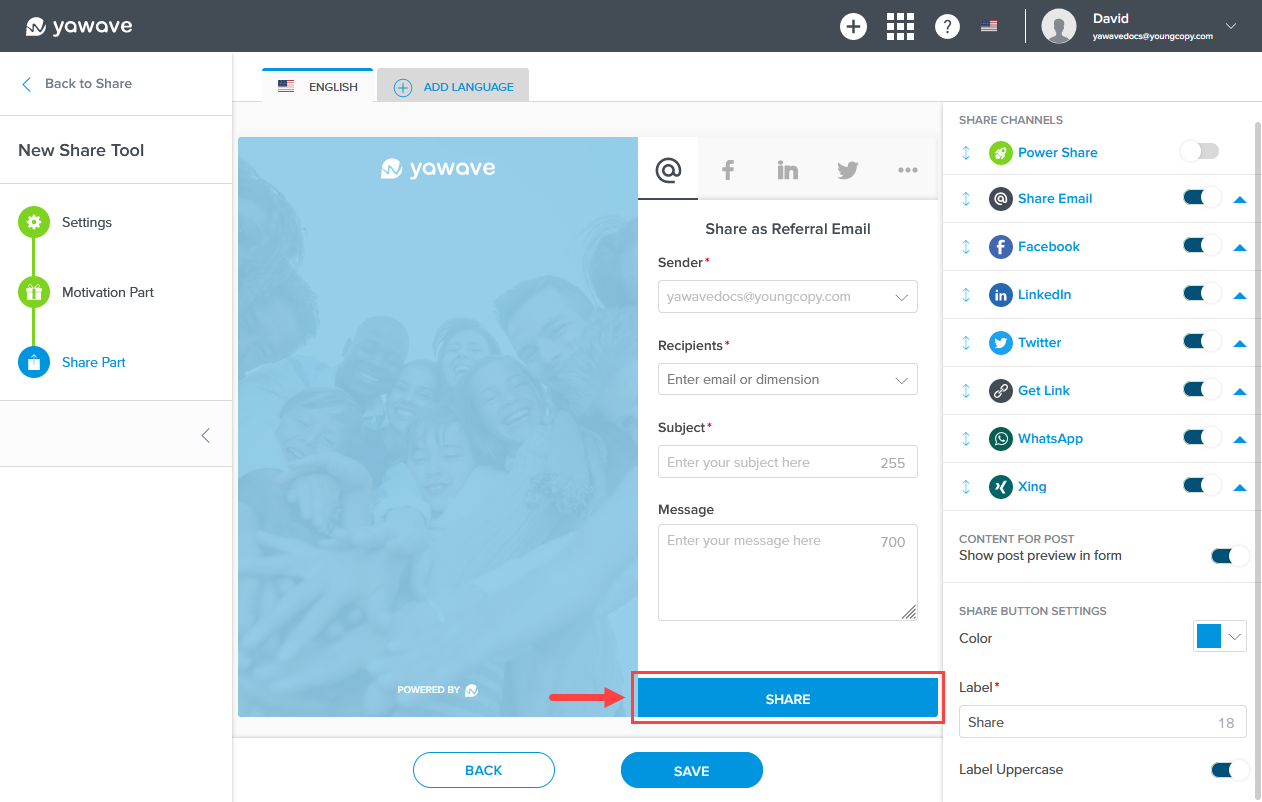
- Next you'll need to configure the Share Button settings. The Share Button is shown in the image below.
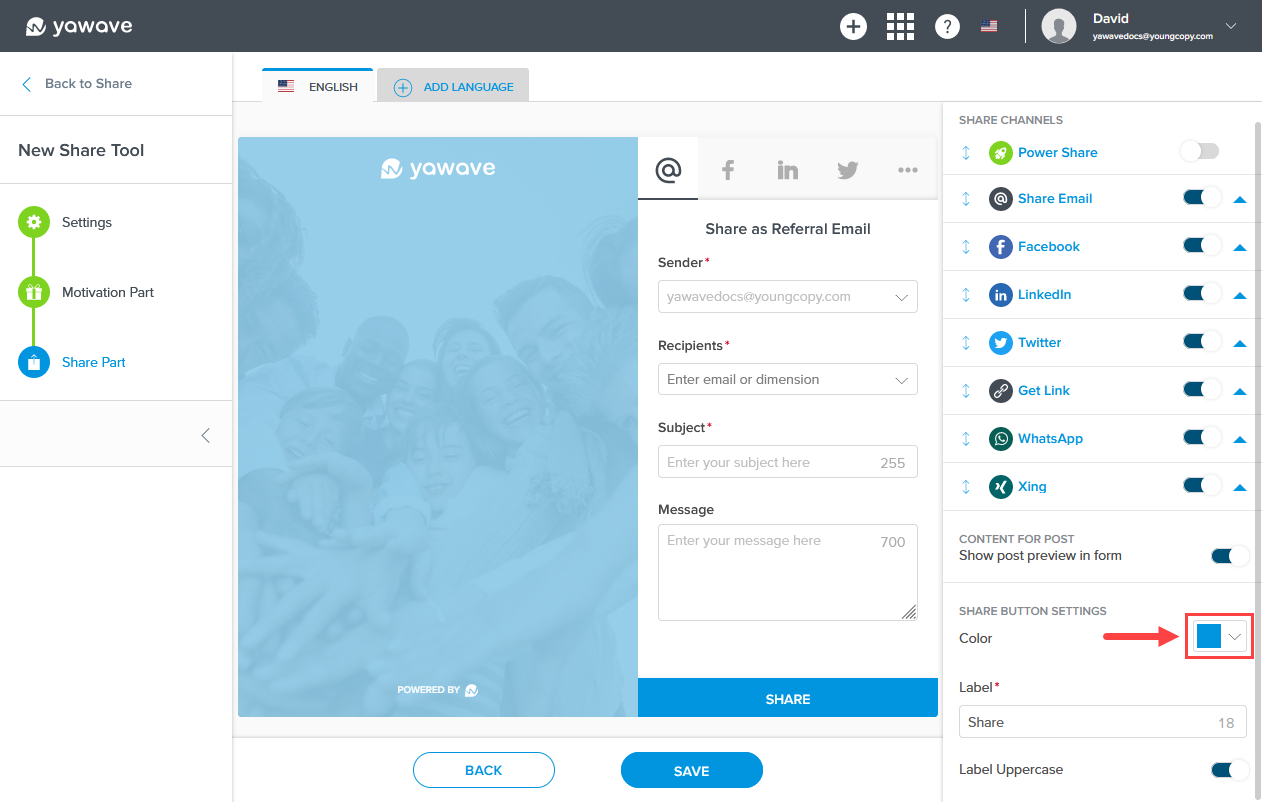
Select the color you want to use for the Share Button from the Share Button Settings drop-down menu. Here you can enter a Hex value, RGB value or use the color picker.
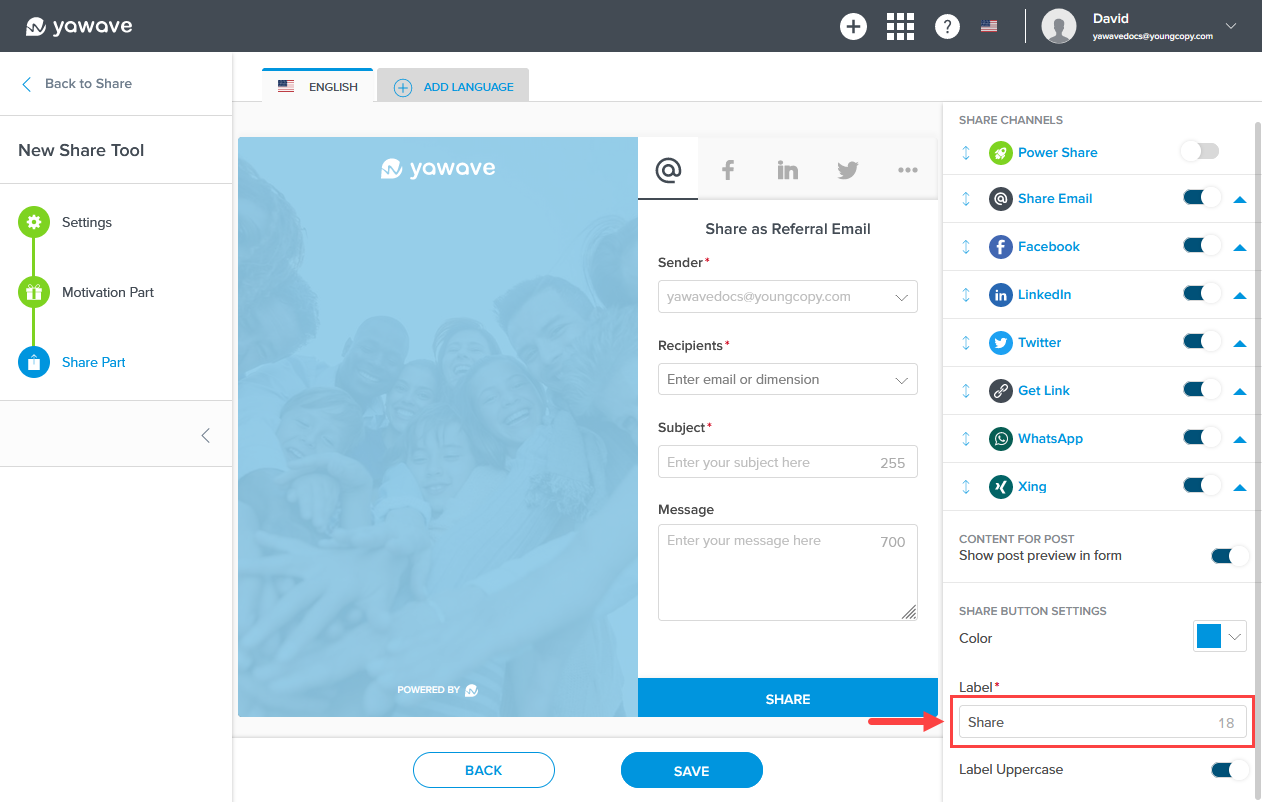
Enter the name you want to use for the Share Tool label in the Label field. Note: This field has a 23 character limit.
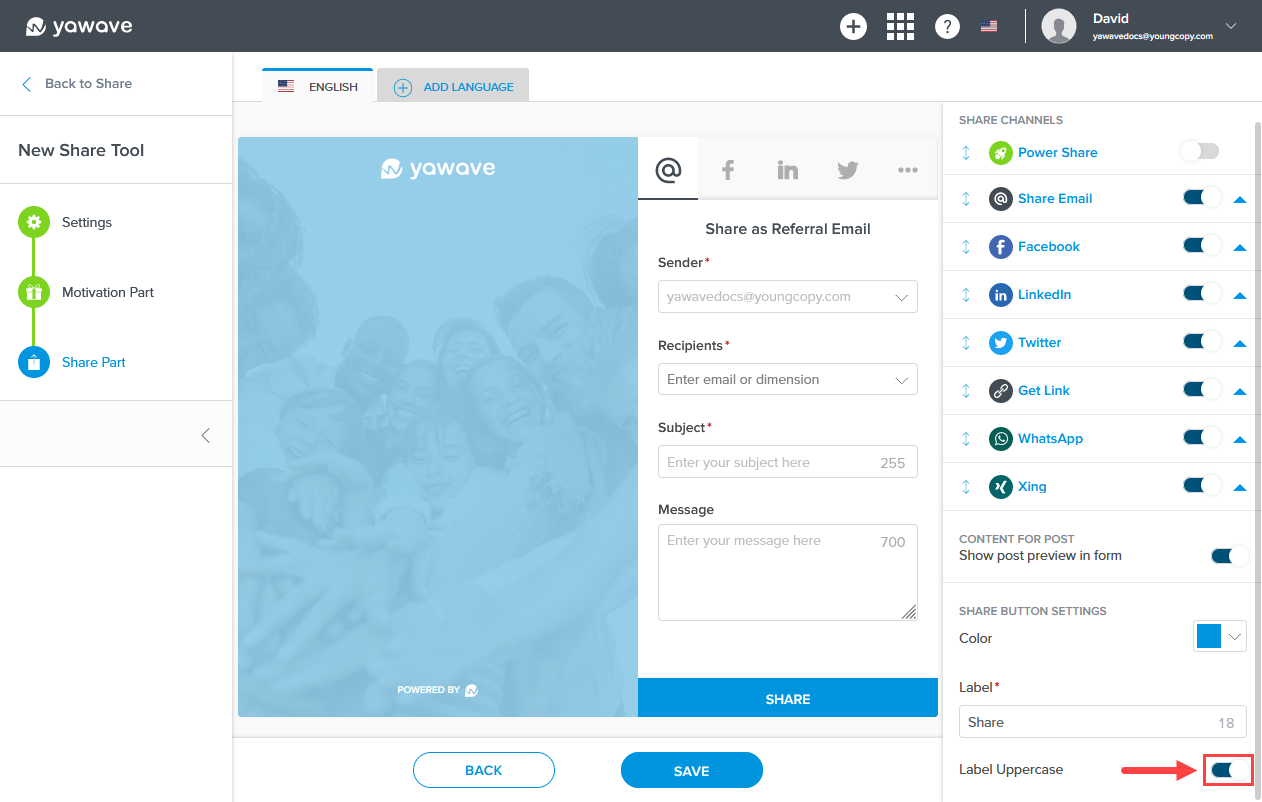
The Label Uppercase setting changes the Share Button label to lowercase or uppercase. When the Label Uppercase toggle is enabled (the default setting), the Share Button label will be shown as uppercase. When the Label Uppercase toggle is disabled, the Share Button label will be shown as lowercase. To show the Share Button label as lowercase, click the Label Uppercase toggle once.
- Click Save.
Create and configure Categories or review Onboarding Steps.