Learn how to create an Engage Tool below.
Read Before You Begin
Read the following sections in blue before you create an Engage Tool.
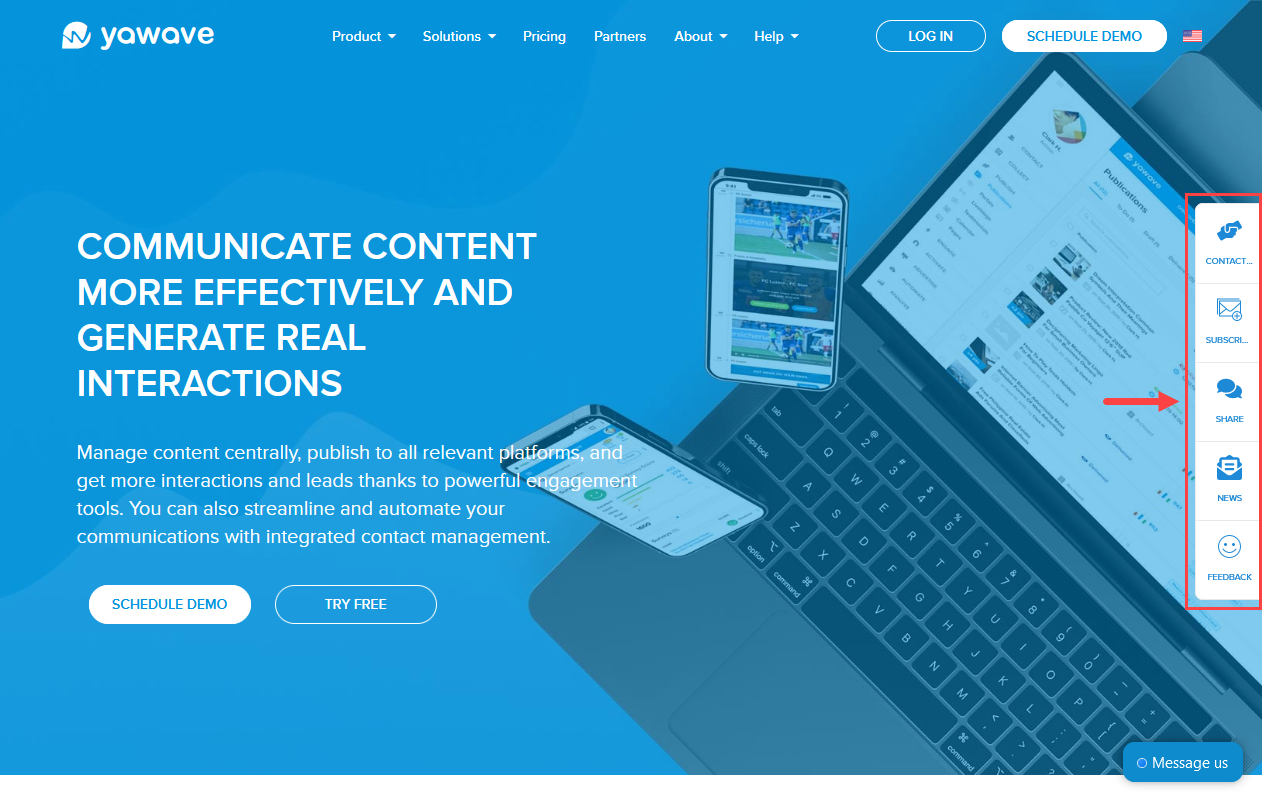
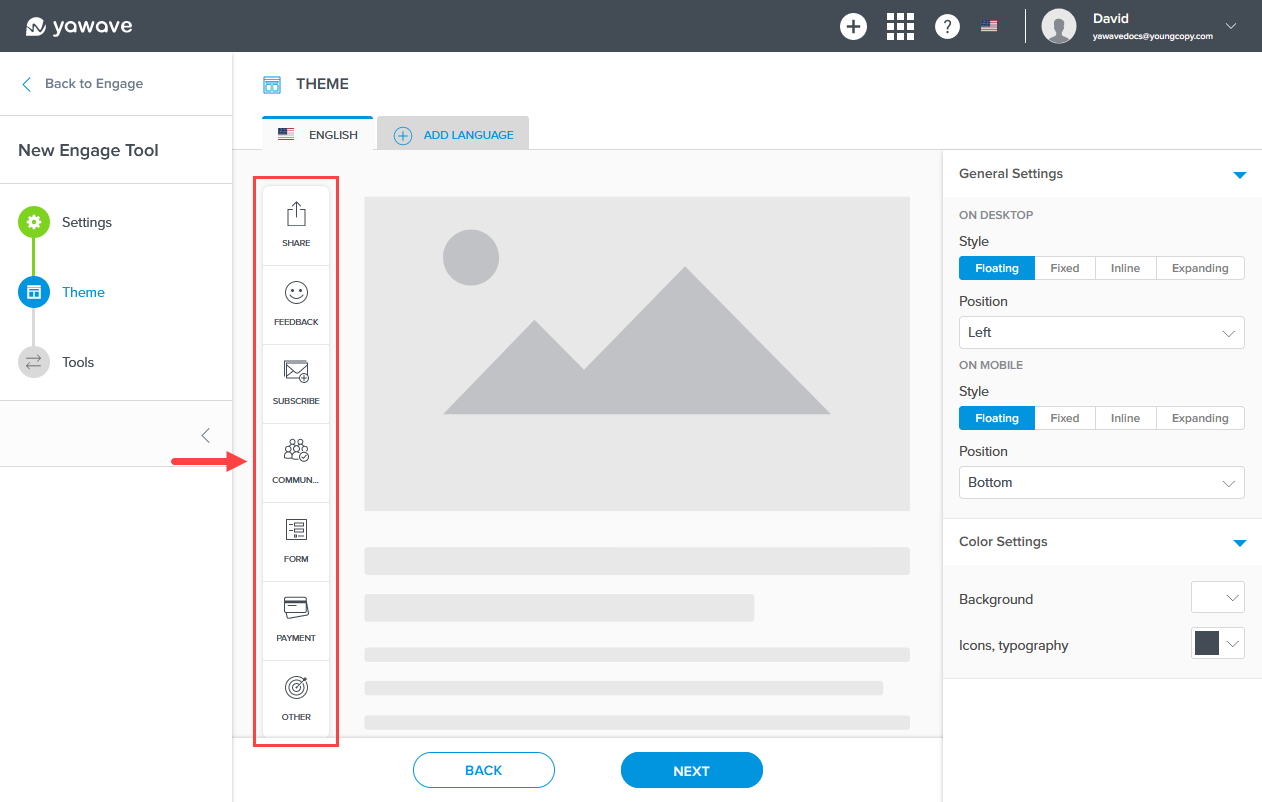
An Engage Tool is a stationary or floating side bar with various icons and labels. yawave refers to these icons/labels as Tools. Each Tool can be linked to a supported yawave Tool or linked to a page you choose. With the Engage Tool you can have a combination of Tools and links.
An Engage Tool contains the following:
- Settings - Determine name and advanced options including Touchpoint and Journey.
- Theme - Adjust colors, styling and position.
- Tools - Add any of the supported yawave Tools including links to pages you choose.
Engage Tool Example
Once a user opens a Tool from the Engage Tool, they can easily switch between Tools depending on what they want to do. Their options are based on what you configure in the following instructions. In the image below you can see the Engage Tool on the Yawave website. Try it at yawave.com by clicking each of the icons.
Configure Engage Tool Settings
If you plan on using supported yawave Tools, you need to configure them before creating your new Engage Tool.
- Click Tools/Engage Tools.
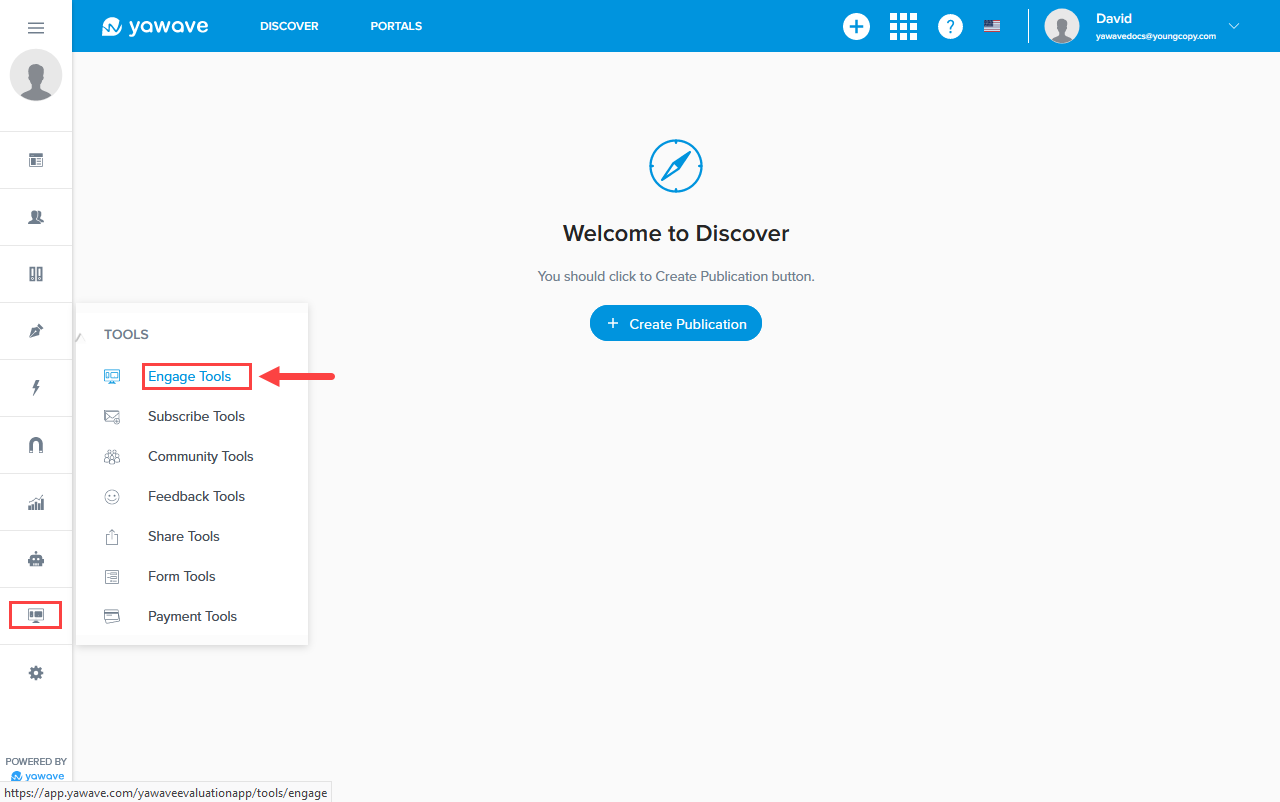
- Click Create Engage Tool.

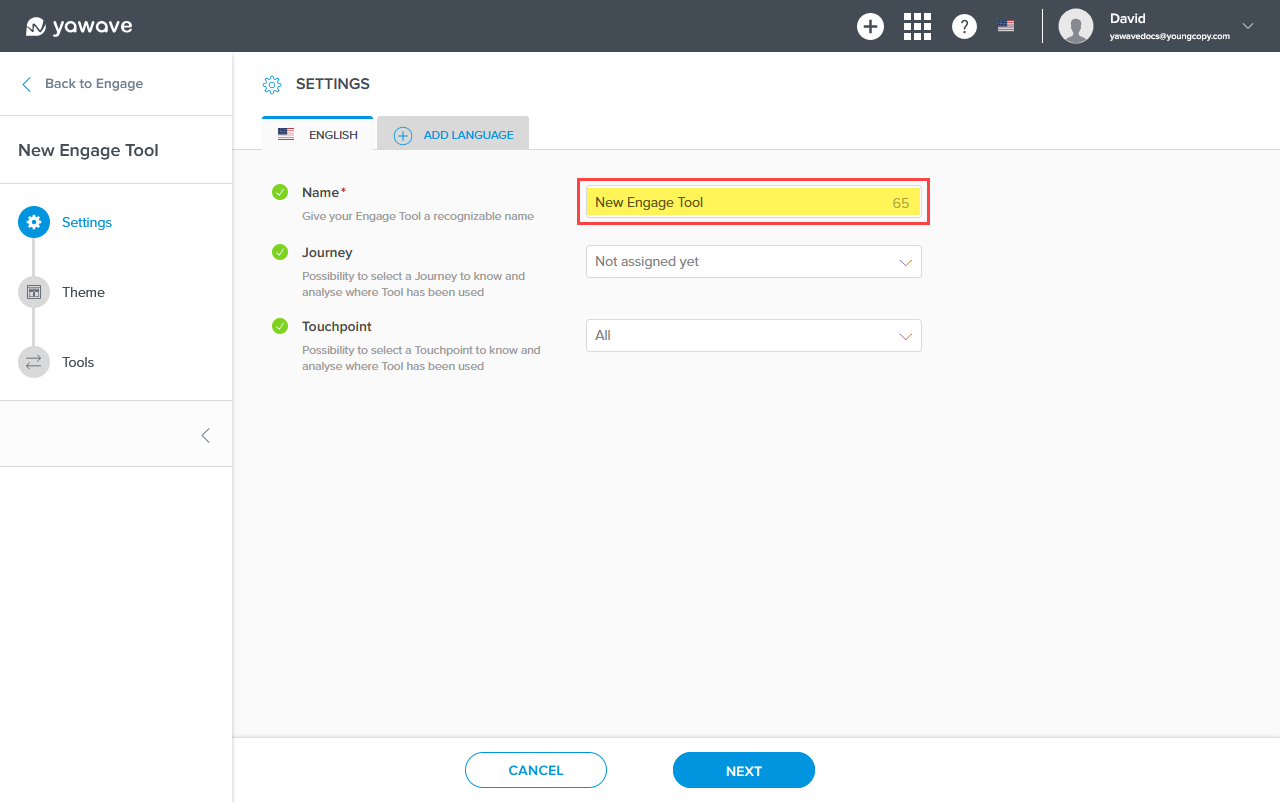
- Enter a name you want to use for the new Engage Tool in the Name field. Note: This field has a 80 character limit.
-
The Touchpoint and Journey settings are optional and require more advanced understanding of the yawave product. If you are already familiar with these settings and how they work, complete the following, otherwise continue to Step 5.
- Select Add Touchpoint from the drop-down menu.
- Select a Journey from the drop-down menu or select Add Journey to create a new one.
-
Click Next.
Configure Engage Tool Theme
- Under On Desktop select the style you want the Engage Tool to show for users on desktop by clicking a Style option. Your choices include Floating, Fixed, Inline, Expanding. Note: When choosing Expanding it gives users the option to expand or minimize the Engage Tool.
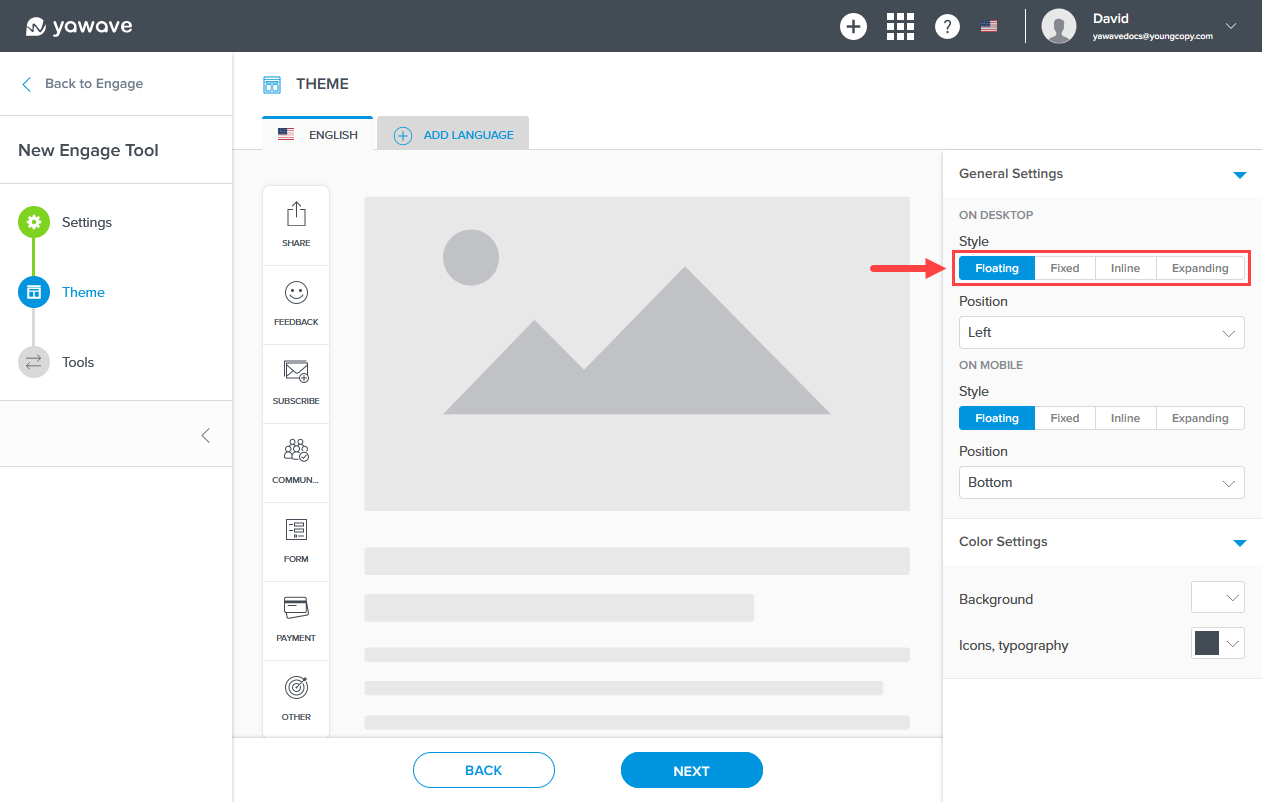
Below is an example of the Entage Tool's style and position. The Engage Tool in the example changes as you modify settings. Try several combinations to see what works best for you. Note: This example applies to all steps in this document.
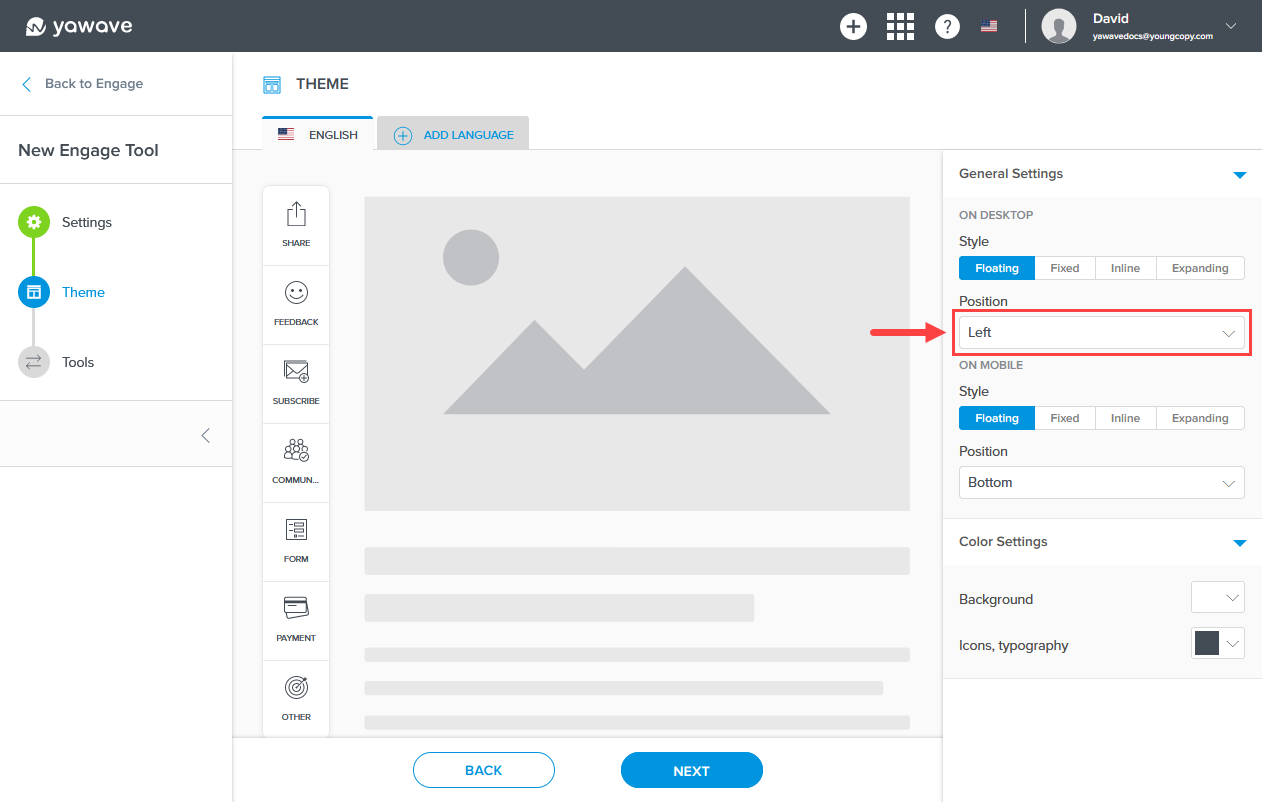
- Under On Desktop select the position you want the Engage Tool to show for users on desktop by clicking a Position option. Your choices include Left, Right, Hide.
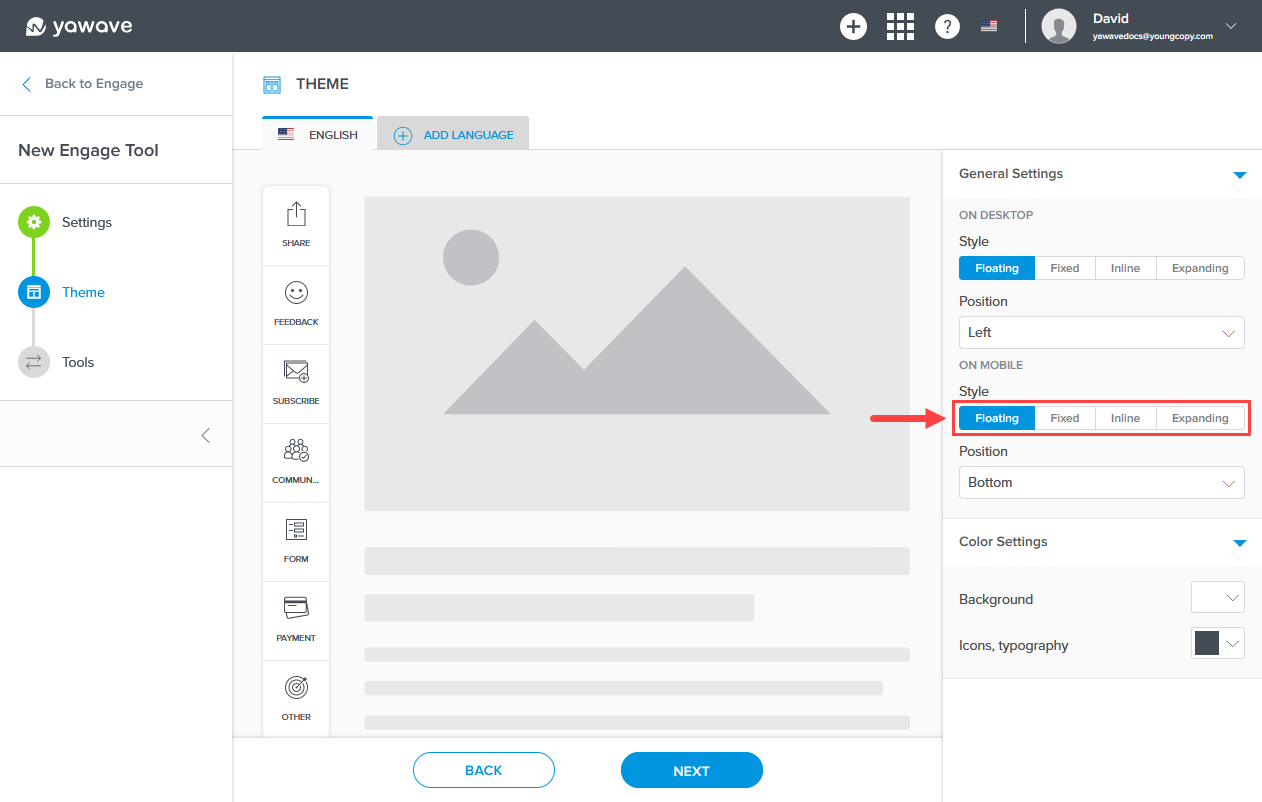
- Under On Mobile select the style you want the Engage Tool to show for users on desktop by clicking a Style option. Your choices include Floating, Fixed, Inline, Expanding. Note: When choosing Expanding it gives users the option to expand or minimize the Engage Tool.
- Under On Mobile select the position you want the Engage Tool to show for users on desktop by clicking a Position option. Your choices include Bottom, Top, Hide.

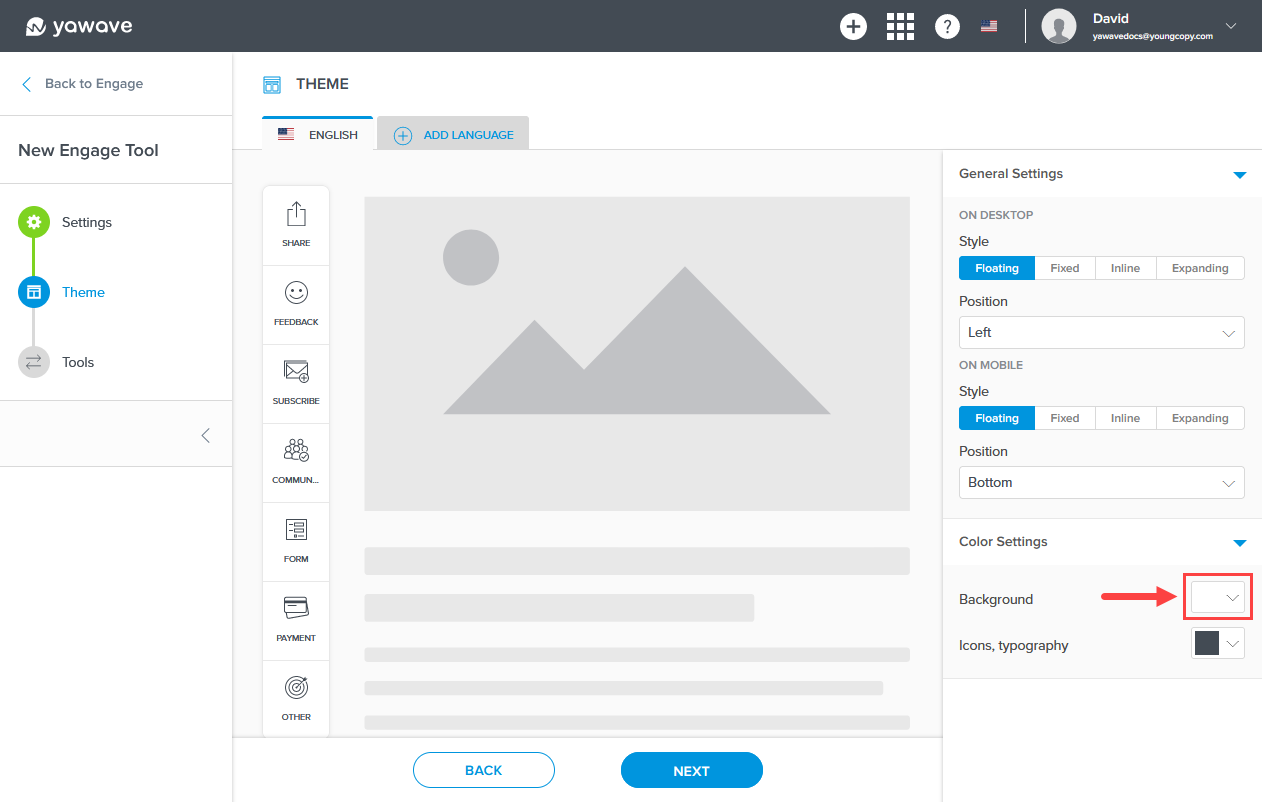
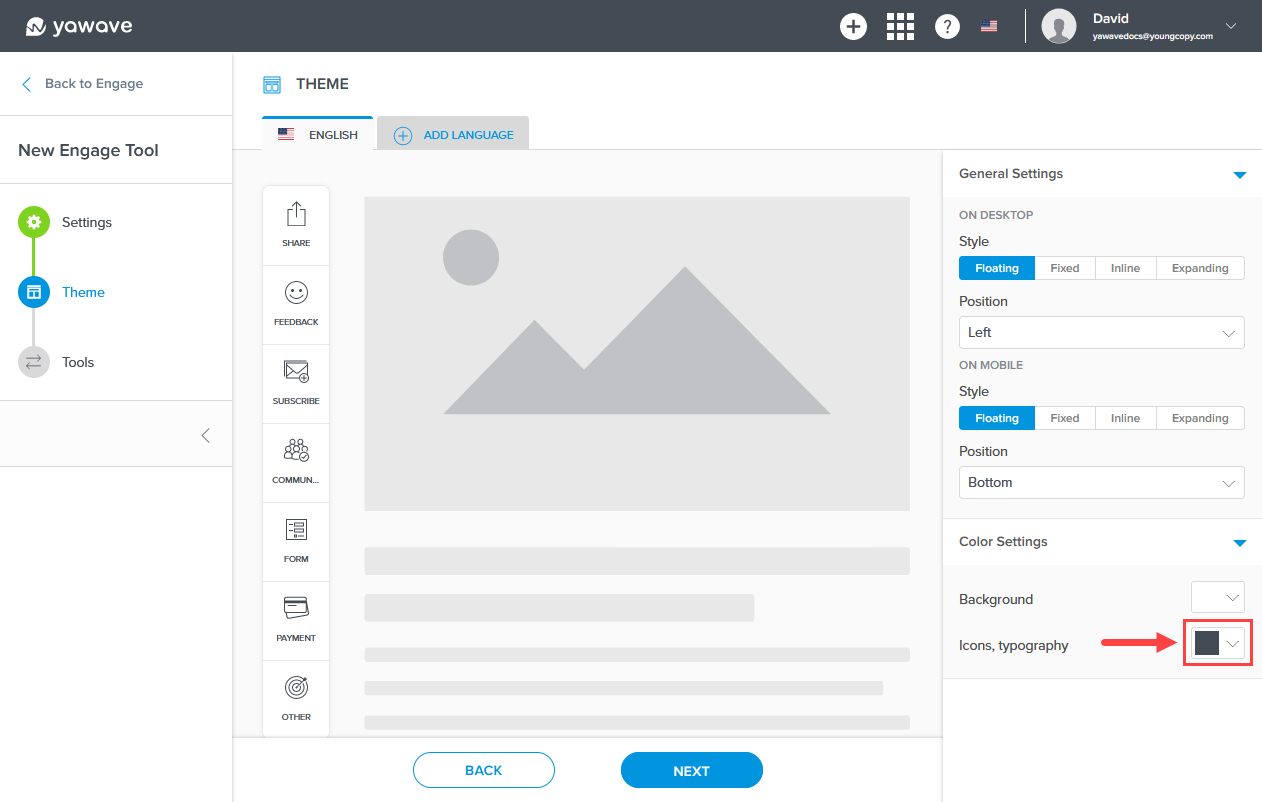
- Under Color Settings select the color you want to use for the Engage Tool background from the Background drop-down menu. Here you can enter a Hex value, RGB value or use the color picker.
- Under Color Settings select the color you want to use for the Engage Tool icons and typography from the Icons, typography drop-down menu. Here you can enter a Hex value, RGB value or use the color picker.
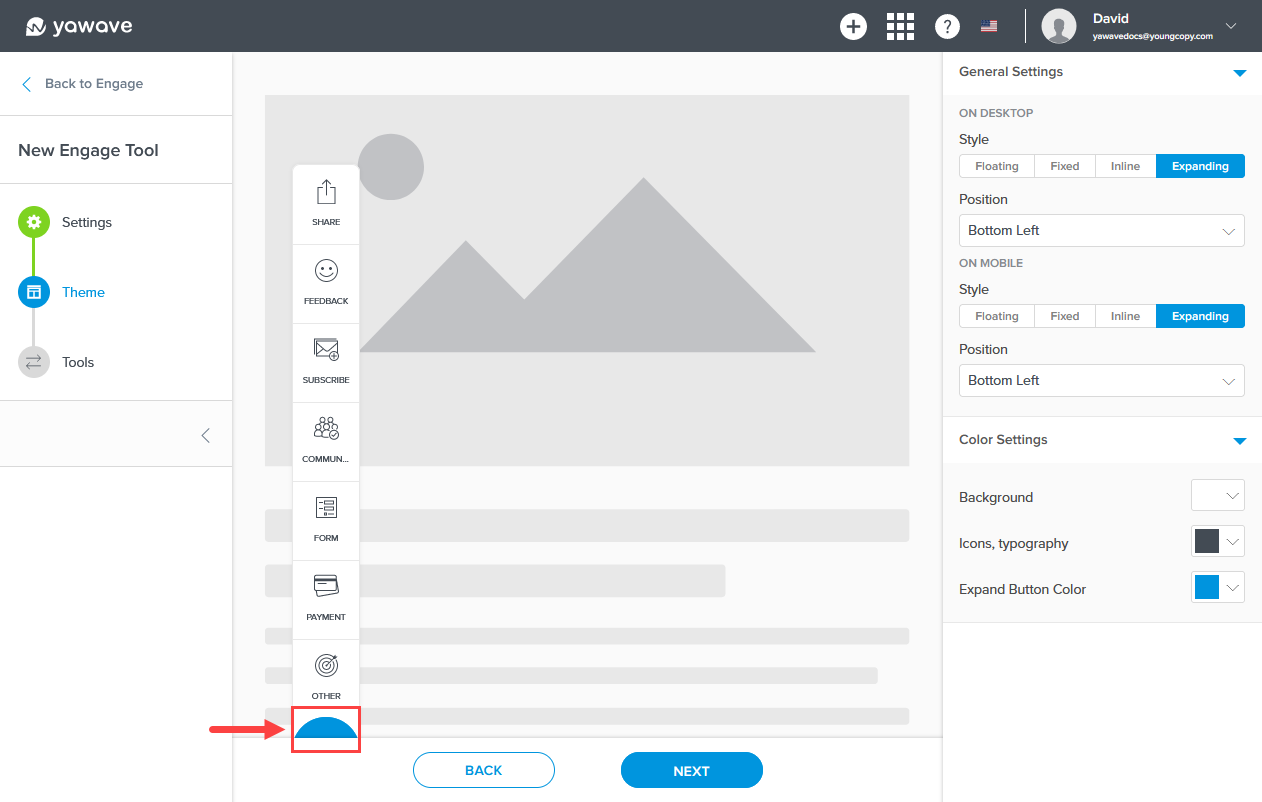
- If you selected Expanding for the Desktop Style or Mobile Style settings, you'll need to configure the Expand Button Color. Here you can enter a Hex value, RGB value or use the color picker.
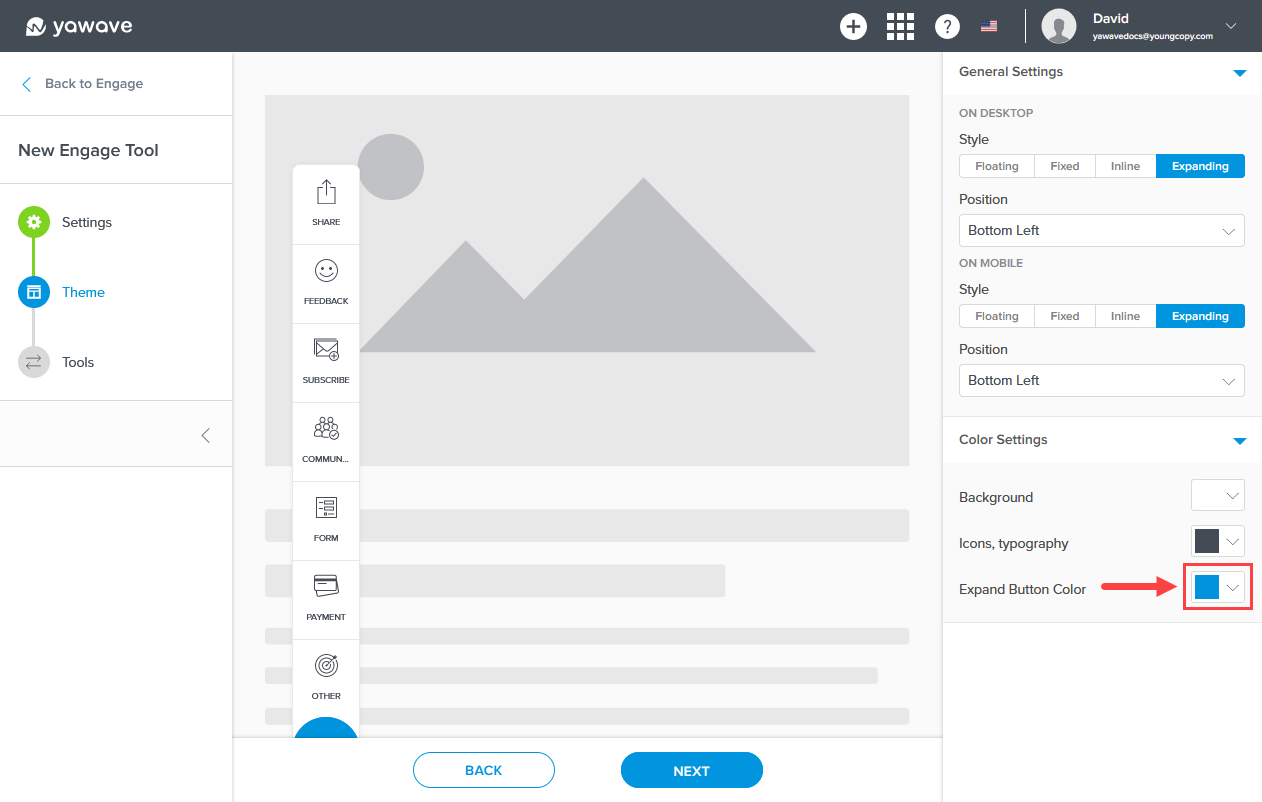
The expand button is highlighted in the image below.
- Click Next.
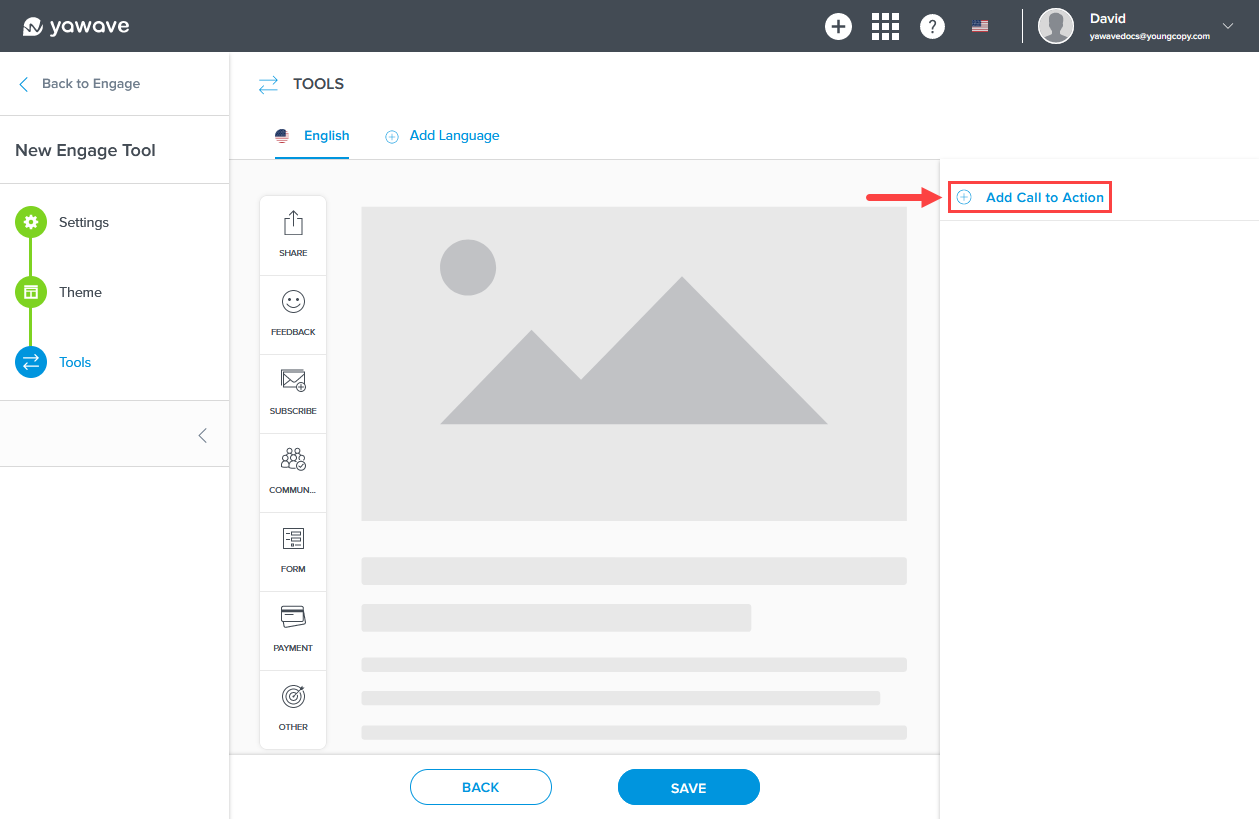
Configure Tools, Icons, Links to include in Engage Tool
- Click Add Call to Action.
- Select the Tool you want to add from the drop-down menu. Your choices include any of the supported yawave Tools. Continue reading for an example on adding a link to your Engage Tool.
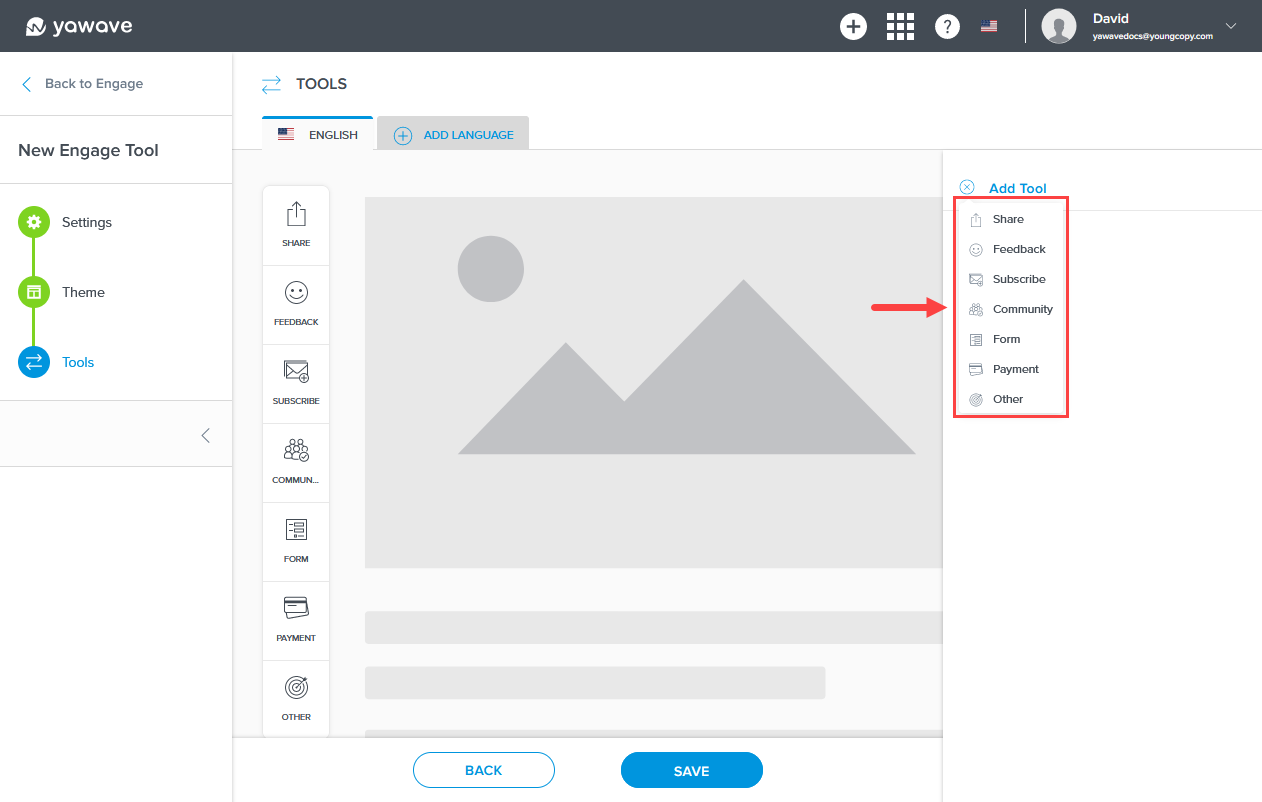
- The Tool name will change based on the Tool you selected in Step 15 above. In our example below we selected Share.
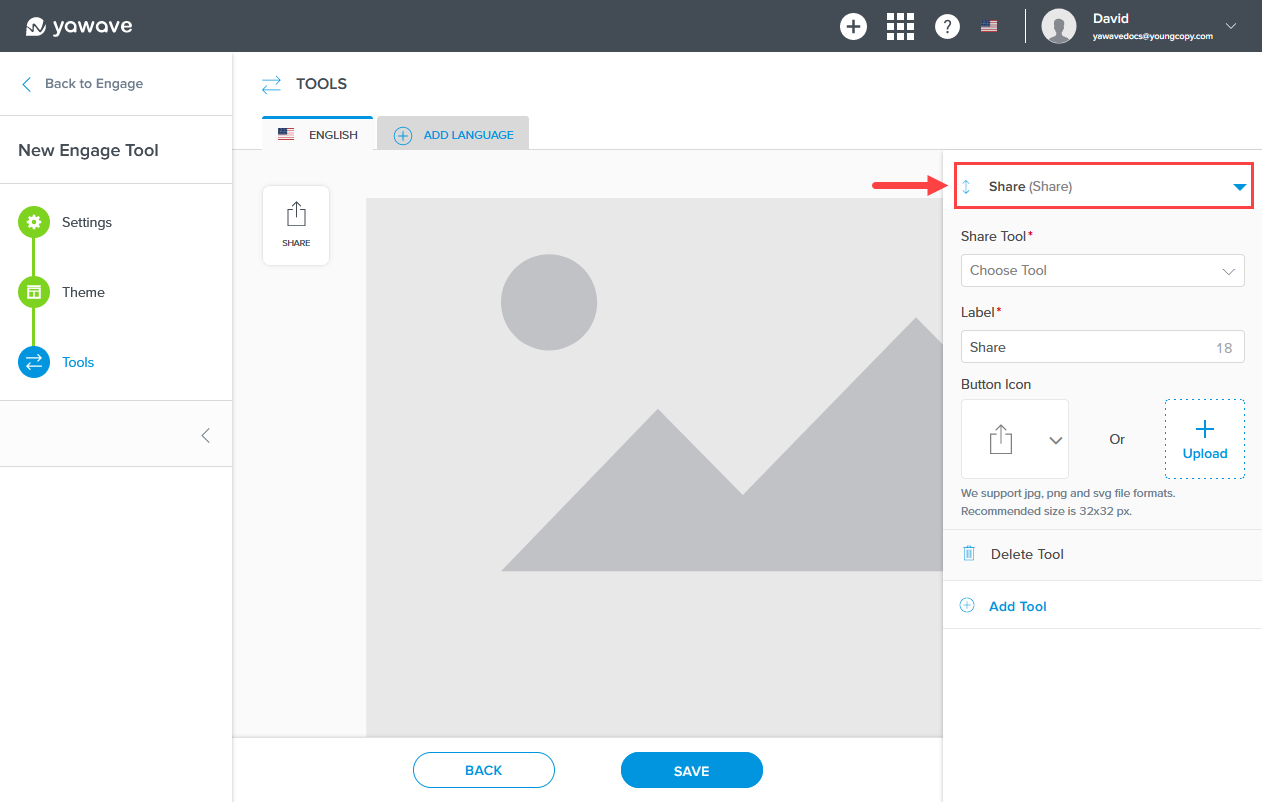
Using our example, select the Share Tool from the Share Tool drop-down menu. If a Tool is not shown in the drop-down menu, you will need to click Save, create one of the supported yawave Tools and then come back to this creen and select the Tool you created.

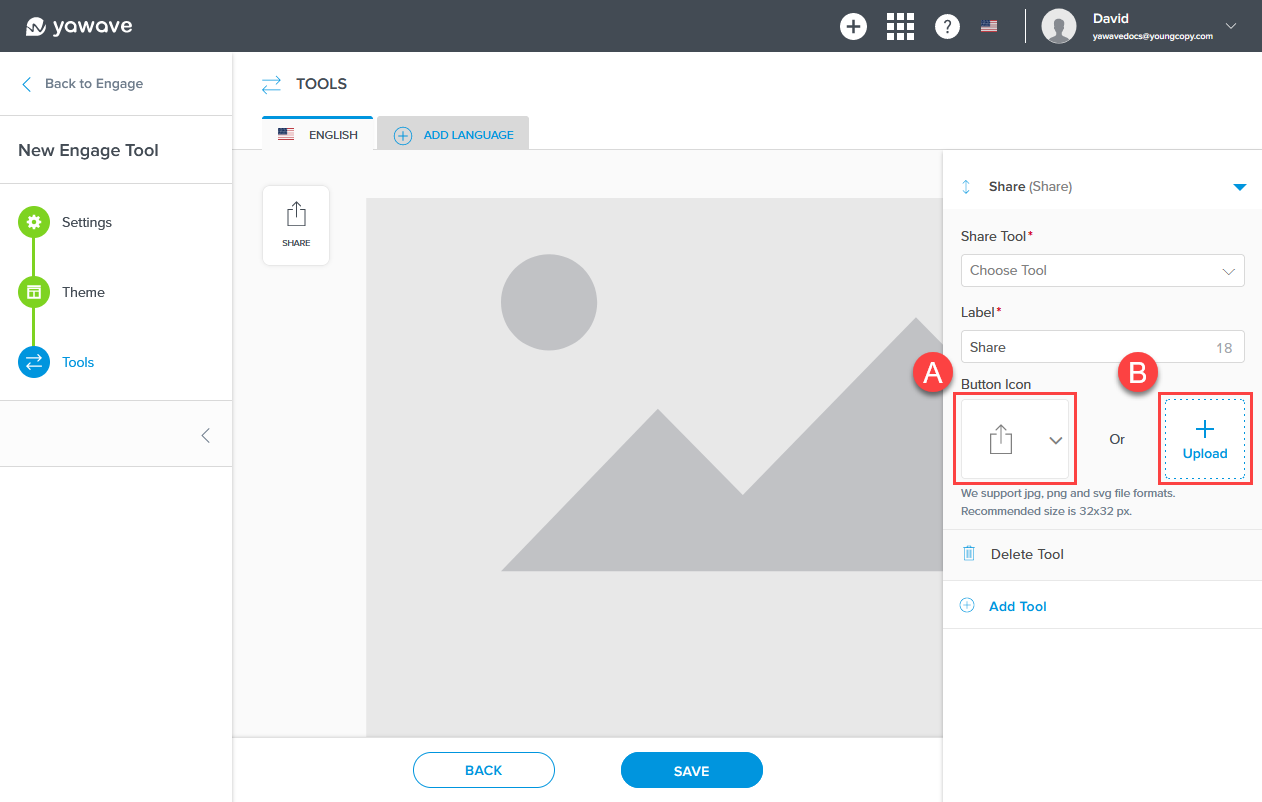
Enter the label name that will be shown under icon for the Share Tool in the Label field.
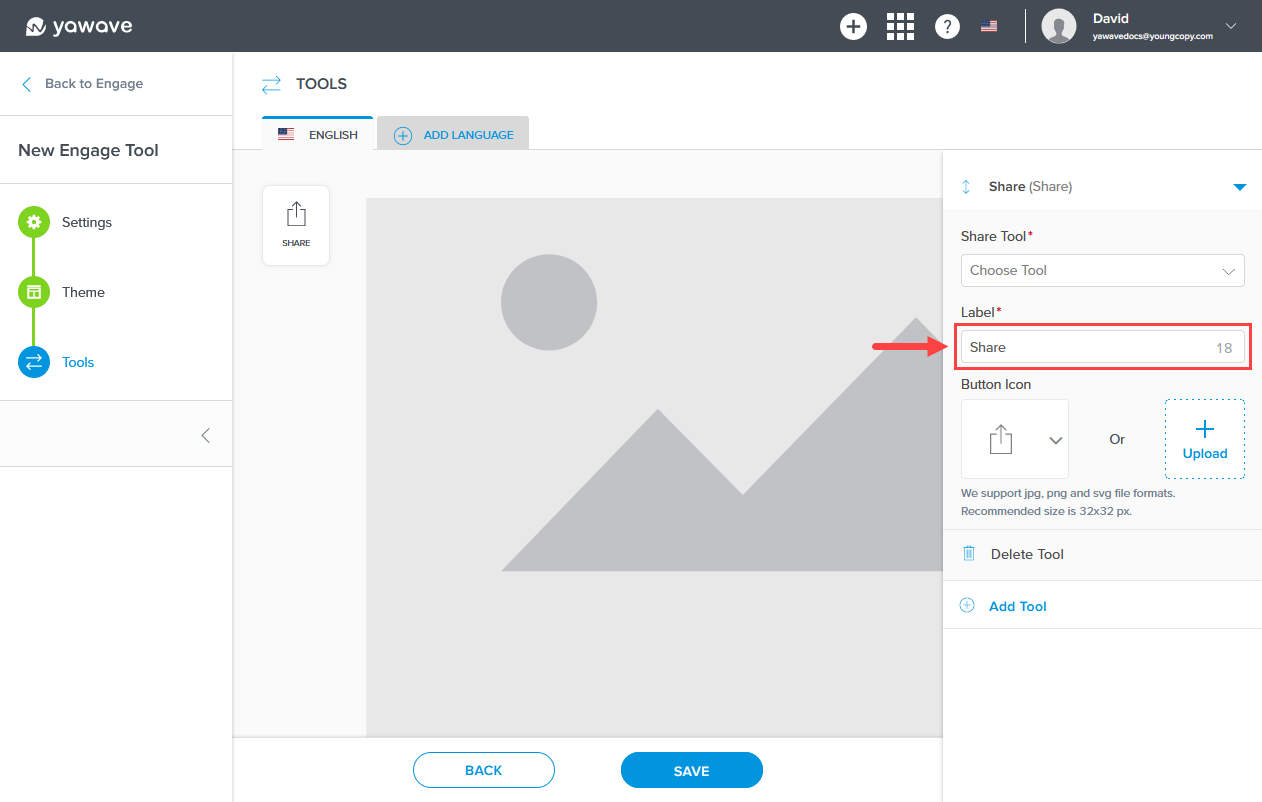
Note: When modifying the label and the icon (icon instructions shown in next step), you'll be able to see the changes in real-time as shown in the following image.
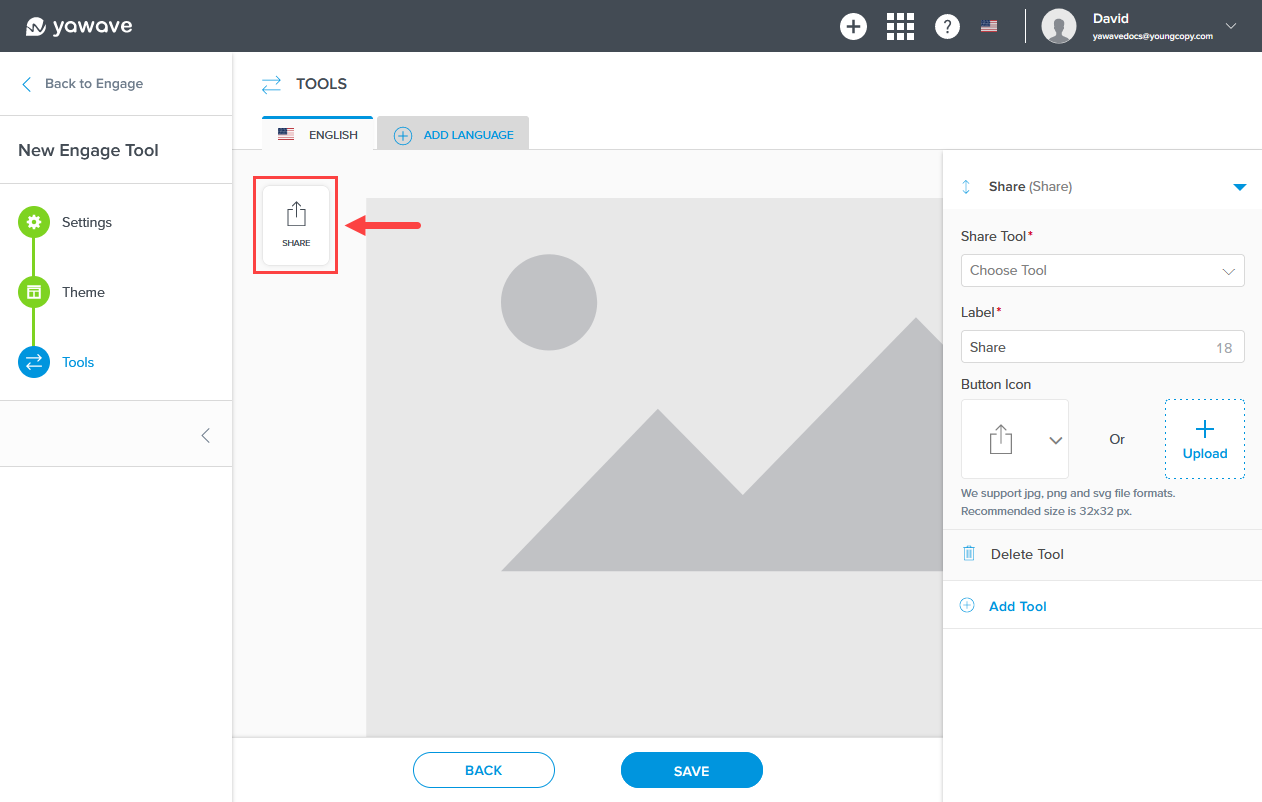
Use the default icon, select a pre-loaded icon from the icon drop-down menu or click Upload to upload a custom icon that you have created.
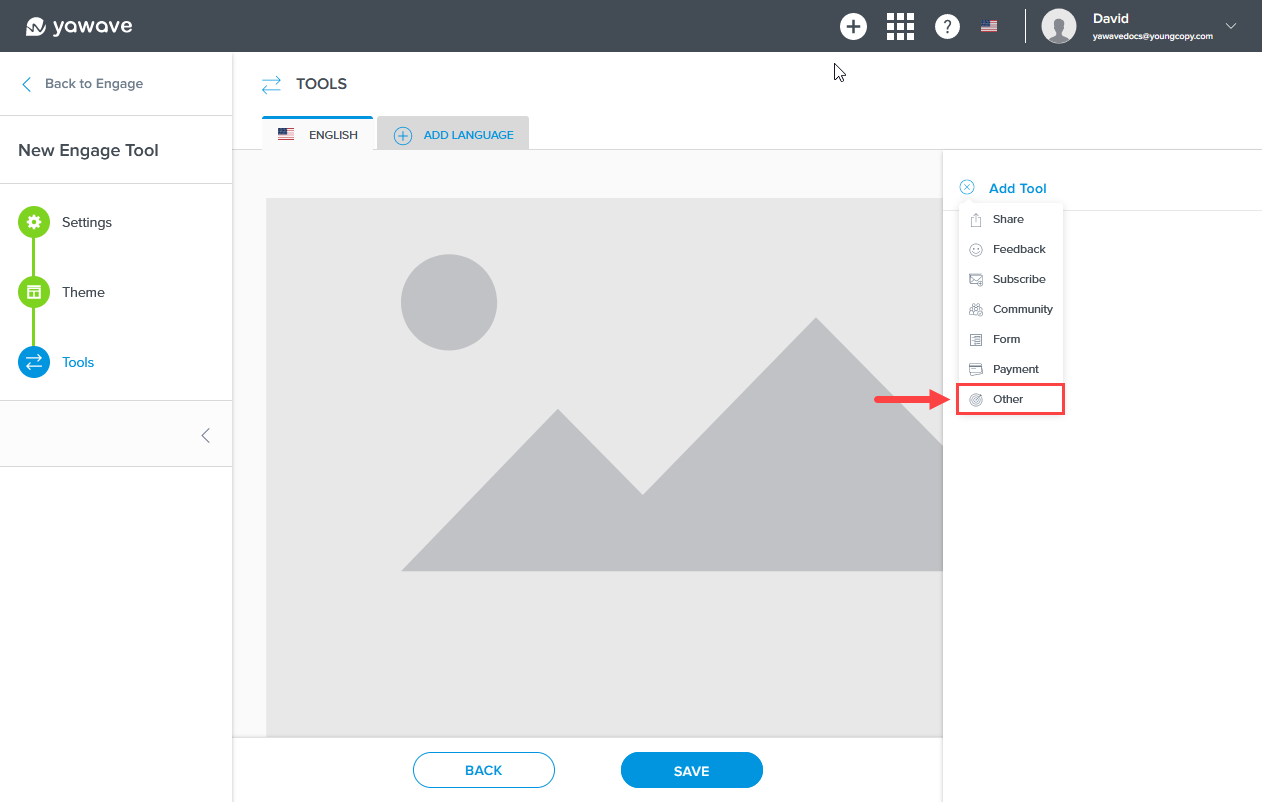
To add a link to your Engage Tool, select Other from the drop-down menu. Note: Click Add Tool as shown in Step 14 above to see the drop-down menu.
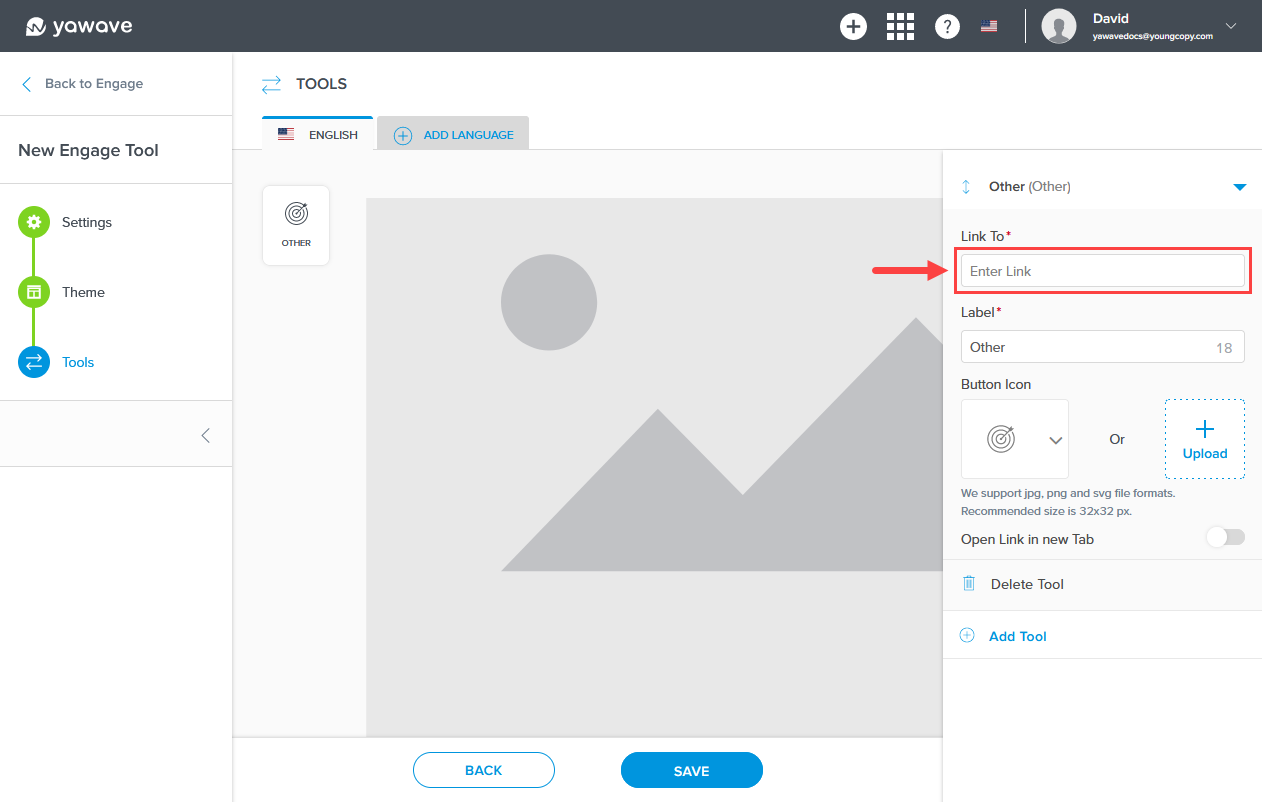
Enter the link to the page you want users to go to when they click the icon in the Link To field.
Enter the label you want to show on the Engage Tool in the Label field.
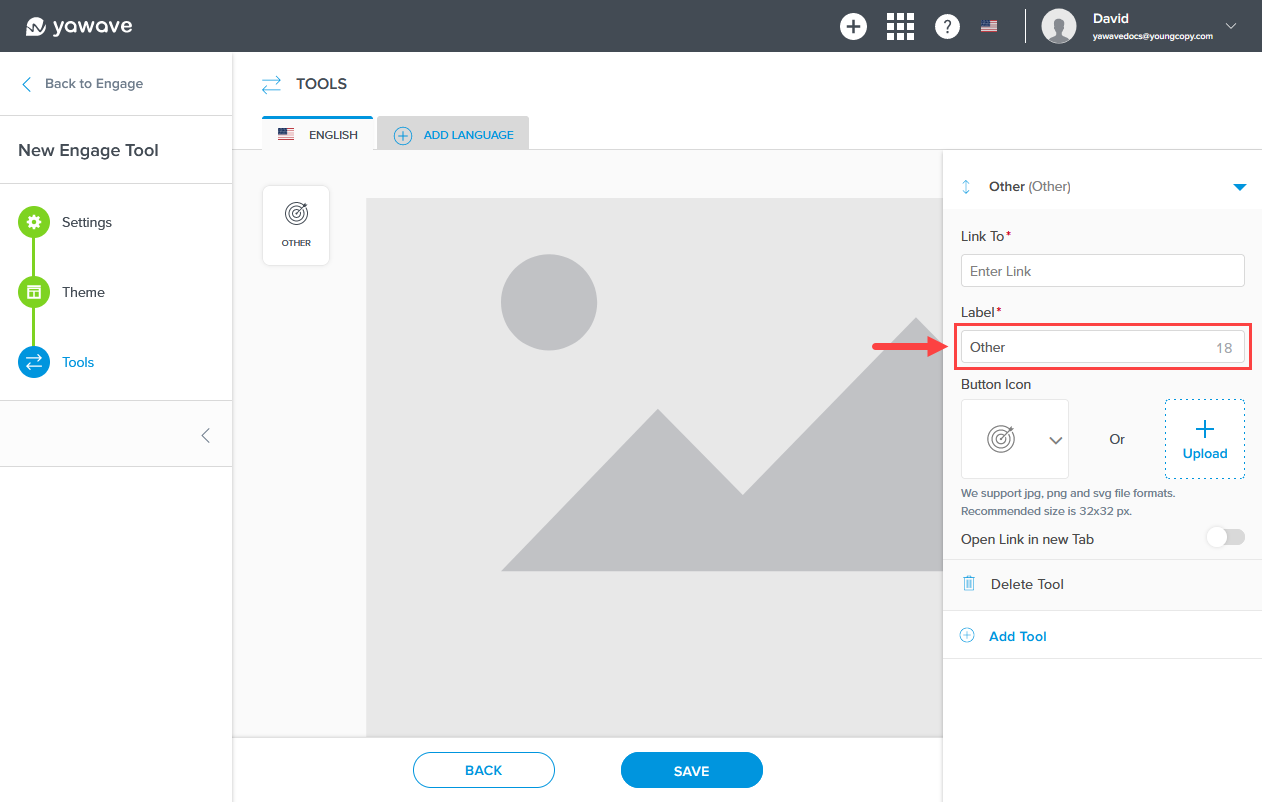
Use the default icon, select a pre-loaded icon from the icon drop-down menu or click Upload to upload a custom icon that you have created.
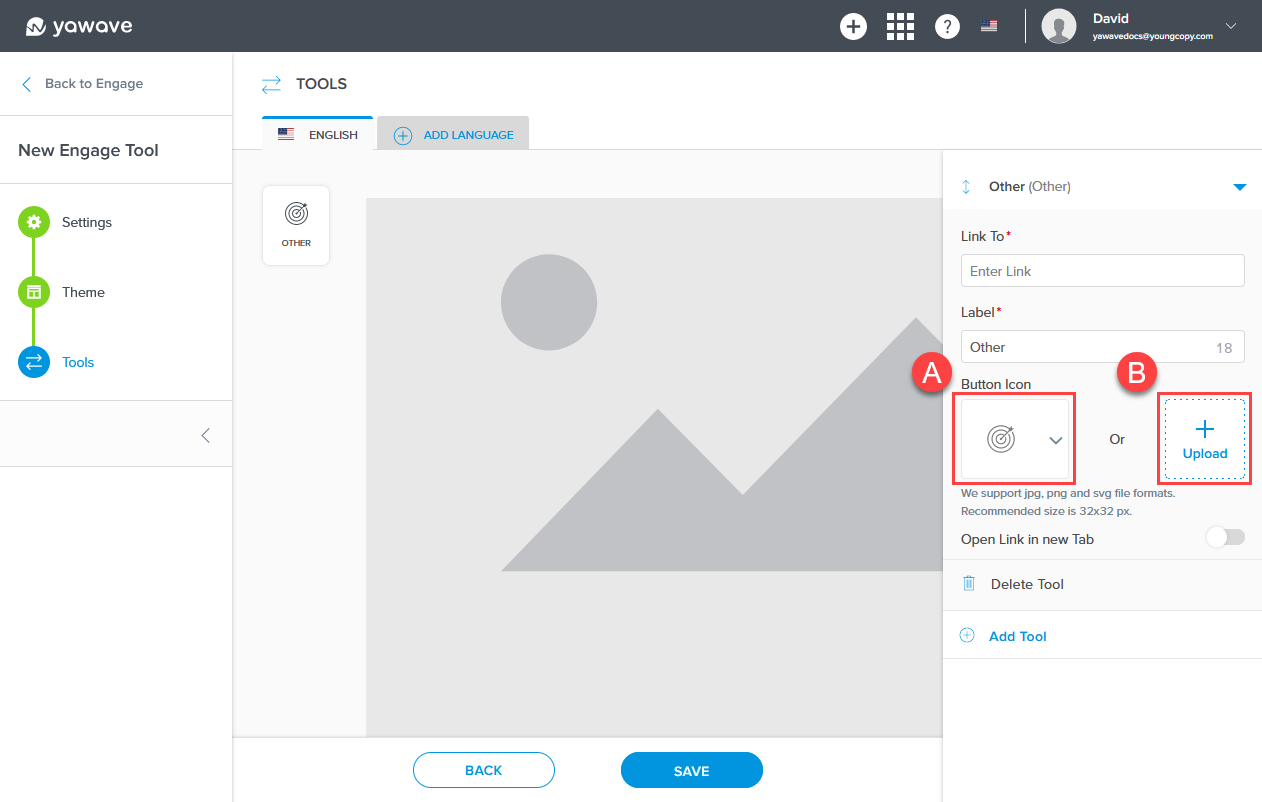
If you want the icon/link to open in a new tab in the user's browser, click the Open Link in new Tab toggle once to enable. Note: This only works with the Other Tool option (link/URL).

Repeat Steps 14, 15 and 16 until you have added all the Tools, Icons and Links you want to use for your new Engage Tool.
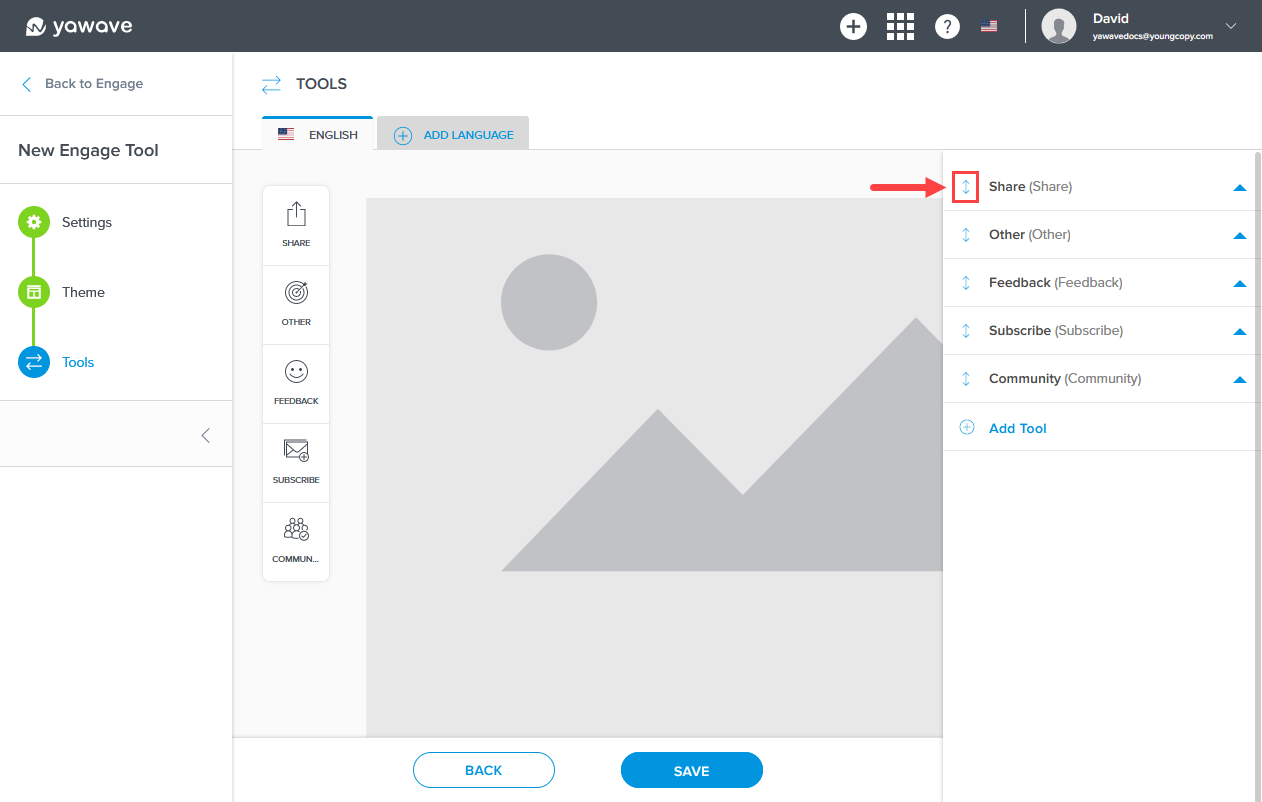
If you have added more than one Tool, you can click and drag the double arrow to the left of the Tool to move it up or down. Note: When you move a Tool up or down it changes the location on the Engage Tool.
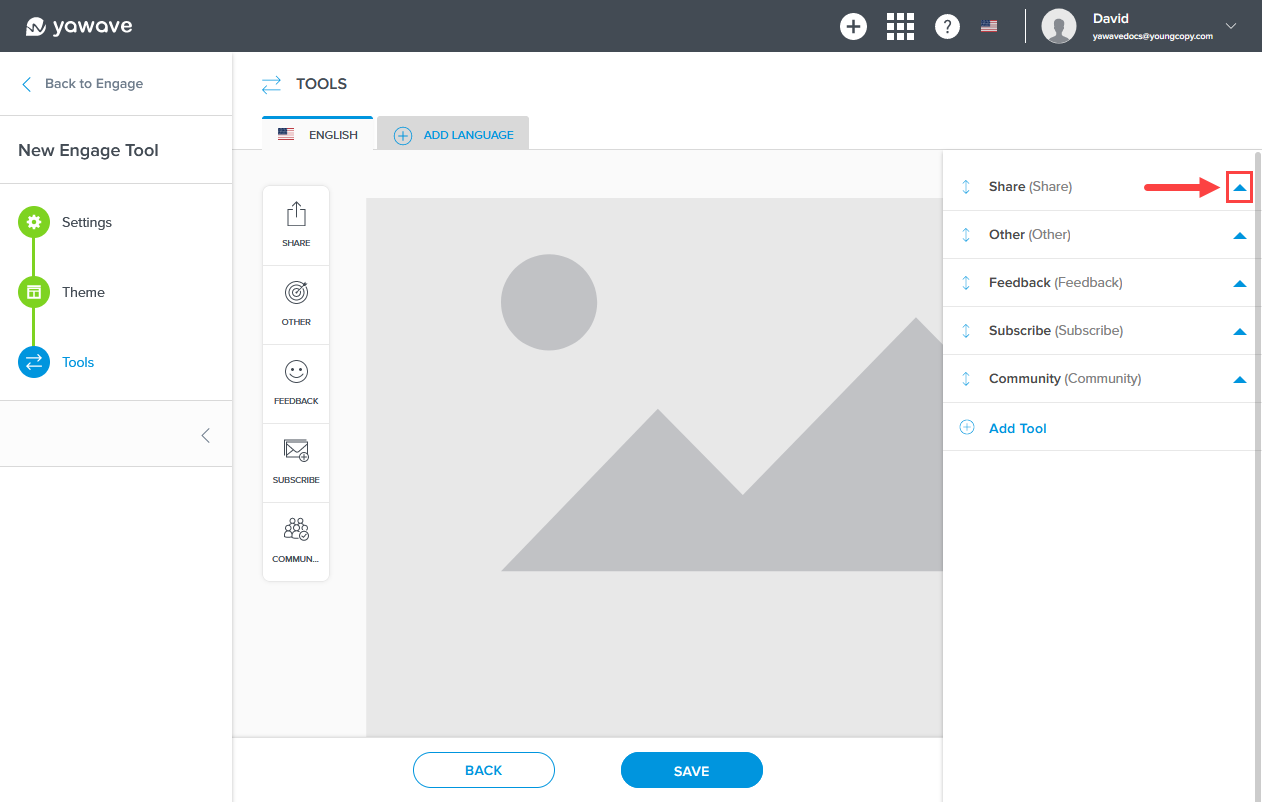
To see settings for any of the Tools you've added, click the settings arrow.
- Click Save.
Embed an Engage Tool on Your Website
Before you can embed an Engage Tool you'll need to create a connection. Follow the instructions below:
- Click Administrate/Integrates/Connections.
- Click Add Connection.
- Click one of the following icons and follow the onscreen instructions:
- Embed and API (works with any website regardless of platform)
- Yawave WP Plugin (works with WordPress)
- Yawave Typo3 Extension (works with Typo3)
- Yawave Joomla Plugin (works with Joomla)
Before you can embed an Engage Tool you'll need create a Publication. Connecting your Engage Tool to a Publication allows you to track statistics and KPIs.
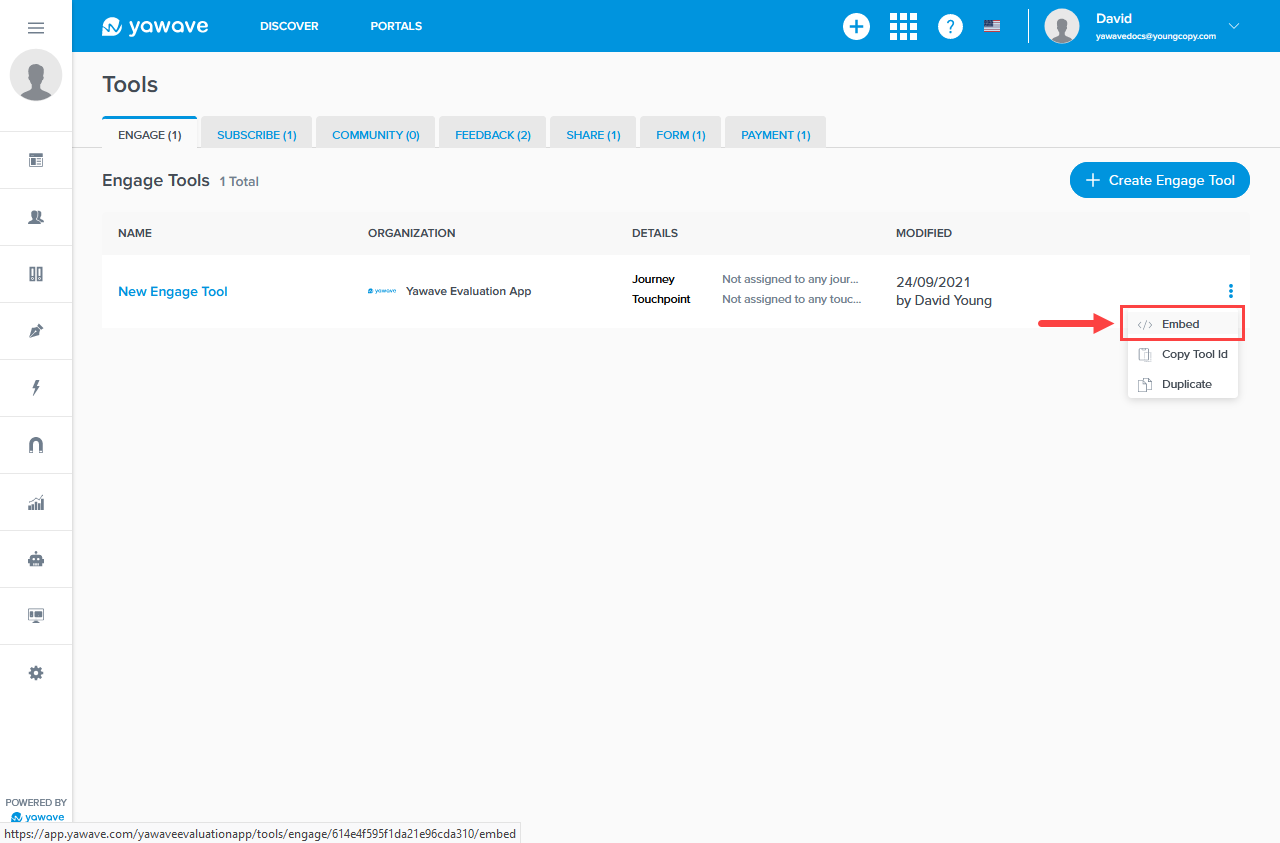
- Click Tools/Engage Tools.
- Locate the Engage Tool you want to embed. Click the three dot menu to the right, located on the same row as your Engage Tool.
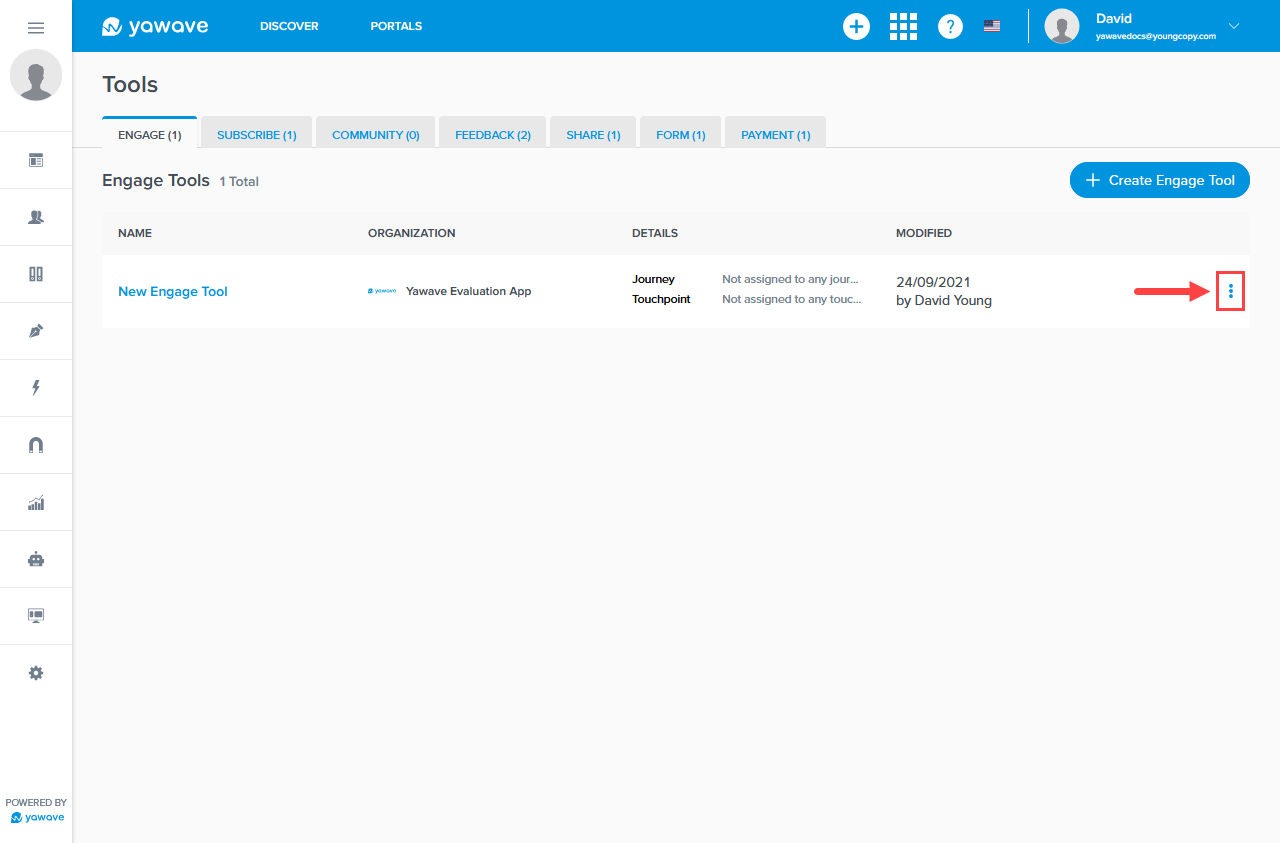
- Select Embed.
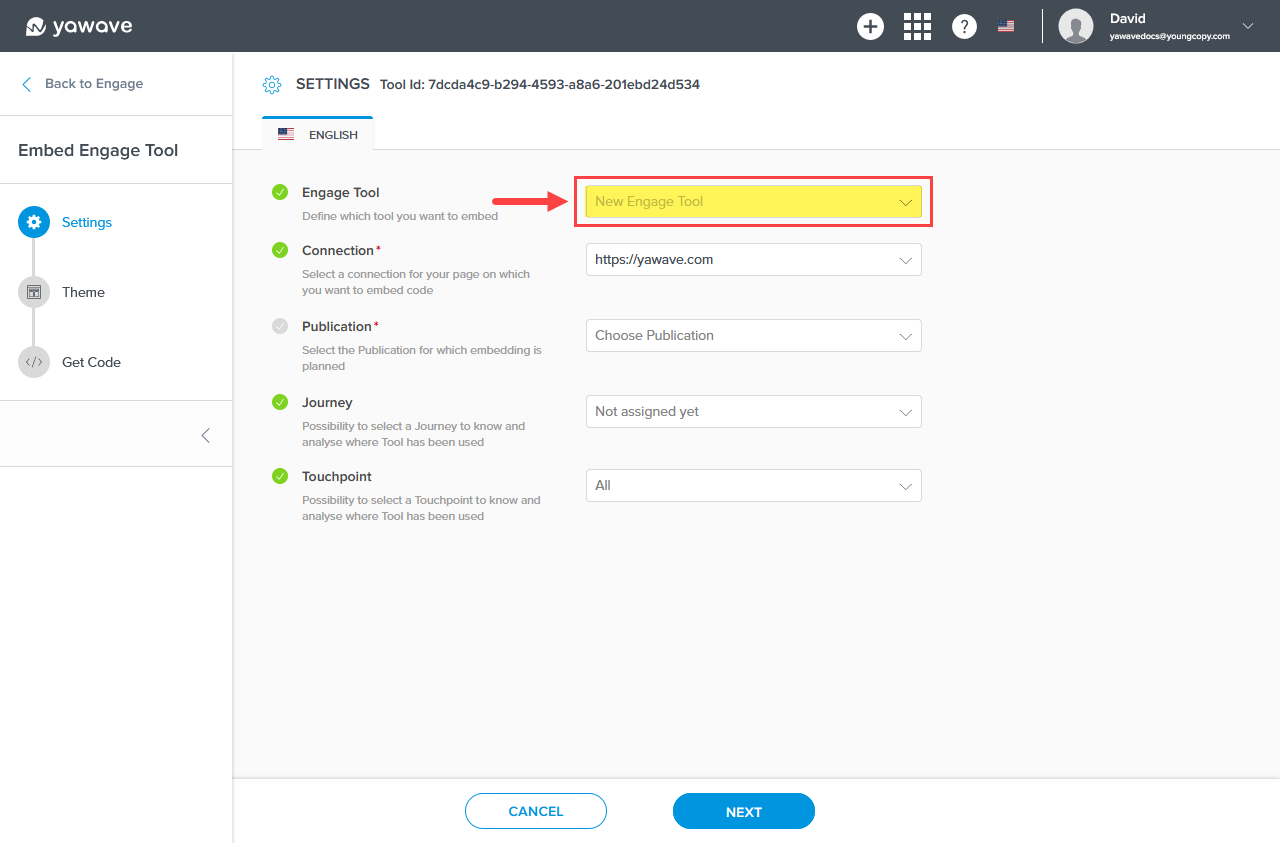
- By default the Engage Tool you selected in Steps 2-3 above will already be selected as the Engage Tool drop-down menu. The only way to change the Engage Tool is to select another Engage Tool using Steps 1-3 above.
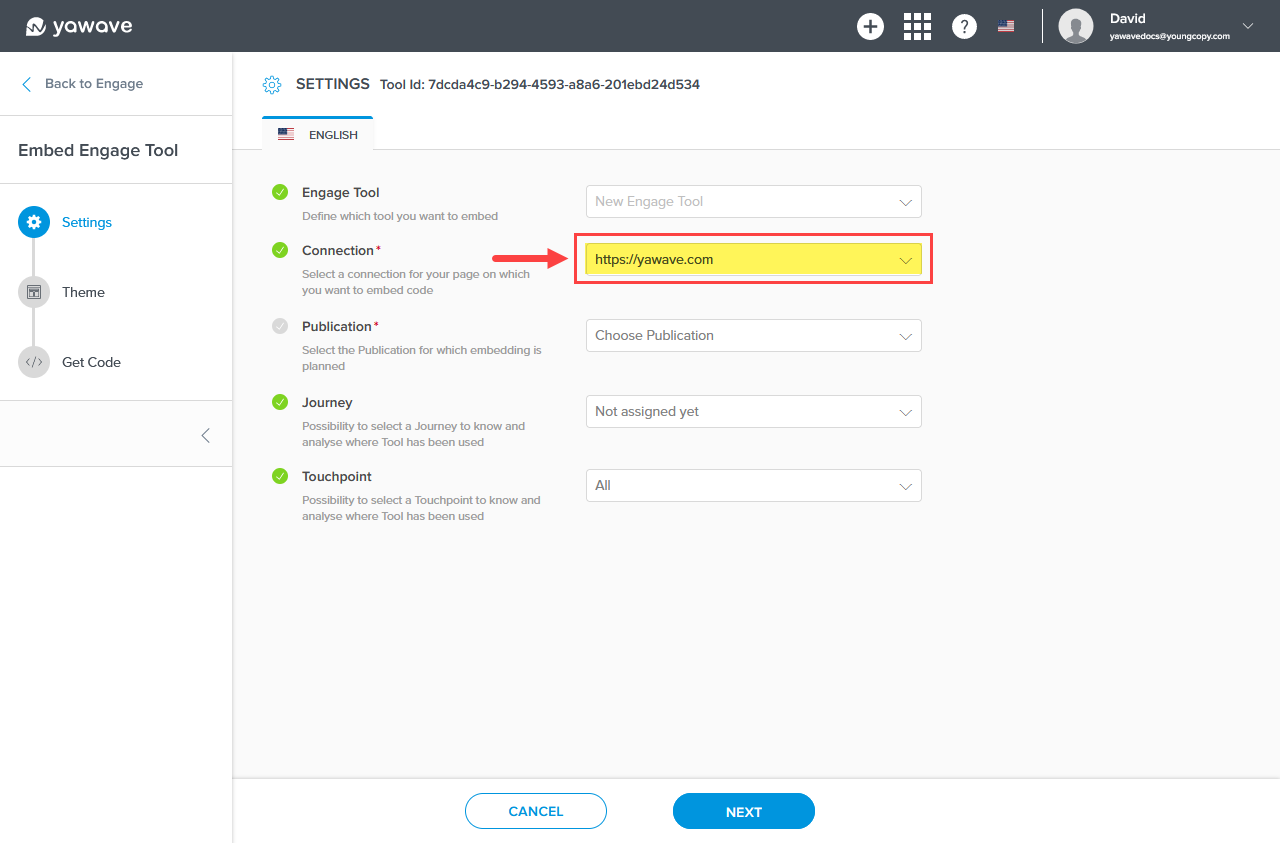
- Select the connection you want to use for this Engage Tool from the Connection drop-down menu. If a Connection is not showing, follow the Create a Connection First instructions above.
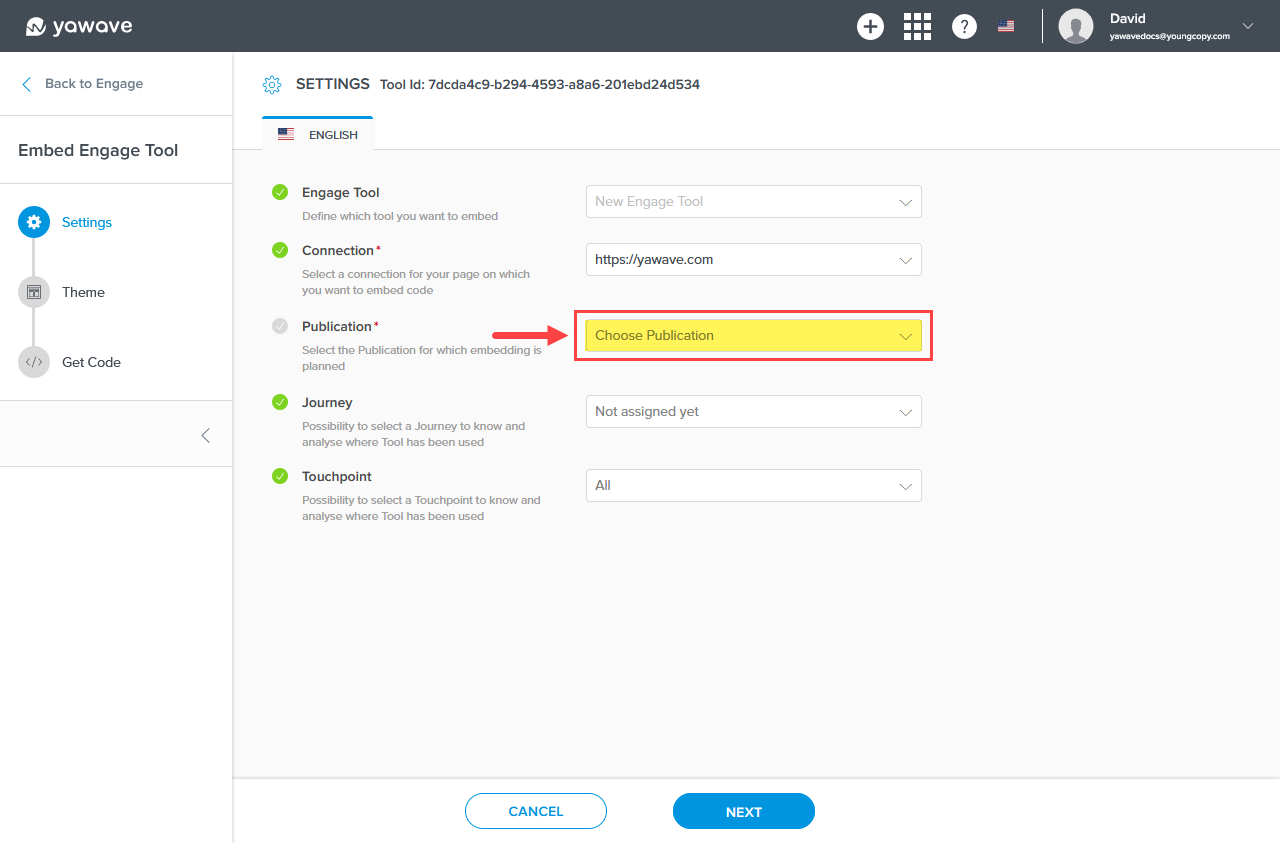
- Select the Publication you want to use for this Engage Tool from the Publication drop-down menu. If a Publication is not showing, follow the Create a Publication First instructions above.
-
The Journey and Touchpoint settings are optional and require more advanced understanding of the Yawave product. If you are already familiar with these settings and how they work, complete the following, otherwise continue to Step 8.
- Select a Journey from the drop-down menu or select Add Journey to create a new one.
- Select Add Touchpoint from the drop-down menu.
-
Click Next.
-
You'll see the Theme settings again. What you adjust here will be specific to the embed code you create next. Make any adjustments now or leave as default. Note: You can also make adjustments at the code level.
-
Click Next.
-
Follow the instructions to copy and embed the Yawave generated code based on the configuration settings you chose in the steps above. Alternatively, we provide more detail below:
- For Step 1 in the onscreen instructions, click Copy Embed Code (a) and place the code in the head part of the website or application where you are embedding your Portal.
- Step 2a and Step 2b in the onscreen instructions give you two options. Click Copy Embed Code (b) if you want to use the settings you configured above or click Copy Embed Code (c) if you want to override what you configured above. Step 2b gives you more control. For example, you can manually change any of the embed code to the configuration settings you want. Place the code from Step 2a or Step 2b in the body of the website or application where you are embedding your Engage Tool.
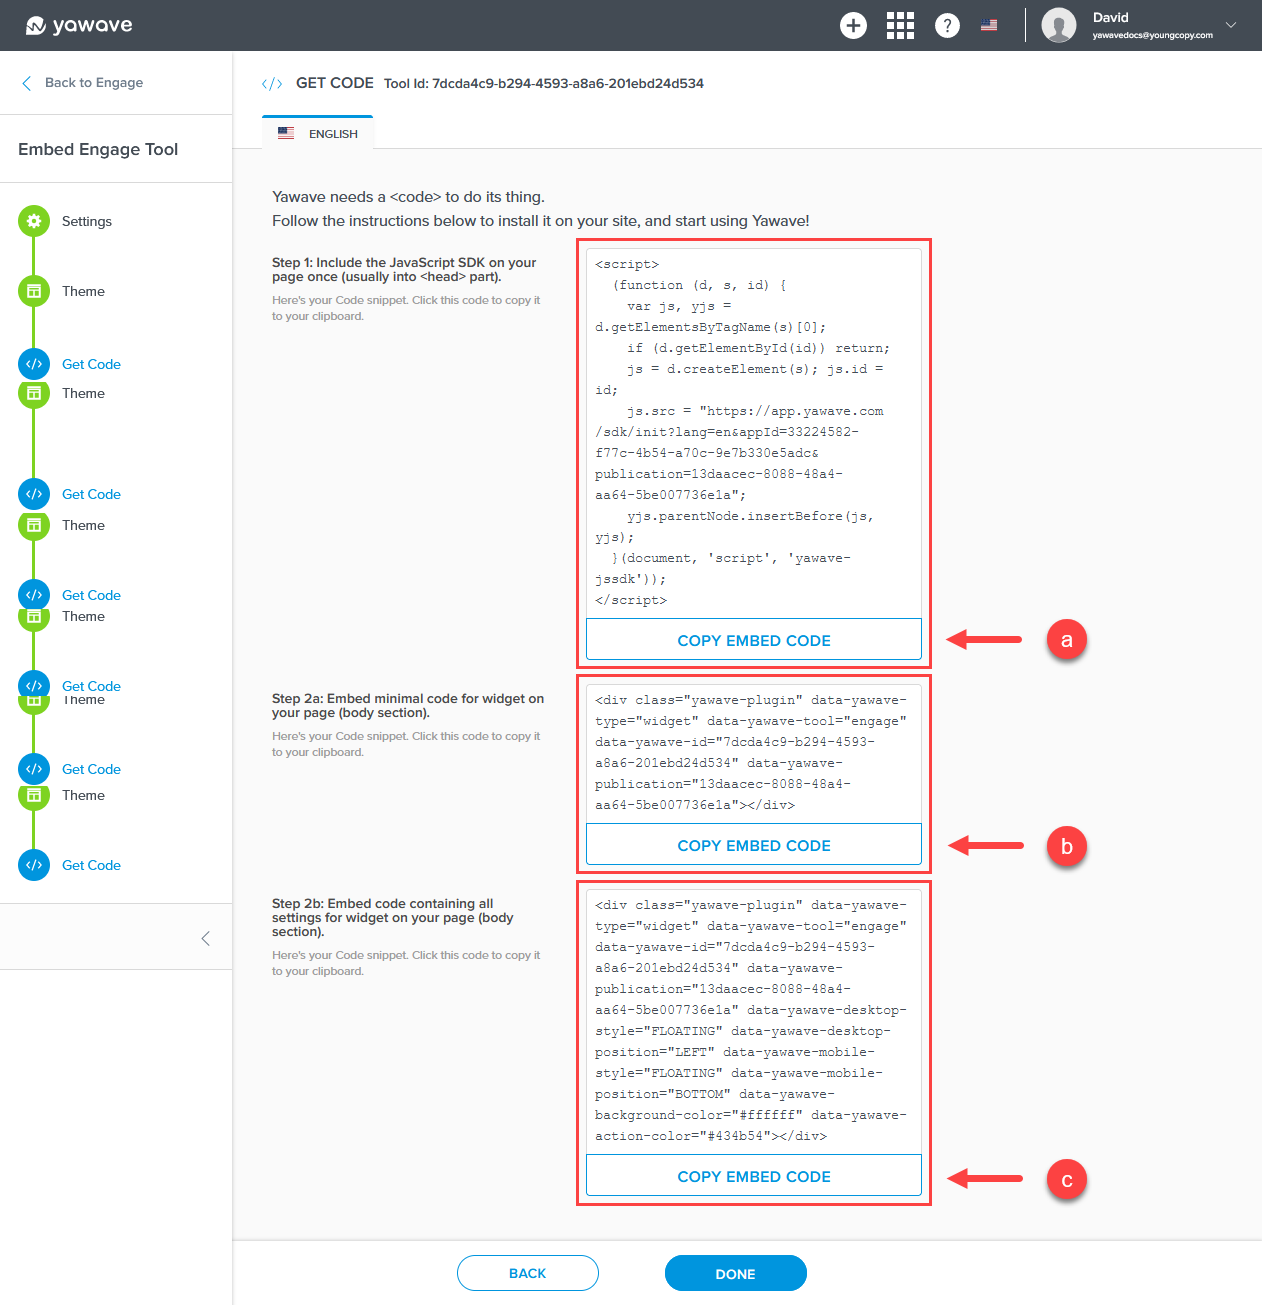
- When completed, click Done.
While we recommend you embed the Engage Tool code in your website using the steps above, you can enable the Engage Tool to show in a Publication. To do this, follow these steps:
a. Click Publish/Publications.
b. Locate the Publication you selected in Step 6 above, click the three dot menu in the top-right corner of the Publication, then select Edit.
c. Click Next.
d. Click Tools.
e. Click the Engage Tool toggle once to enable.
f. Select the Engage Tool you created above from the Choose Engage Tool drop-down menu.
g. Click Next.
h. Click Save.
i. We recommend you test how the Publication looks with the Engage Tool on a responsive screen. Here are the instructions for Firefox and Chrome.
Note: If you enable the Engage Tool in a Publication, we recommend the Tools you choose to appear in the Publication be different than the Tools you choose to appear in the Engage Tool, otherwise it creates duplication.