Learn how to add and manage Dimensions below.
Dimensions are used when you want to filter and/or add specific information to a Contact. A Dimension can be any information (Text, Date, Number, Values) you want to include. When you create a Dimension, it will appear in the Dimensions section when you Add a Contact/Subscriber.
-
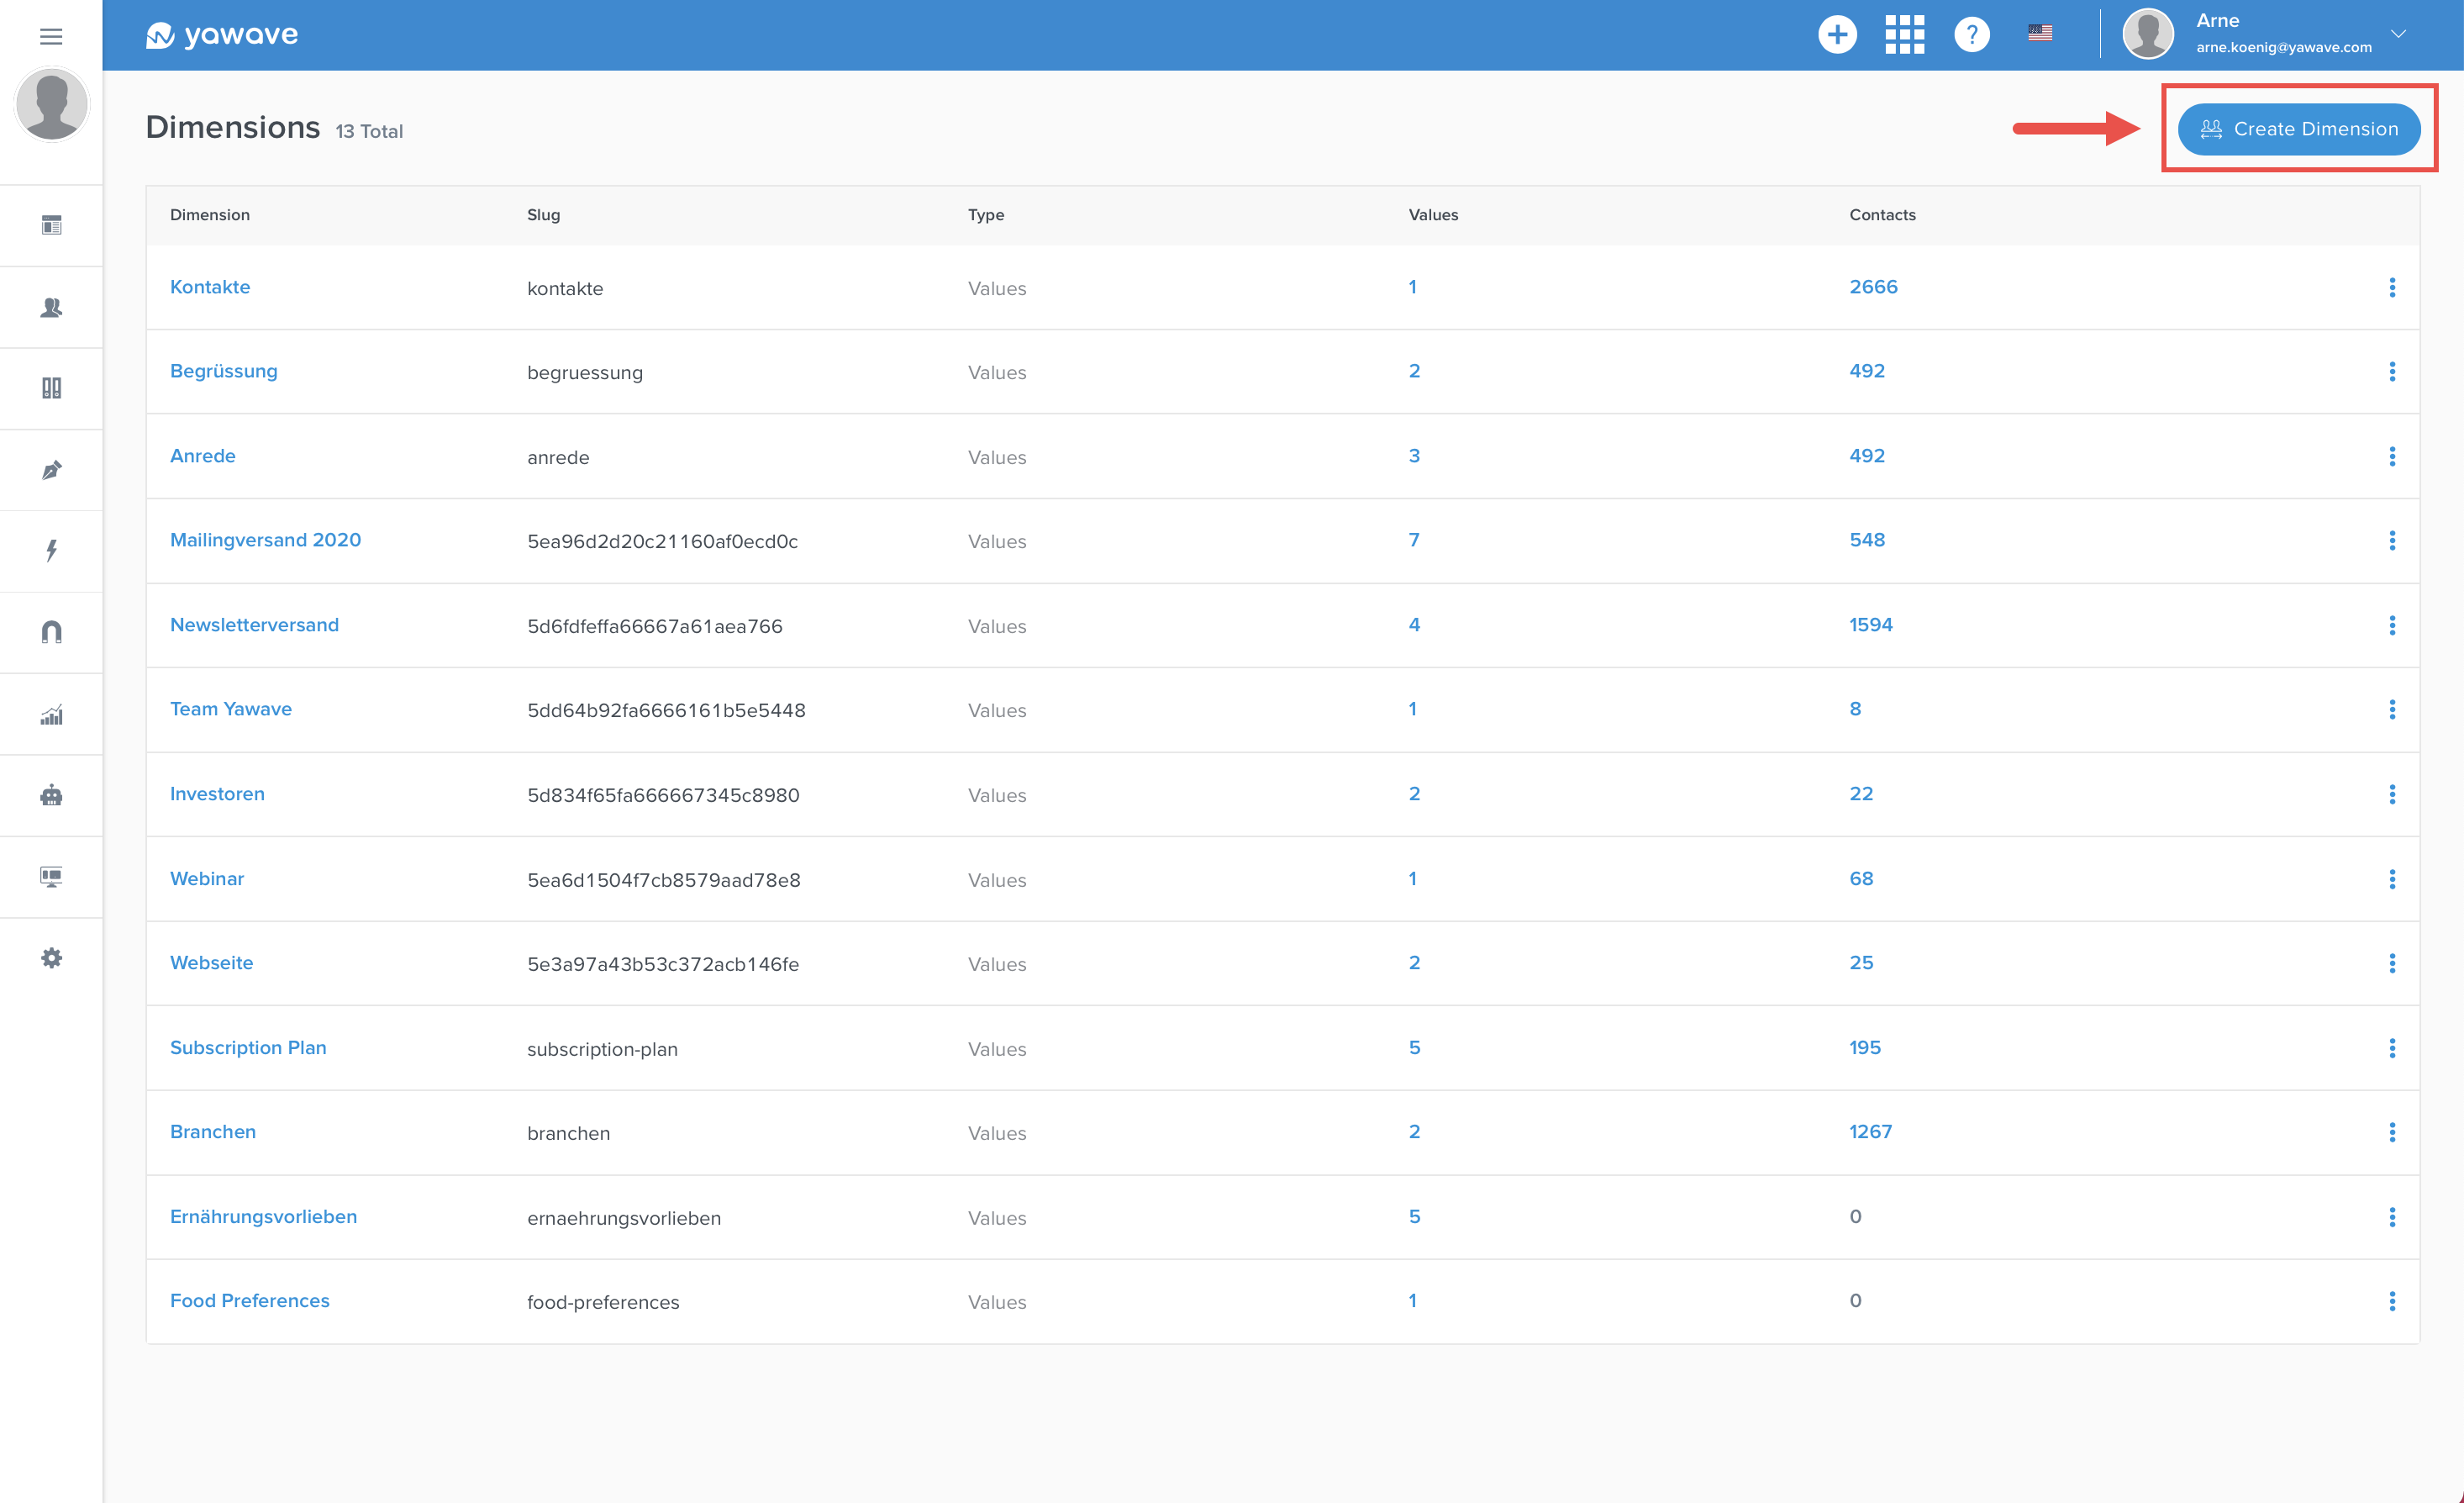
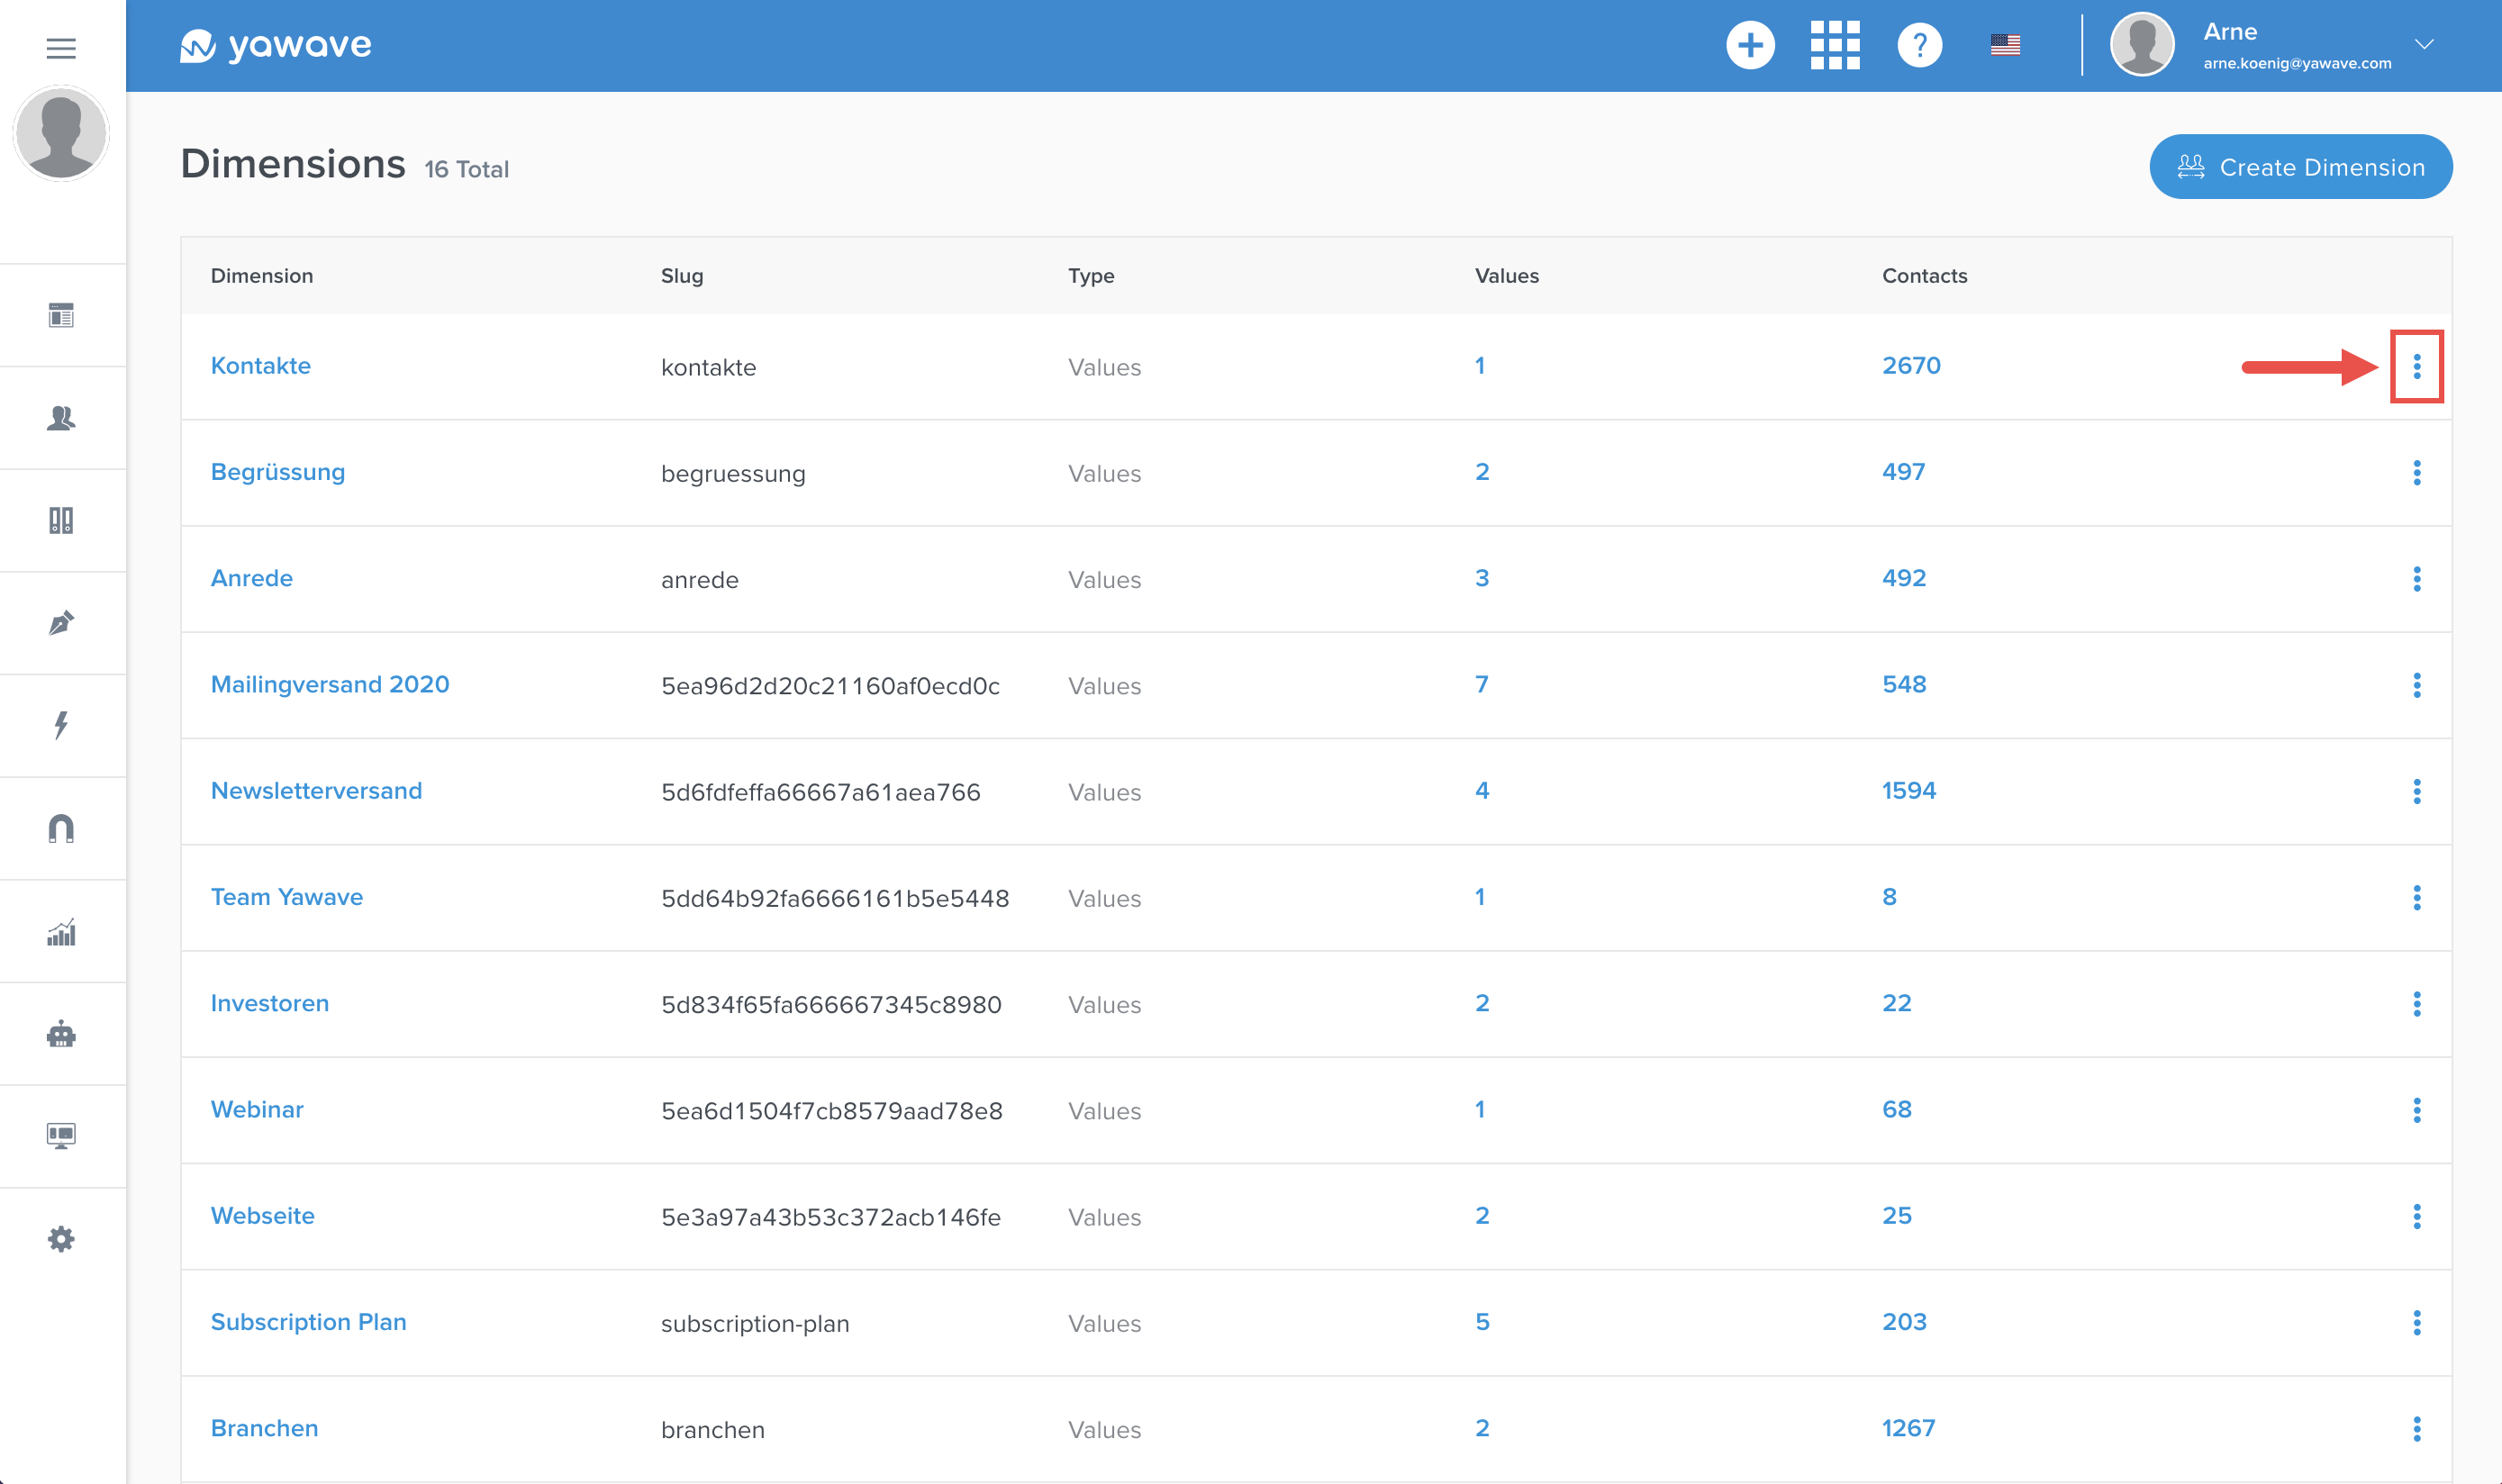
Click Contacts/Dimensions.
-
Click Create Dimension.
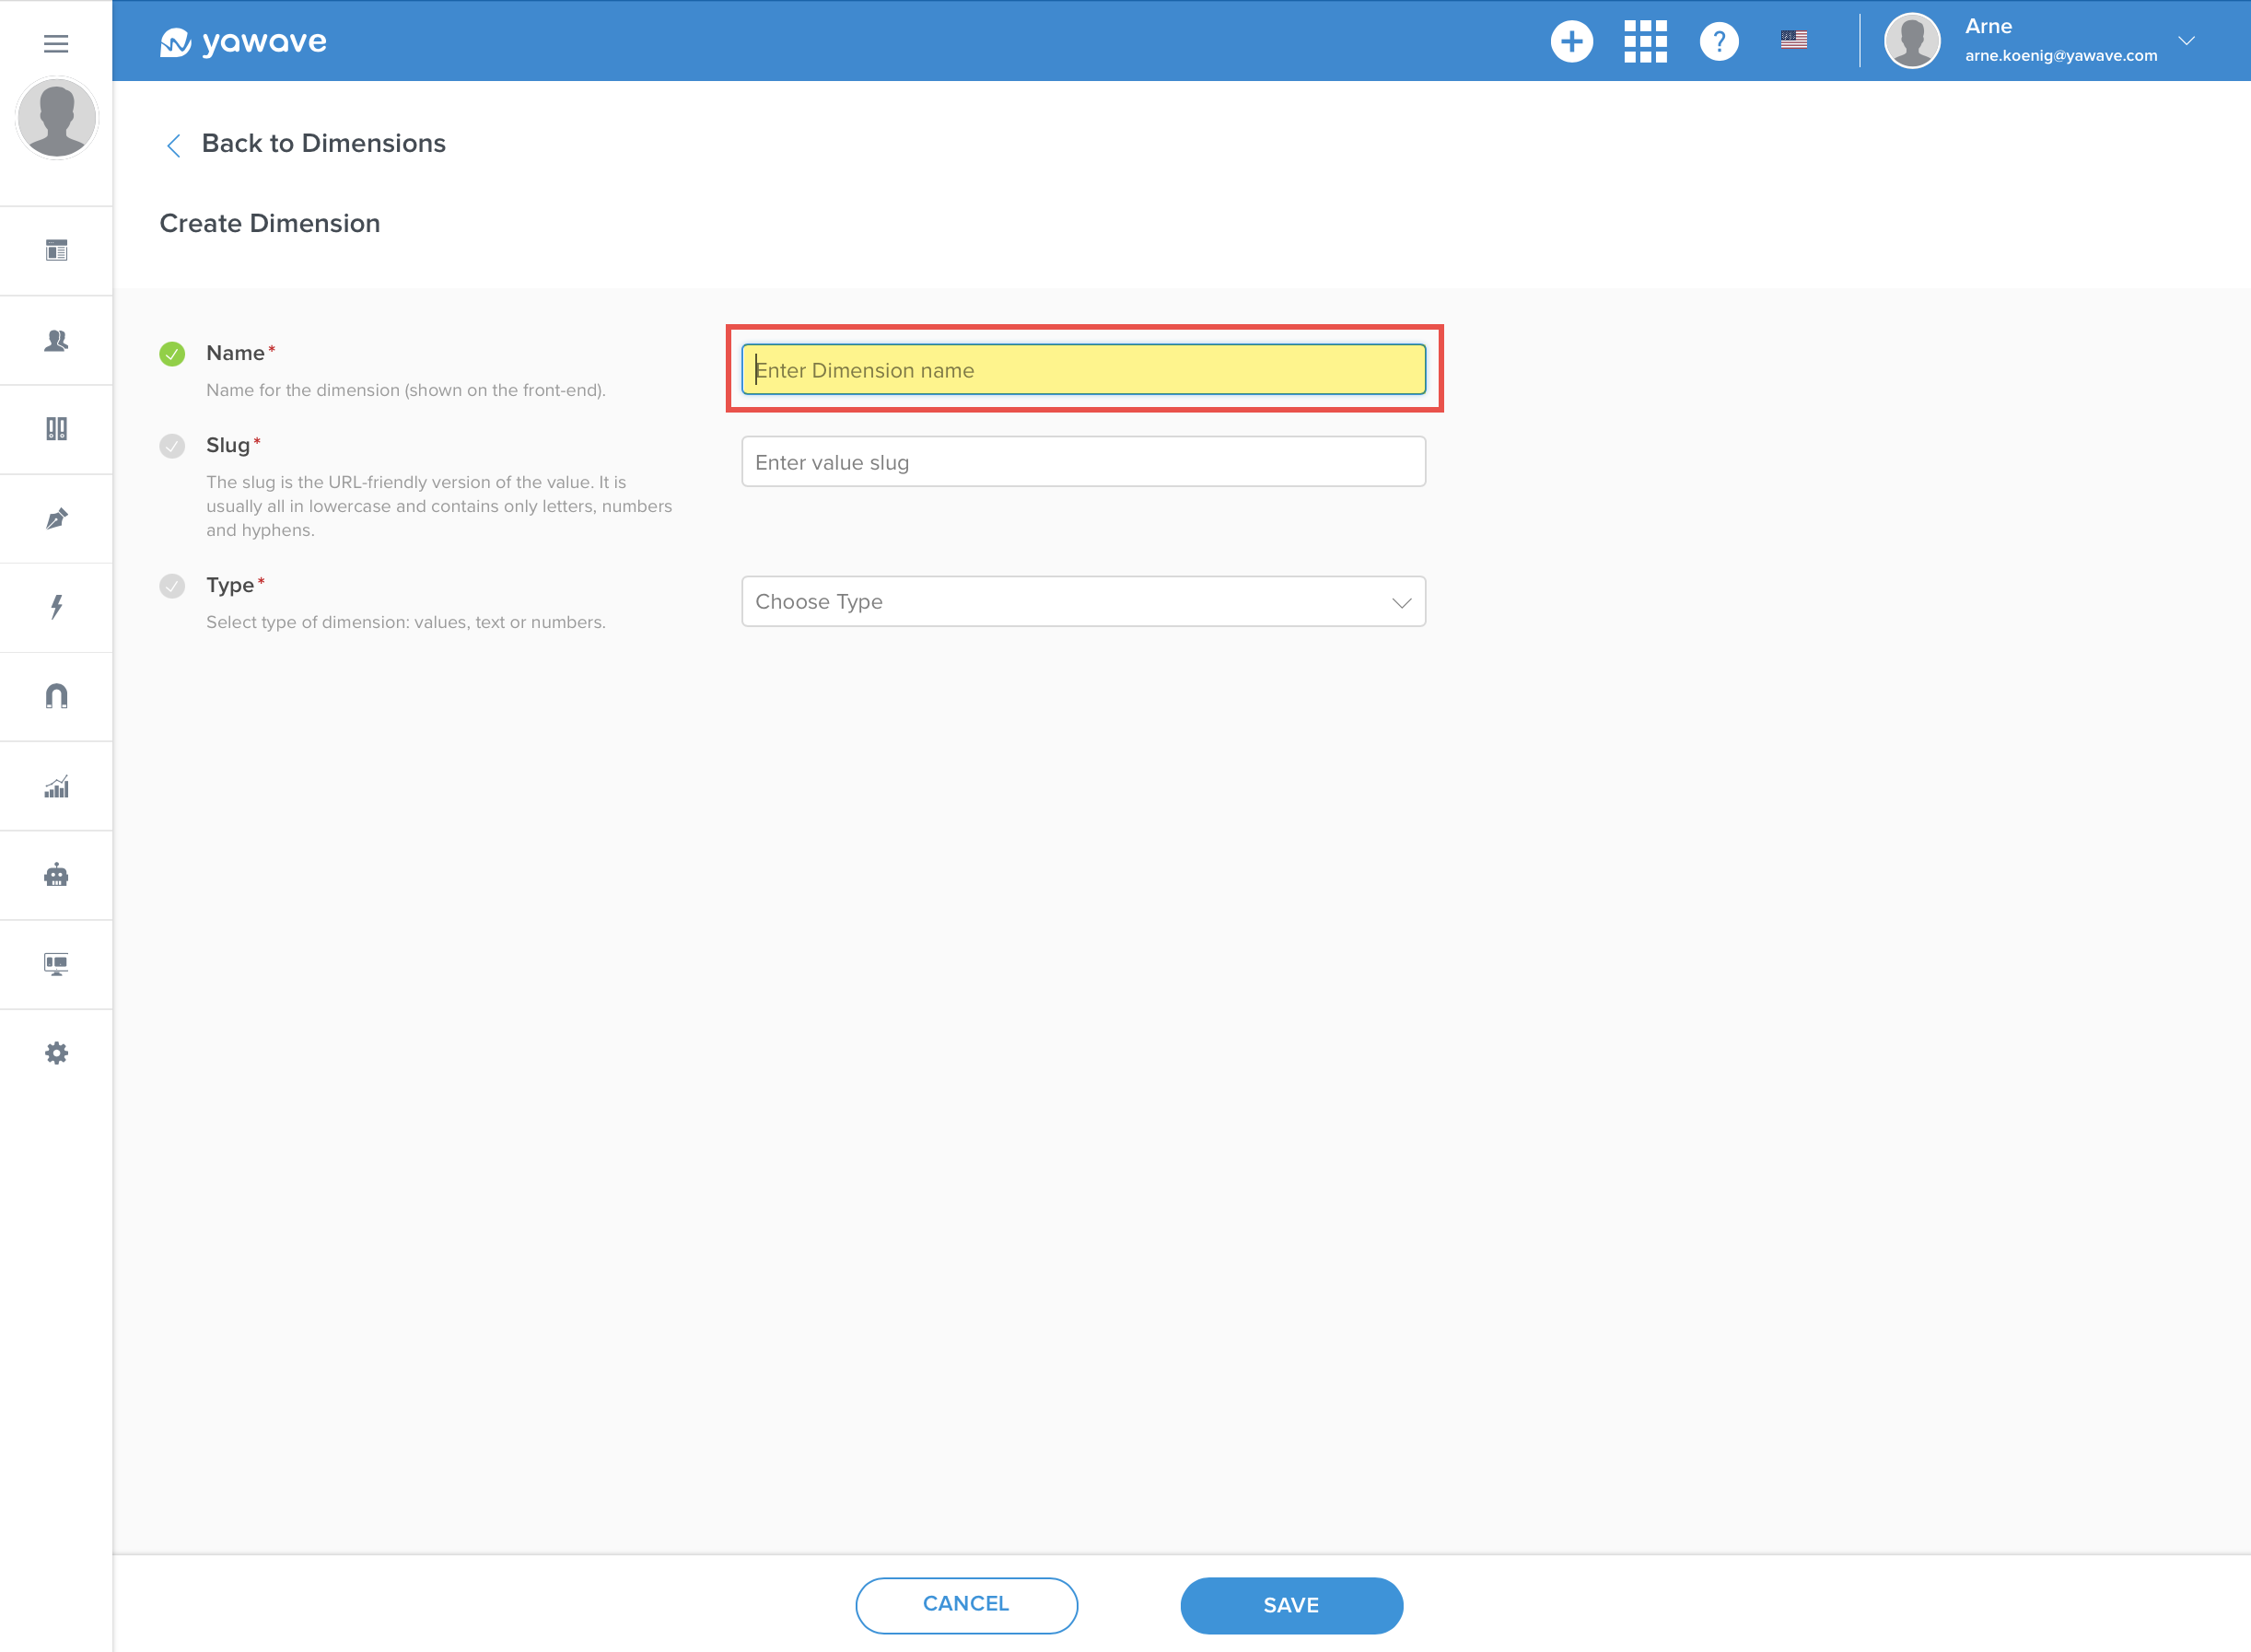
- Enter a name you want to use for the new Dimension in the Name field.
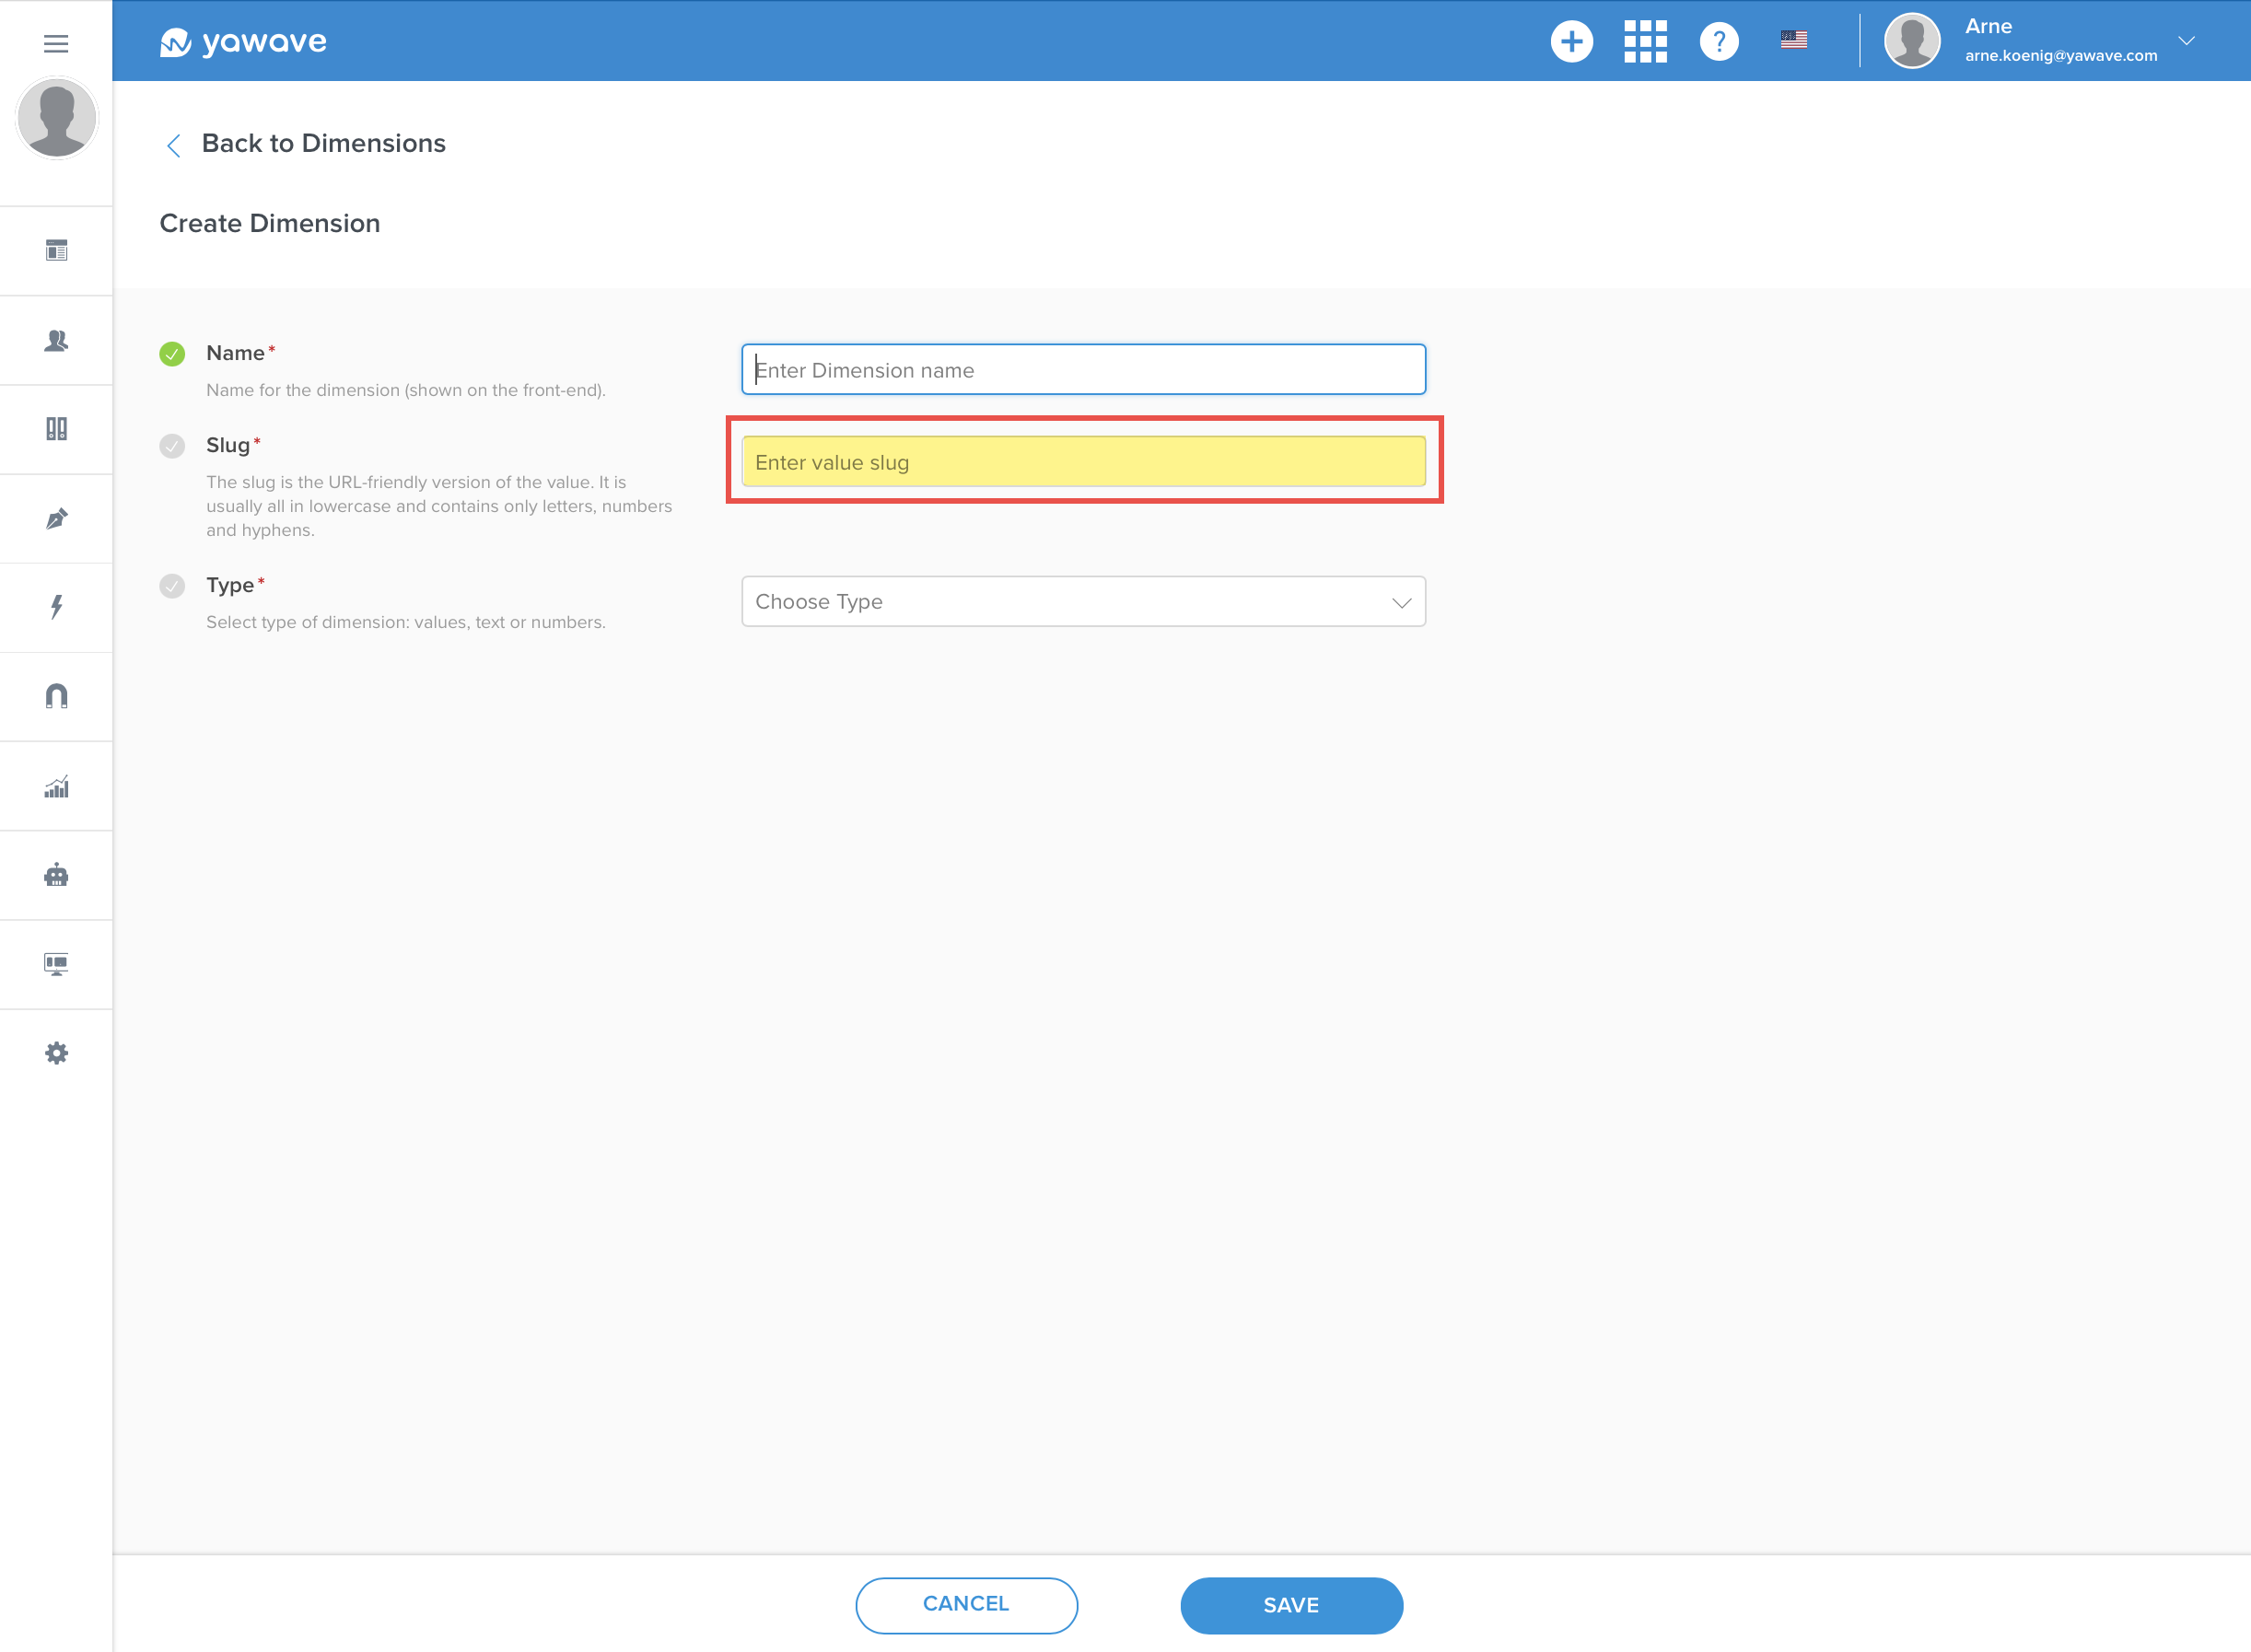
- The Slug field automatically populates with the value you entered in the Name field in Step 3 above. Leave as default or modify if needed.
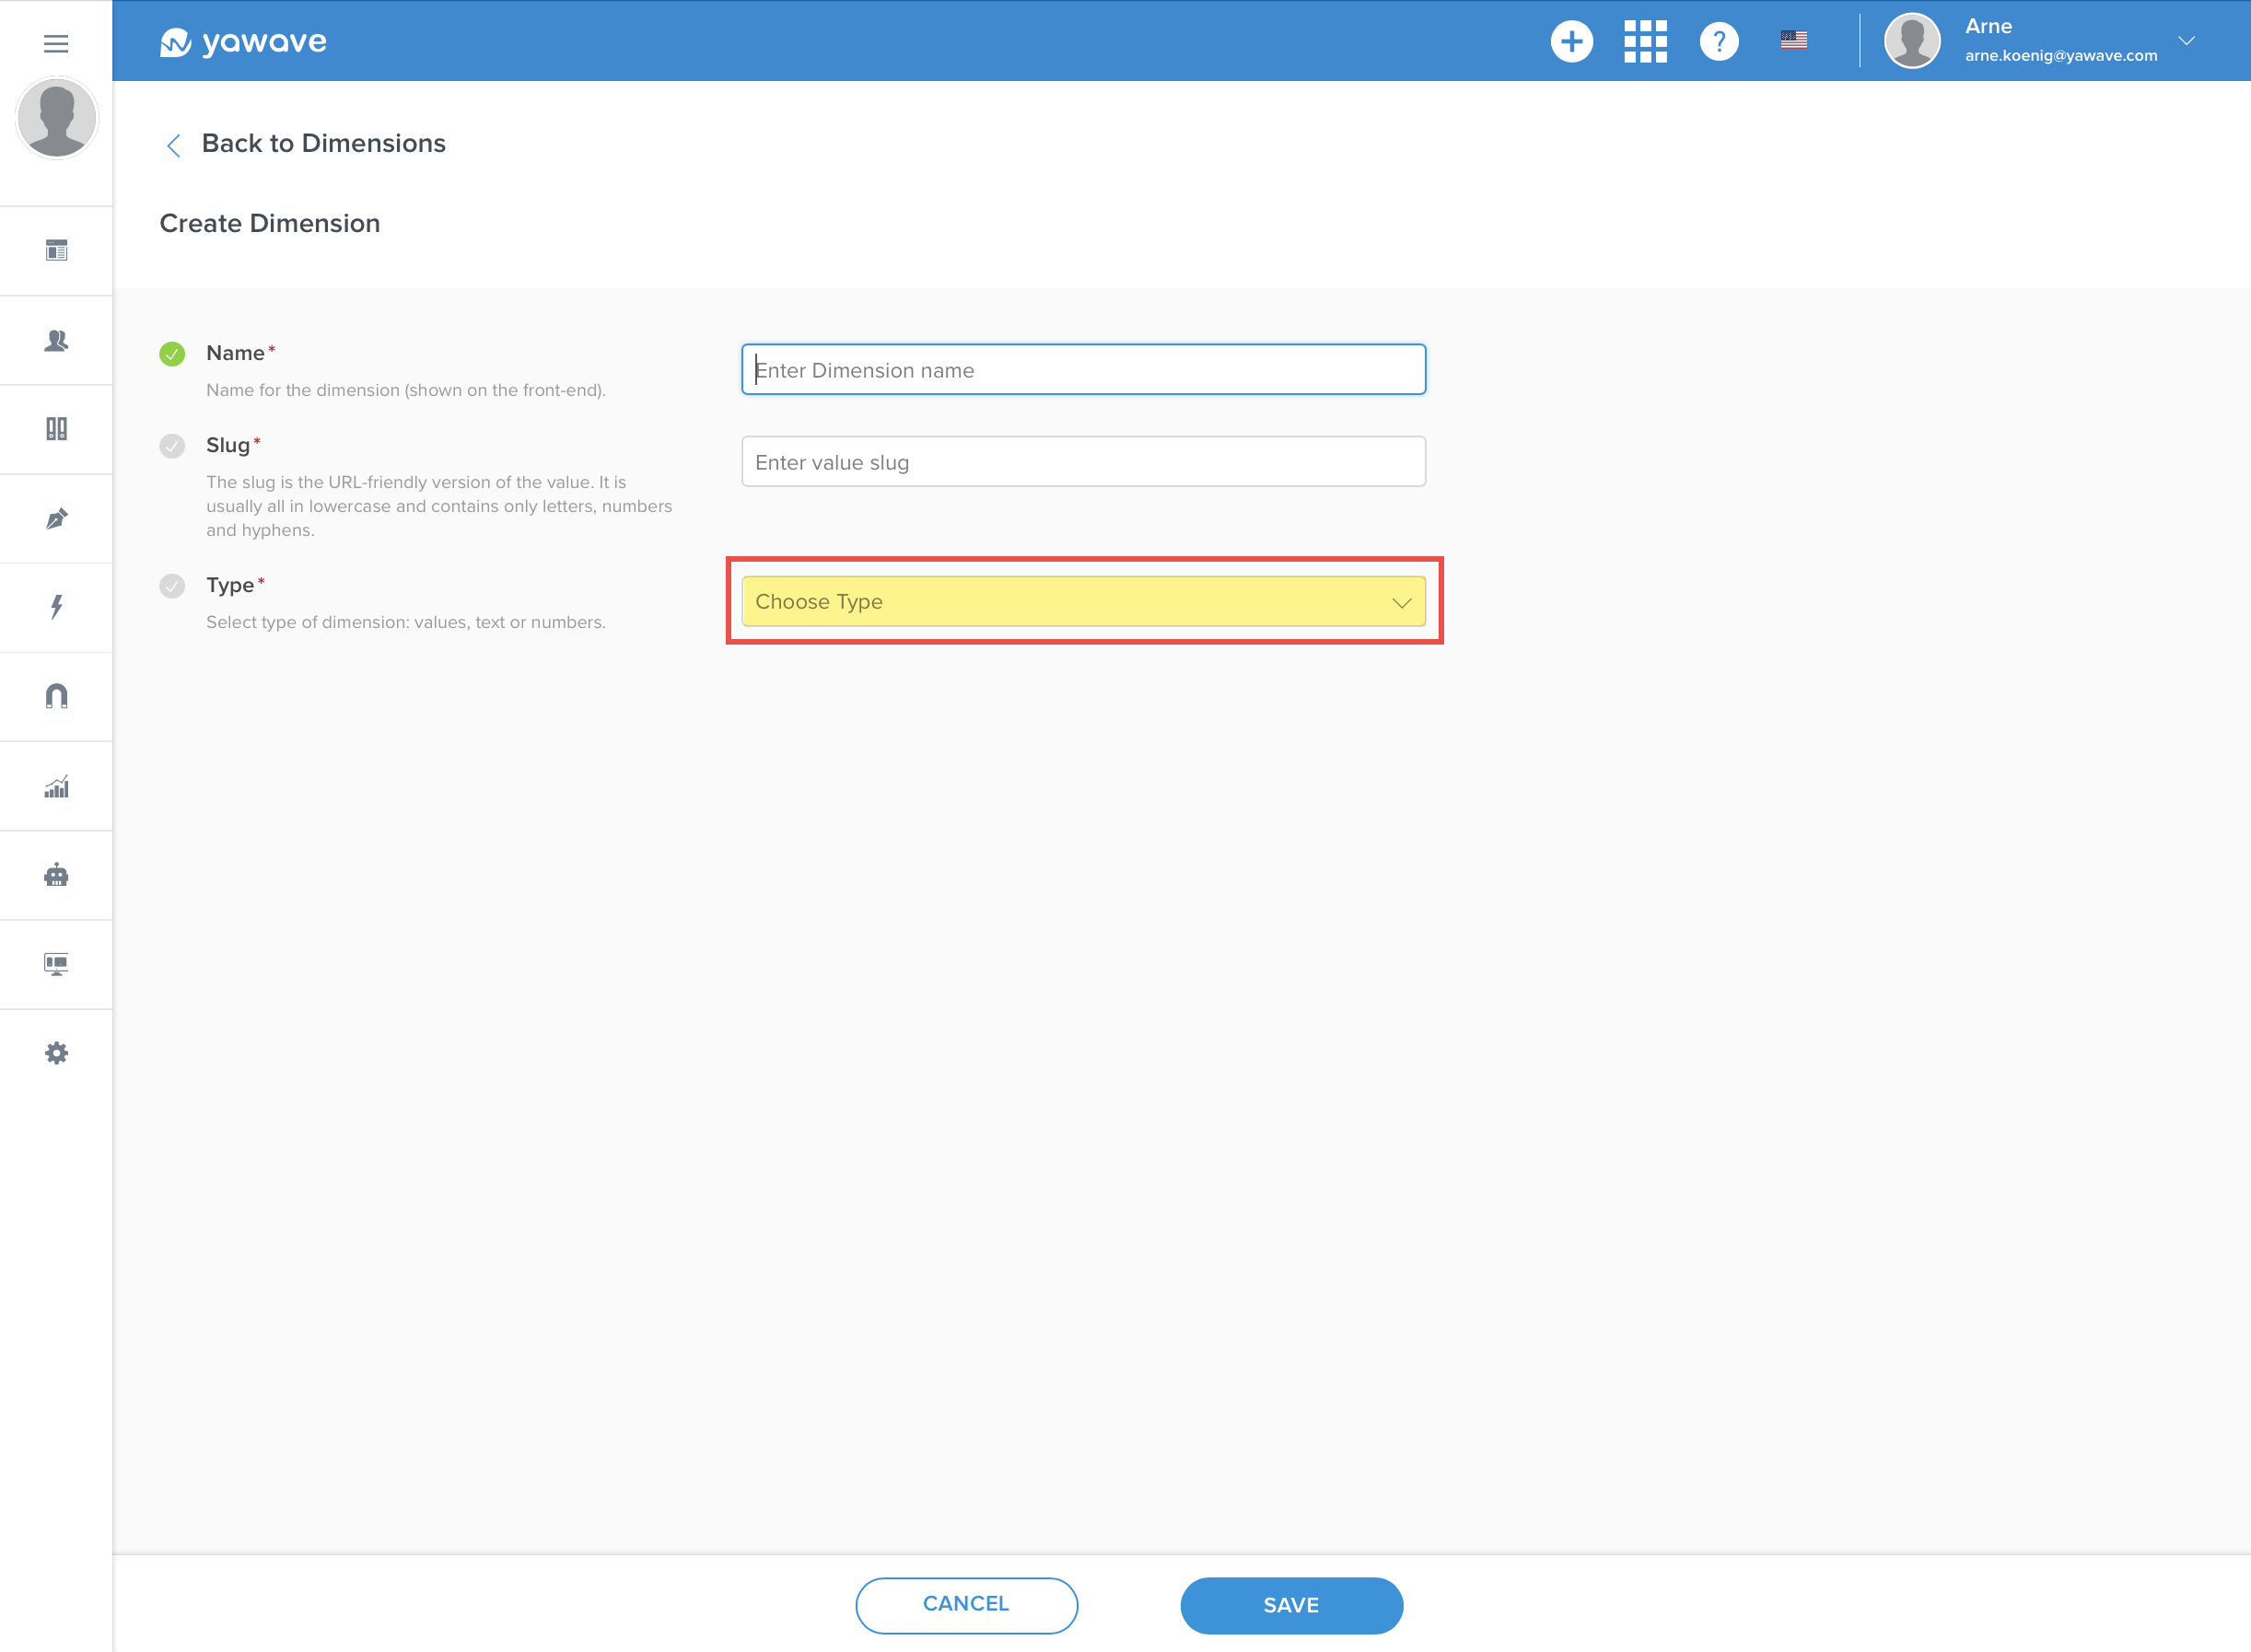
- Select the type of information (Text, Date, Numbers, Values) you want to use for this Dimension from the Type drop-down menu. Your choices include the following:
- Text
- Date
- Number
- Values
If you selected Values as the Type, you have the option to enable multiselection. This means you can select multiple values when adding a Contact/Subscriber. To enable multiselection, click the Enable multiselection toggle once.
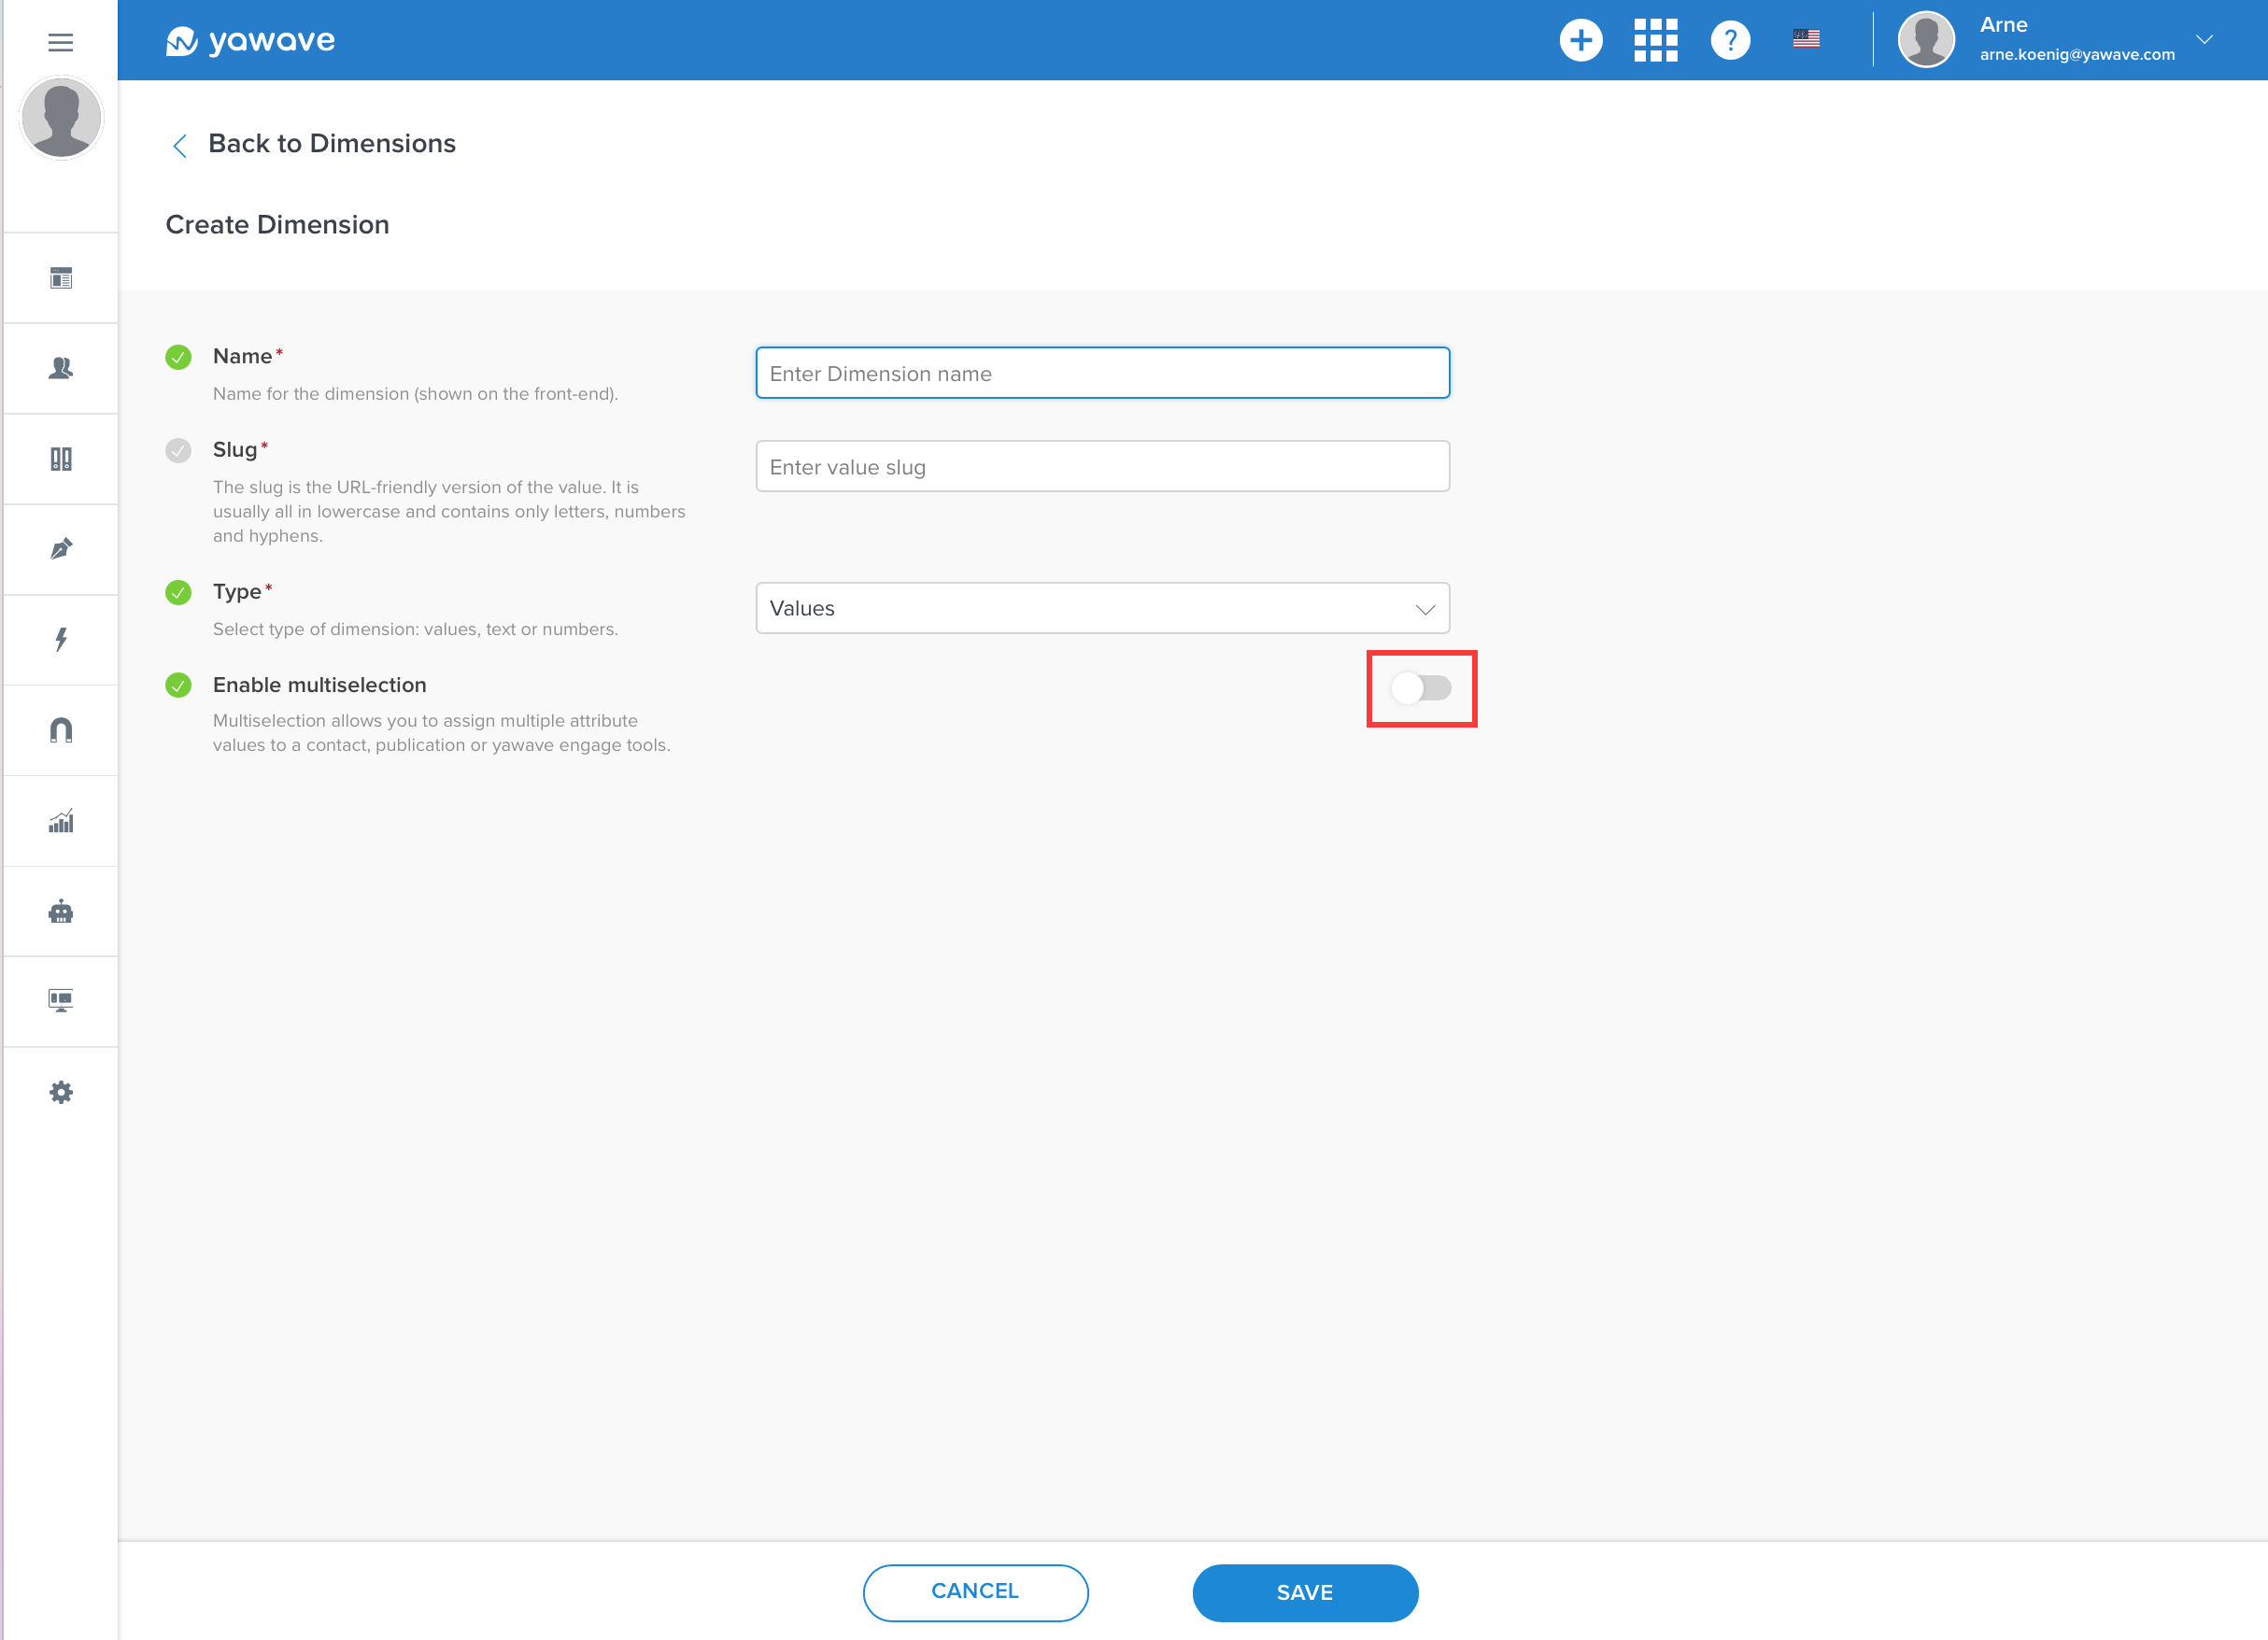
- Click Save. Note: Once you have added a Dimension and clicked Save, you cannot change the Type.
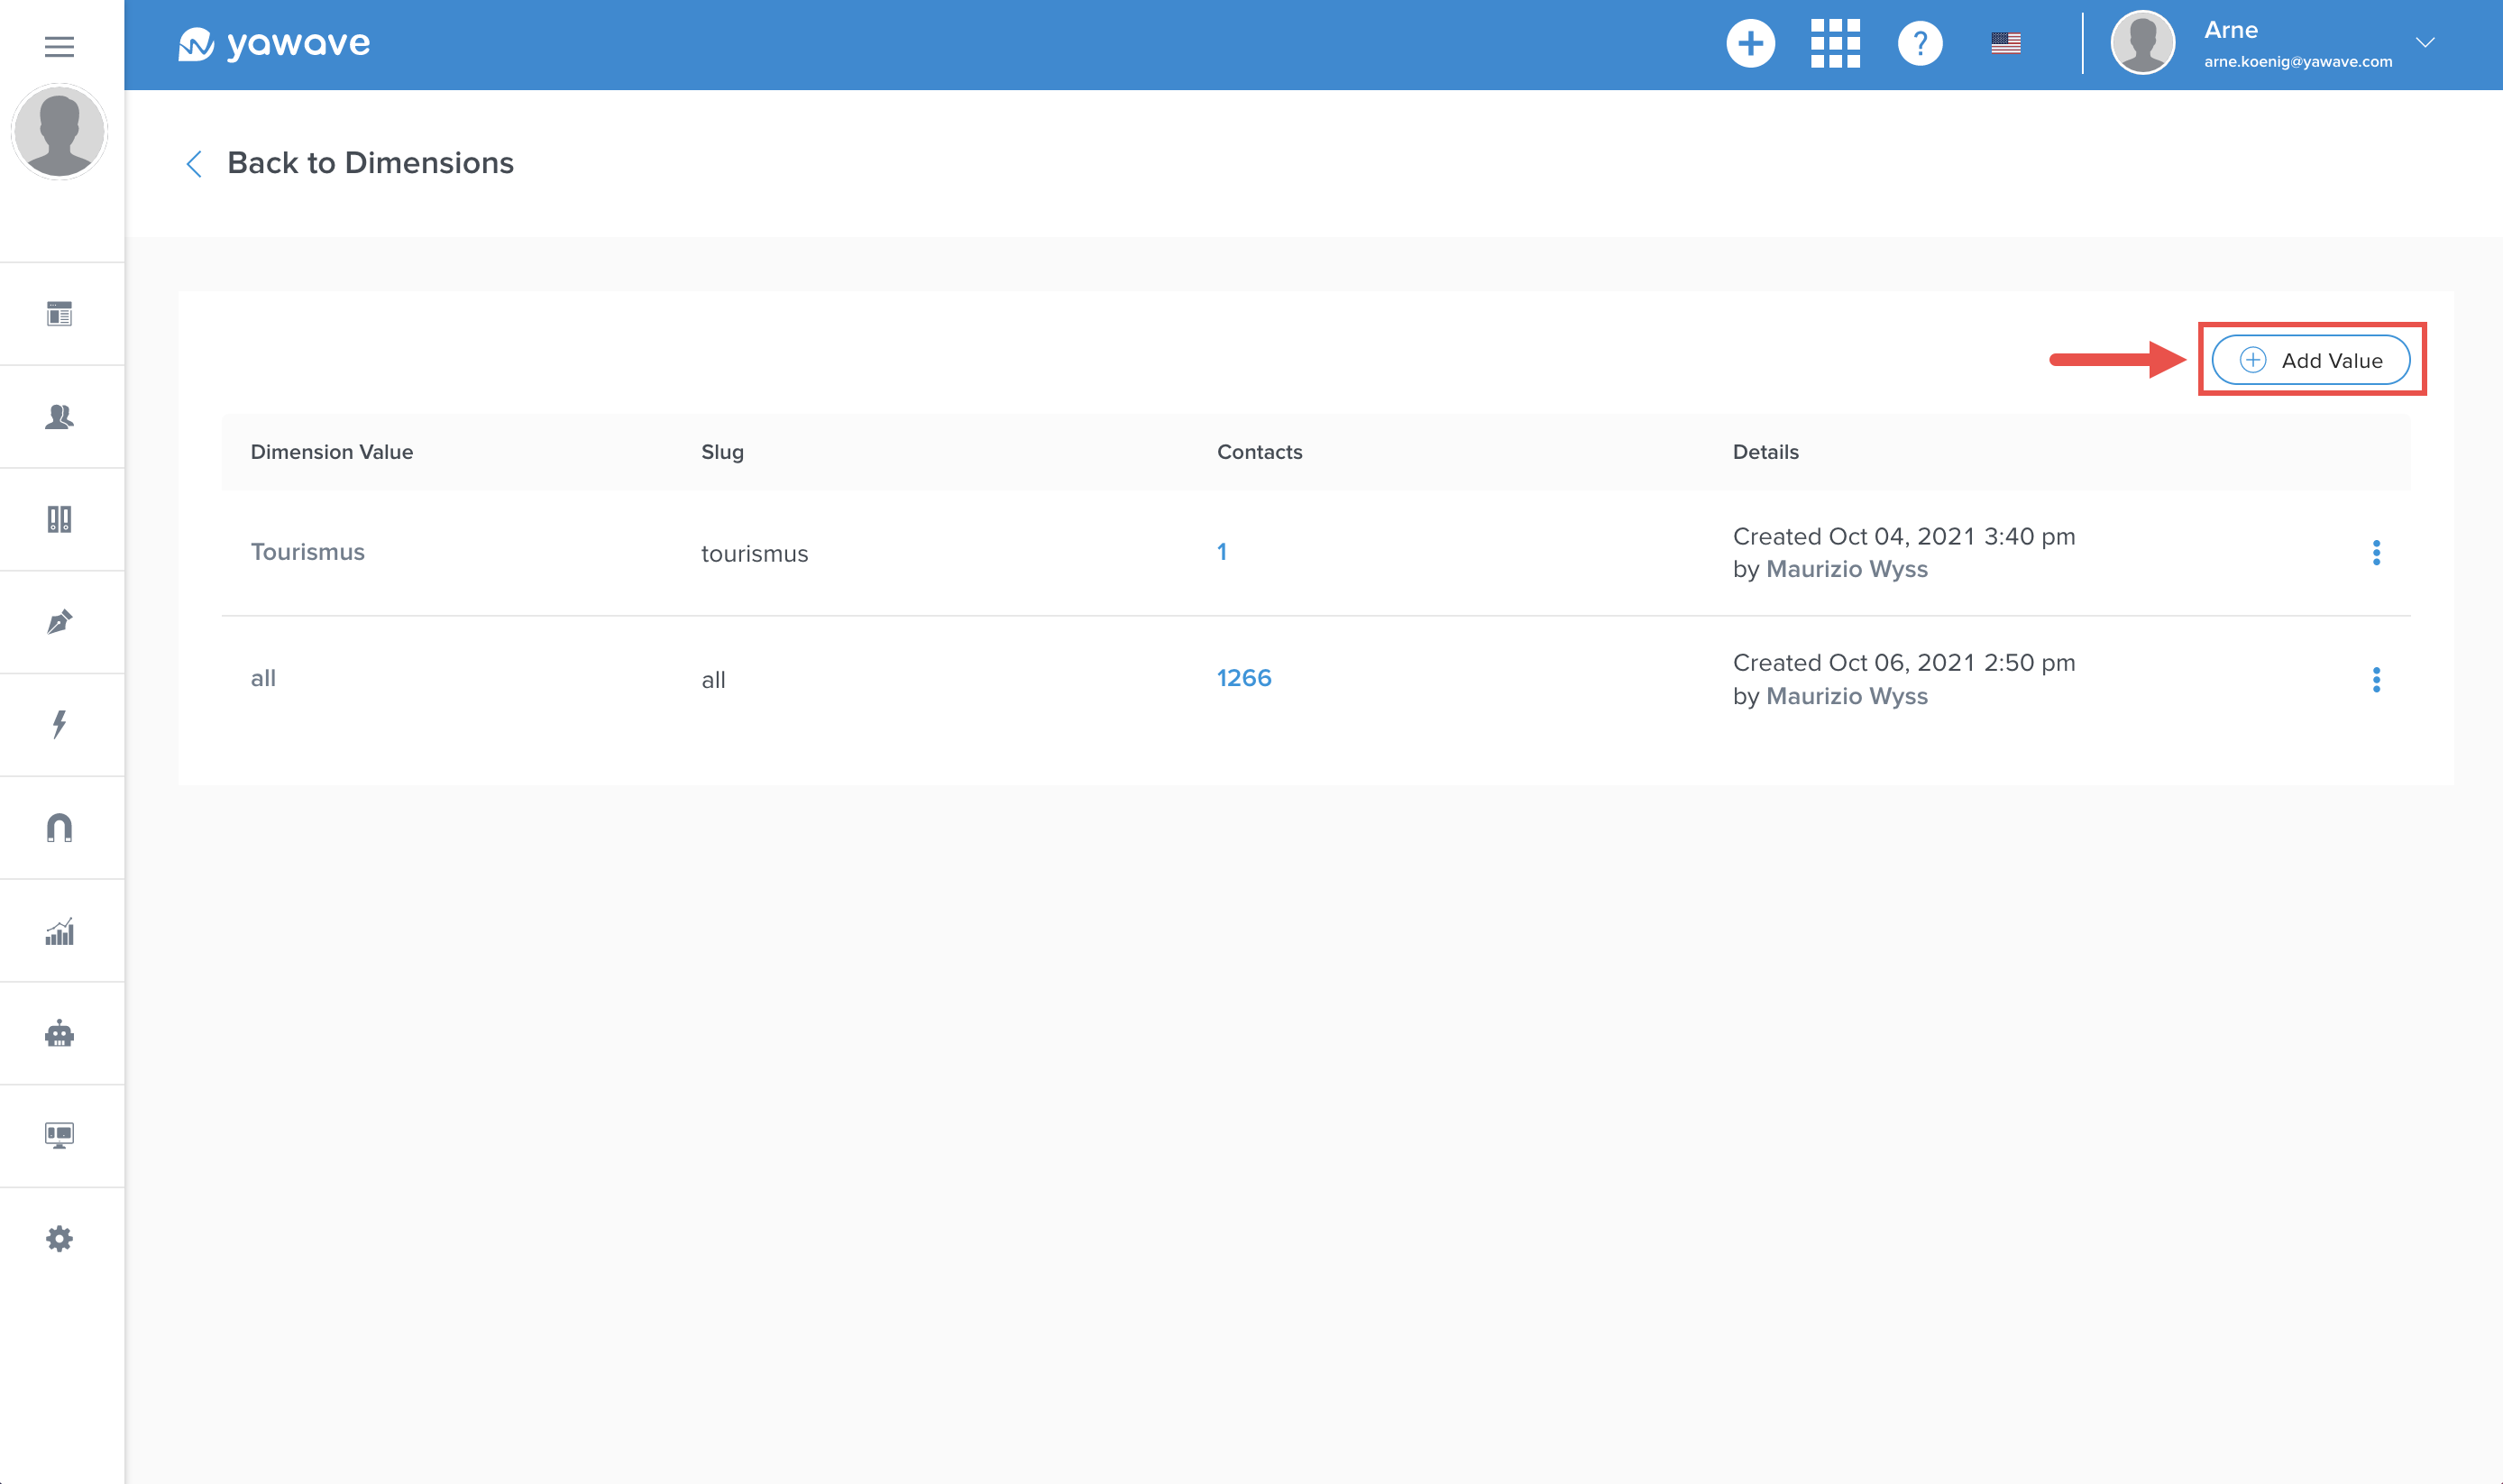
Add Values to Dimension
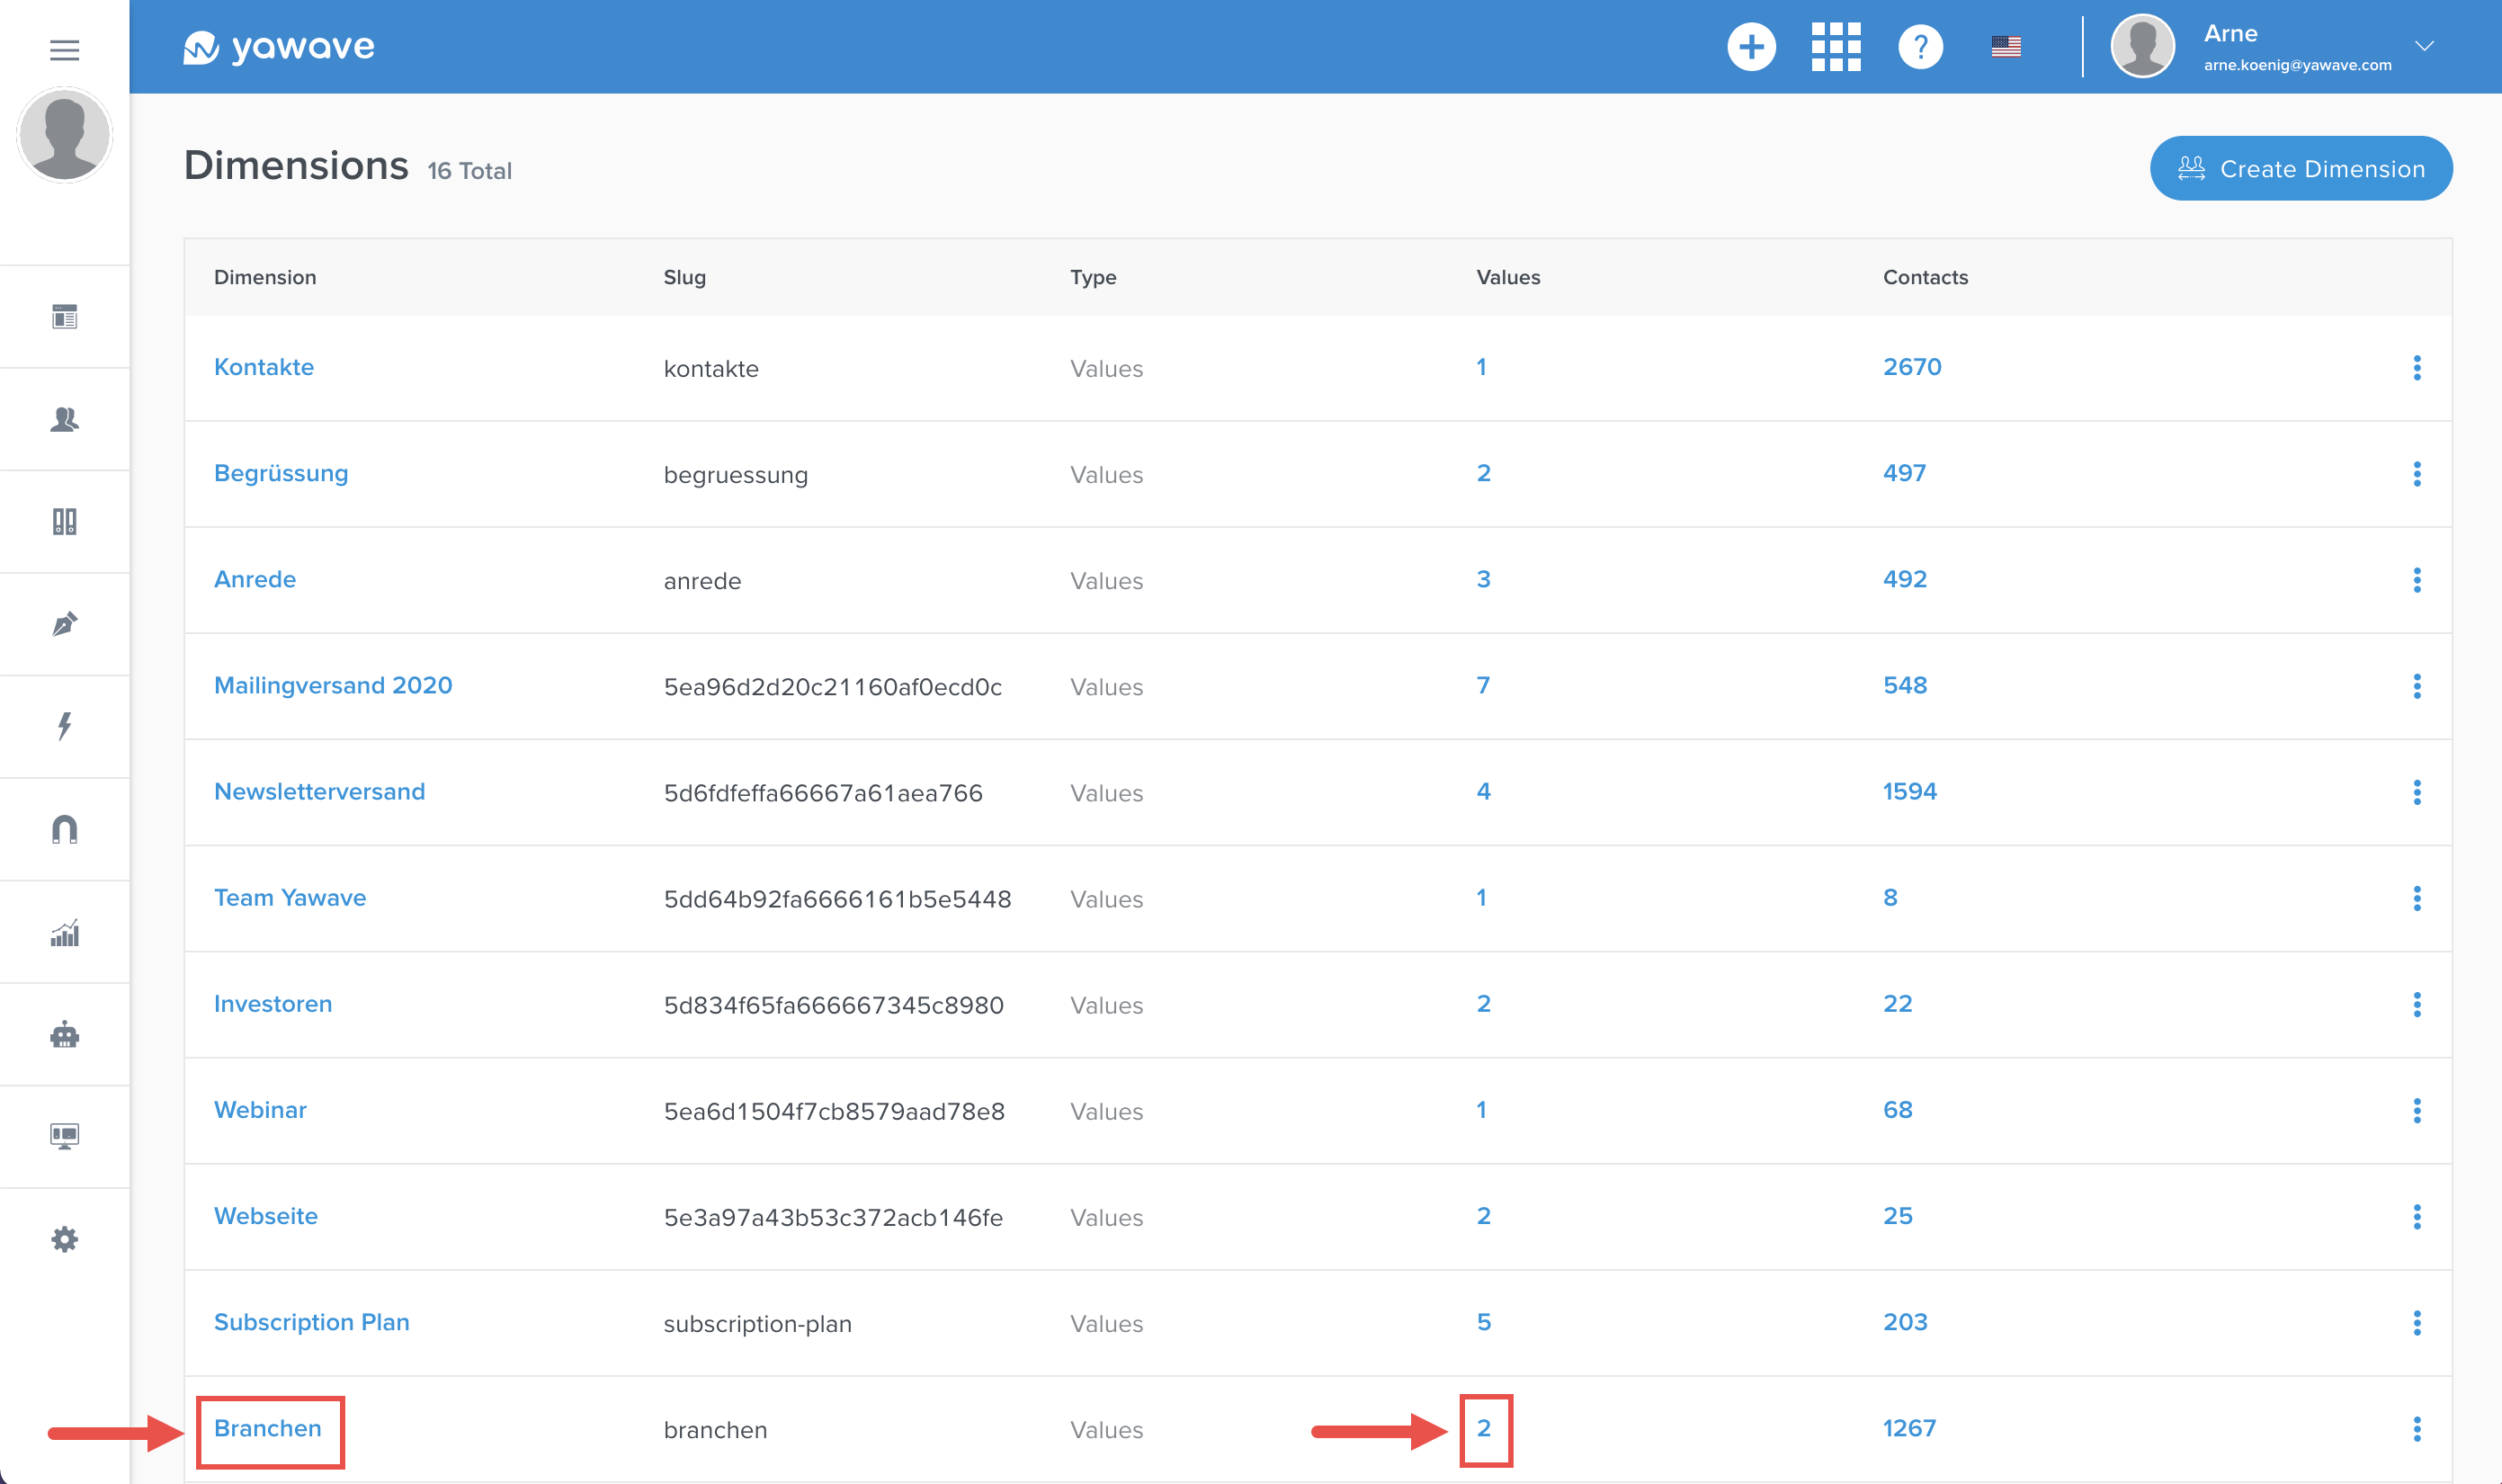
Notice the Dimensions table has a Values column. The Values column is populated when you use the Values type for your Dimension and you add the values for the Dimension:
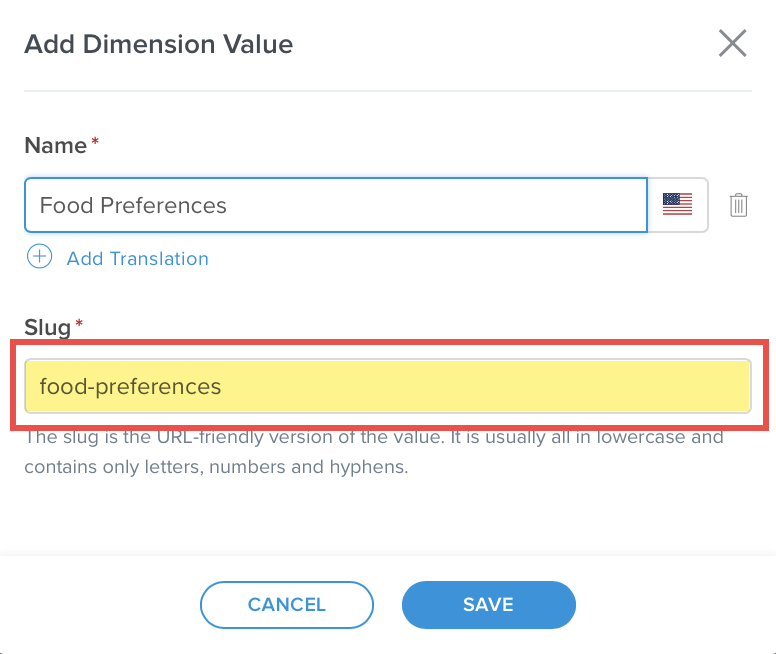
- To add the values, click on the Dimension name in the Dimension column or number in the Values column.
- Click Add Value.
- Enter a name you want to use for the value in the Name field.
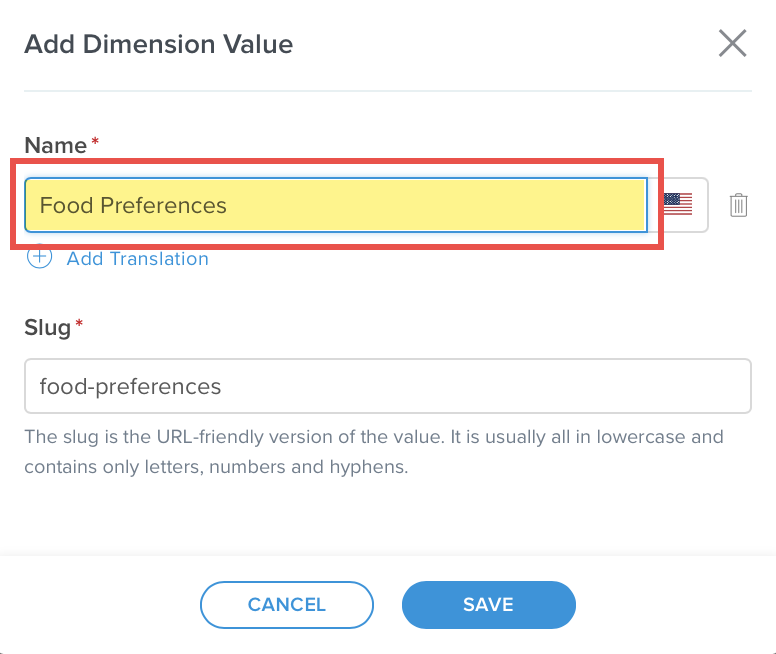
- The Slug field automatically populates with the value you entered in the Name field in Step 3 above. Leave as default or modify if needed.
-
Click Save.
-
Repeat Steps 2-5 until you have added all the values you want to use for this Dimension. Notice the Values column's default zero number increased when we added two values.
Edit Dimension
- To edit a Dimension, click the three dot menu located on the right side of the same row as the Dimenion you want to edit and select Edit.
- Make changes to the fields Name (a) and Slug (b) only if you want to edit, then click Save (e). Note: Once you have added a Dimension, you cannot change the Type (c). This also means you cannot change the Enable multiselection setting (d).
