Learn how to create a Community Tool below.
A Community Tool gives registered users a way to see their Points, Benefits, Rewards, Favourites, Publications, Coupons and various other pieces of information.
Notes:
- A Community Tool is the same data pulled from a user's Profile.
- The Community Tool shows registered users a My Section.
- If a user has enough points they can redeem those points in a Catalog that you enable and configure in the Community Tool.
When you create a new Community Tool you'll need to configure multiple settings and screens.
A Community Tool contains the following:
- Settings - Determine name and advanced options including Touchpoint and Journey.
- Styling - Adjust colors and cover image.
- Tabs - Add tabs including Publications, Activities, Contacts, Points, Catalog, Engagements, Benefits and Favourites.
- Account - Account information including name, email and other settings for account management.
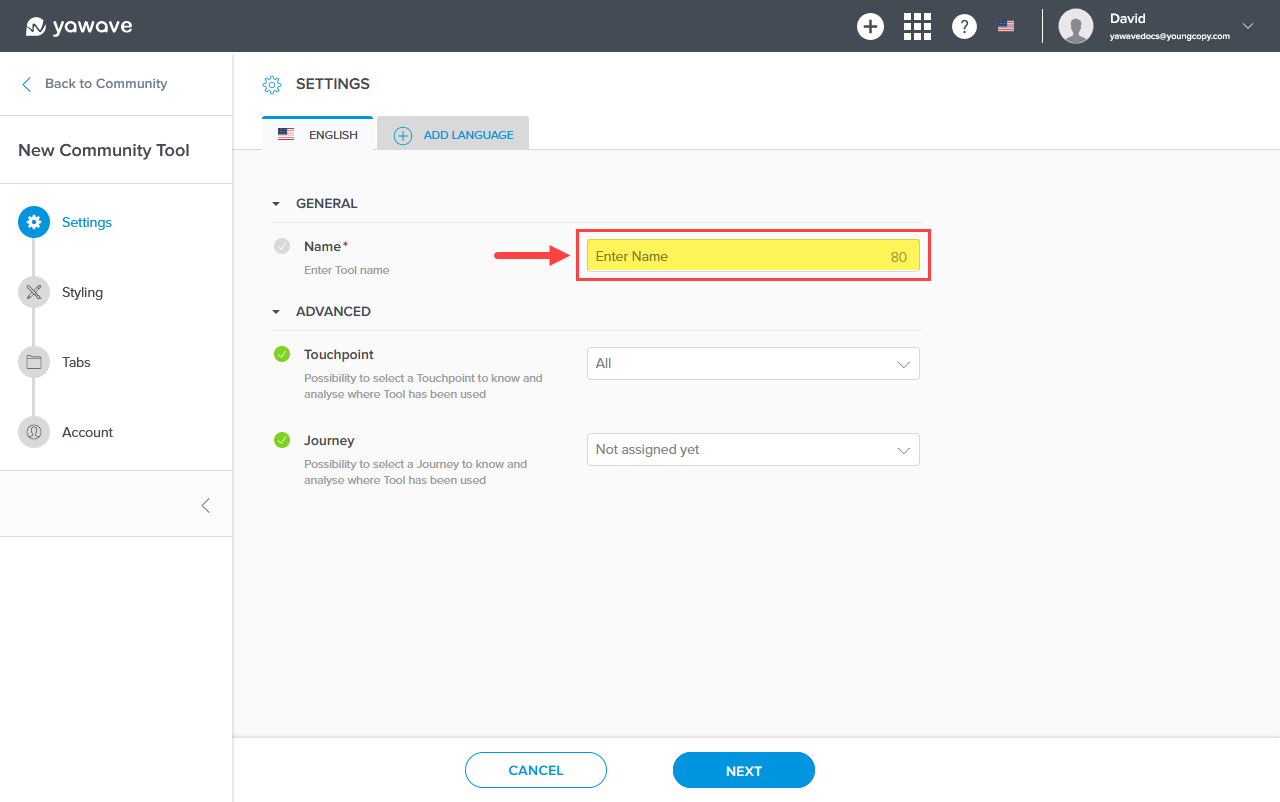
Configure Community Tool Settings
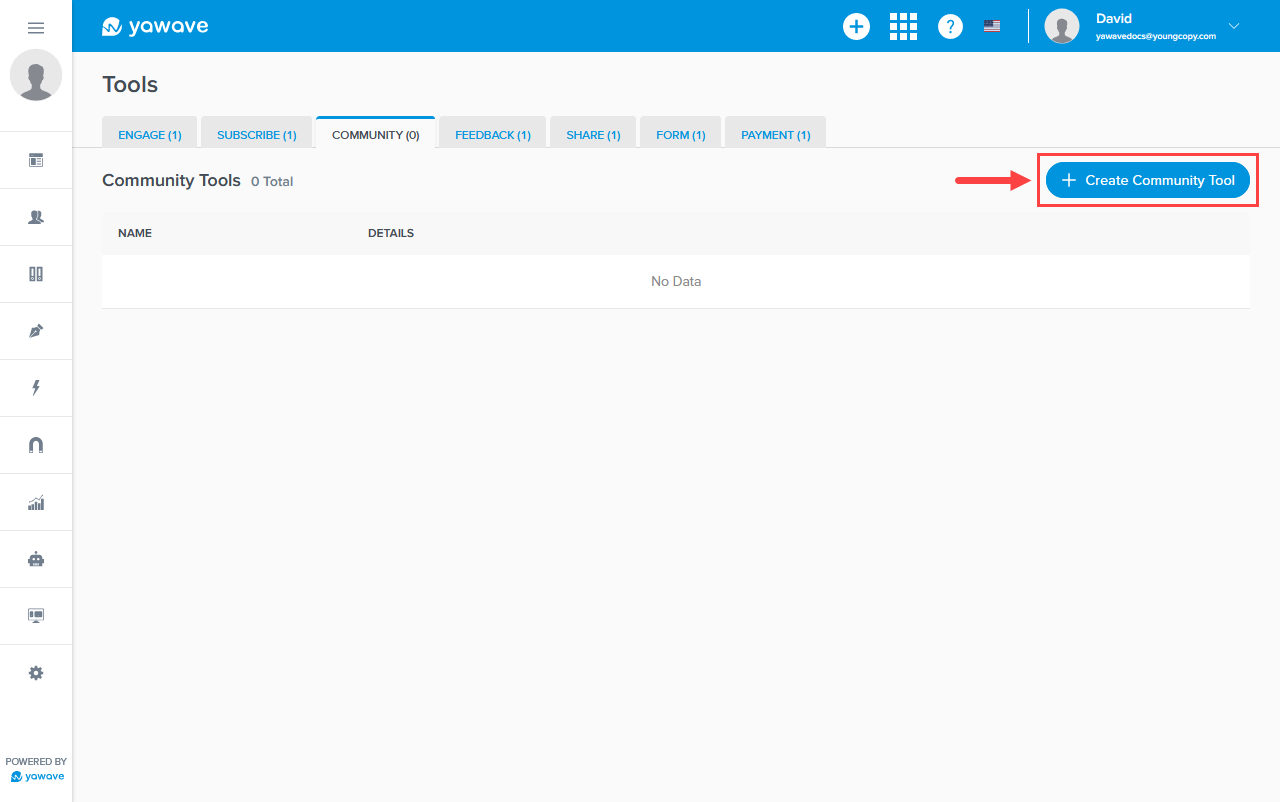
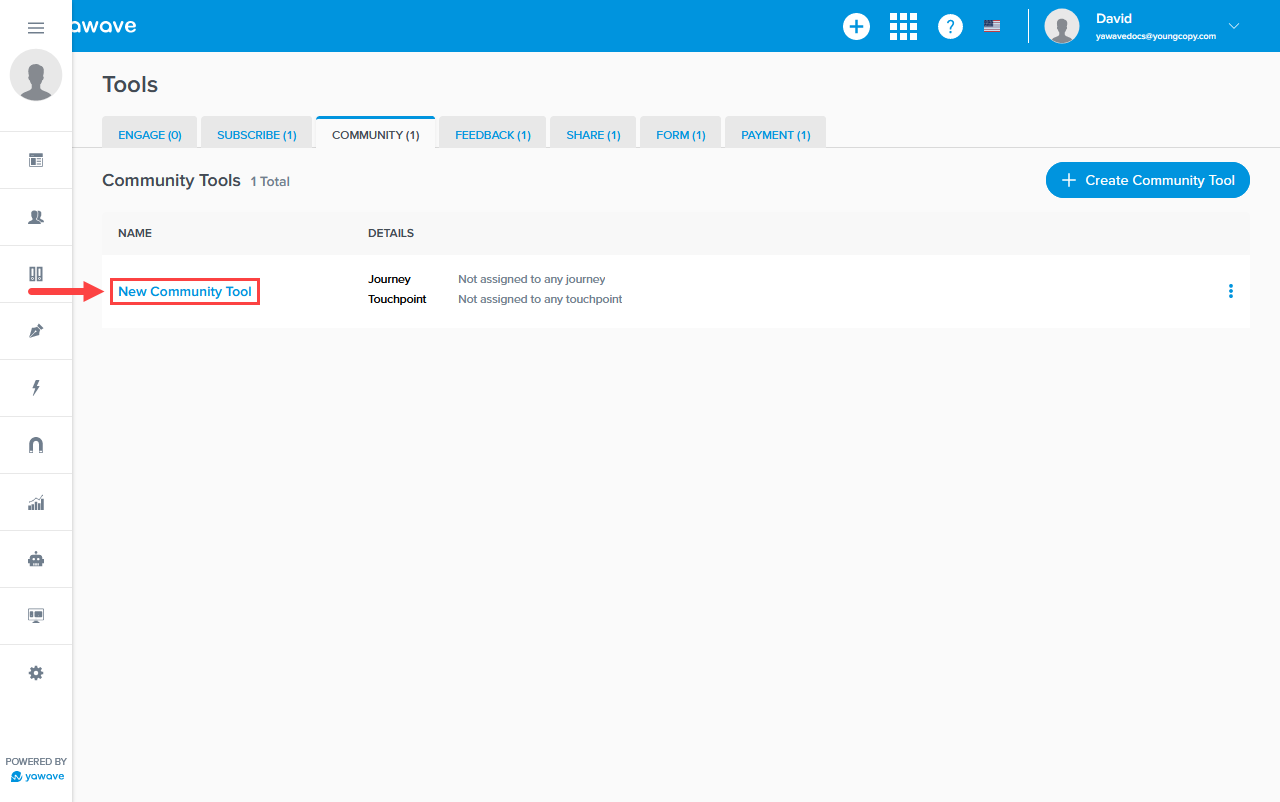
- Click Tools/Community Tools.
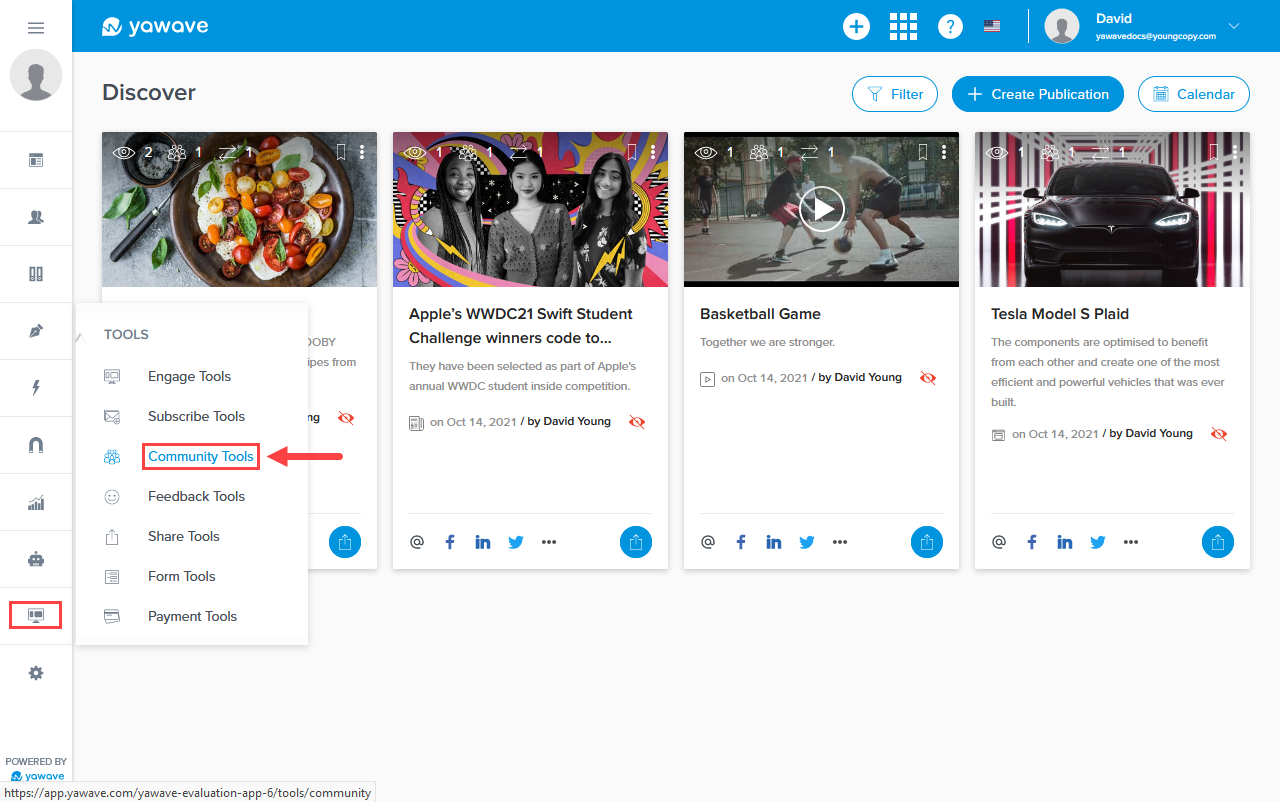
- Click Create Community Tool.
- Enter a name of your choosing in the Name field. Note: This field has a 80 character limit.
-
The Touchpoint and Journey settings are optional and require more advanced understanding of the yawave product. If you are already familiar with these settings and how they work, complete the following, otherwise continue to Step 5.
- Select Add Touchpoint from the drop-down menu.
- Select a Journey from the drop-down menu or select Add Journey to create a new one.
-
Click Next.
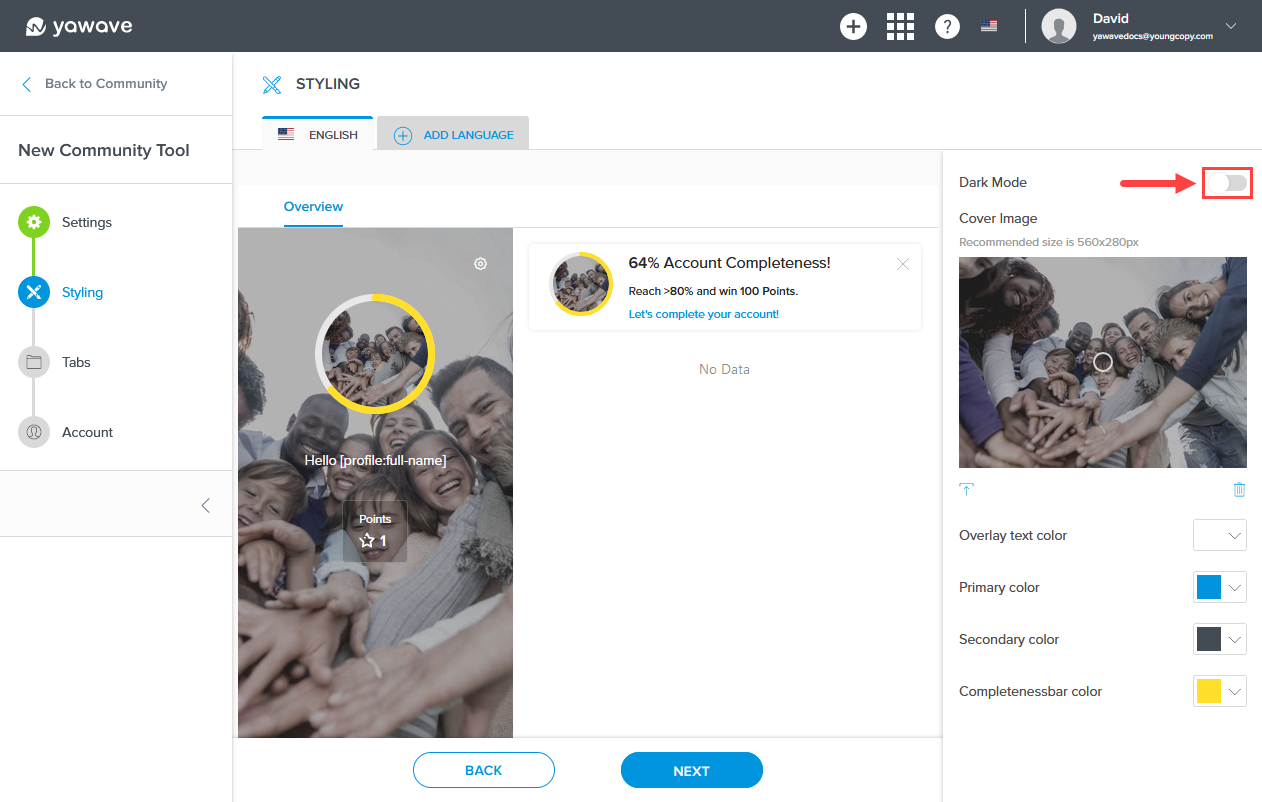
Configure Community Tool Styling
- By default Dark Mode is disabled. If enabled, yawave will automatically add an overlay to the New Community Tool Styling Overview. Click the toggle once to add the overlay.
When enabled, the Overview Cover Image looks similar to the following. Notice the Overview Cover Image is darker.

When Dark Mode is enabled, two new configuration options are shown. Configure the following, otherwise continue to Step 2:
- Overlay color - Select the color you want to use for the Overview Dark Mode Cover Image color from the Overlay color drop-down menu. Here you can enter a Hex value, RGB value or use the color picker.
- Opacity - To adjust the Opacity, click and drag the blue circle along the percentage line. The default is 25%.
- Click the upload icon below the Cover Image to select a new image for the Community Tool Overview background.

Click and drag the circle icon in the Cover Image to change the image's focal point.

-
Select the color you want to use for the Overlay text color from the Overlay color drop-down menu. Here you can enter a Hex value, RGB value or use the color picker.
-
Select the color you want to use for the Primary color from the Primary color drop-down menu. Here you can enter a Hex value, RGB value or use the color picker.
-
Select the color you want to use for the Secondary color from the Secondary color drop-down menu. Here you can enter a Hex value, RGB value or use the color picker.
-
Select the color you want to use for the Completenessbar color from the Completenessbar color drop-down menu. Here you can enter a Hex value, RGB value or use the color picker.
-
Click Next.
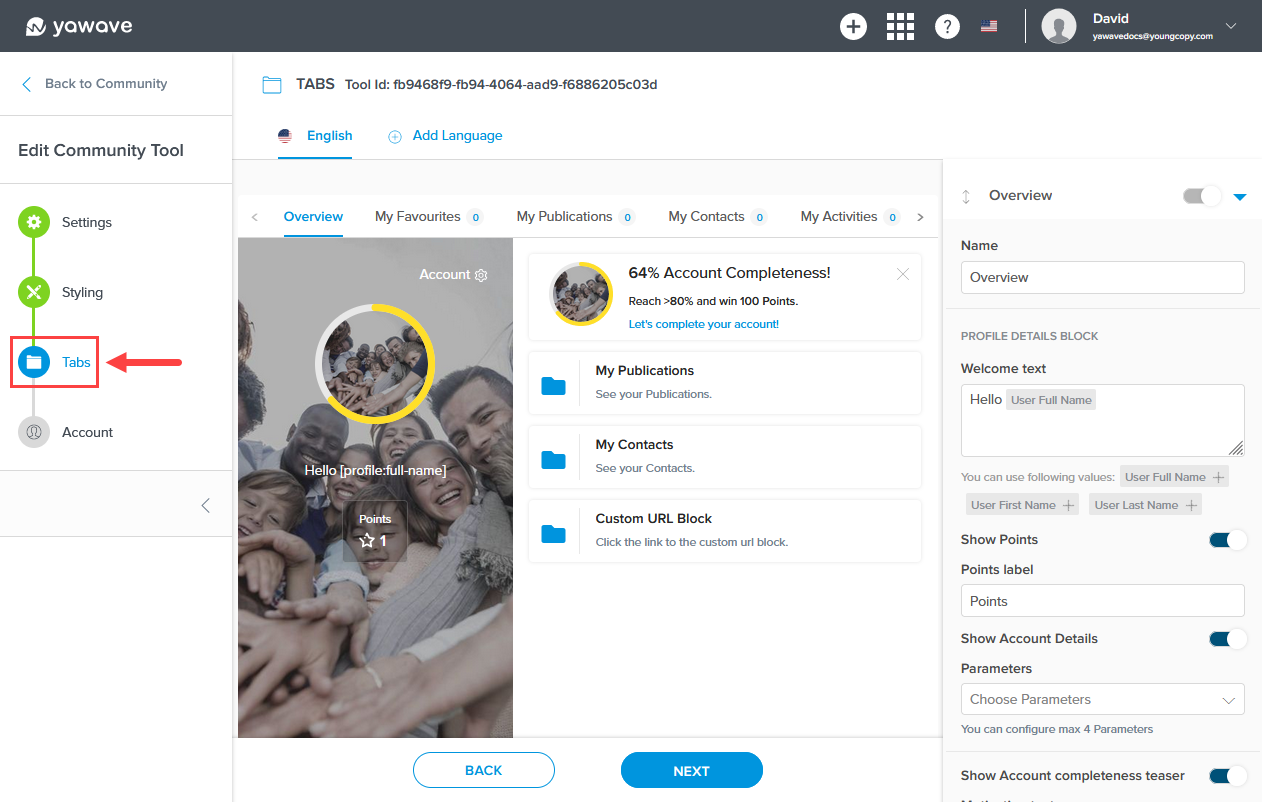
Configure Community Tool Tabs
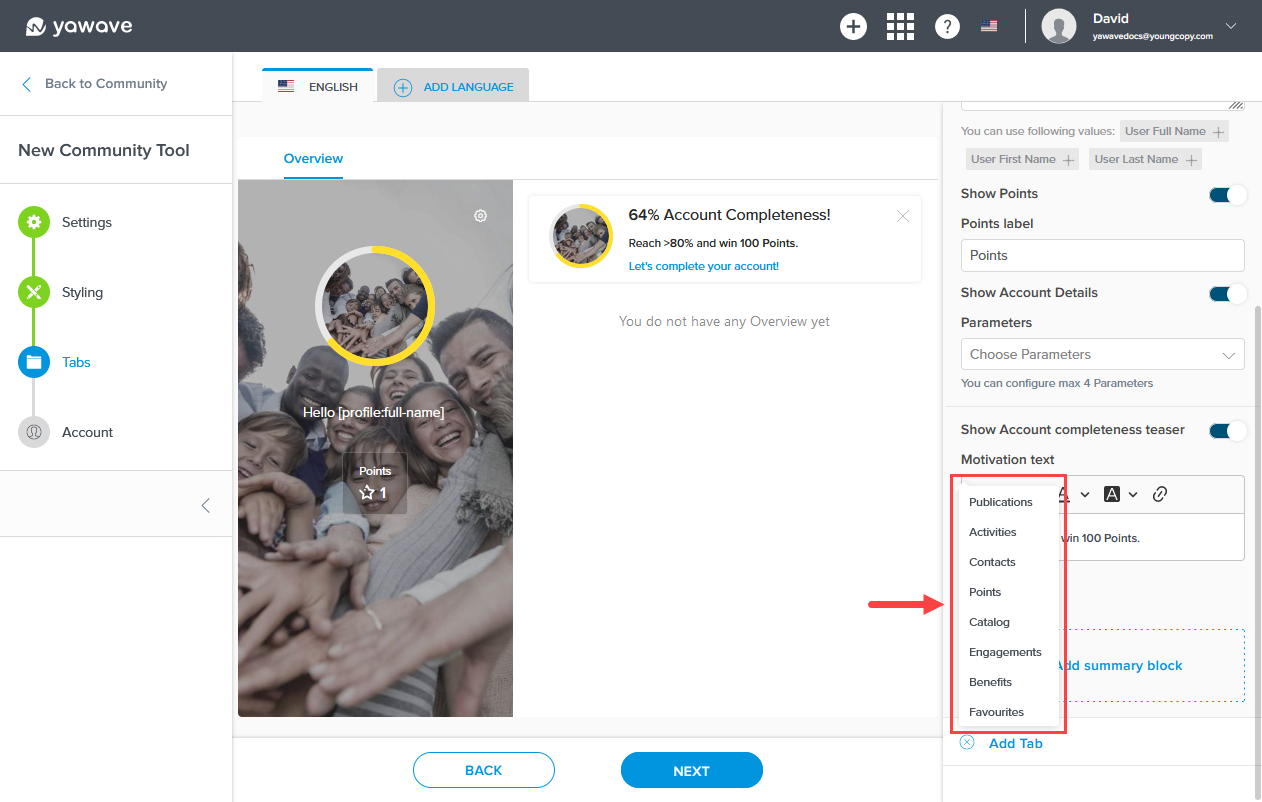
In addition to the default Overview tab, you can add one or more of the following Tab types:
- Publications
- Activities
- Contacts
- Points
- Catalog
- Engagements
- Benefits
- Favourites
Configure Default Overview Tab
- By default the Community Tool contains one tab, the Overview tab. You cannot disable this tab, but you can change the tab's title, welcome text, and other information you want your contacts and subscribers to see when they launch the Community Tool.
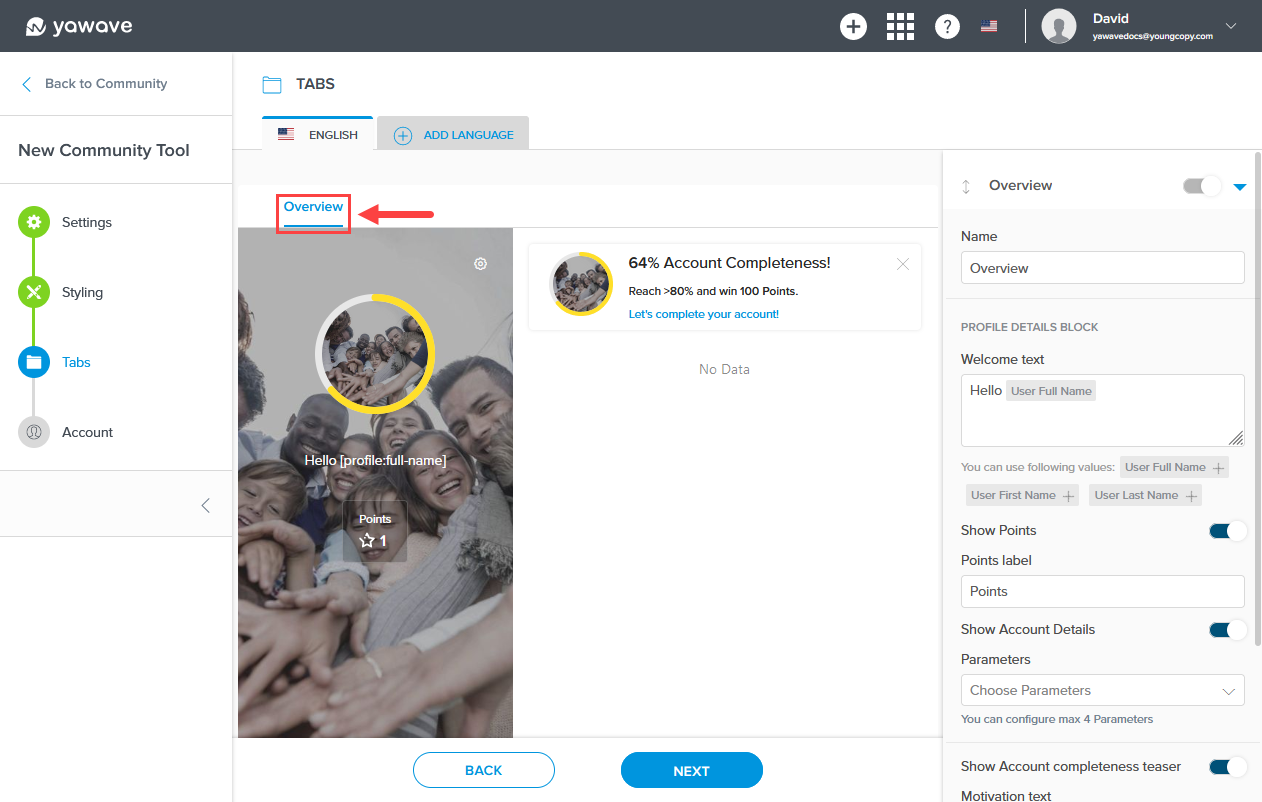
Leave as default Overview or enter a new name for the Overview tab in the Name field.

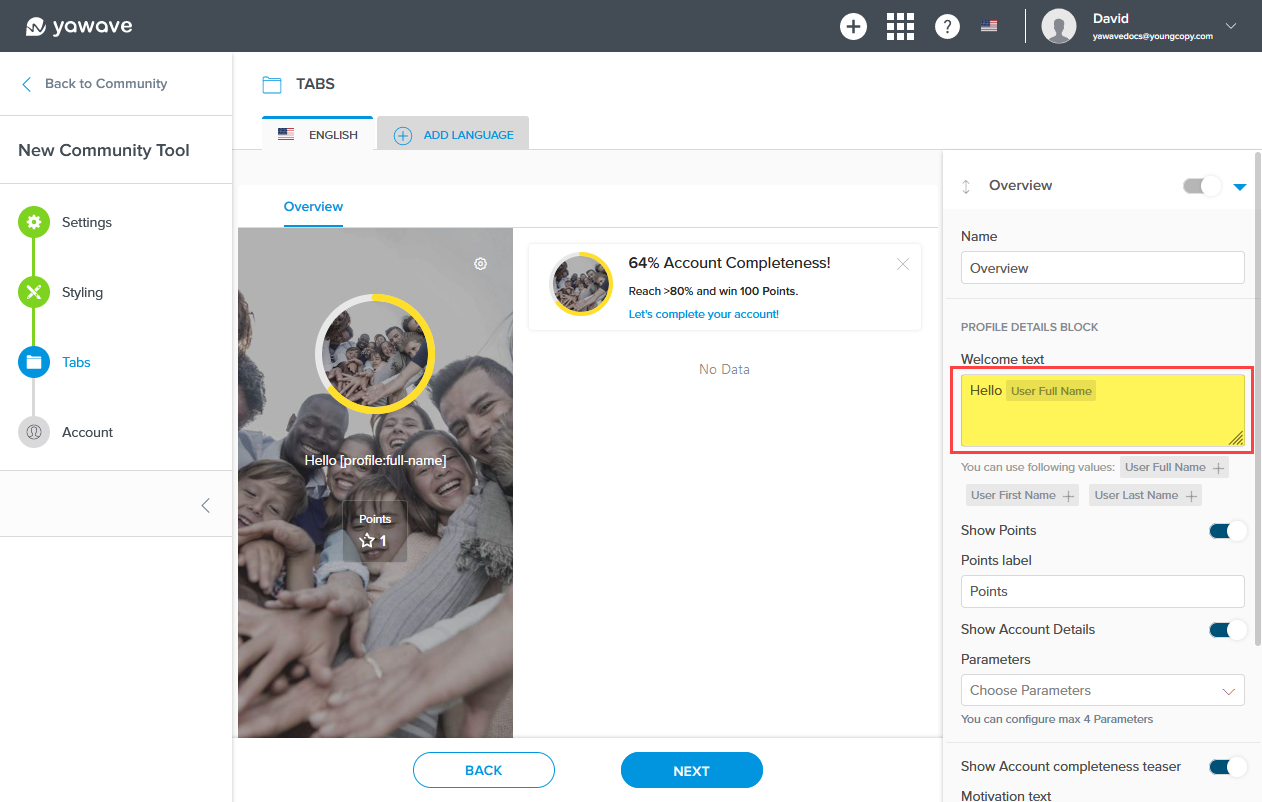
- The Welcome text will display the logged-in user's information based on the variable you select. The default variable is User Full Name. This means the Community Tool will show the logged-in user's full name. To delete a variable from the Welcome text, place your cursor at the beginning of the variable and tap the delete key or place your cursor at the end of the variable and tap the delete key or backspace key. You can customize this message and use the variables based on your preference. You can also select User First Name, User Last Name or User Full Name.
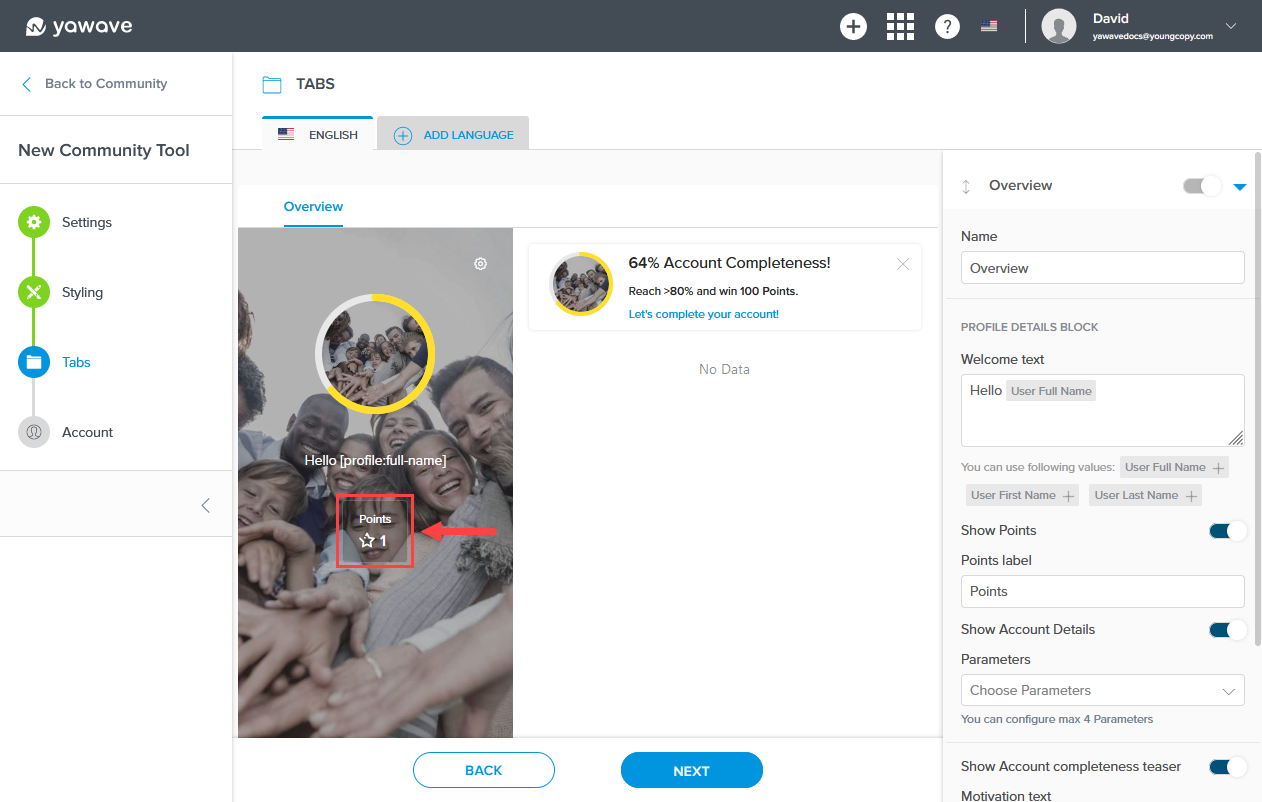
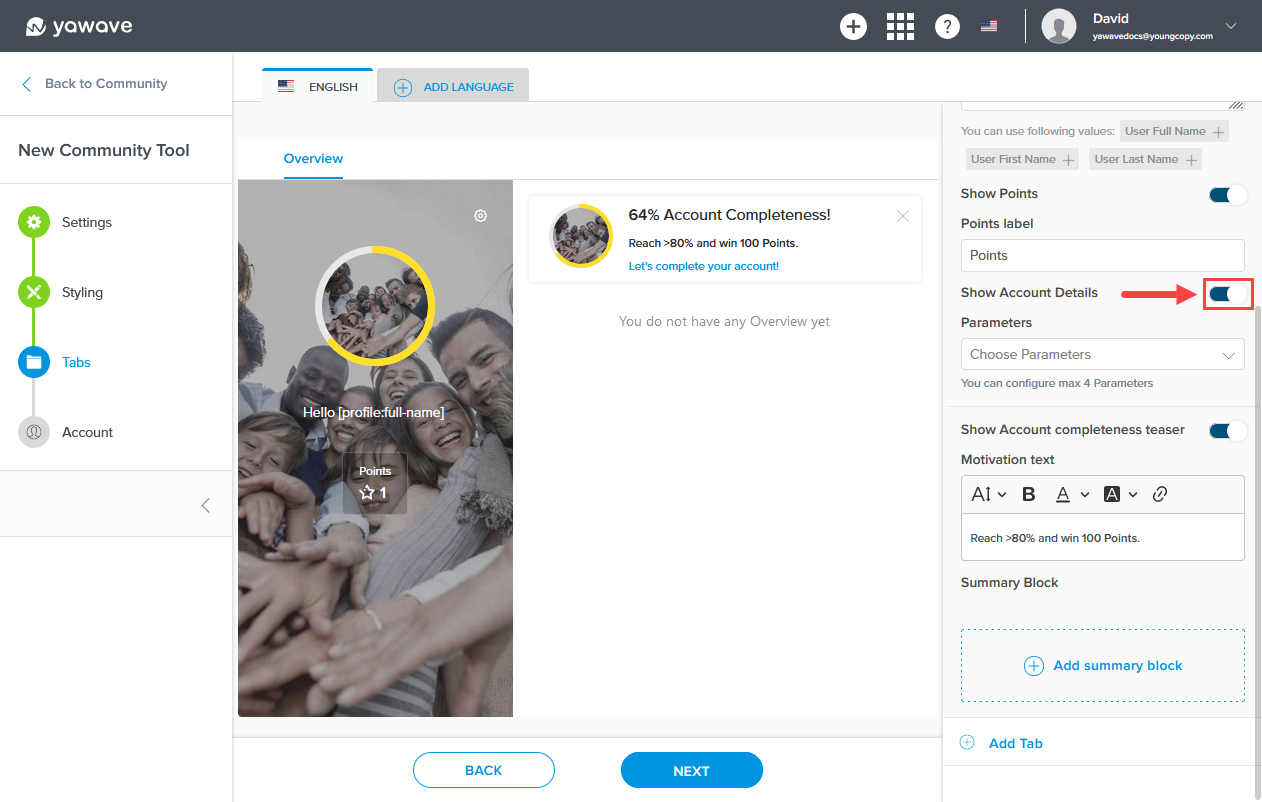
- By default Show Points is enabled.

When Show Points is enabled, the logged-in user's Points displays as shown in the image below.
To disable, click the Show Points toggle once. When Show Points is disabled, the logged-in user's Points will not be displayed.
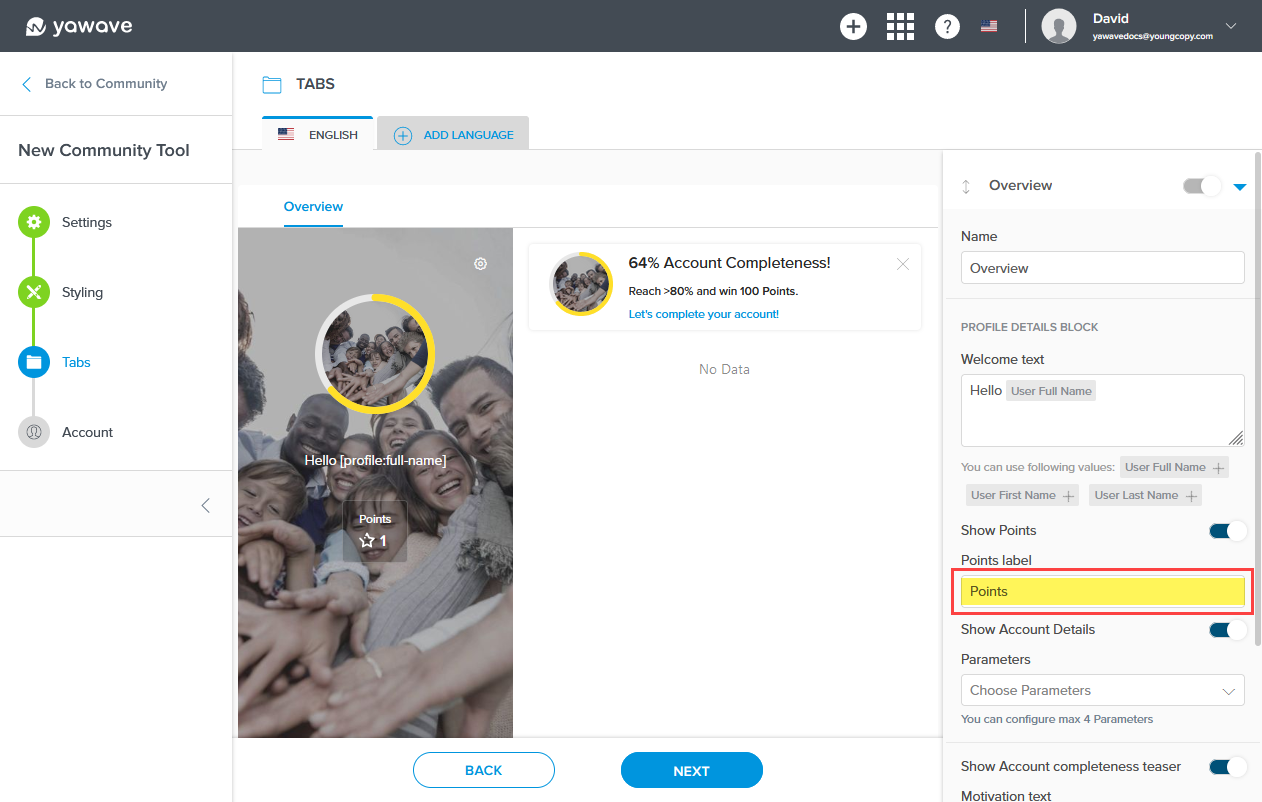
- Leave Points label as default or enter a new label name for Points in the Points label field.
Click the Show Points toggle once to disable. When disabled, Points are not shown.
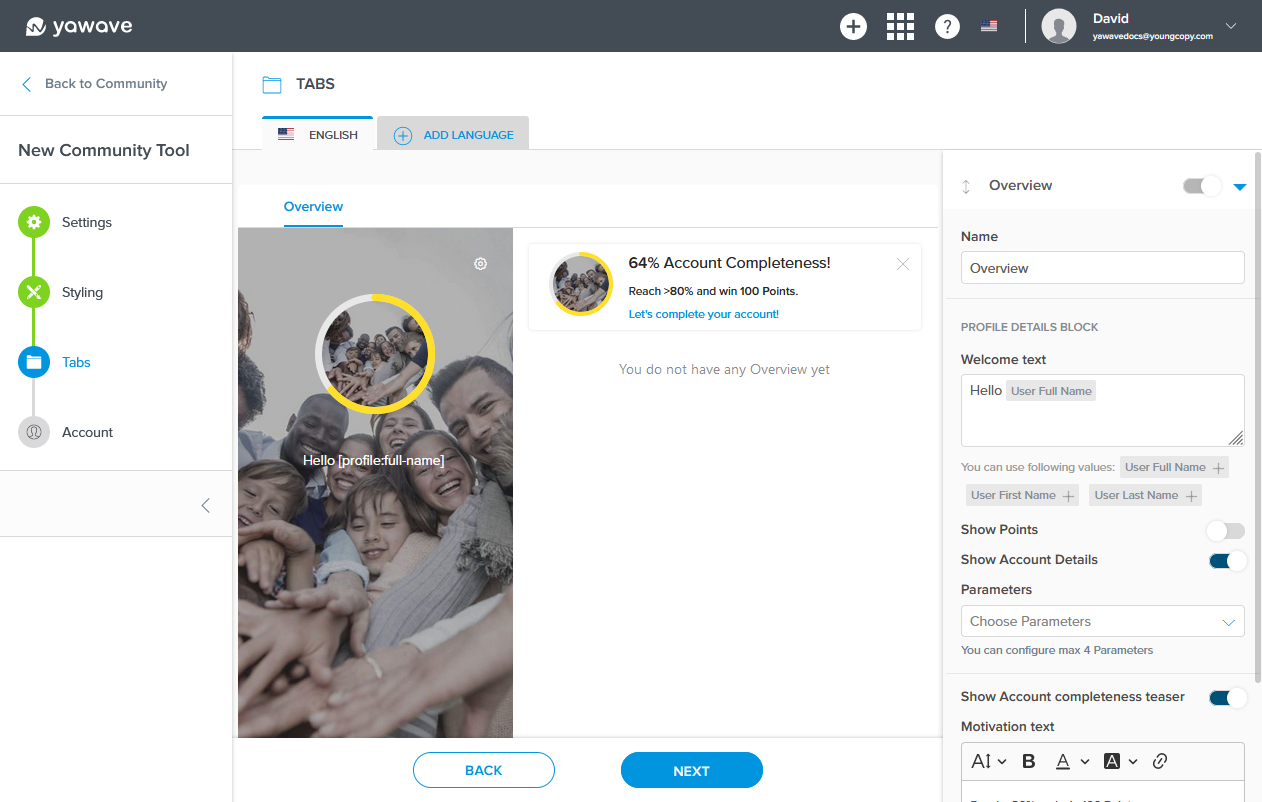
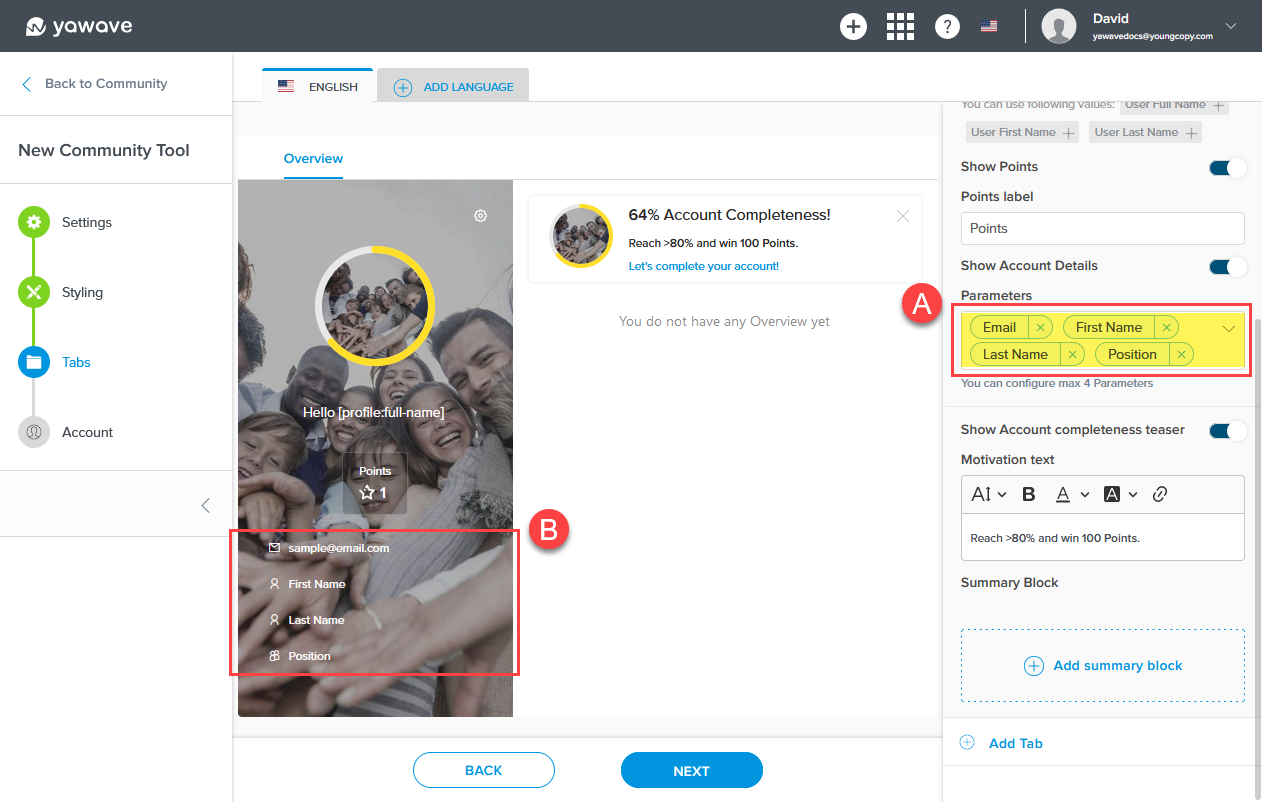
- By default Show Account Details is enabled.
When Show Account Details is enabled you can select up to four parameters to be shown in the Account Details section. In our example below we selected Email, First Name, Last Name and Position from the Parameters drop-down menu (A). The Parameters we selected are shown in the Overview section (B). To delete a Parameter click the x icon next to the parameter's name, then click the Parameters box to select a new parameter.
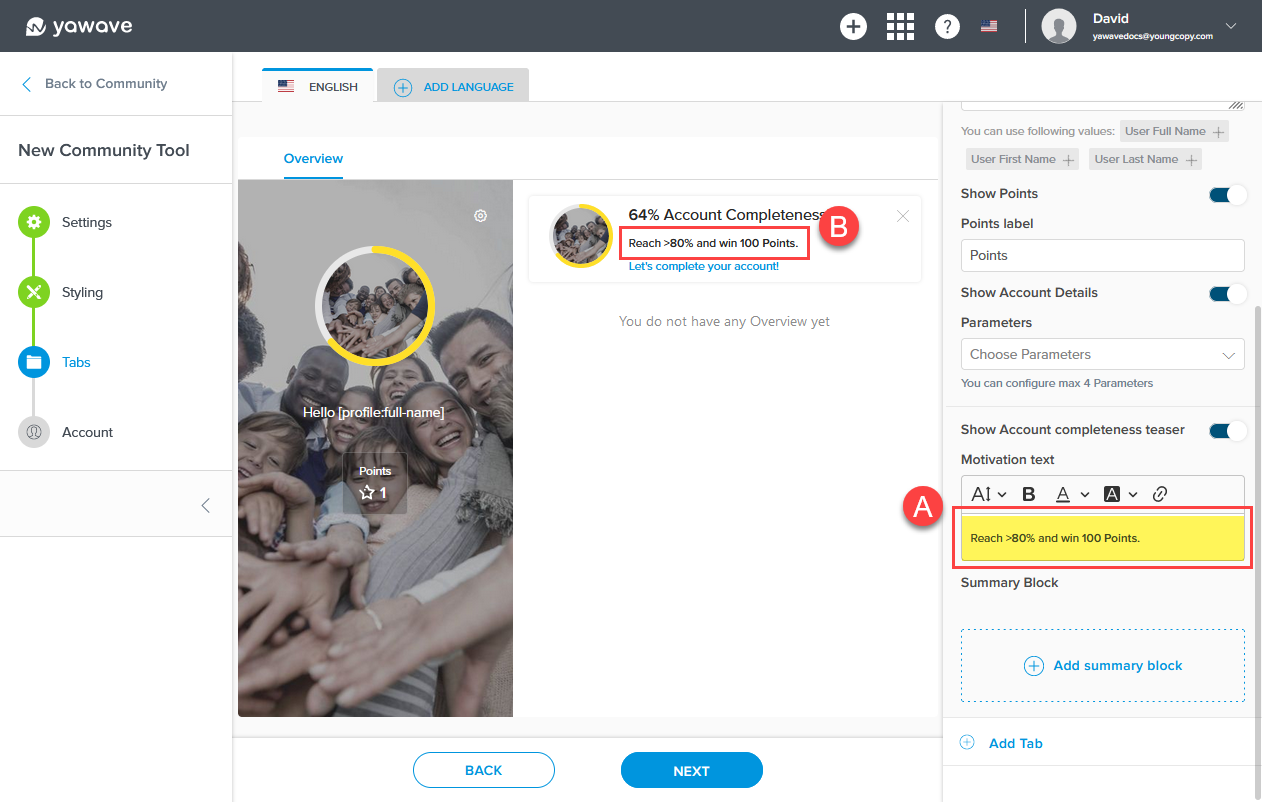
- By default Show Account completeness teaser is enabled.
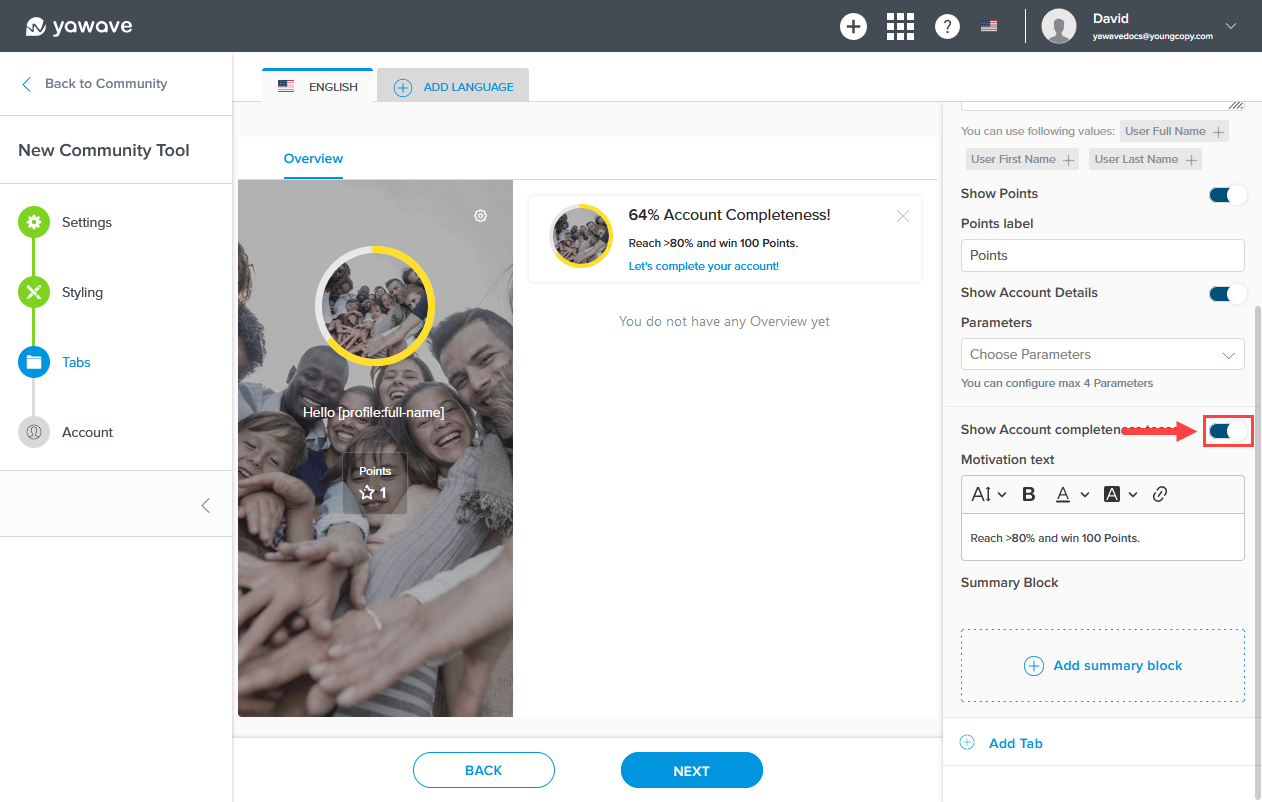
Leave the Show Account Completeness teaser Motivation text as default (B) or enter a new message in the Motivation text field (A).
When Show Account Completeness teaser is disabled, the Completeness box is not shown. Click the Show Account Completeness teaser toggle once to disable.

Add and Configure New Tab
- Click Add Tab to add another tab.

- Select the tab you want to use from the Tab list. Note: Each tab type requires different settings depending on the type you choose from the Tab list. Documentation coming soon on how to configure each Tab type.
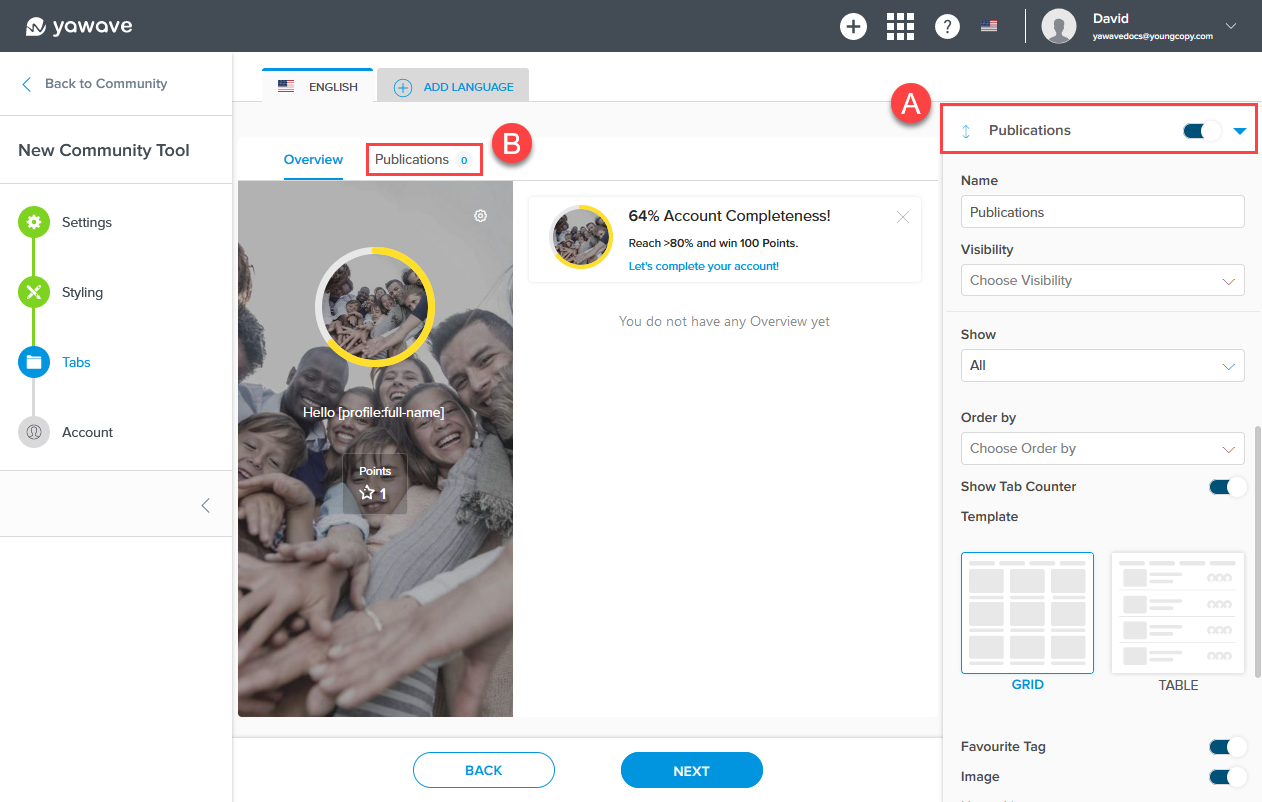
- In our example below we selected Publications from the Tab list. The new tab's Publications settings are shown in the right (A) and the new Publications tab is added to the tabs menu on the left (B).
- In the following example we changed the Publications label to My Publications and added three additional tabs: My Favourites, My Contacts and My Activities. You can see the new tabs users will see on the left (A) and the settings for each of the new tabs on the right (B).
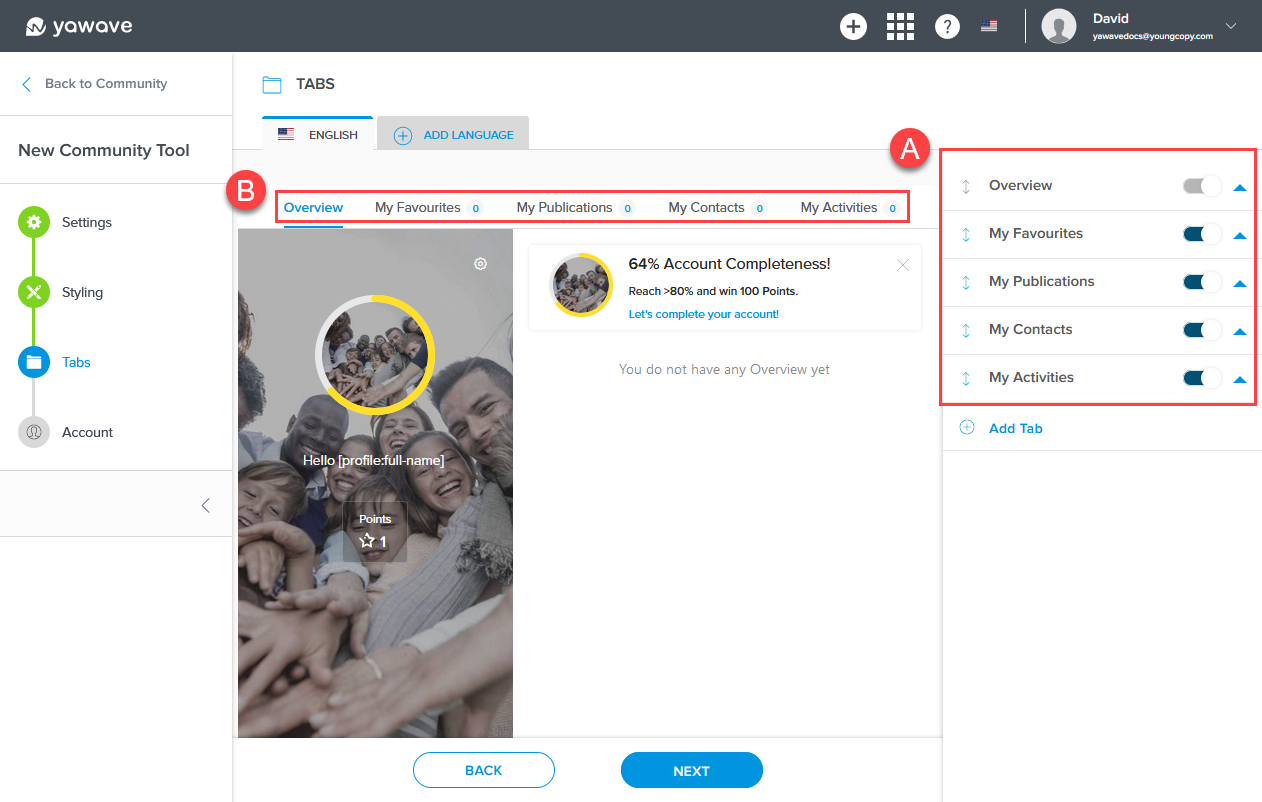
- Click and drag the double arrow to the left of the tab to move the tab up or down. This will change the order tabs appear to users.
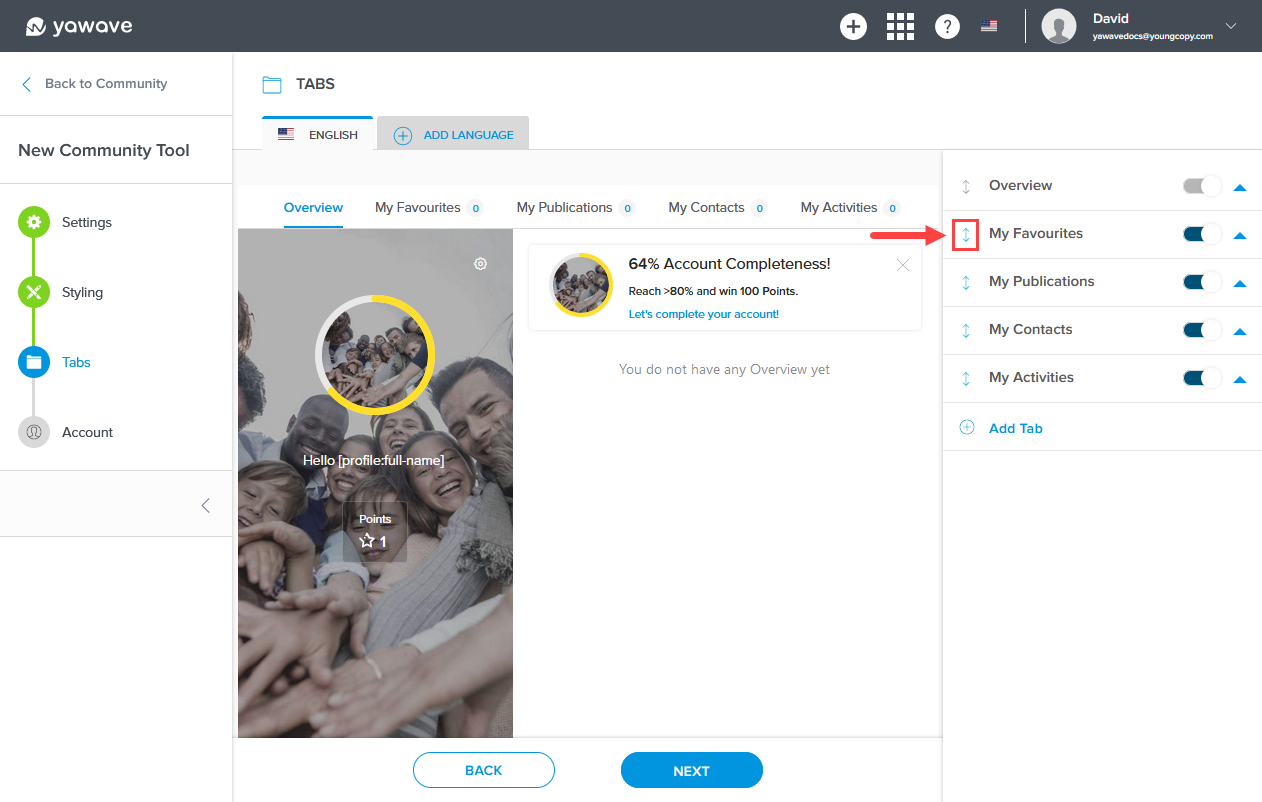
- You can click any tab's arrow at anytime to open the tab's settings. In this example, the arrow is pointing up, which means the settings will not be shown. When the arrow is pointing down, the settings for that tab will be shown.
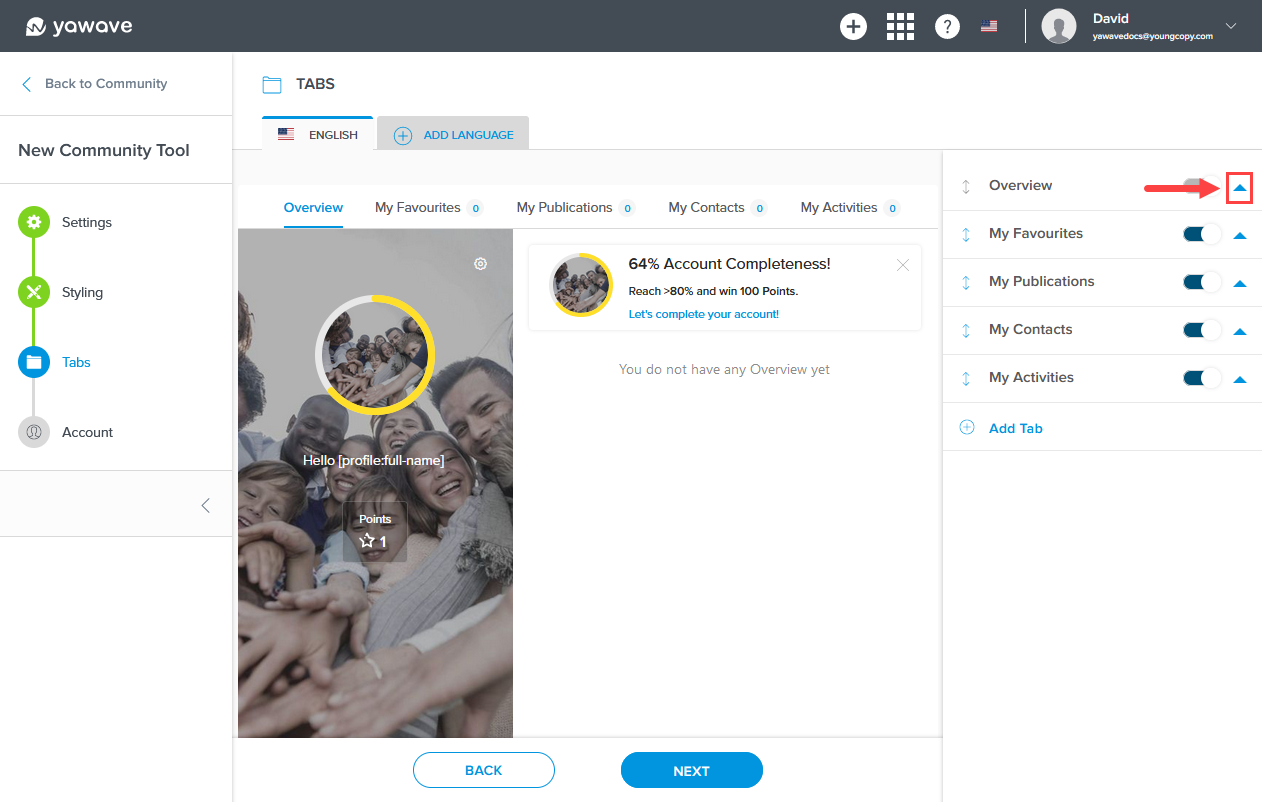
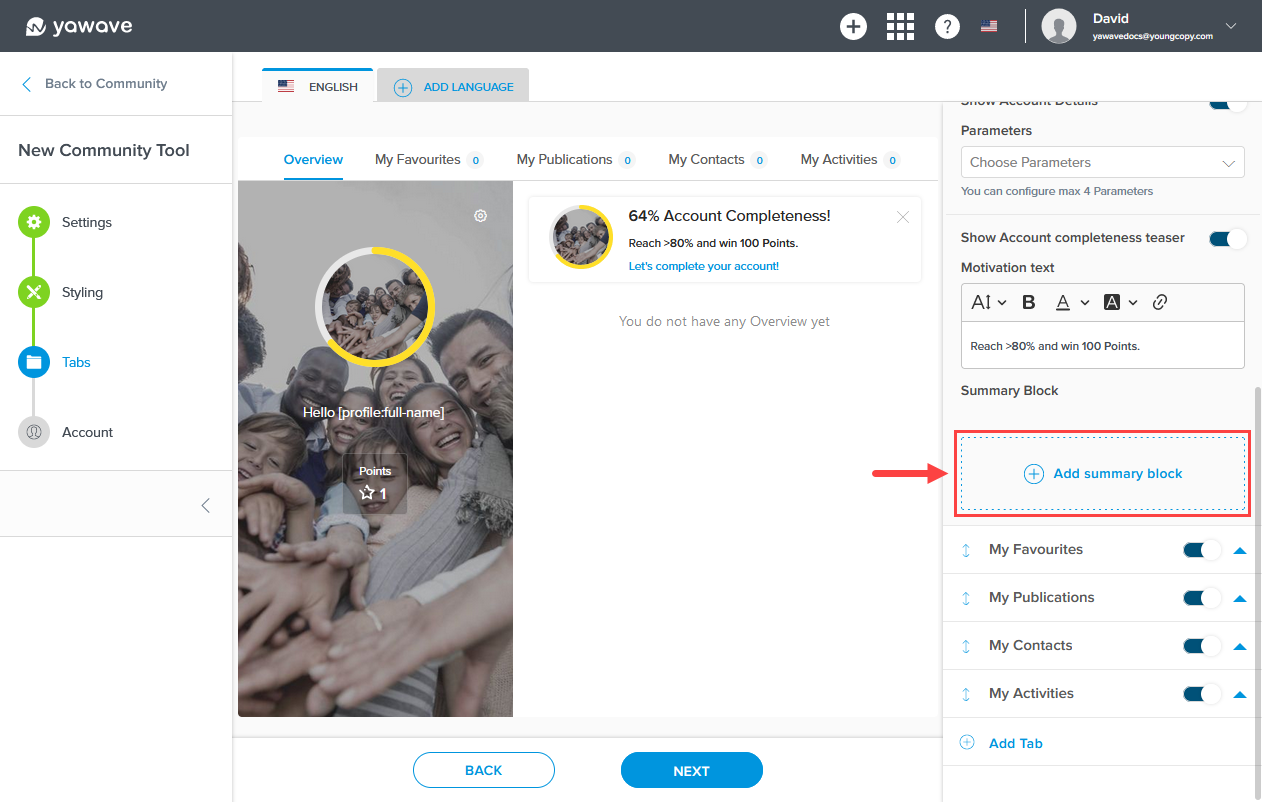
- Now that we've added multiple tabs, let's go back to the Overview tab and add a Summary Block. Note: If the Overview tab's settings are not showing, click the arrow to the right of the Overview tab to expand the tab's settings and scroll down until you see Add Summary Block. Click Add summary block.
- Enter a name you want to use for this Summary Block in the Name field.
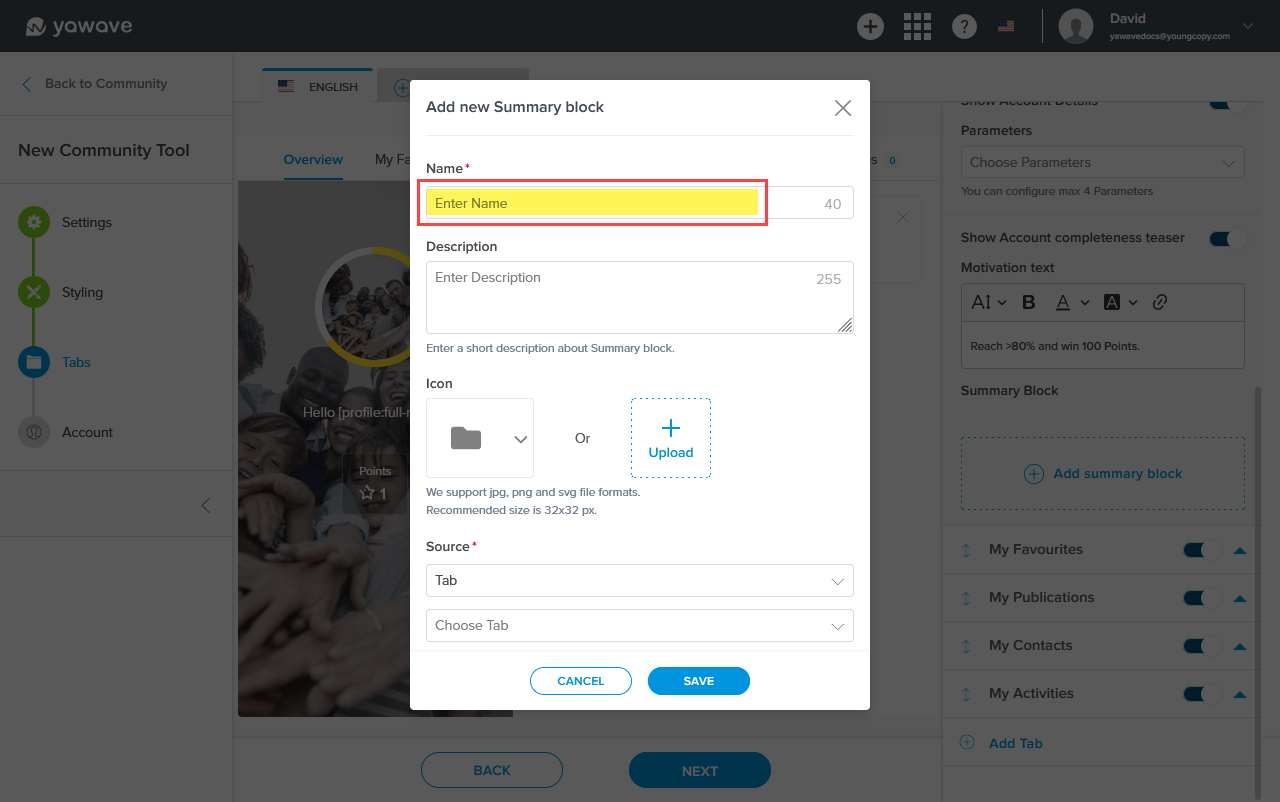
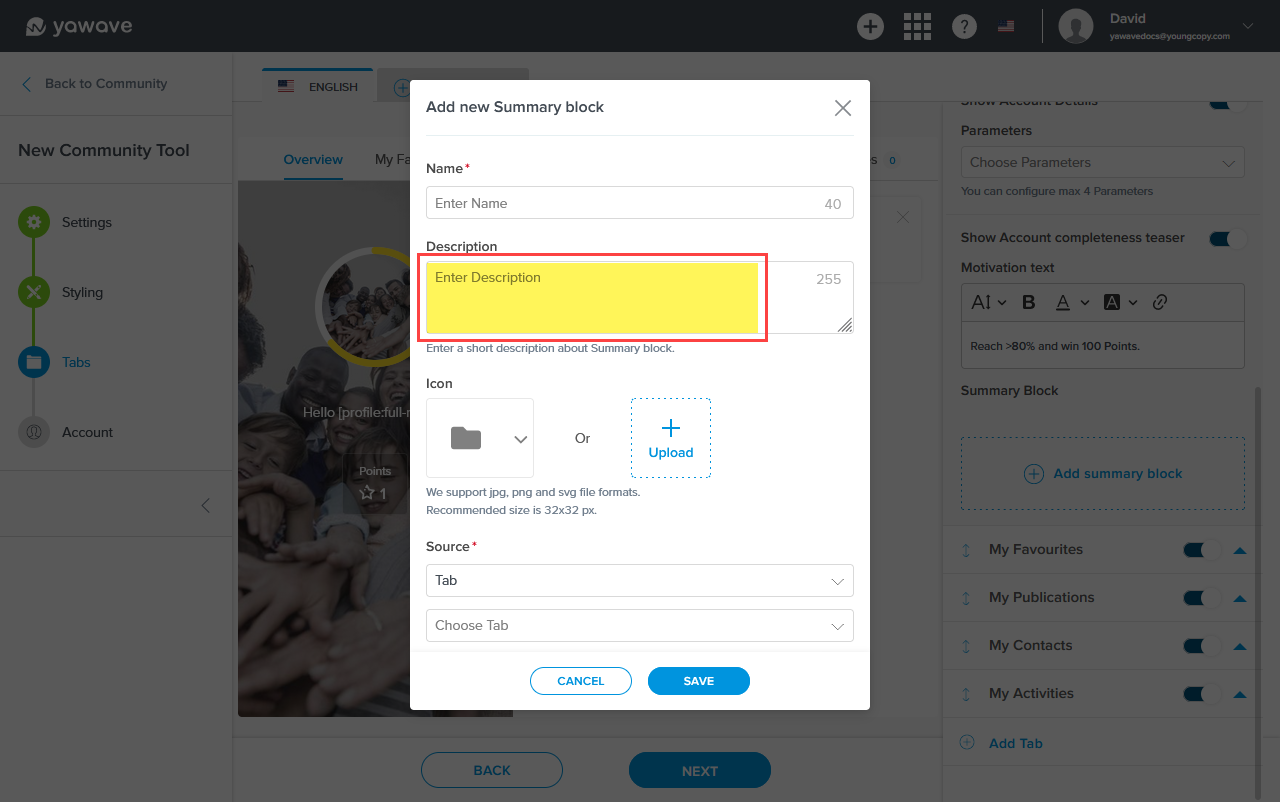
- Enter a description you want to use for this Summary Block in the Description field.
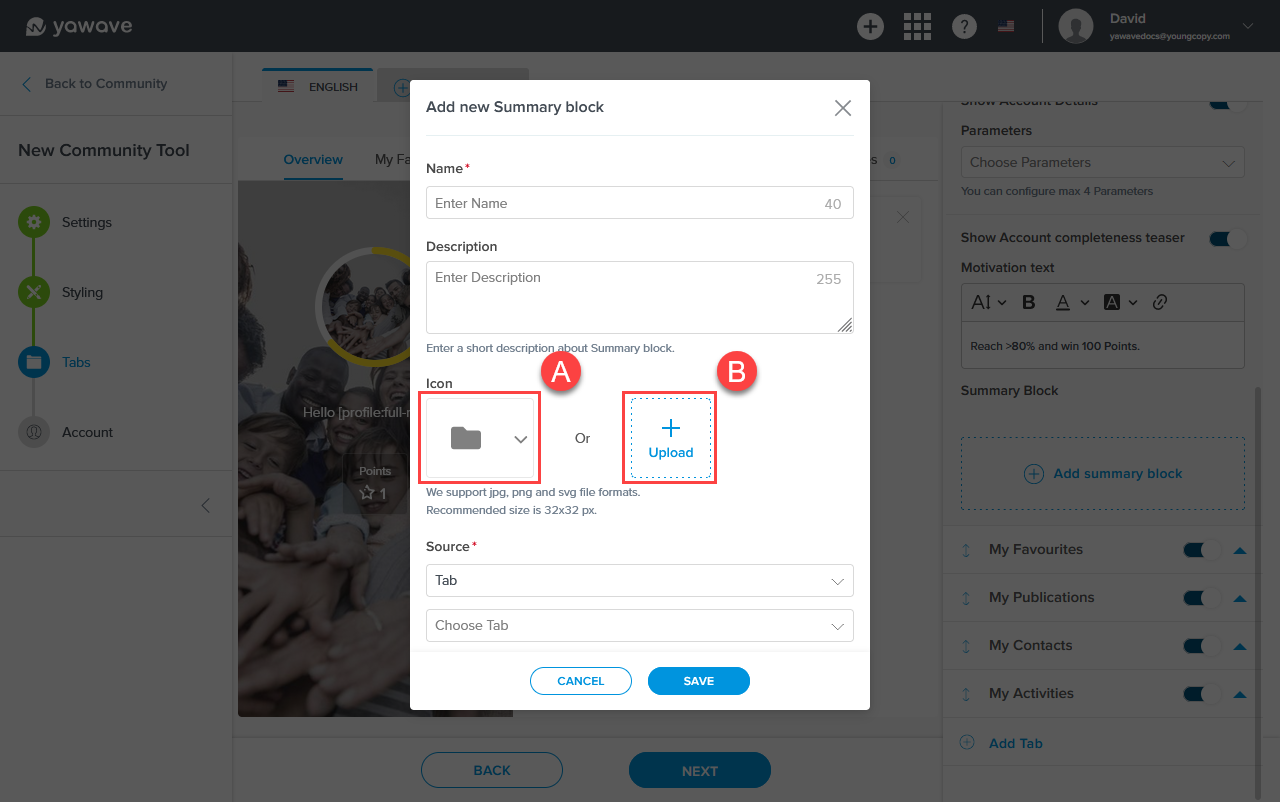
- Select a default icon from the drop-down menu (A) or upload your own icon by clicking Upload (B).
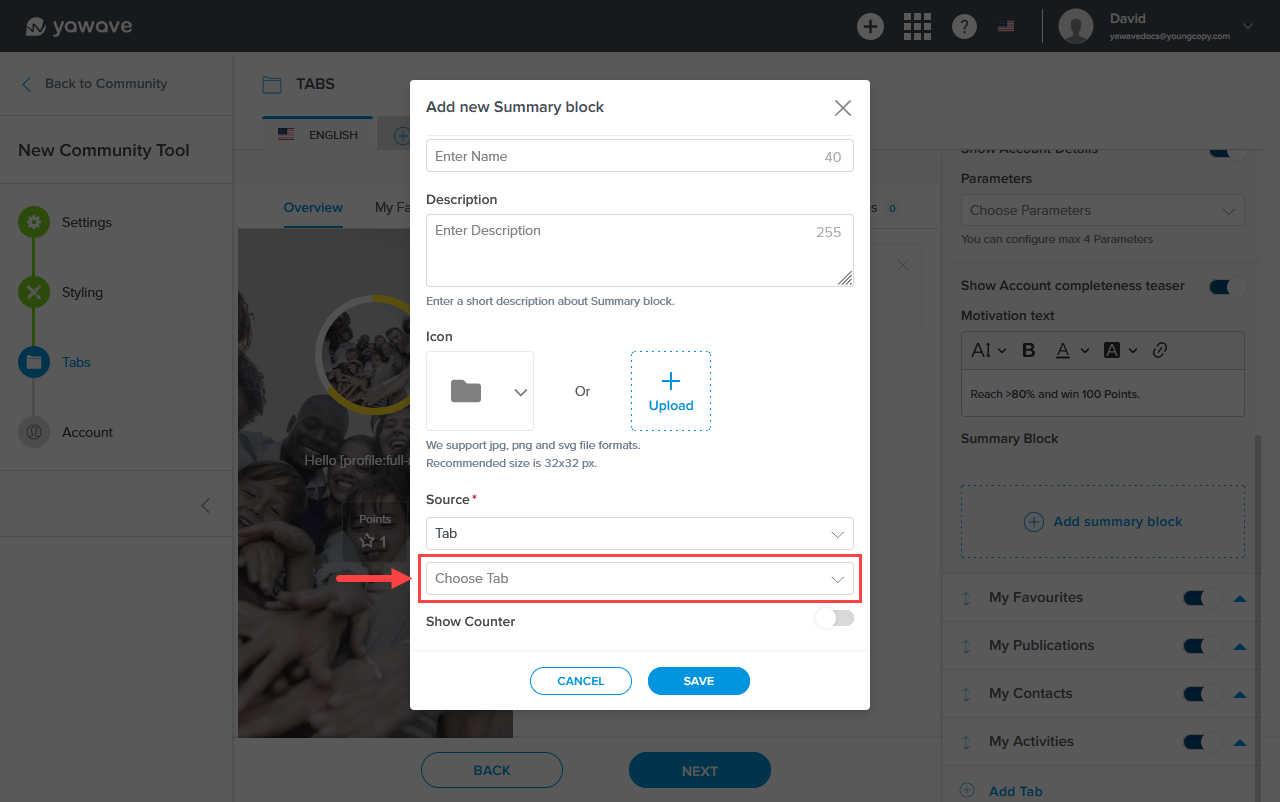
- Select a source from the Source drop-down menu. Your choices include the default Tab or Custom URL.
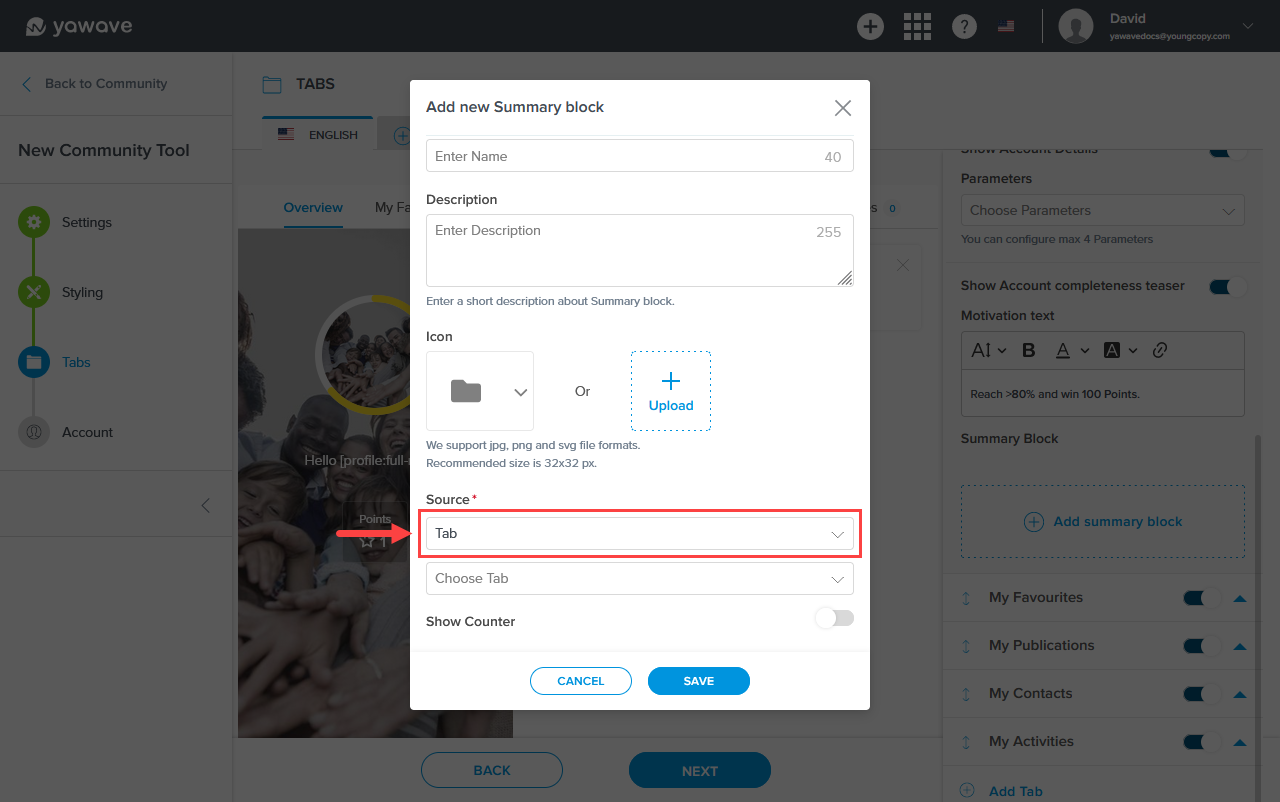
- If you choose the default Tab as the source, select the tab you want to use from the Choose Tab drop-down menu. Note: The tabs available on the Choose Tab drop-down menu are the tabs you created using the Add and Configure New Tab instructions above. For example, in our Choose Tab drop-down menu our choices include My Favourites, My Publications, My Contacts and My Activities. Tabs will not show up in the Tab Source drop-down menu until you Add and Configure New Tab.
- If you choose Custom URL as the source, enter the URL you want to link the summary block to in the Enter URL field.
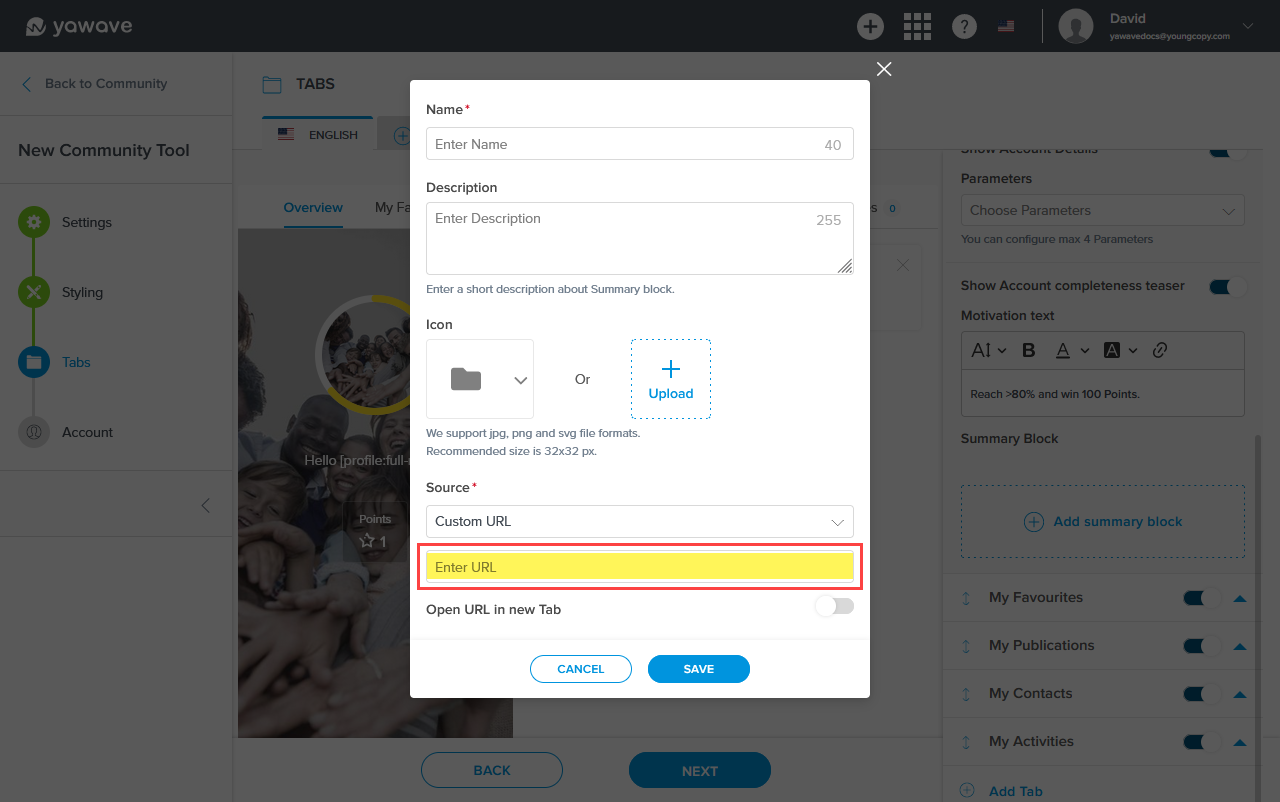
- By default Open URL in new Tab is disabled. If you want the Custom URL to open in a new Tab, click the Open URL in new Tab toggle once.
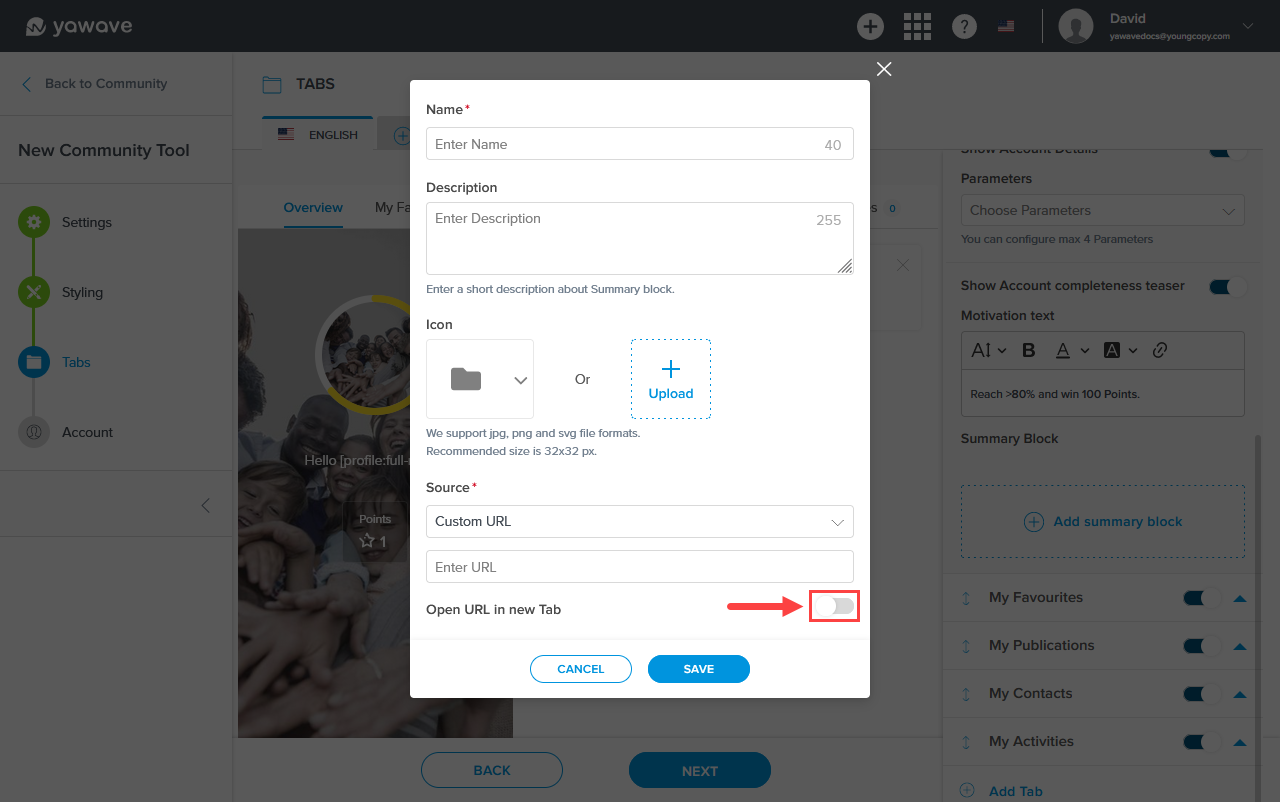
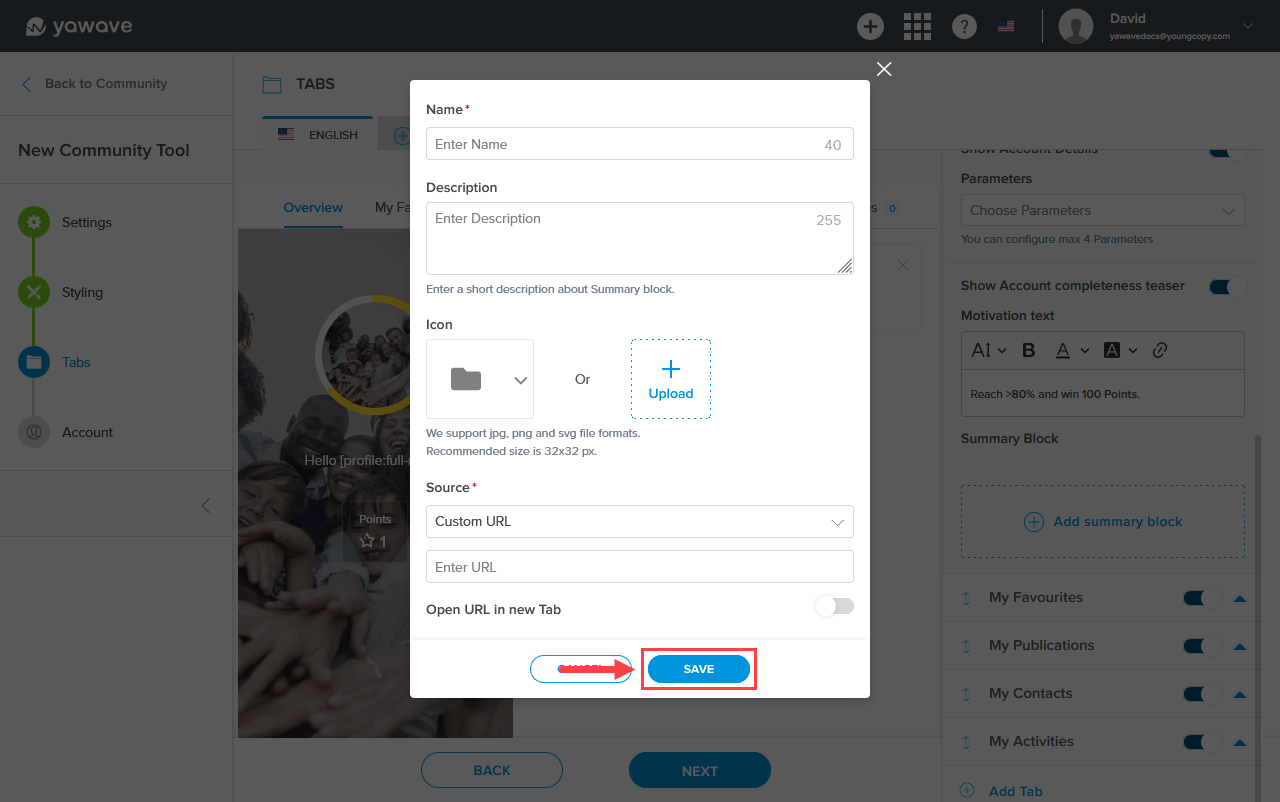
- Click Save.
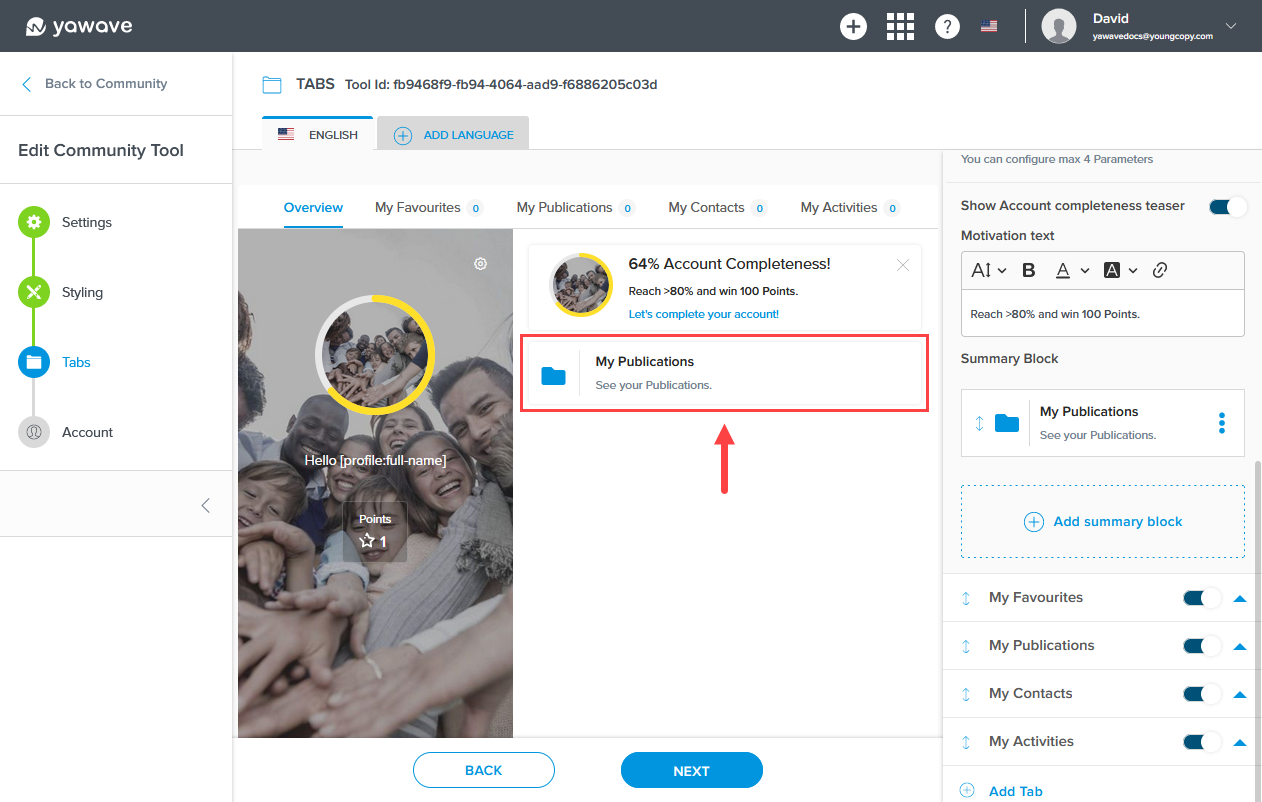
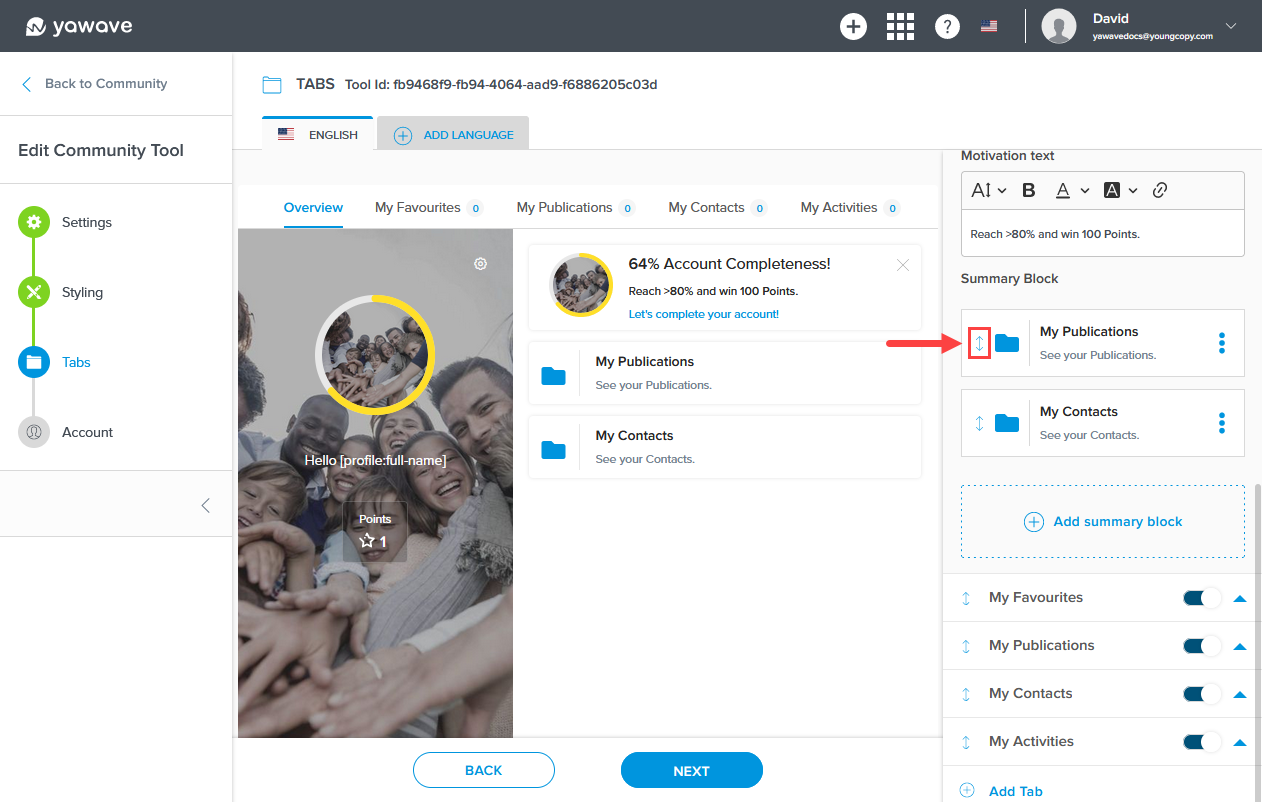
- Let's say you want to add a summary block in the Overview screen that points to My Publications. Once added it looks like the following.
- Below is an example of what it looks like when we add My Contacts.

- If you have more than one summary block, click and drag the arrow up or down to change the summary block order.
- To edit, duplicate or delete a summary block, click the three dot menu to the right of the summary block you want to modify.

- Click Next.
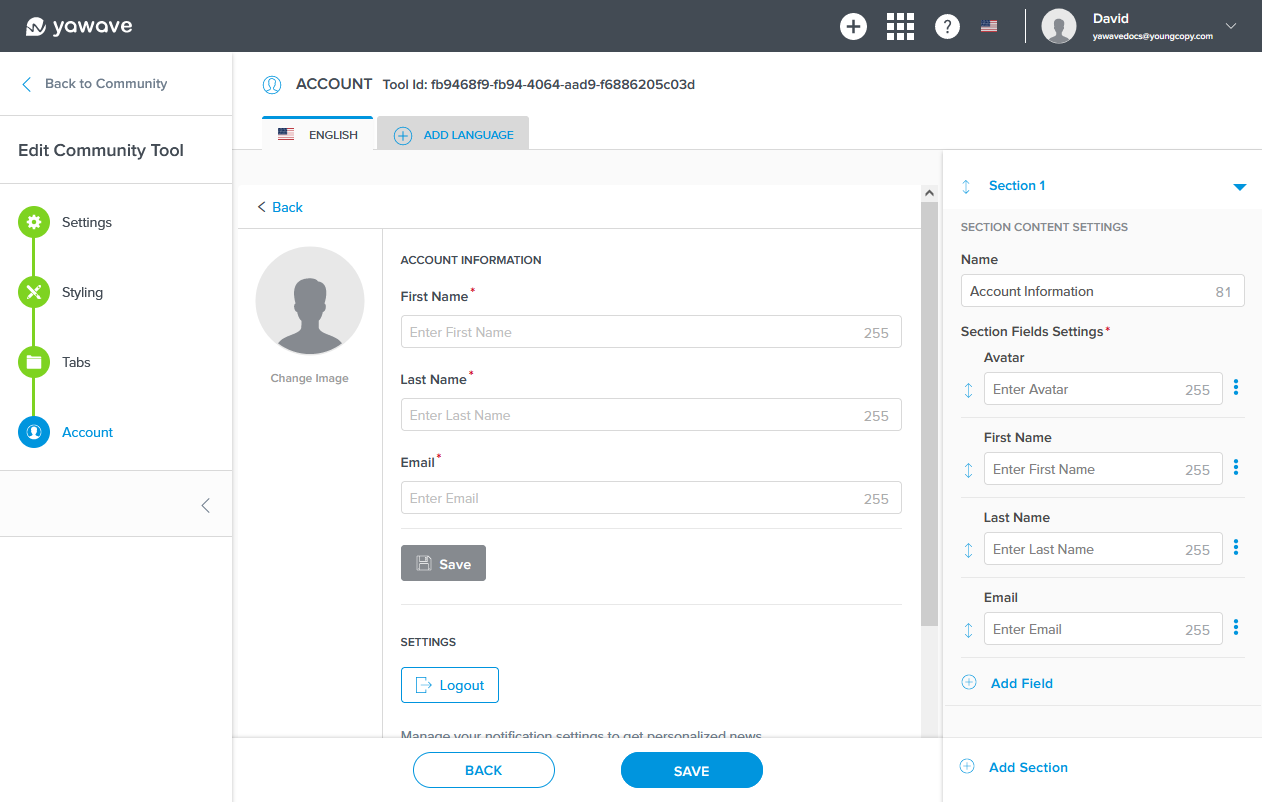
Configure Community Tool Account
The Community Tool Account section is the same information a logged-in user can see when they visit their Profile page in yawave.
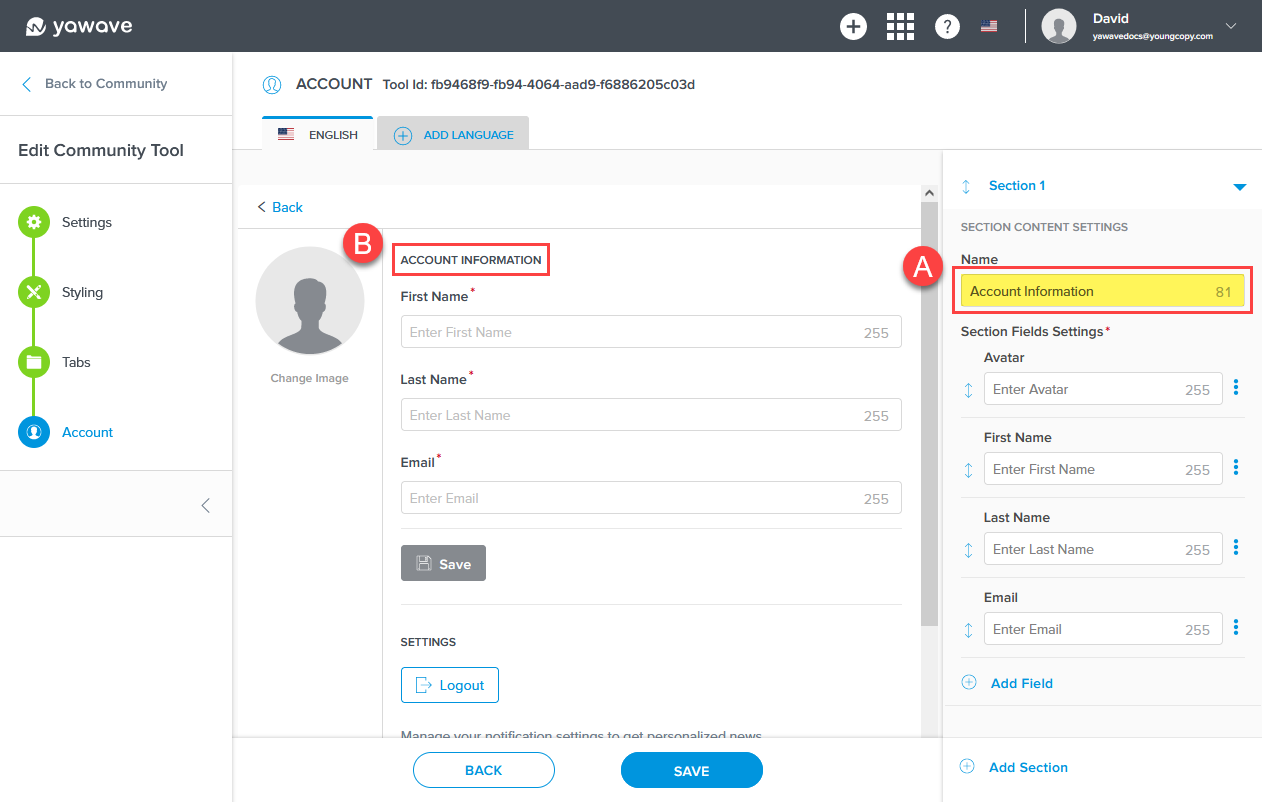
- By default the Account settings contains one section (Section 1) and four fields (Avatar, First Name, Last Name, Email). On this screen you can add, delete, move and edit sections and fields. Each section contains the number of fields you want your contacts and subscribers to see when they view the Community Tool.

- Leave the Name field as default Account Information or change the name based on your preference (A). What you change in the Name field is reflected in the content area viewable to the end user (B).
- To move a field up or down, click the arrow to the left of the field you want to move.

- To edit a field, click the three dot menu to the right of the field you want to edit and select Edit from the drop-down menu.

- When editing a field, note the Account field cannot be changed - it will be the same as the field you are editing. For example, if you edit the Avatar field, the Account field will show Avatar in the drop-down menu.
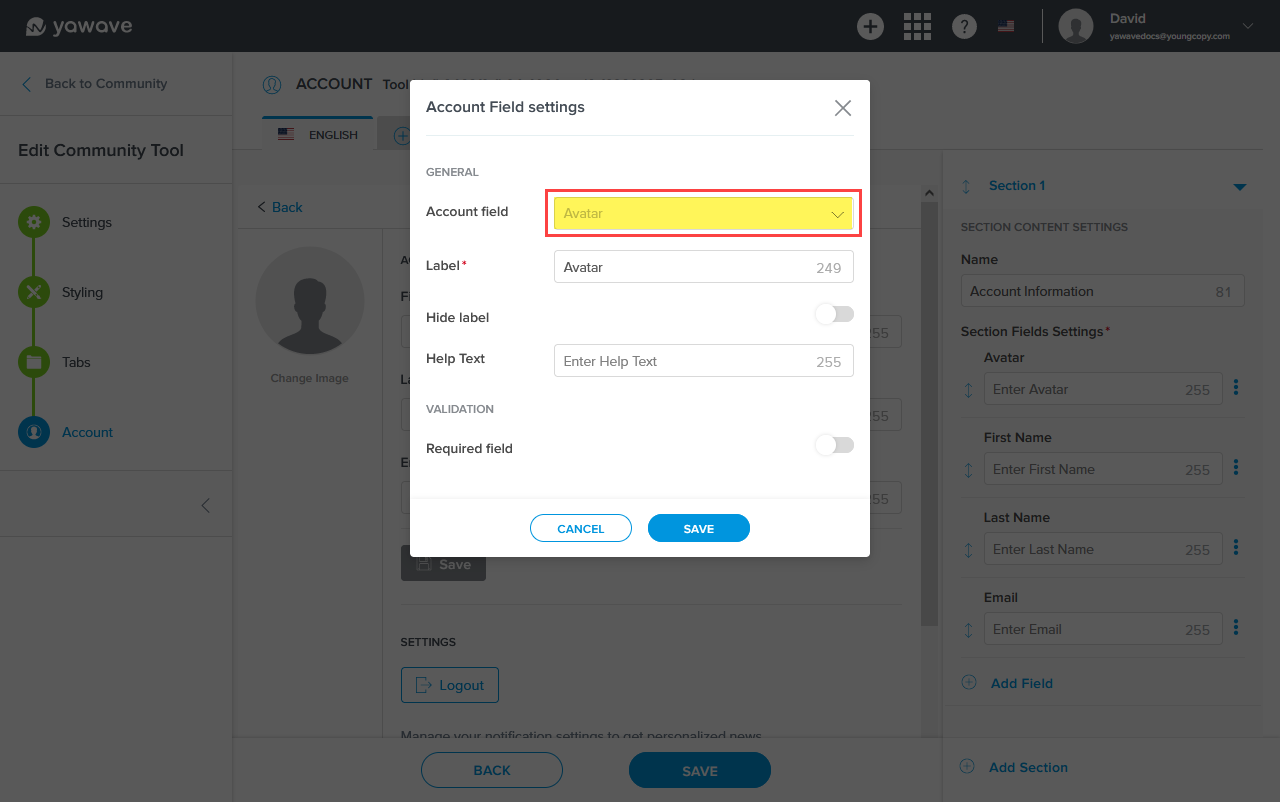
- The Label field will have the same name as the field type you are editing. For example, if you are editing the Avatar field, the Label field will show Avatar. Leave the Label field as default or change the name based on your preference. What you change in the Label field is reflected in the content area viewable to the end user.

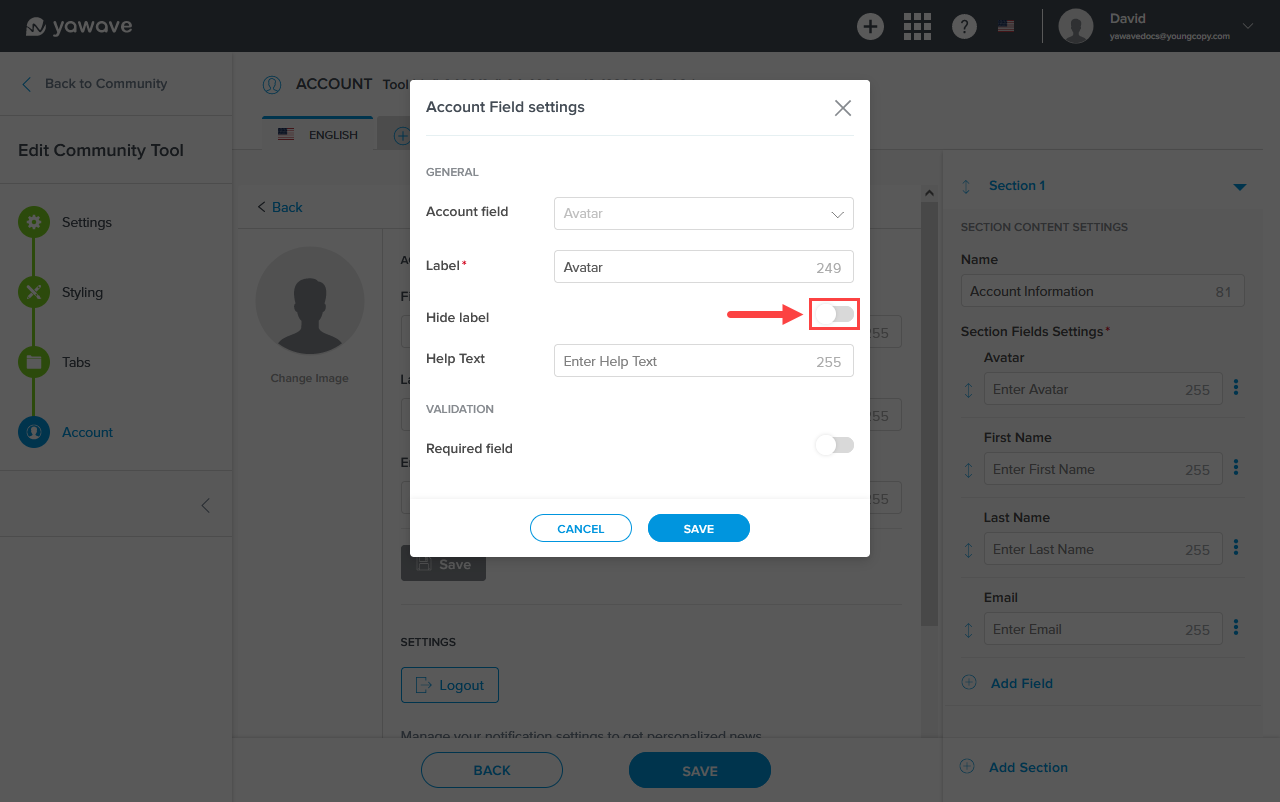
- By default Hide label is disabled. When enabled, the Label you entered or modified above will not be shown to the end user. To hide the Label to the end user, click the Hide label toggle once.
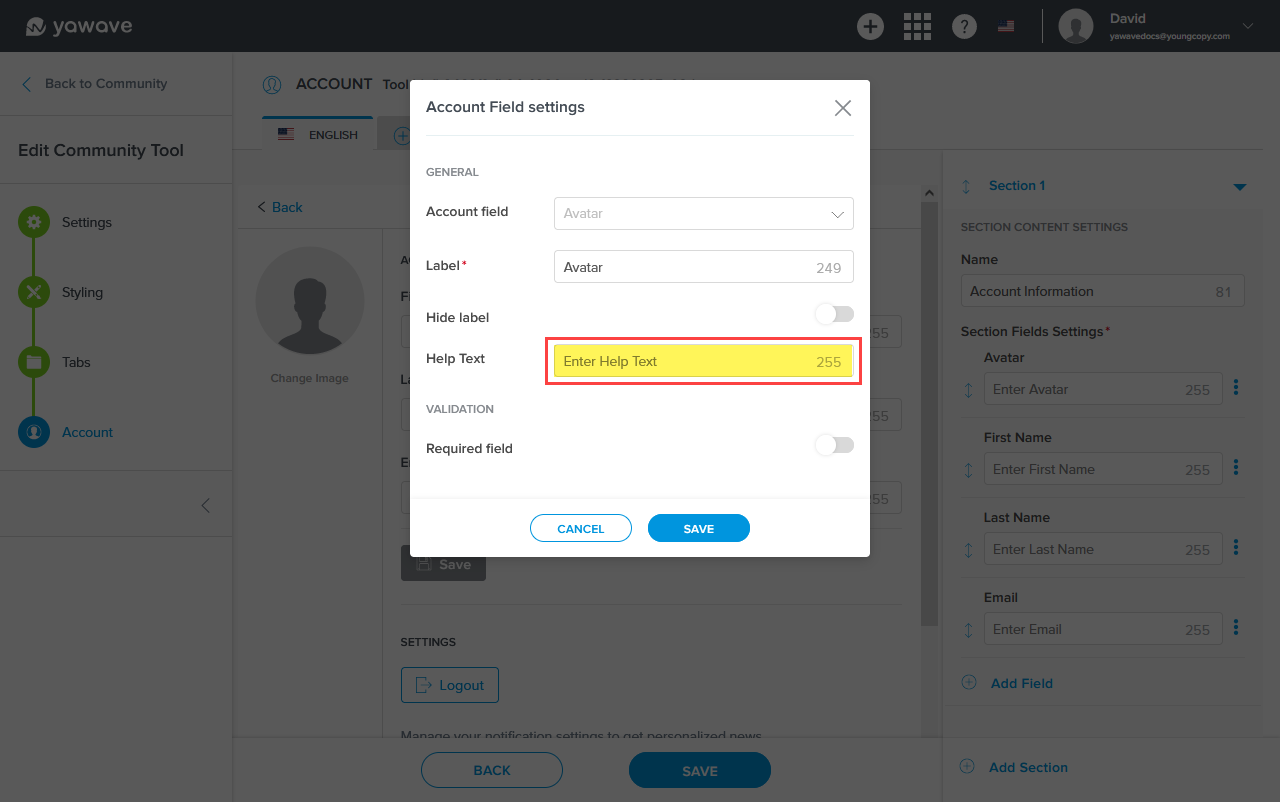
- Enter the text you want your users to see in the Help Text field. Note: This is the text that will be shown when a user hovers their cursor over the field.
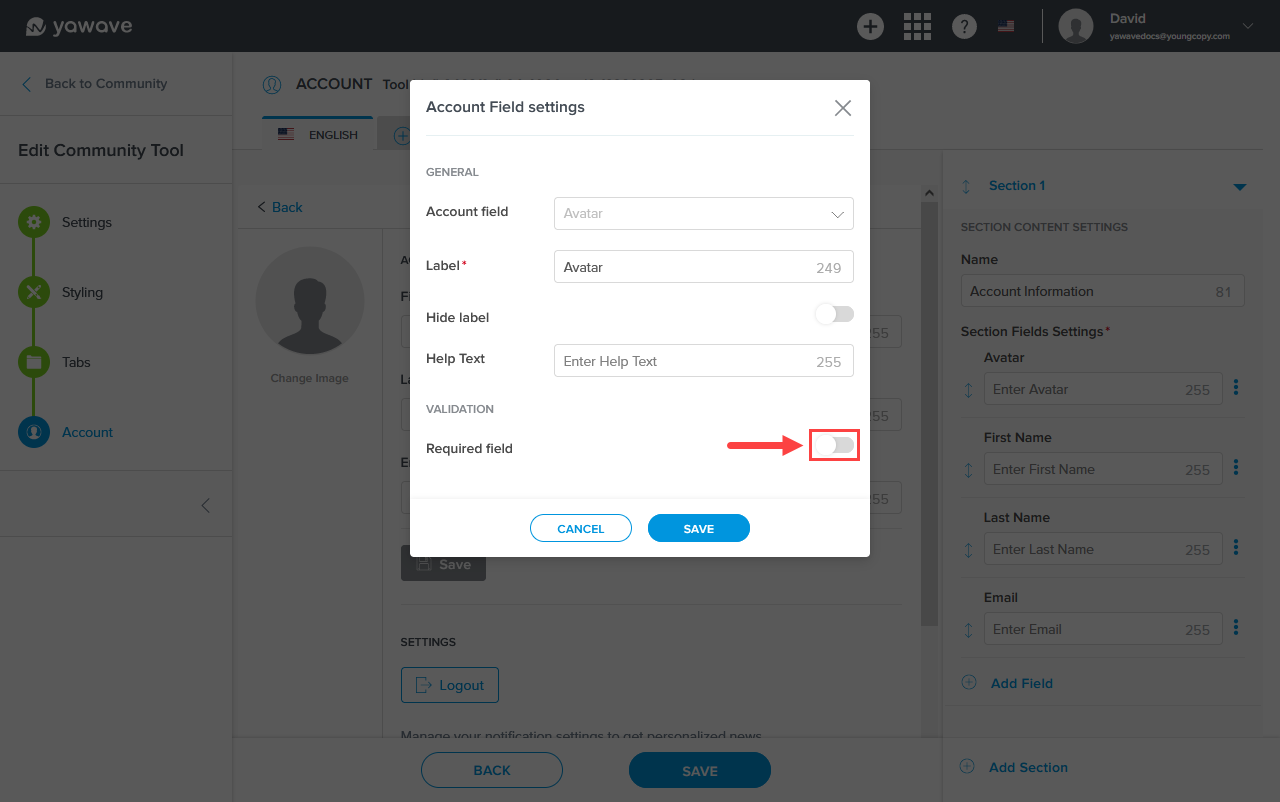
- By default Required field is disabled. When enabled, users are required to enter or select value(s) for the field you are editing. To make the field you are editing required, click the Required field toggle once.
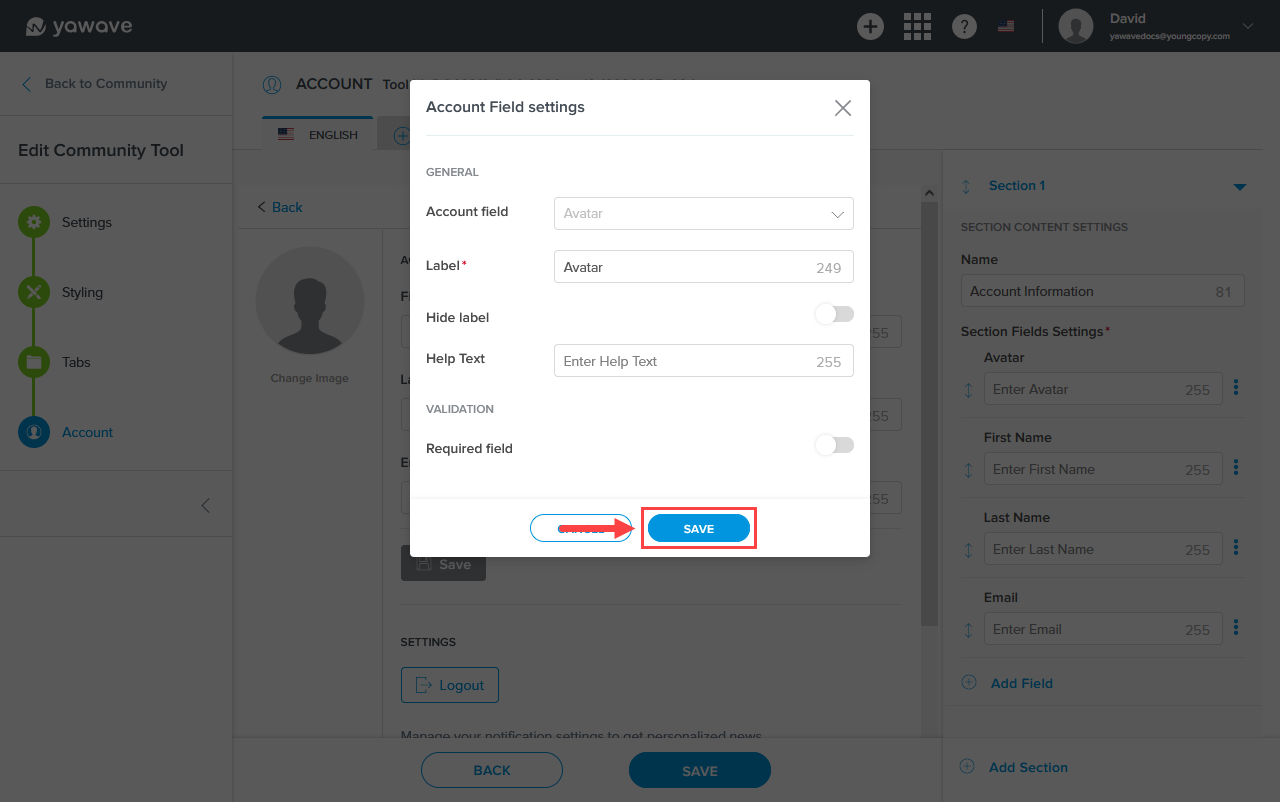
- Click Save.
-
Optional Setting: To add a new field, click Add Field and select Account Field, otherwise continue reading at Step 21.
-
Select one of the following from the Account field drop-down menu:
- Nick Name
- Birth Date
- Gender
- Website
- Account Type
- Company
- Position
- Address
- Phone Number
-
The Label field will have the same name as the field type you select in Step 12. For example, if you Birth Date as the Account field, the Label field will show Birth Date. Leave the Label field as default or change the name based on your preference. What you change in the Label field is reflected in the content area viewable to the end user.
-
By default Hide label is disabled. When enabled, the Label you entered or modified in Step 13 above will not be shown to the end user. To hide the Label to the end user, click the Hide label toggle once.
-
Enter the text you want to show in the Account field as the user sees it in the Placeholder field.
-
Enter the text you want your users to see in the Help Text field. Note: This is the text that will be shown when a user hovers their cursor over the field.
-
By default Required field is enabled. When enabled, users are required to enter or select value(s) for the field you are editing. To make the field you are editing not required, click the Required field toggle once to disable.
-
Enter the maximum character length the user can enter for the Account field in the Max length field.
-
Click Save.
-
Continue adding or editing Account Fields (repeat Steps 11-10) or continue reading at Step 21.
-
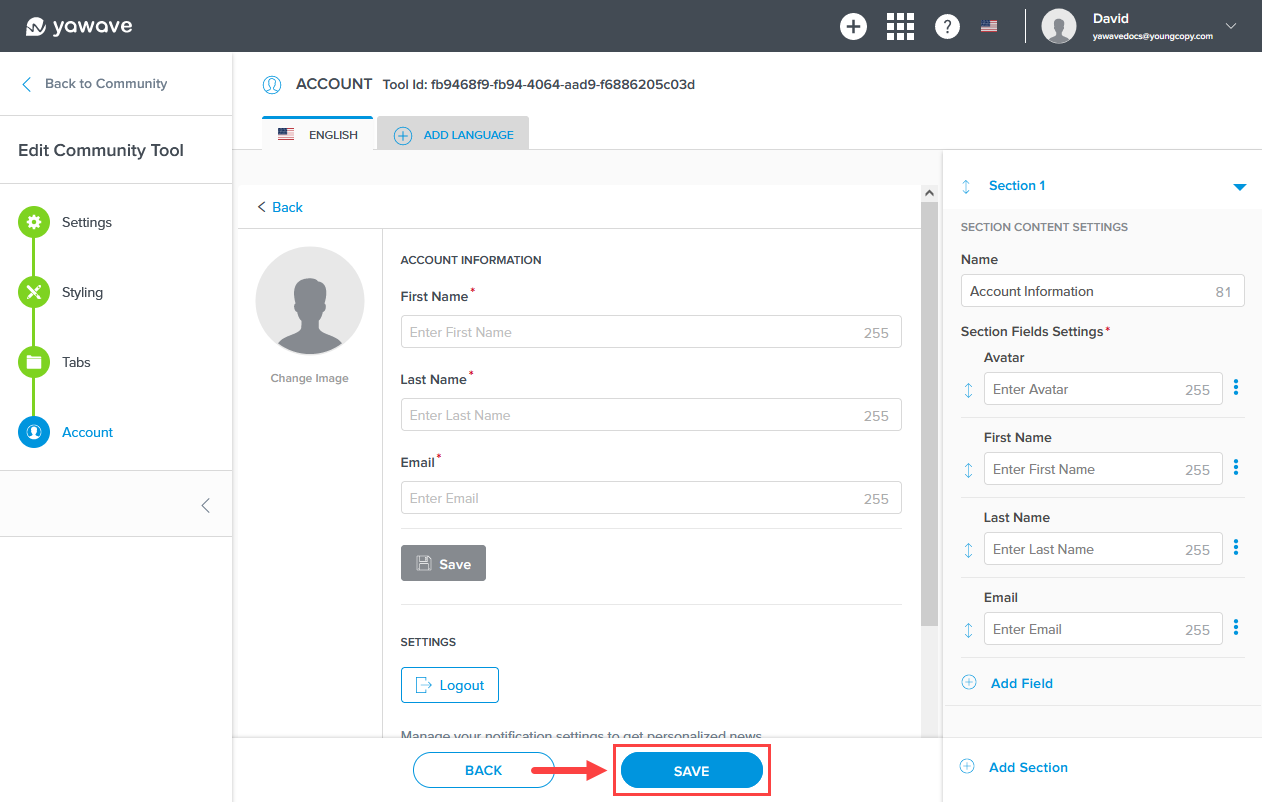
Click Save on the Account screen. This will save all your changes to the Community Tool.
Testing Your Newly Configured Community Tool
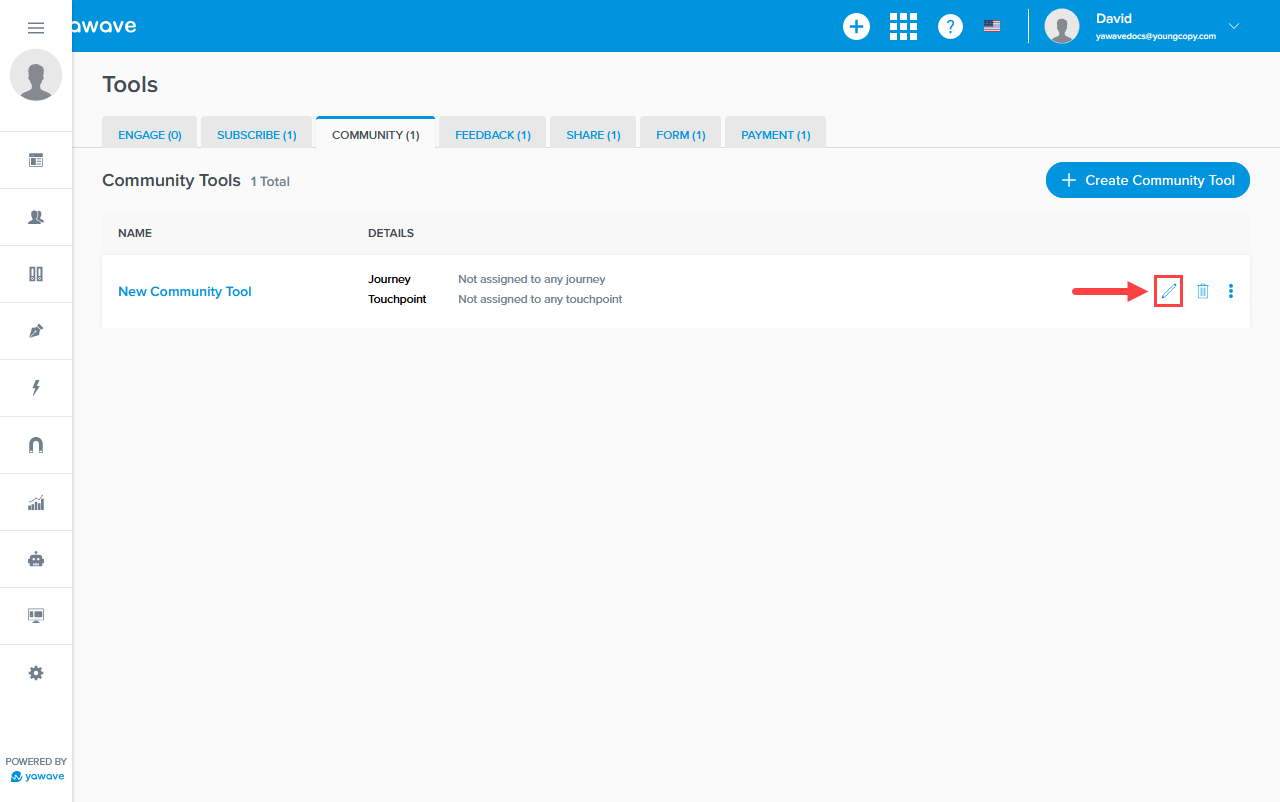
- At this point we recommend you view the Community Tool with the settings you have configured so far. To do this, click Save. When the Community Tools page loads click the name of the Community Tool you just created.
- If you need to make edits to the Community Tool's settings, click the pencil icon located on the same row as the Community Tool you want to edit. Then click Edit. Note: The pencil icon appears when you move your cursor over the row the Community Tool is located on.
- Go through the screens and make adjustments to the Community Tool's settings using the instructions you have learned. When you are ready to configure the Account settings, click Next on each screen until you see the following image.
- When you are finshed configuring the Community Tool's settings, click Save. Note: To click Save you must be on the Account settings page as shown below.
Add Catalog and Benefits Tabs to Community Tool
- Once you have created Benefits, you can now add the Benefits to the Community Tool. In the Community Tool, make sure you are on the Tabs settings screen.
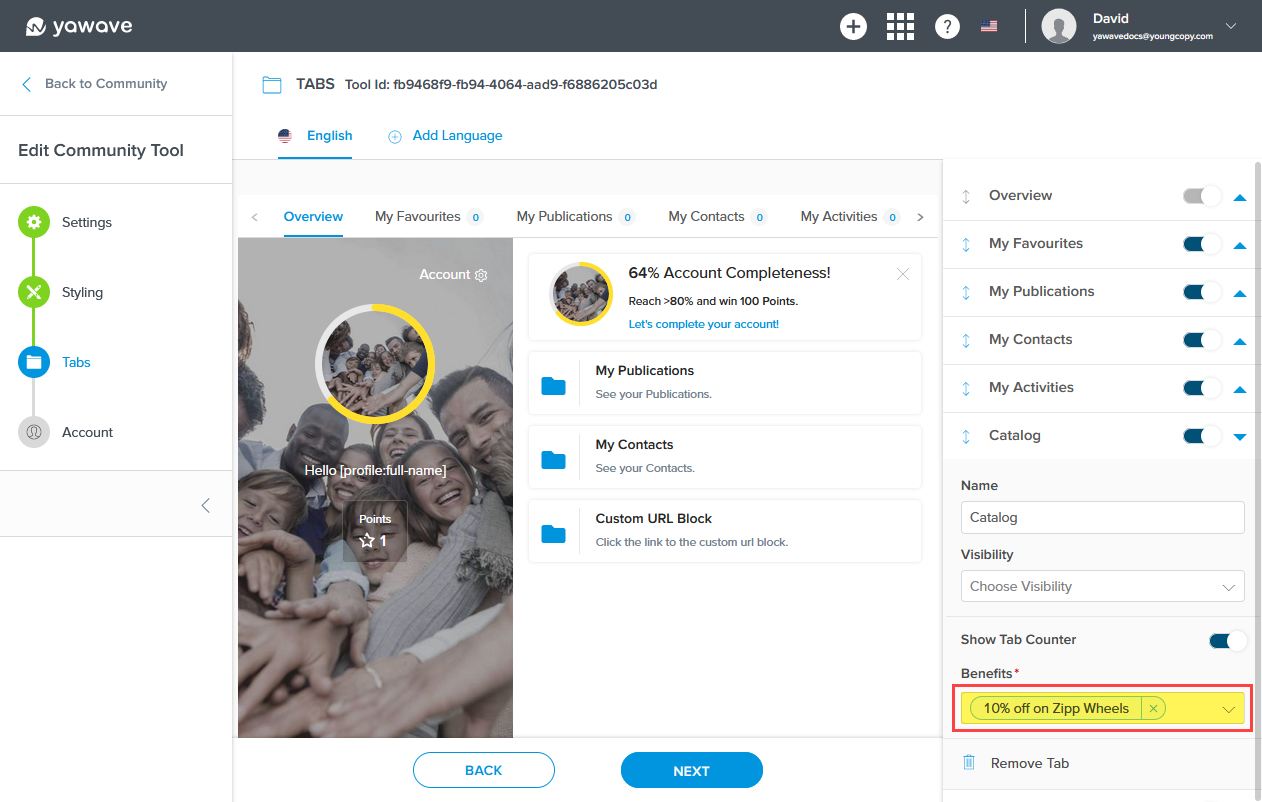
- You'll need to add two tabs: Catalog and Benefits. Click Add Tab and select Catalog from the drop-down menu.
-
Leave the Name field as default Catalog or change the name based on your preference. For example, you can change it to My Catalog.
-
By default Show Tab Counter is enabled. When enabled, the number of Benefits available will be shown to the right of the Catalog tab as a numerical value. If you do not want the counter to be shown, click the Show Tab Counter toggle once to disable.
-
Select the Benefits you want to use for this Catalog from the Benefits drop-down menu. If the Benefit you want to use is not showing in the drop-down menu, create Benefits, then return to the screen below. The new Benefits you created should now be showing in the drop-down menu.
-
Click Add Tab again and select Benefits from the drop-down menu.
-
Leave the Name field as default Benefits or change the name based on your preference. For example, you can change it to My Coupons. This will change the default name Benefits to My Coupons.
-
By default Show Tab Counter is enabled. When enabled, the number of Benefits available will be shown to the right of the Benefits tab (or My Coupons tab depending on what you choose in Step 7 above) as a numerical value. If you do not want the counter to be shown, click the Show Tab Counter toggle once to disable.
-
Click Next, then click Save.
-
To test the newly added Catalog and Benefits, open the Community Tool by clicking the Community Tool name.
-
When the Community Tool is open, you should see the newly added Catalog and Benefits (or My Coupons tab depending on what you choose in Step 7 above) tabs.
Note: If you are testing using the default Benefits we used in our examples, you may not have enough Points to redeem or purchase from the Catalog. Also note Owners and Members are not awarded Points so you must test this by logging in as a registered user.
-
To test the Community Tool with the Catalog and Benefits you added, you need to add the Community Tool to a Publication. Create a Publication now if you have not created one already or you can add the Community Tool to an existing Publication such as the ones included with yawave by default. Note: The Publication must be published. To publish a Publication, go to Publish/Publications, locate the Publication you want to publish, then select Published from the drop-down menu located next to the Publication in the State column.
-
On the Publications screen (go to Publish/Publications if you haven't already), click the three dot menu located on the same row as the Publication you want to add the Community Tool to and select Edit from the drop-down menu.
-
Click Next (Note: You can also click Publication on the left-side navigation menu). At this point you should be on the Publication screen.
-
On the right side of the screen, scroll down and click Add Call to Action and select Community.
-
Leave the default label as Community or enter a new label in the Label field.
-
Select the color you want to use for the Community Tool button color from the Button Color drop-down menu. Here you can enter a Hex value, RGB value or use the color picker.
-
Select a default icon from the drop-down menu (A) or upload your own icon by clicking Upload (B).
-
Leave the default visibility as All or select the type of visibility you want to use for the Community Tool from the Visibility drop-down menu.
-
Select the Community Tool you want to use from the Community Tool drop-down menu.
-
Click Next, then click Save.
-
When the page loads, you should see the Community Tool Call To Action button you created above.

- Before you continue, click the three dot menu located in the top-right of the page and select Publish. The Publication needs to be published before your end users can interact with the Community Tool. Note: If the only option available is Unpublish, leave it as is and continue to Step 25.
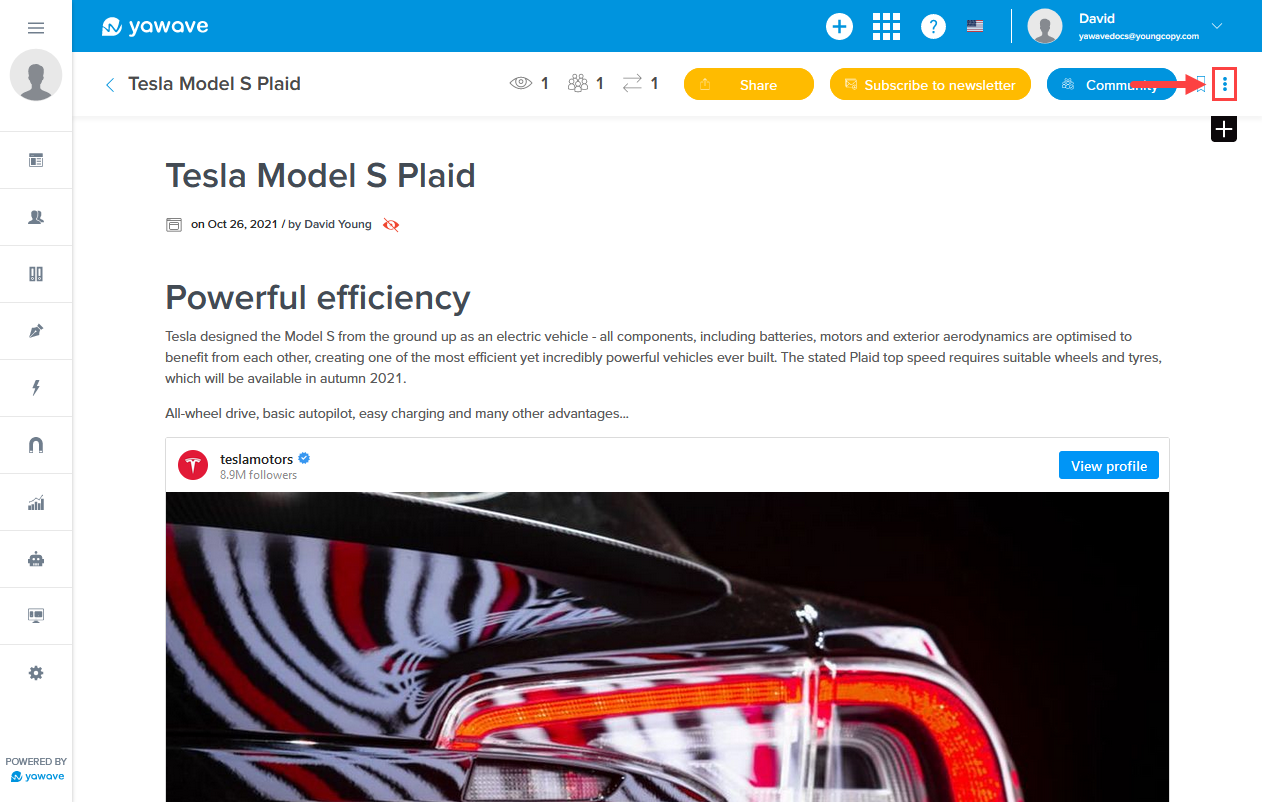
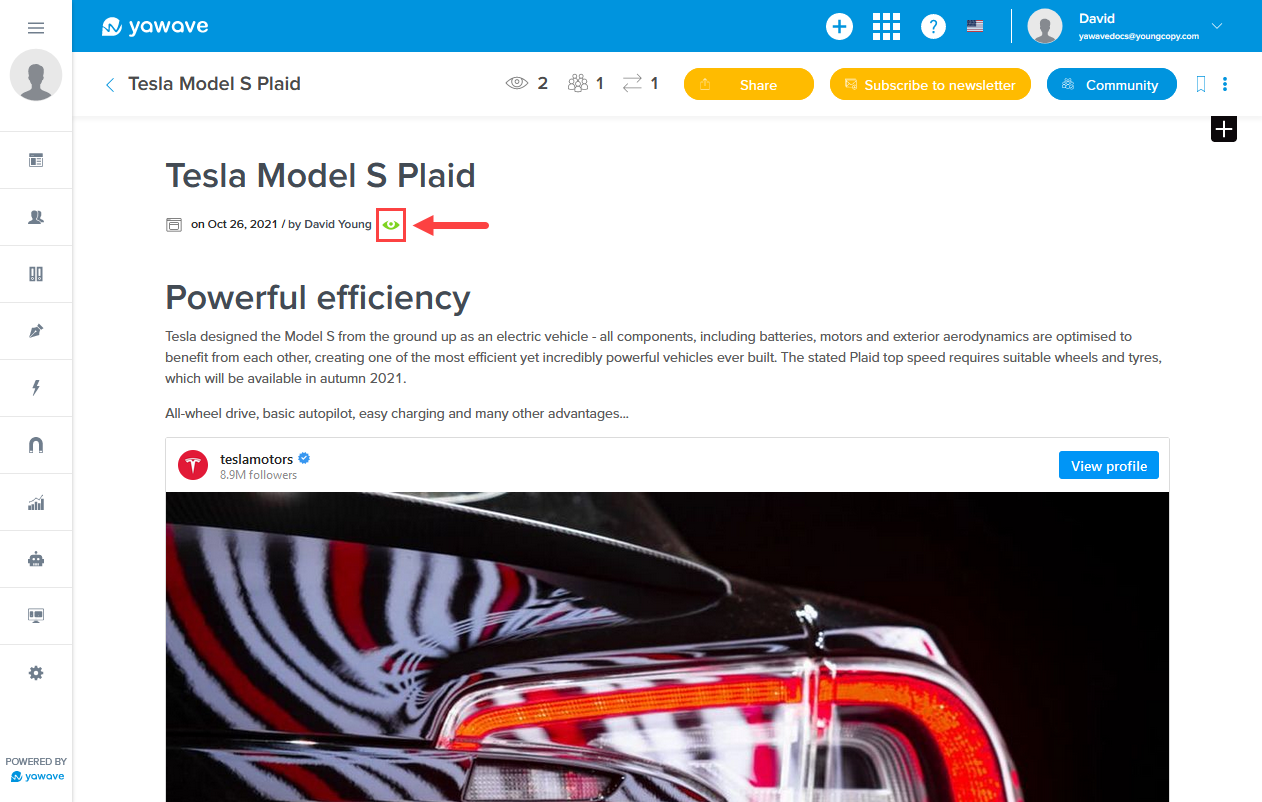
- When the Publish your Publication? pop-up appears, click Publish. If the Publication is published, you should see the green eye icon as shown below. Depending on the Publication type, you may need to scroll down to see the green eye icon.
-
Log out as Owner and log back in as a registered user. You should see a list of your Publications. Click the Publication you are using to test the Community Tool.
-
When the page loads, click the Community Tool Call To Action button you added above. In our example we left the button as default Community.
-
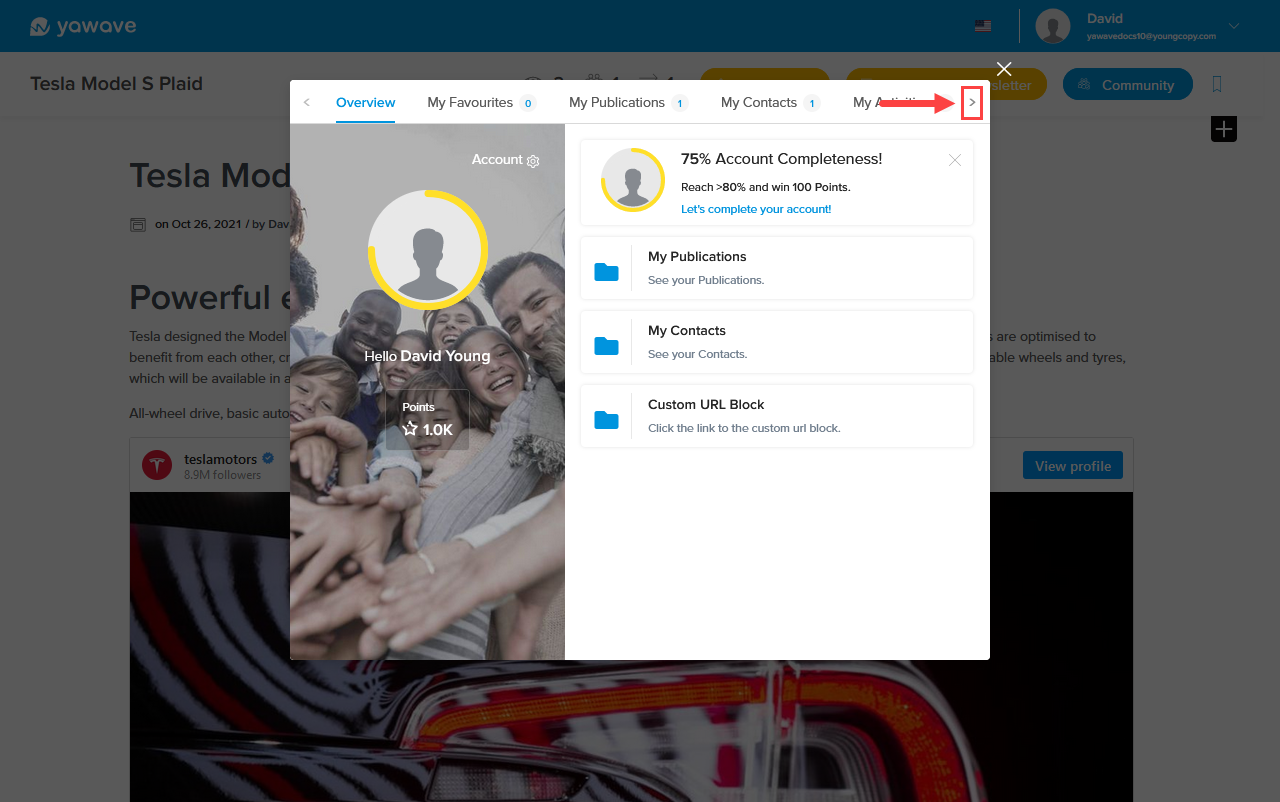
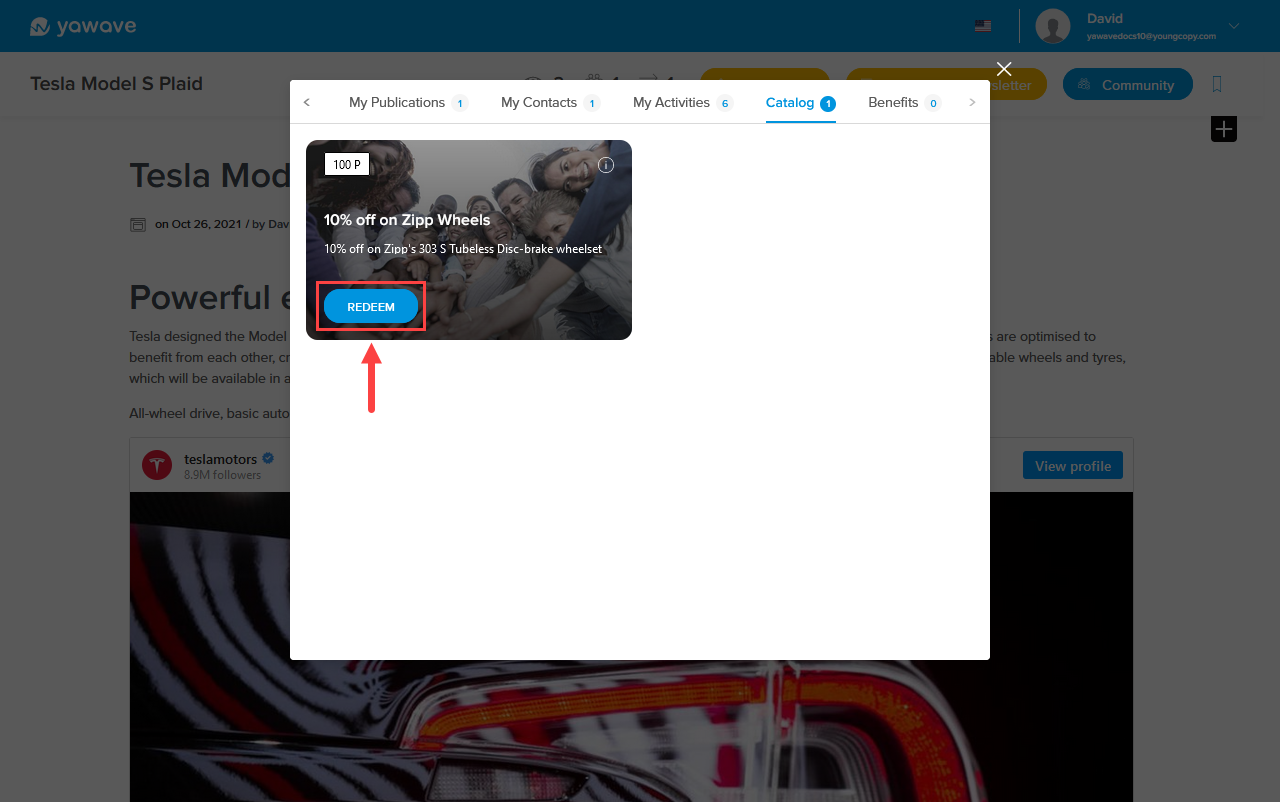
When the Community Tool opens, click the Catalog tab.
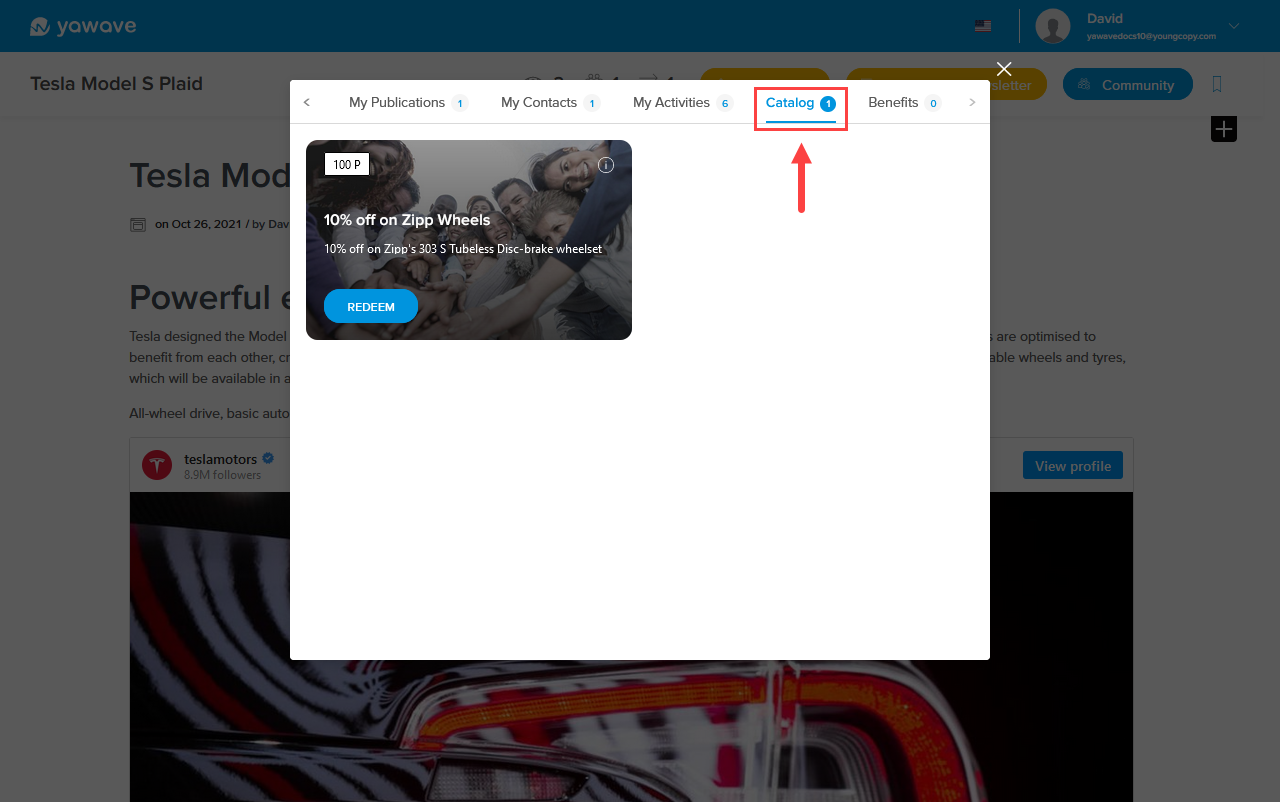
Note: Depending on how many tabs you have added, you may need to click the arrow icon until you see the Catalog tab.
- We have enough Points so we can redeem our Benefits. Click the Redeem button. Note: If you do not have enough Points the Redeem button would not be clickable. If using the default Benefits, you need 100 Points. Edit your Benefits to include more than 100 points. The Redeem button should then be clickable. If this is the case, give Points to the user you are testing the Community Tool with in order to have enough Points.
-
When the Redeem Points for Benefits pop-up appears, click Redeem.
-
Next, click the Benefits tab.
-
You should see the Benefits redeemed.
-
If you click the My Activities (Activities is the default name), you should see the entry where the Benefits has been redeemed.
-
If you click the Overview tab, you should see the number of Points remaining. Note: The Points only show up if you have configured this setting in the default Overview tab.