Follow the steps below to create a yawave account.
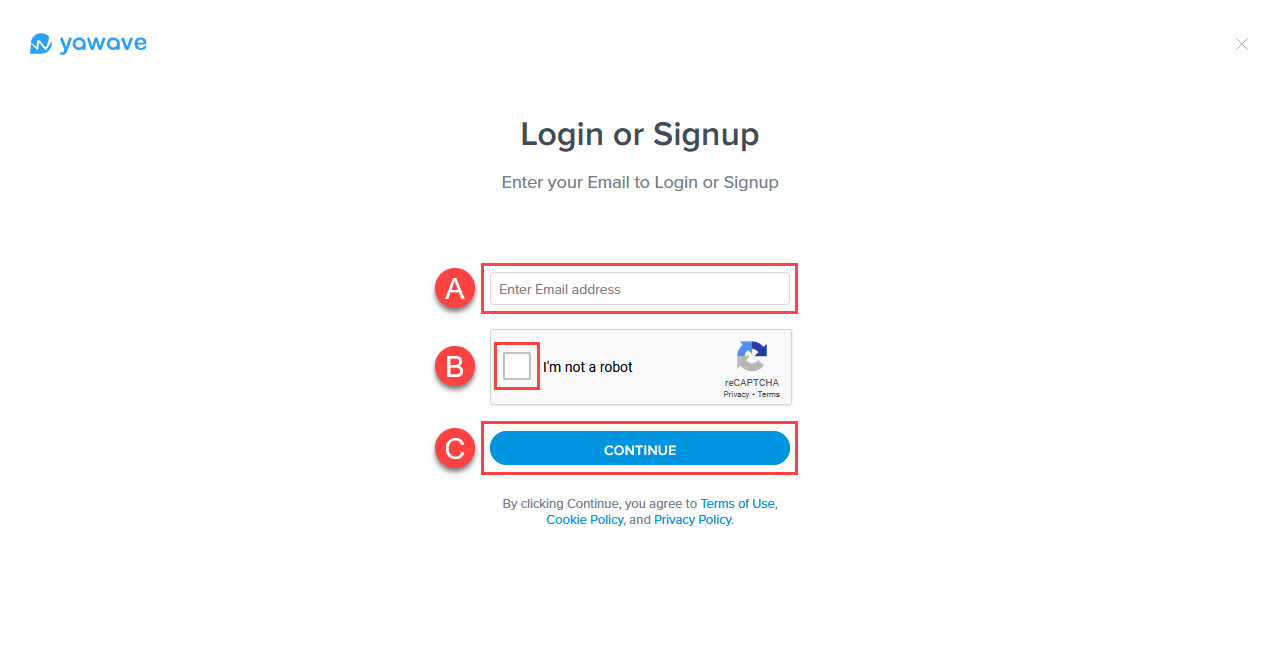
- Go to https://yawave.com/ and click Log-In.
- When the page loads, enter your email address (A), click the box next to I'm not a robot (B), then click Continue (C).
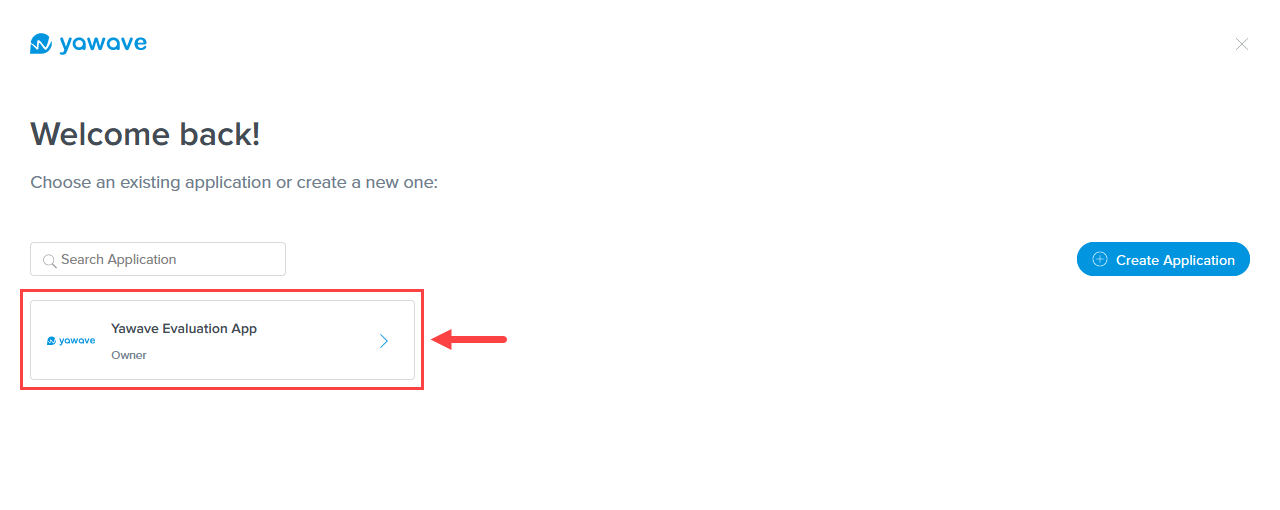
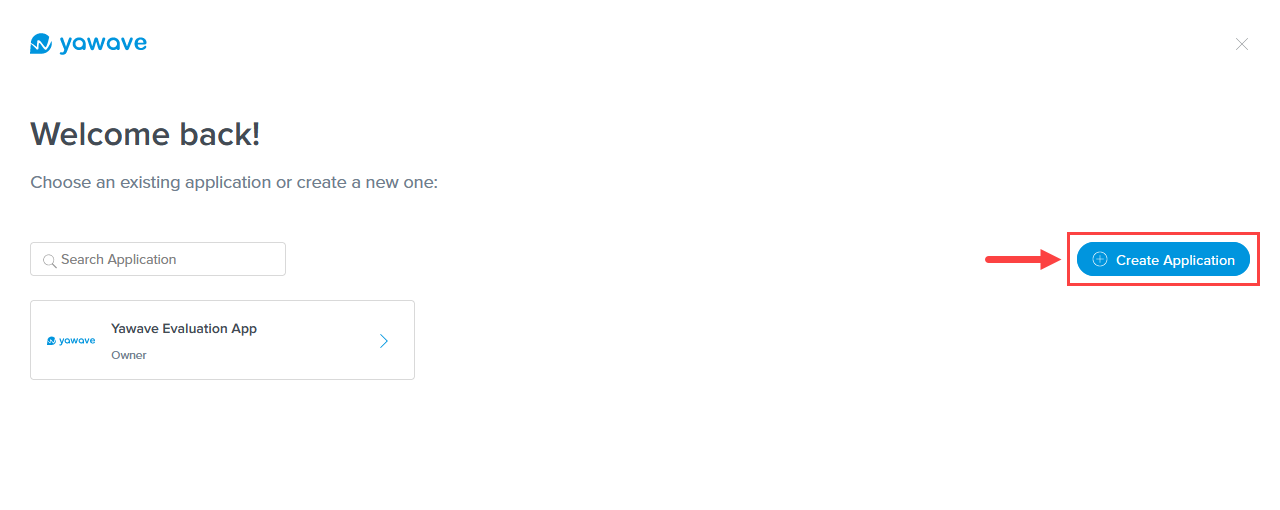
If the email address you entered is already registered in yawave, the system will show all the applications associated with the email address as shown below. In the following example only one application is associated with the email address. You may see one or more applications depending on how many applications are associated with the email address you entered. Click the application you want to use.
Note: yawave shows applications where you are an Owner or Member. If no applications are associated with the email address you entered, yawave will automatically direct you to the create application page as shown in Step 3 below.
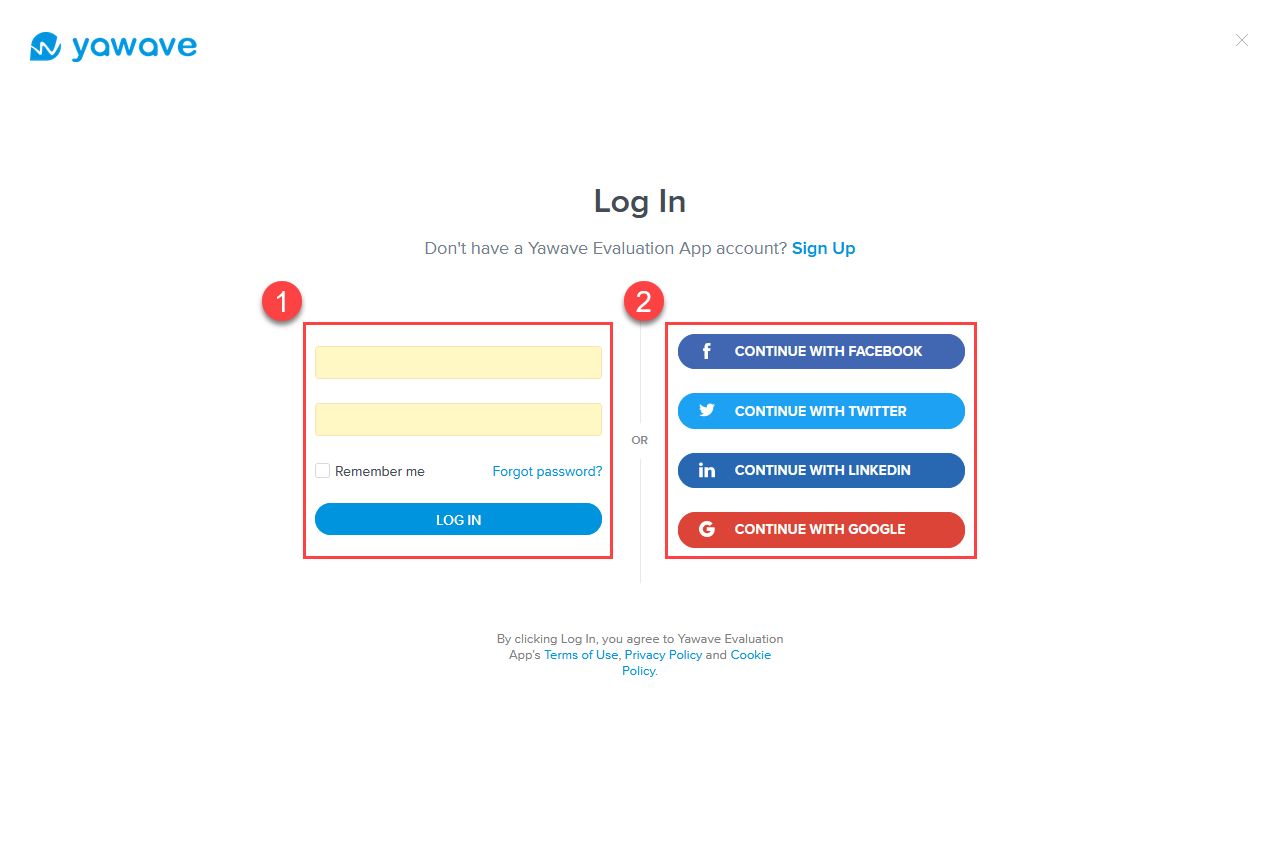
If you click an existing application, you have two options when logging in to the application:
Option 1: Add your credentials manually (enter Email Address and Password and then click Log In) or
Option 2: Use your social media credentials (click either Facebook, Twitter, LinkedIn, or Google)
You can also click Create Application and follow Steps 3-8 below.
- Enter the name you want to use for your first application in the Application Name field. The name you choose can be anything.
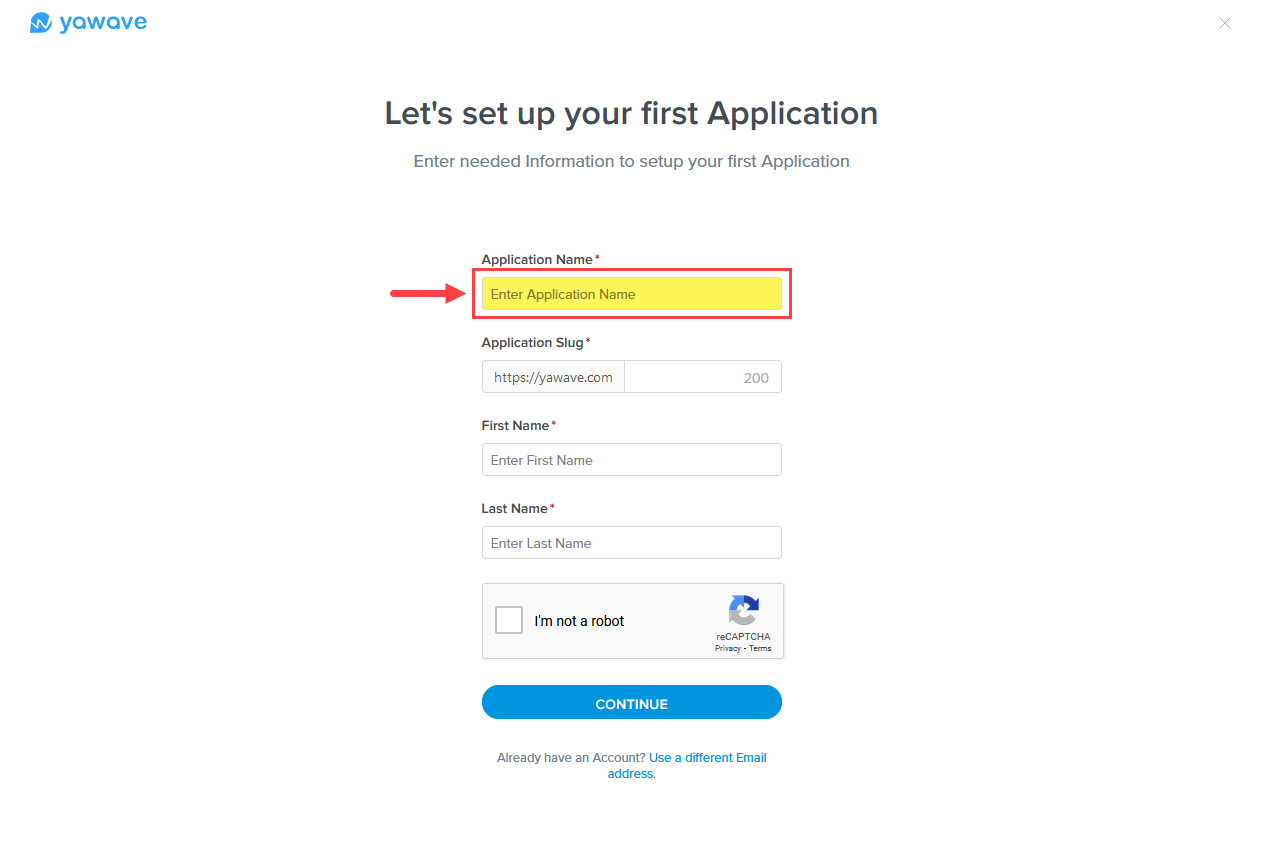
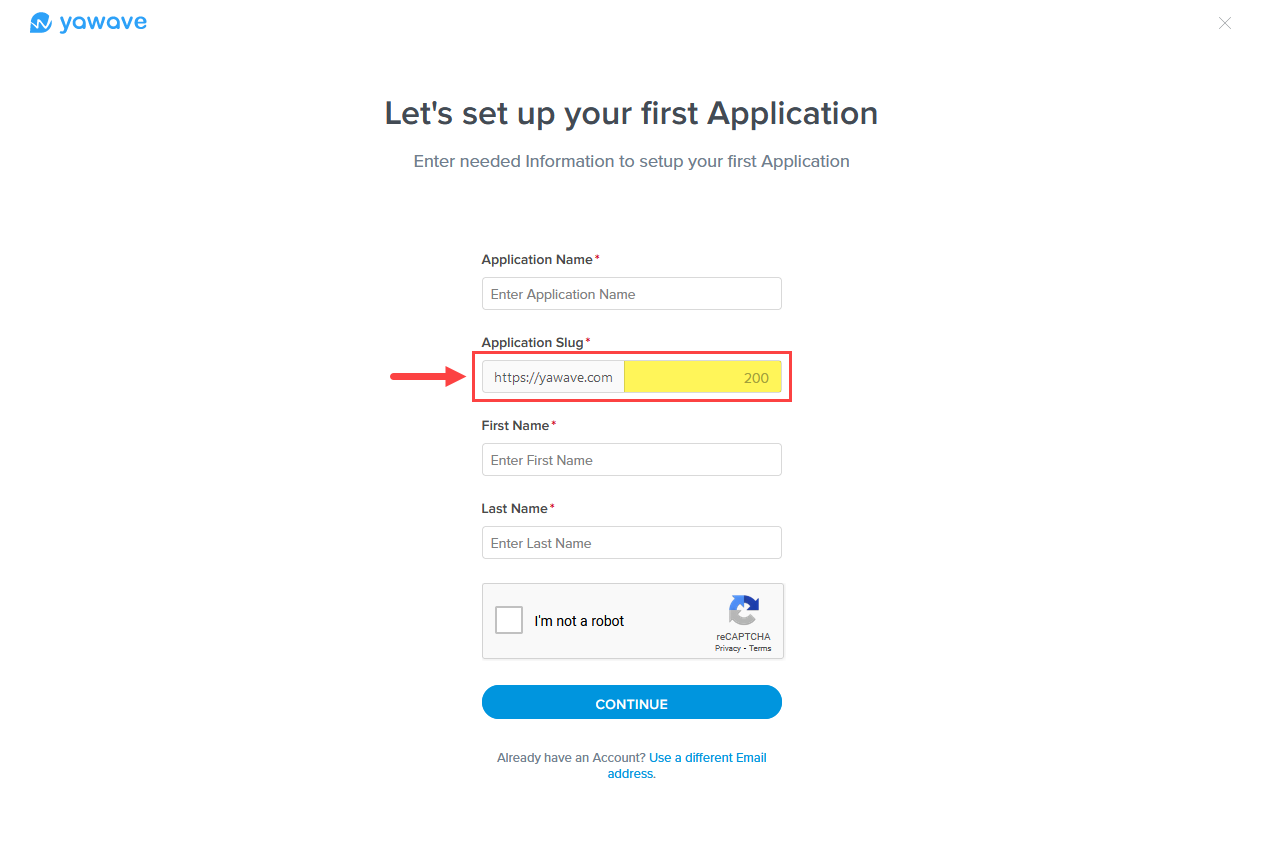
- Enter the name you want to use for your first application's slug in the Application Slug field. The name you choose can be anything. If a slug name is already taken by another yawave user, you'll see a message stating the slug is already taken. Slug names have a 200 character limit. Note: yawave automatically uses the name you entered for the Application Name in Step 3 above. You can change it to any name you choose unless it already taken by another user.
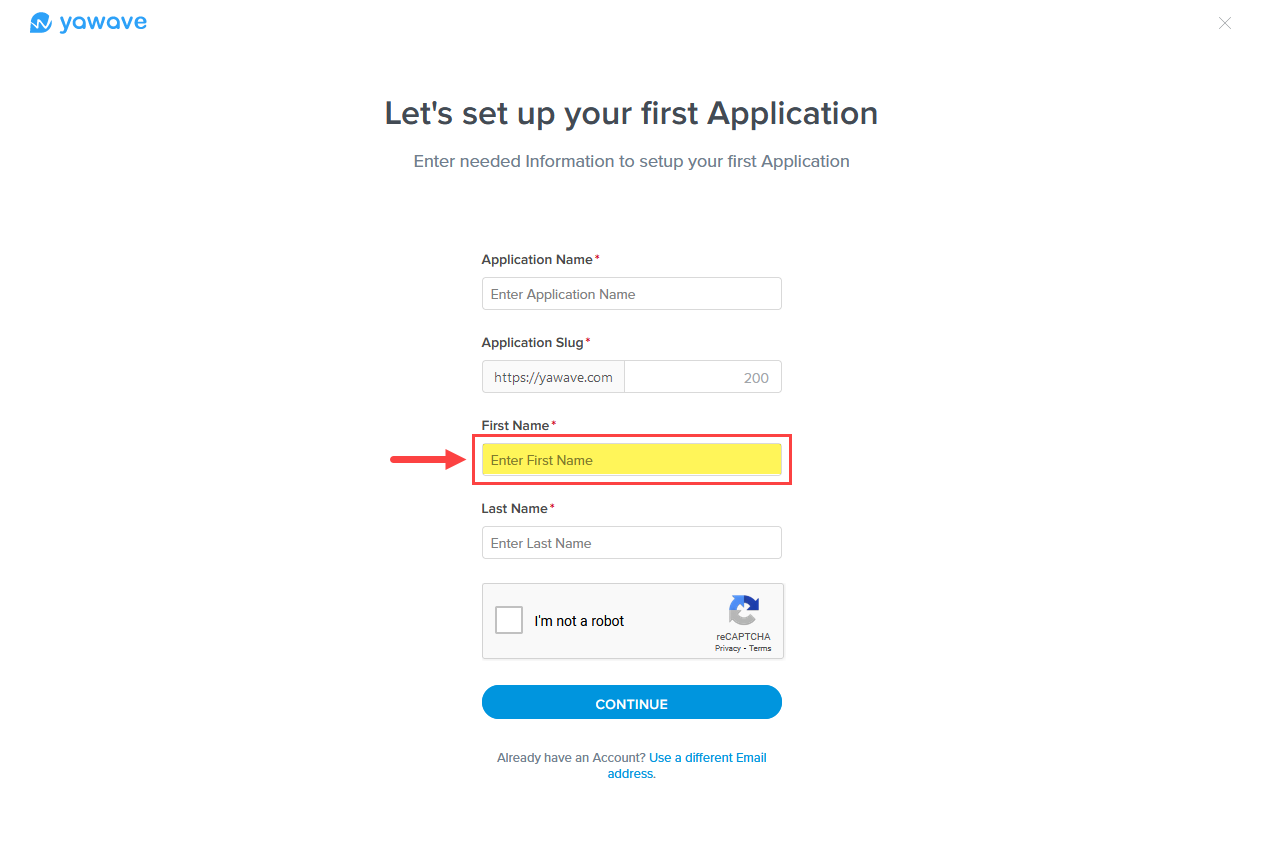
- Enter the first name you want to use for the application in the First Name field.
- Enter the last name you want to use for the application in the Last Name field.
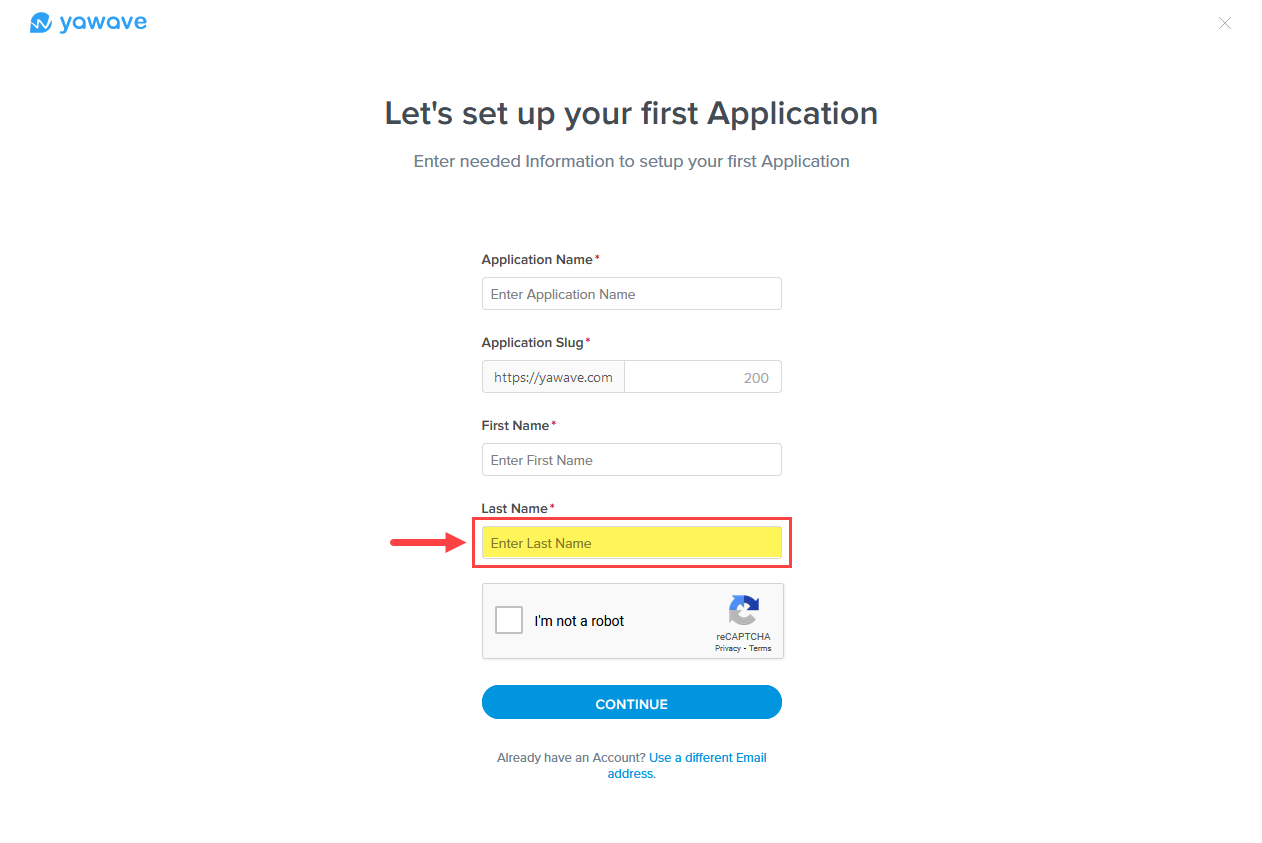
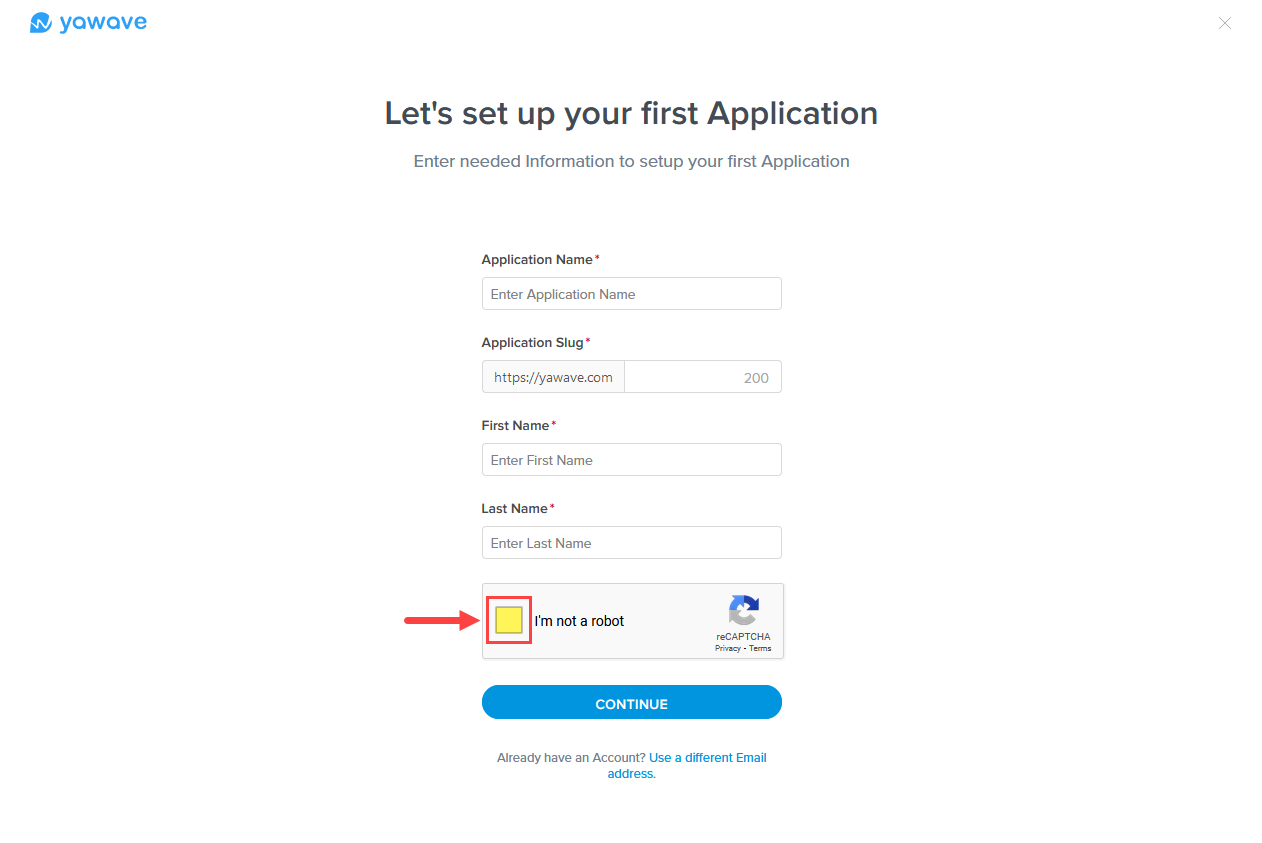
- Click the box next to I'm not a robot.
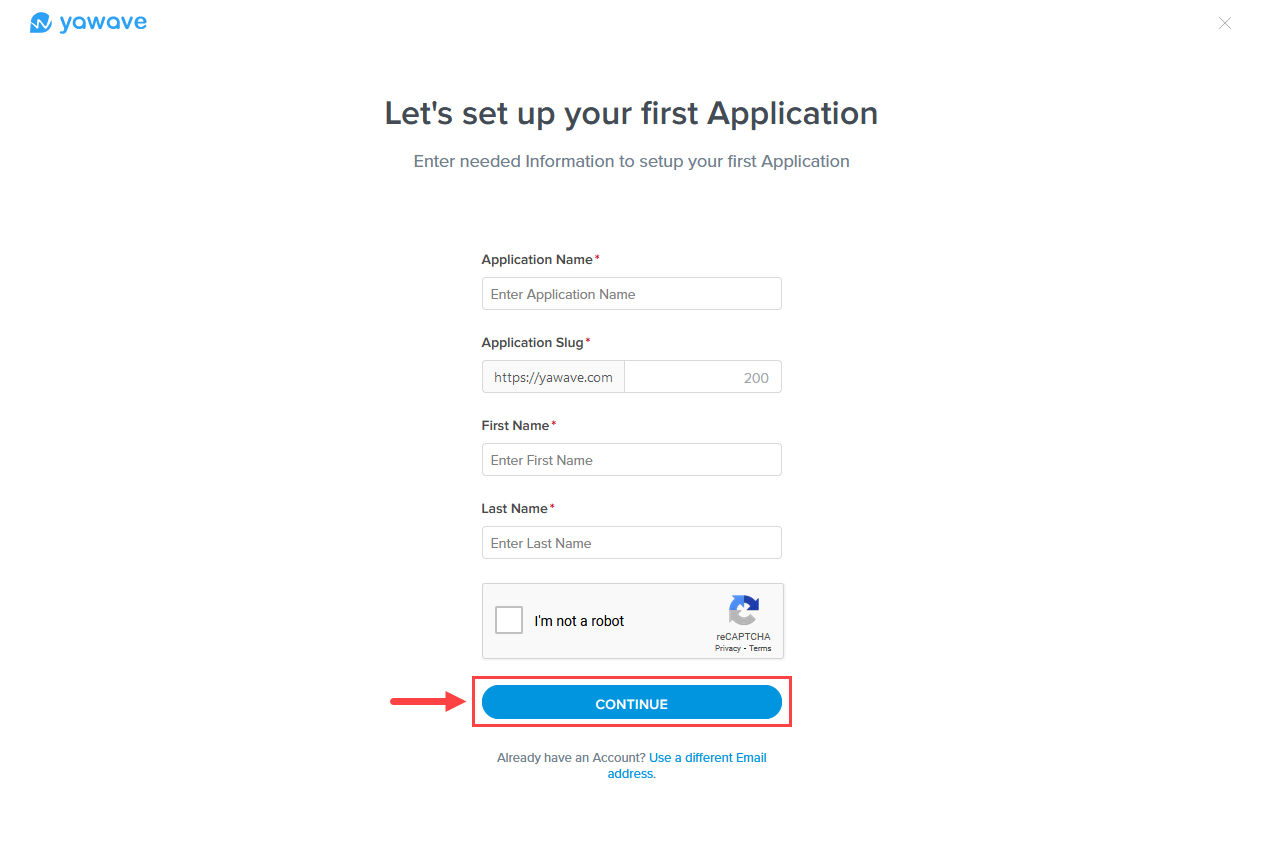
- Click Continue.
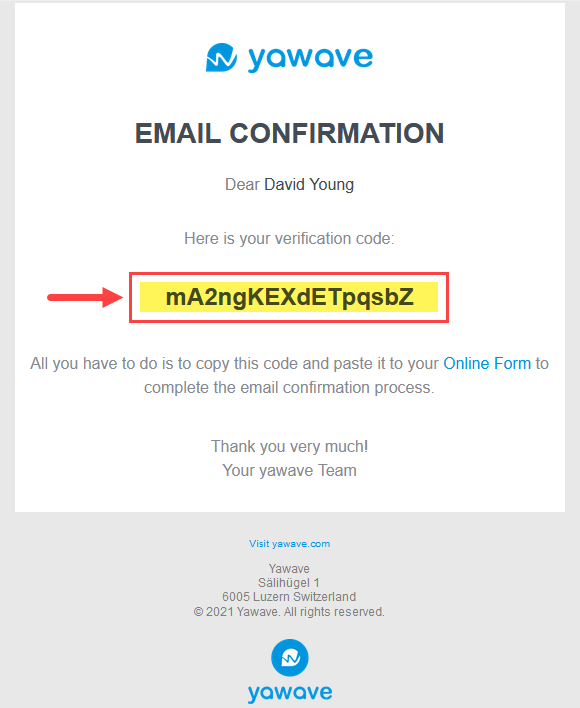
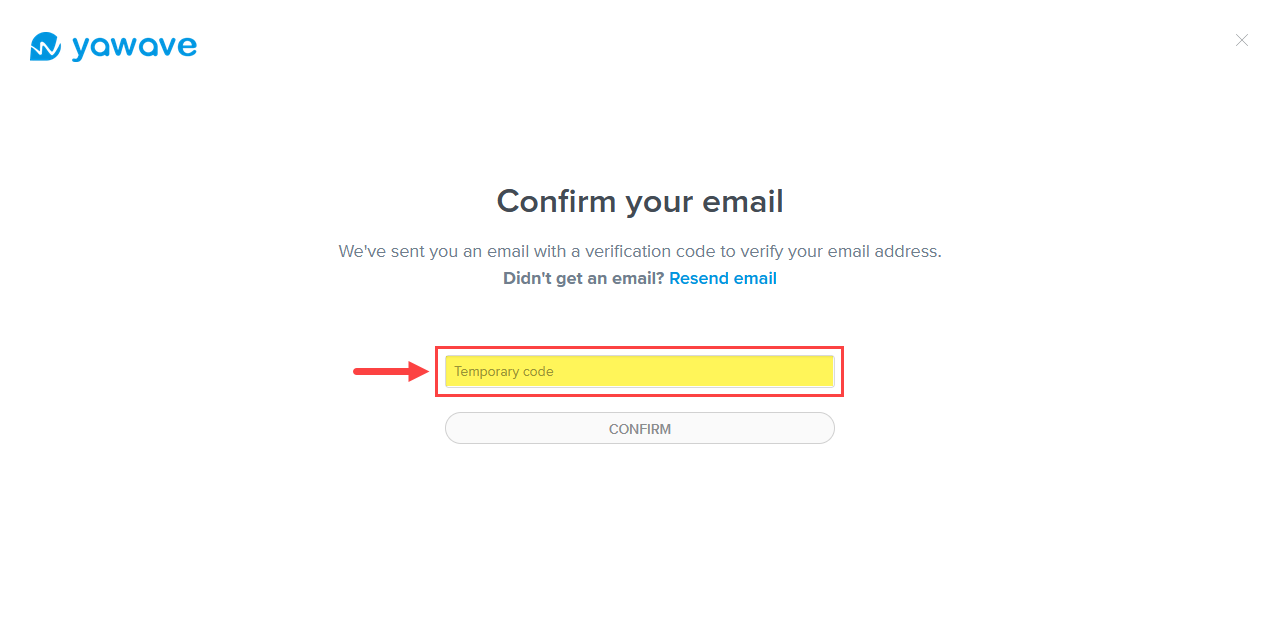
- When the page loads, check the Inbox of the email address you used in Step 2A above. Highlight and copy the verification code shown in the email. Below is an example of the email and where the verification code is located.
- Paste the highlighted verification code in the yawave Temporary code field.
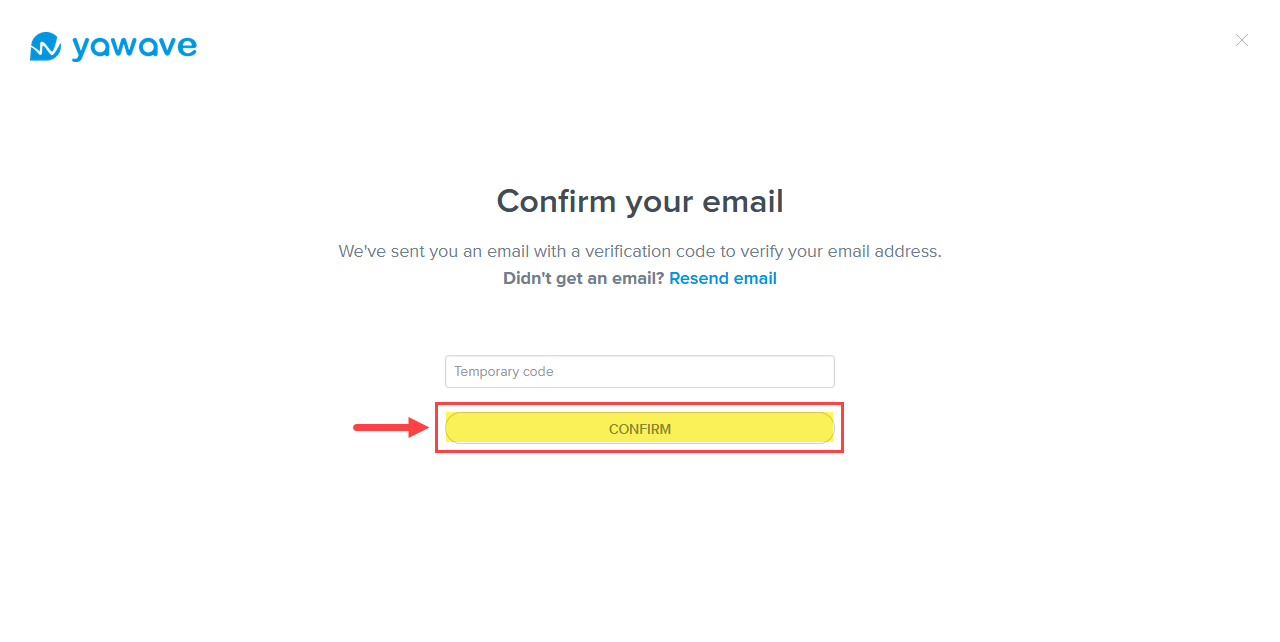
- Click Confirm.
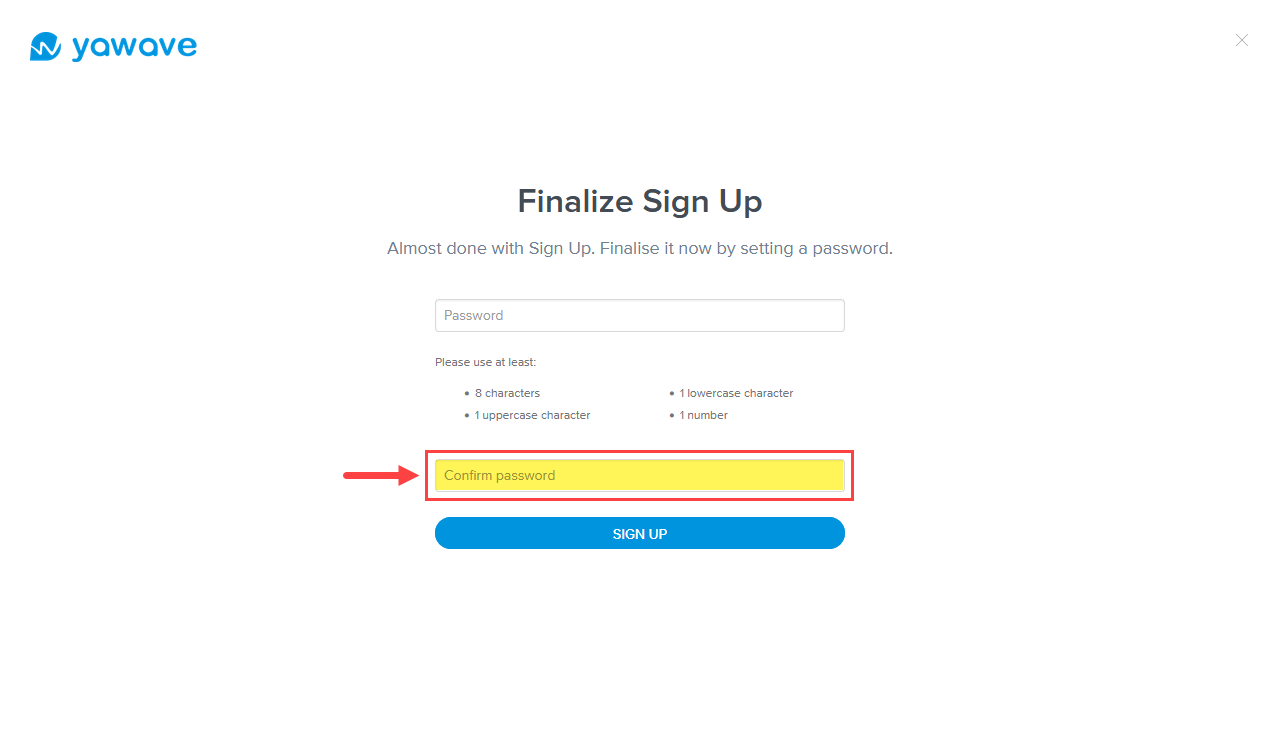
- Enter the password you want to use for the application in the Password field.

- Using the same password you used in Step 12 above, enter the password in the Confirm Password field.
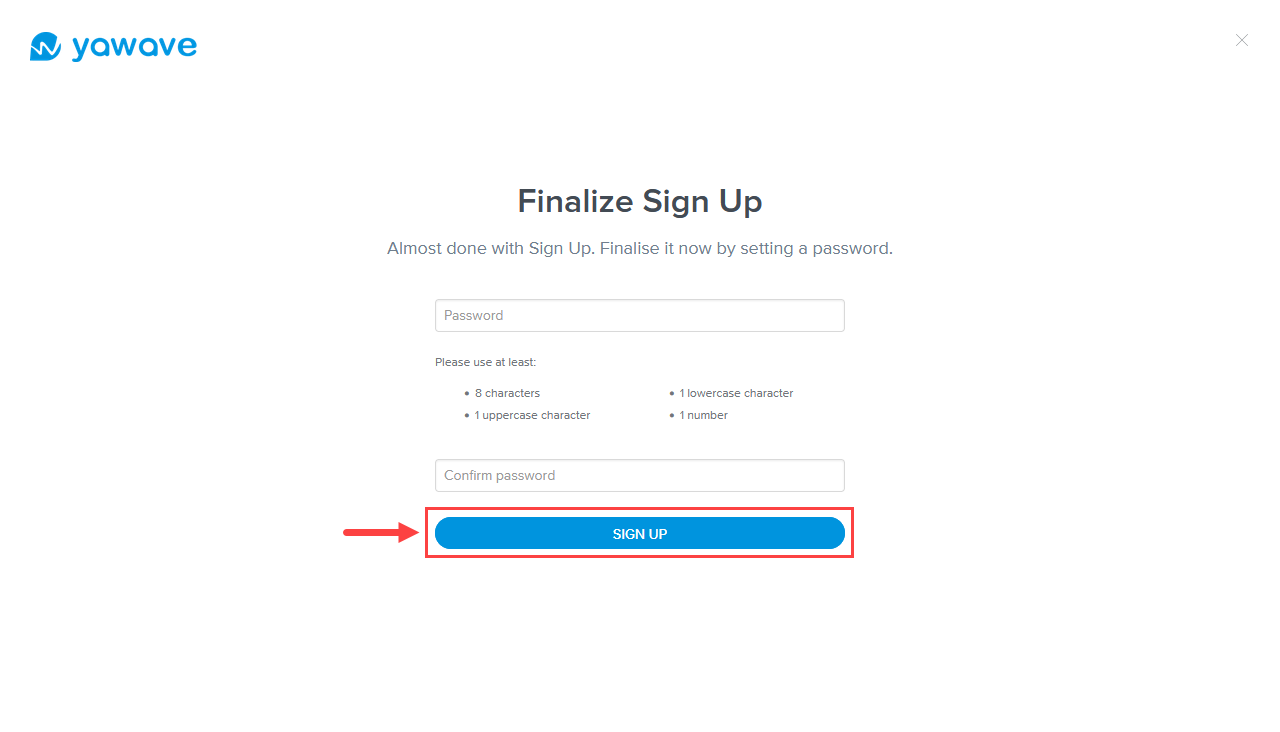
- Click Sign Up.
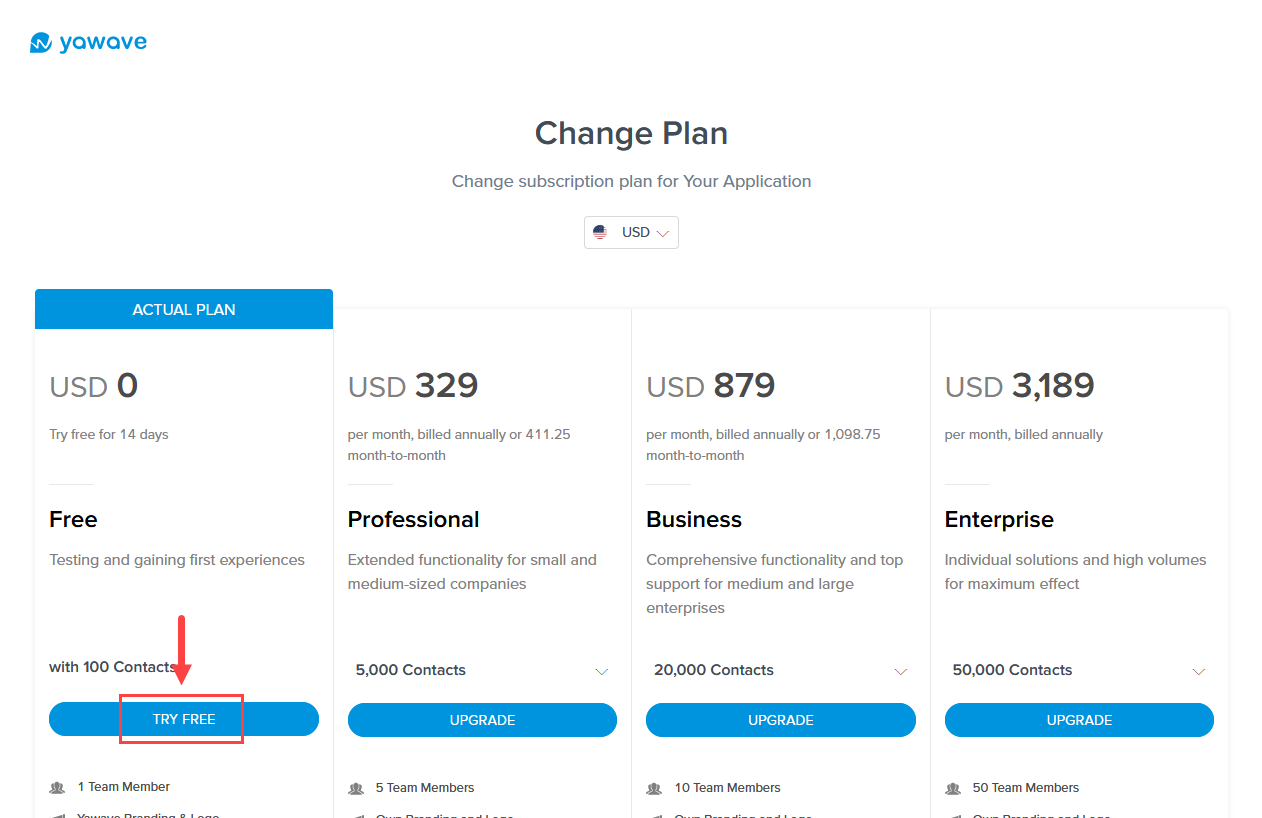
- The Plan page loads. The default plan selected is the Free plan. Click Try Free to continue with the Free plan or click Upgrade under any of the paid plans.
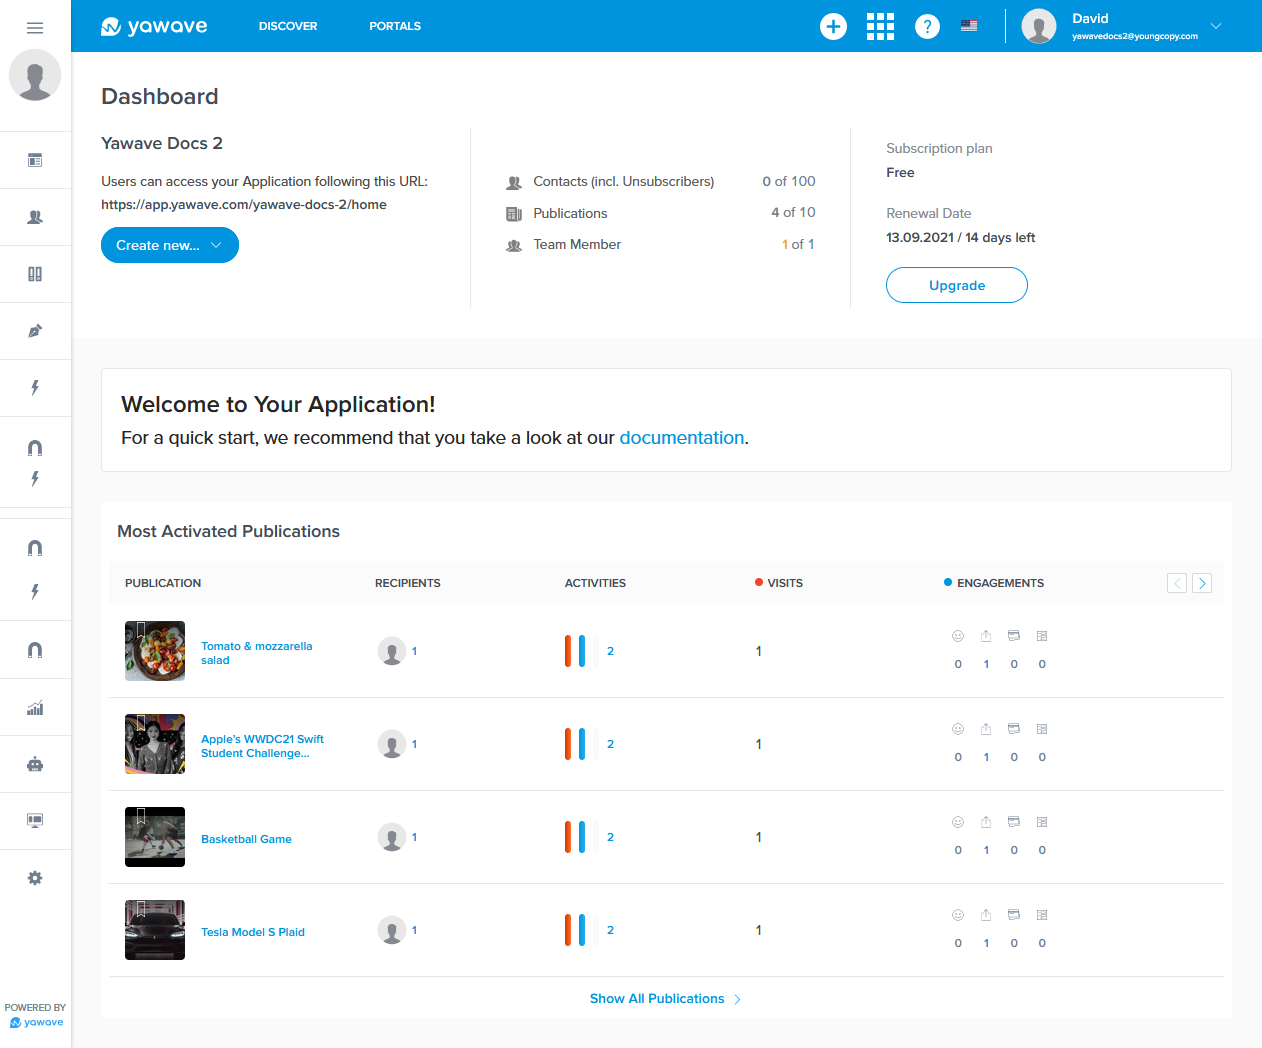
- When the page loads you'll see the yawave dashboard. If you are new to yawave, continue with the onboarding steps described in the Start Here page.
Create and configure Tools or review Onboarding Steps.